目录
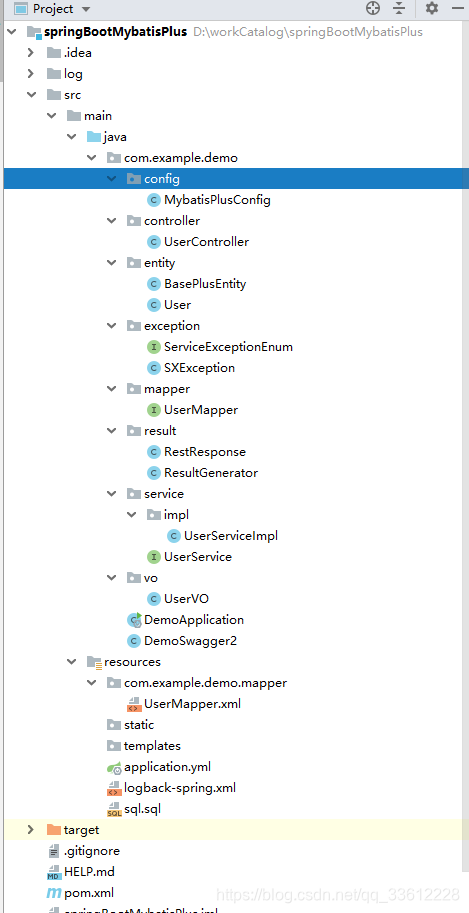
项目目录结构
前言
Mybatis-Plus是一个优秀的Mybatis增强工具,目前更新到3.1.1。Mybatis-Plus原生提供了很多单表操作的方法,极大简化了繁琐的curd的操作,同时又支持xml配置、自定义sql的编写。mybatis-plus是基于mybatis,相对于mybatis,他有许多特性是比较好用的,比如分页查询、表字段自动转换为实体类属性等,使用mybatis-plus与Spring Data JPA有点相似的地方,个人觉得mybatis-plus的分页比JPA的分页好用。这篇文章介绍SpringBoot2集成Mybatis-Plus 3.1.0,同时介绍mybatis提供MysqlGenerator.java,你可以通过指定的数据库表生成对应的bean、mapper.xml、mapper.java、service.java、serviceImpl.java,甚至controller。此文章我写了一个user的demo分页查询。
pom.xml添加相关依赖
maven的引用很简单,官方已经给出starter,不需要我们考虑它的依赖关系了,此处使用的是2.1.8版本。
        <!--mysql依赖-->
        <dependency>
            <groupId>mysql</groupId>
            <artifactId>mysql-connector-java</artifactId>
            <version>${mysql-connector-java.version}</version>
        </dependency>
        <!--阿里巴巴fastjosn依赖-->
        <dependency>
            <groupId>com.alibaba</groupId>
            <artifactId>fastjson</artifactId>
            <version>${fastjson.version}</version>
        </dependency>
        <!-- Druid -->
        <dependency>
            <groupId>com.alibaba</groupId>
            <artifactId>druid-spring-boot-starter</artifactId>
            <version>${druid.version}</version>
        </dependency>

        <!-- MyBatis增强工具-->
        <dependency>
            <groupId>com.baomidou</groupId>
            <artifactId>mybatis-plus-boot-starter</artifactId>
            <version>${mybatis-plus-boot-starter.version}</version>
        </dependency>
        <dependency>
            <groupId>com.baomidou</groupId>
            <artifactId>mybatis-plus-generator</artifactId>
            <version>${mybatis-plus-generator.version}</version>
        </dependency>
配置mybatis-plus
添加application.yml,配置mybatis-plus;其中column-underline: true特别好用,会自动将下划线格式的表字段,转换为以驼峰格式命名的属性。此处我没有用。
mybatis-plus:
  mapper-locations: classpath*:com.example.demo.mapper/*.xml #扫描的sql路径
  global-config:
    db-config:
      id-type: uuid
      field-strategy: not_null
    refresh: true
  configuration:
    map-underscore-to-camel-case: false
    log-impl: org.apache.ibatis.logging.stdout.StdOutImpl
数据库配置
spring:
  datasource:
    url: jdbc:mysql://127.0.0.1:3306/test?autoReconnect=true&useUnicode=true&characterEncoding=utf8&serverTimezone=GMT%2B8&useSSL=false
    username: root
    password: root1234
    # 使用Druid数据源
    type: com.alibaba.druid.pool.DruidDataSource
    driver-class-name: com.mysql.cj.jdbc.Driver
    druid:
      filters: stat
      maxActive: 20
      initialSize: 1
      maxWait: 60000
      minIdle: 1
      timeBetweenEvictionRunsMillis: 60000
      minEvictableIdleTimeMillis: 300000
      validationQuery: select 'x'
      testWhileIdle: true
      testOnBorrow: false
      testOnReturn: false
      poolPreparedStatements: true
      maxOpenPreparedStatements: 20
  resources:
    static-locations:
  profiles:
    active: dev
添加MybatisPlusConfig.java
@Configuration
@MapperScan(basePackages = {"com.example.demo.mapper"}) //扫描的包
public class MybatisPlusConfig {


    /**
     * mybatis-plus分页插件
     */
    @Bean
    public PaginationInterceptor paginationInterceptor() {
        return new PaginationInterceptor();
    }

}
编写对应的表功能(curd)
此处我是手动创建bean以及查询的接口,可以自行根据代码生成器MysqlGenerator来生成。如下做参考。
public class MysqlGenerator {

    /**
     * RUN THIS
     */
    public static void main(String[] args) {
        // 代码生成器
        AutoGenerator mpg = new AutoGenerator();

        // 全局配置
        GlobalConfig gc = new GlobalConfig();
        String projectPath = System.getProperty("user.dir");
        gc.setOutputDir(projectPath + "/src/main/java");
        // TODO 设置用户名
        gc.setAuthor("yuan");
        gc.setOpen(true);
        // service 命名方式
        gc.setServiceName("%sService");
        // service impl 命名方式
        gc.setServiceImplName("%sServiceImpl");
        // 自定义文件命名,注意 %s 会自动填充表实体属性!
        gc.setMapperName("%sMapper");
        gc.setXmlName("%sMapper");
        gc.setFileOverride(true);
        gc.setActiveRecord(true);
        // XML 二级缓存
        gc.setEnableCache(false);
        // XML ResultMap
        gc.setBaseResultMap(true);
        // XML columList
        gc.setBaseColumnList(false);
        mpg.setGlobalConfig(gc);

        // TODO 数据源配置
        DataSourceConfig dsc = new DataSourceConfig();
        dsc.setUrl("jdbc:mysql://127.0.0.1:3306/demo_druid?useUnicode=true&useSSL=false&characterEncoding=utf8&serverTimezone=UTC");
        dsc.setDriverName("com.mysql.jdbc.Driver");
        dsc.setUsername("root");
        dsc.setPassword("root");
        mpg.setDataSource(dsc);

        // TODO 包配置
        PackageConfig pc = new PackageConfig();
        //pc.setModuleName(scanner("模块名"));
        pc.setParent("com.yuan.demodruid");
        pc.setEntity("domain.entity");
        pc.setService("service");
        pc.setServiceImpl("service.impl");
        mpg.setPackageInfo(pc);

        // 自定义需要填充的字段
        List<TableFill> tableFillList = new ArrayList<>();
        //如 每张表都有一个创建时间、修改时间
        //而且这基本上就是通用的了,新增时,创建时间和修改时间同时修改
        //修改时,修改时间会修改,
        //虽然像Mysql数据库有自动更新几只,但像ORACLE的数据库就没有了,
        //使用公共字段填充功能,就可以实现,自动按场景更新了。
        //如下是配置
        //TableFill createField = new TableFill("gmt_create", FieldFill.INSERT);
        //TableFill modifiedField = new TableFill("gmt_modified", FieldFill.INSERT_UPDATE);
        //tableFillList.add(createField);
        //tableFillList.add(modifiedField);

        // 自定义配置
        InjectionConfig cfg = new InjectionConfig() {
            @Override
            public void initMap() {
                // to do nothing
            }
        };
        List<FileOutConfig> focList = new ArrayList<>();
        focList.add(new FileOutConfig("/templates/mapper.xml.ftl") {
            @Override
            public String outputFile(TableInfo tableInfo) {
                // 自定义输入文件名称
                return projectPath + "/src/main/resources/mapper/"
                        + "/" + tableInfo.getEntityName() + "Mapper" + StringPool.DOT_XML;
            }
        });
        cfg.setFileOutConfigList(focList);
        mpg.setCfg(cfg);
        mpg.setTemplate(new TemplateConfig().setXml(null));

        // 策略配置
        StrategyConfig strategy = new StrategyConfig();
        strategy.setNaming(NamingStrategy.underline_to_camel);
        strategy.setColumnNaming(NamingStrategy.underline_to_camel);
        strategy.setEntityLombokModel(true);
        // 设置逻辑删除键
        strategy.setLogicDeleteFieldName("deleted");
        // TODO 指定生成的bean的数据库表名
        strategy.setInclude("mp_user");
        //strategy.setSuperEntityColumns("id");
        // 驼峰转连字符
        strategy.setControllerMappingHyphenStyle(true);
        mpg.setStrategy(strategy);
        // 选择 freemarker 引擎需要指定如下加,注意 pom 依赖必须有!
        mpg.setTemplateEngine(new FreemarkerTemplateEngine());
        mpg.execute();
    }

}
以下是用户分页查询代码,仅供demo做参考。controller层。
    /**
     * 获取用户列表
     *
     * @param loginName 登录名
     * @param userName  姓名
     * @param idCard    身份证号码
     * @param current   当前页数
     * @param size      每页大小
     * @return
     */
    @GetMapping(value = "/list", produces = "application/json; charset=utf-8")
    @ApiOperation(value = "获取用户列表", notes = "获取用户列表", code = 200, produces = "application/json")
    @ApiImplicitParams({
            @ApiImplicitParam(paramType = "query", dataType = "string", name = "loginName", value = "登录名"),
            @ApiImplicitParam(paramType = "query", dataType = "string", name = "userName", value = "姓名"),
            @ApiImplicitParam(paramType = "query", dataType = "string", name = "idCard", value = "身份证号码"),
            @ApiImplicitParam(paramType = "query", dataType = "int", name = "current", value = "当前页数"),
            @ApiImplicitParam(paramType = "query", dataType = "int", name = "size", value = "每页大小")})
    public RestResponse<IPage<UserVO>> listUser(@RequestParam(name = "loginName", required = false) String loginName,
                                                @RequestParam(name = "userName", required = false) String userName,
                                                @RequestParam(name = "idCard", required = false) String idCard,
                                                @RequestParam(name = "current", defaultValue = "1") Integer current,
                                                @RequestParam(name = "size", defaultValue = "10") Integer size) {

        return ResultGenerator.genSuccessResult(userService.listUser(loginName, userName, idCard, current, size));
    }
service层代码
    /**
     * 获取用户列表
     *
     * @param loginName 登录名
     * @param userName  姓名
     * @param idCard    身份证号码
     * @param current   当前页数
     * @param size      每页大小
     * @return
     */
    IPage<UserVO> listUser(String loginName, String userName, String idCard, Integer current, Integer size);
serviceImpl实现层代码
 /**
     * 获取用户列表
     *
     * @param loginName
     * @param current
     * @param size
     * @return
     */
    @Override
    public IPage<UserVO> listUser(String loginName, String userName, String idCard, Integer current, Integer size) {
        Page<UserVO> pageInfo = new Page<>(current, size);
        IPage<UserVO> page = userMapper.selectPageVO(pageInfo, loginName, userName, idCard);
        return page;
    }
UserMapper代码
    /**
     * 根据分页查询用户信息
     *
     * @param pageInfo  分页信息
     * @param loginName 登录名
     * @param userName  姓名
     * @param idCard    身份证号码
     * @return
     */
    IPage<UserVO> selectPageVO(Page<UserVO> pageInfo, @Param("loginName") String loginName, @Param("userName") String userName, @Param("idCard") String idCard);
sql代码
 <select id="selectPageVO" resultType="com.example.demo.vo.UserVO">
        SELECT
            sys_user.id AS uid,
            sys_user.login_name AS loginName,
            sys_user.user_name AS userName,
            sys_user.id_card AS idCard,
            sys_user.email AS email,
            inet_ntoa(sys_user.ip) AS ip,
            sys_user.last_login AS lastLogin
        FROM
            sys_user
        <trim prefix="where" prefixOverrides="and">
            sys_user.del_flag ='0'
            <if test="loginName != null and loginName != '' ">
                AND INSTR(sys_user.login_name,#{loginName}) > 0
            </if>
            <if test="userName != null and userName != '' ">
                AND INSTR(sys_user.user_name,#{userName}) > 0
            </if>
            <if test="idCard != null and idCard != '' ">
                AND INSTR(sys_user.id_card,#{idCard}) > 0
            </if>
        </trim>
        GROUP BY sys_user.id
        ORDER BY sys_user.update_date desc
    </select>
执行项目中的sql文件(user表和用户数据)

最后就是调式页面啦


以上内容可供初学者搭建mybatis-plus简单增删改查。
需要源码的伙伴可前往自行下载,附上下载地址: https://download.csdn.net/download/qq_33612228/12037756
