keepalived加MySQL高可用
需要两台主机安装配置mysql并授权
安装配置keepalived
mysql配置
yum -y install mariadb mariadb-server   #安装mysql
vim /etc/my.cnf							#my.cnf修改my.cnf配置文件
[mysqld]
datadir=/var/lib/mysql
socket=/var/lib/mysql/mysql.sock
# Disabling symbolic-links is recommended to prevent 		assorted security risks
symbolic-links=0
# Settings user and group are ignored when systemd is used.
# If you need to run mysqld under a different user or 	group,
# customize your systemd unit file for mariadb according to the
# instructions in http://fedoraproject.org/wiki/Systemd
#
	server-id=1			#新增
	log-bin=mysqlbin	#新增  主机A
	relay-log=relays	#新增  主机B

	[mysqld_safe]
	log-error=/var/log/mariadb/mariadb.log
	pid-file=/var/run/mariadb/mariadb.pid

#
# include all files from the config directory
#
!includedir /etc/my.cnf.d
#------------------------配置完毕------------------------
systemctl start mariadb		#启动mysql数据库
mysql	#进入数据库
主机A中操作
grant all on *.* to 'root'identified by '123'; #授权并设置用户名和密码
MariaDB [(none)]> show master status;	#查询file和pos
+-----------------+----------+--------------+------------------+
| File            | Position | Binlog_Do_DB | Binlog_Ignore_DB |
+-----------------+----------+--------------+------------------+
| mysqlbin.000003 |      365 |              |                  |
+-----------------+----------+--------------+------------------+

主机B中操作
systemctl start mariadb		#启动mysql数据库
mysql	#进入数据库
change master to master_host='192.168.40.111',master_user='root',master_password='123',master_log_file='mysqlbin.000003',master_log_pos=365; #添加对方的ip主机地址授权的用户名密码,并填写查询后的file于pos;
start slave;  #手动开启线程
show slave status、G;	#查询线程是否开启成功
#------------------------查询后的结果-----------------------
*************************** 1. row ***************************
               Slave_IO_State: Waiting for master to send event
                  Master_Host: 192.168.40.111
                  Master_User: root
                  Master_Port: 3306
                Connect_Retry: 60
              Master_Log_File: mysqlbin.000003
          Read_Master_Log_Pos: 365
               Relay_Log_File: relays.000002
                Relay_Log_Pos: 528
        Relay_Master_Log_File: mysqlbin.000003
             Slave_IO_Running: Yes			#看到双yes表明创建成功
            Slave_SQL_Running: Yes
              Replicate_Do_DB:
          Replicate_Ignore_DB:
           Replicate_Do_Table:
       Replicate_Ignore_Table:
      Replicate_Wild_Do_Table:
  Replicate_Wild_Ignore_Table:
                   Last_Errno: 0
                   Last_Error:
                 Skip_Counter: 0
          Exec_Master_Log_Pos: 365
              Relay_Log_Space: 813
              Until_Condition: None
               Until_Log_File:
                Until_Log_Pos: 0
           Master_SSL_Allowed: No
           Master_SSL_CA_File:
           Master_SSL_CA_Path:
              Master_SSL_Cert:
            Master_SSL_Cipher:
               Master_SSL_Key:
        Seconds_Behind_Master: 0
Master_SSL_Verify_Server_Cert: No
                Last_IO_Errno: 0
                Last_IO_Error:
               Last_SQL_Errno: 0
               Last_SQL_Error:
  Replicate_Ignore_Server_Ids:
             Master_Server_Id: 1
1 row in set (0.00 sec)

ERROR: No query specified
---------------------------查询完毕------------------------------
keepalived配置
yum -y install keepalived #安装keepalived
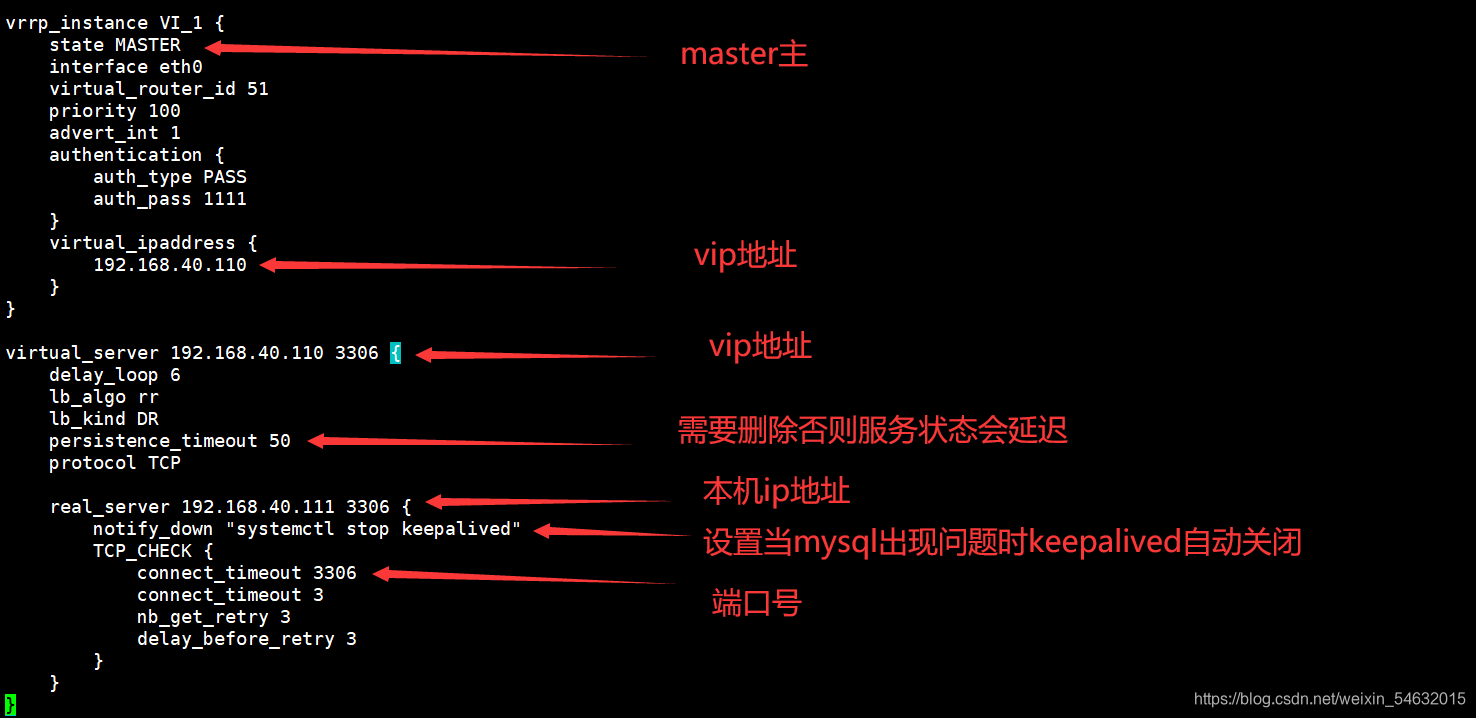
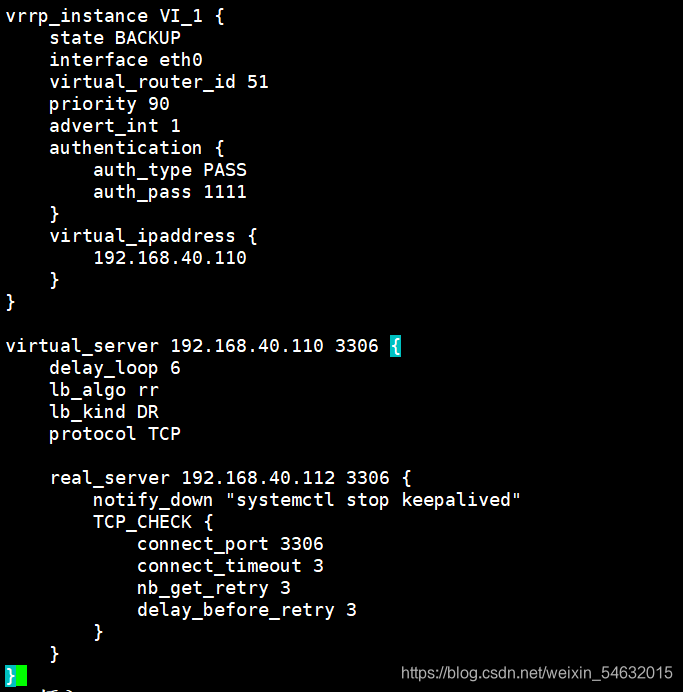
vim /etc/keepalived/keepalived.conf #进入keepalived配置文件
MASTER{主}
BACKUP{从}
最后开启systemctl start keepalived
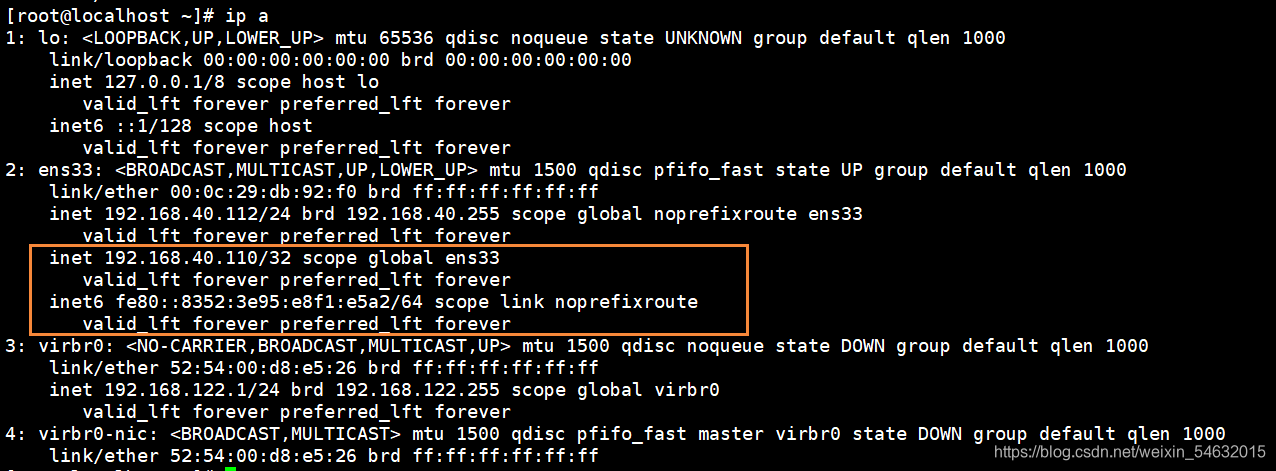
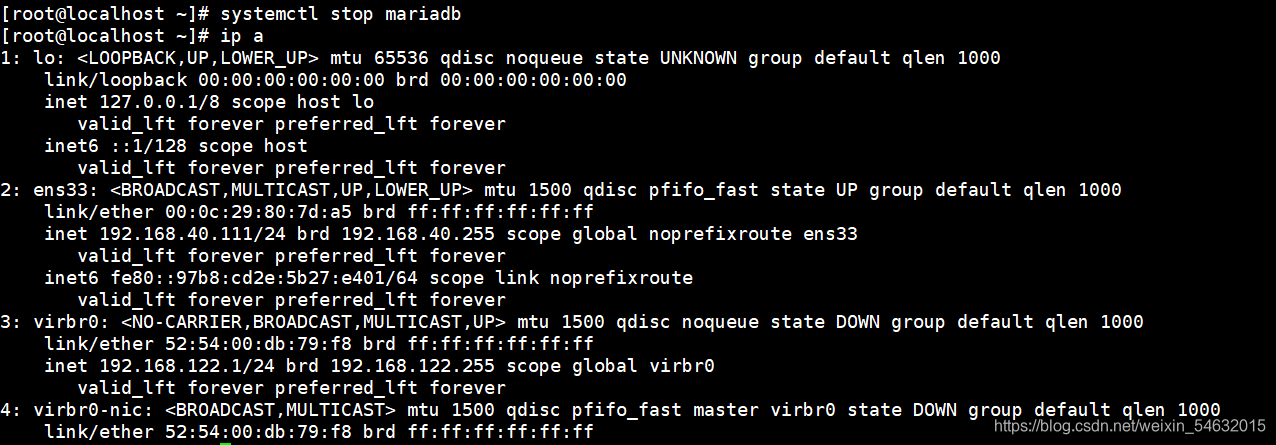
命令ip a查看是否成功
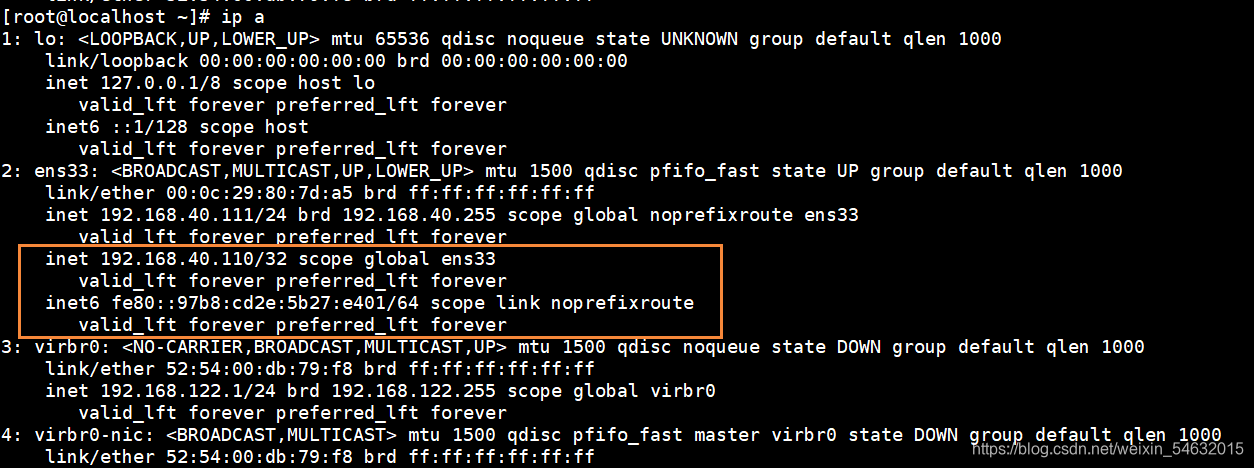
关闭mysql来充当当服务器中mysql数据库出现问题时vip是否会自动跳转
192.168.40.111服务器:
192.168.40.112服务器: