作者:追梦1819
原文:https://blog.csdn.net/weixin_39759846/article/details/95988525
版权声明:本文为博主原创文章,转载请附上博文链接!
引言
前一章节中,我们详细阐述了 ActiveMQ 的安装和使用。其实在网站发展壮大的过程中,消息中间件是无法忽视的技术框架,其重要性在前一章也作了详细的说明。如此重要的技术,SpringBoot 生态圈自然也是不会"放过"的了,必然要集成到它的体系中去。
本章将阐述 SpringBoot 整合 ActiveMQ。
使用
首先创建项目,引入 maven 依赖:
<dependency>
    <groupId>org.springframework.boot</groupId>
    <artifactId>spring-boot-starter-activemq</artifactId>
</dependency>
<!-- 该启动器是后面做测试用,非必须的 -->
<dependency>
    <groupId>org.springframework.boot</groupId>
    <artifactId>spring-boot-starter-web</artifactId>
</dependency>
第二步,配置相关信息:
spring.activemq.broker-url=tcp://xxx:61616
spring.activemq.in-memory=true
spring.activemq.pool.enabled=false
第三步,创建消息生产者:
package com.yanfei1819.activemq.producer;

import org.springframework.beans.factory.annotation.Autowired;
import org.springframework.jms.core.JmsMessagingTemplate;
import org.springframework.stereotype.Component;
import javax.jms.Destination;

/**
 * Created by 追梦1819 on 2019-06-26.
 */
@Component
public class Producer {
    @Autowired
    private JmsMessagingTemplate template;
    public void sendMessage(Destination destination, String message){
        template.convertAndSend(destination,message);
    }
}
第四步,创建消息消费者:
package com.yanfei1819.activemq.consumer;
import org.springframework.jms.annotation.JmsListener;
import org.springframework.stereotype.Service;
/**
* Created by 追梦1819 on 2019-06-26.
*/
@Service
public class Consumer {
@JmsListener(destination = "active.queue")
public void receive(String text) {
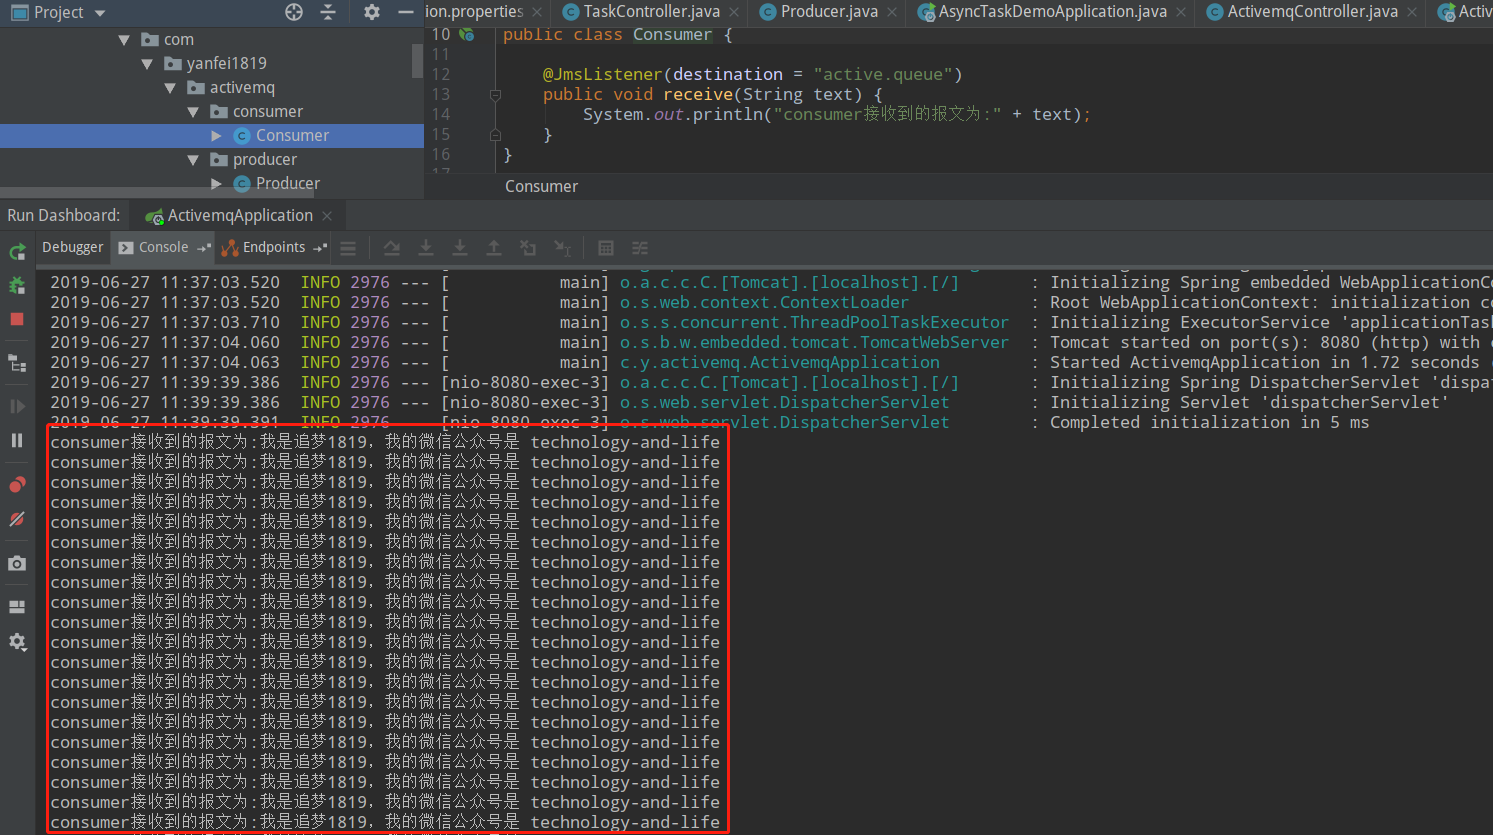
System.out.println("consumer接收到的报文为:" + text);
}
}最后,创建测试接口:
package com.yanfei1819.activemq.web.controller;

import com.yanfei1819.activemq.producer.Producer;
import org.apache.activemq.command.ActiveMQQueue;
import org.springframework.beans.factory.annotation.Autowired;
import org.springframework.stereotype.Controller;
import org.springframework.web.bind.annotation.RequestMapping;
import org.springframework.web.bind.annotation.ResponseBody;

import javax.jms.Destination;

/**
 * Created by 追梦1819 on 2019-06-26.
 */
@Controller
public class ActivemqController {

    @Autowired
    private Producer producer;

    @ResponseBody
    @RequestMapping("/test")
    public void test(){
        Destination destination=new ActiveMQQueue("active.queue");
        for (int i = 0; i <50 ; i++) {
            producer.sendMessage(destination,"我是追梦1819,我的微信公众号是 technology-and-life ");
        }
    }
}
对以上代码作一个简单的说明:
- 为了简化模型来说明 SpringBoot 中 Activemq 的使用,以上的消息生产者和消息消费者都只做了最简单的模拟,没有任何逻辑;
- 以上的测试使用接口进行测试(作者比较喜欢这种方式),不局限这种方式,读者可以用单元测试。
启动项目,先看看 ActiveMQ 界面:

可以看到生产出来的消息,已经被注入到 ActiveMQ 中去了。
然后再访问以上测试接口:http://localhost:8080/test,再看 ActiveMQ 界面:

生产者生产的消息,被消费者消费。
控制台的信息是:
以上演示了 ActiveMQ 在 SpringBoot 项目中的使用。其余的一些详细的测试,读者可以按照前一章 ActiveMQ 的说明,自行测试。此处由于篇幅所限,就不做冗余阐述。
总结
看完以上的示例,读者应该能继续感受到 SpringBoot 框架的"开箱即用"的特性和极简模式。关注几个注解或者几个组件,就能用的很顺畅。
但是,还是重复那句,框架的封装度越高,用起来越简单,但是对底层的原理的理解越难。如果碰到了问题,也更难追踪。所以作者建议读者,特别是新人或者刚接触 SpringBoot 的读者,一定要在使用的基础上,去理解每一个被整合的框架的使用和原理(当然,如果基础好,能够读底层源码更好了)。万不可为了使用而使用。就像一个同事说的,如果哪一天 Spring 生态圈被别的框架取代了,那你就失业了。
忧患意识一定要保持着。