翻译 | 《JavaScript Everywhere》第14章 使用Apollo Client
写在最前面
大家好呀,我是毛小悠,是一位前端开发工程师。正在翻译一本英文技术书籍。
为了提高大家的阅读体验,对语句的结构和内容略有调整。如果发现本文中有存在瑕疵的地方,或者你有任何意见或者建议,可以在评论区留言,或者加我的微信:code_maomao,欢迎相互沟通交流学习。
(σ゚∀゚)σ…:*☆哎哟不错哦
第14章 使用Apollo Client
我清楚地记得我的第一个互联网连接。我用计算机的调制解调器拨号上网,然后我可以免费上网。当时感觉如此神奇,与我们今天使用的始终在线的连接相距甚远。
流程如下所示:
-
坐在我的电脑上,然后打开
ISP软件。 -
单击“连接”,然后等待调制解调器拨打该号码。
-
如果连接成功,请听到“调制解调器声音”。
如果不是这样,例如在高峰时段,此时线路可能会过载和繁忙,请重试。 -
建立连接后,你将收到成功通知,并浏览所有充满
GIF的90年代辉煌的网页。
这个周期看起来很艰巨,但是它仍然代表了服务彼此之间进行通信的方式:它们请求一个连接,建立该连接,发送一个请求,并得到一些回应。我们的客户应用程序将以相同的方式工作。我们将首先连接到服务器API应用程序,如果成功,将向该服务器发出请求。
在本章中,我们将使用Apollo Client连接到我们的API。连接之后,我们将编写一个GraphQL查询,该查询将用于在页面上显示数据。我们还将在API查询和接口组件中引入分页。
在本地运行API
Web客户端应用程序的开发将需要访问我们API的本地实例。如果你一直在阅读本书,那么你可能已经在计算机上启动了Notedly API及其数据库。如果不是这样,我已经在附录A添加了有关如何获取API并使用一些样本数据一起运行的副本。如果你已经在运行API,但是希望使用其他数据,请从API项目目录的根目录运行npm run seed。
设置Apollo客户端
与Apollo服务器非常相似,Apollo客户端提供了许多有用的功能来简化在JavaScript UI应用程序中使用GraphQL的工作。Apollo客户端提供了用于将Web客户端连接到API、本地缓存、GraphQL语法、本地状态管理等的库。我们还将在React应用程序中使用Apollo Client,但Apollo还提供了Vue,Angular,Meteor,Ember和Web Components的库。
首先,我们要确保.env文件包含了对我们本地API URI的引用,这将使我们能够在开发中使用本地API实例,同时在将应用程序发布到公共Web服务器时指向我们的产品API。在我们的.env文件,我们应该有一个API_URI变量保存我们本地API服务器的地址:
API_URI=http://localhost:4000/api
我们的代码捆绑程序Parcel设置为自动处理.env文件。
任何时候我们想在我们的代码中引用一个.env变量,我们可以使用process.env.VARIABLE_NAME。这将使我们能够在本地开发、生产以及我们可能需要的任何其他环境(例如暂存或持续集成)中使用特有的变量值。
使用存储在环境变量中的地址,我们可以将Web客户端连接到API服务器。在src/App.js文件中工作,首先,我们需要导入将要使用的Apollo软件包:
// import Apollo Client libraries
import {

     ApolloClient, ApolloProvider, InMemoryCache } from '@apollo/client';
导入这些内容后,我们可以配置一个新的Apollo Client实例,将其传递给API URI,启动缓存,并启用本地Apollo开发者工具:
// configure our API URI & cache
const uri = process.env.API_URI;
const cache = new InMemoryCache();

// configure Apollo Client
const client = new ApolloClient({


  uri,
  cache,
  connectToDevTools: true
});
最后,我们可以将React应用程序打包到一个ApolloProvider。我们将用替换空标签,并将我们的客户端包括在内:
const App = () => {


  return (
   <ApolloProvider client={

    client}>
    <GlobalStyle />
    <Pages />
   </ApolloProvider>
  );
};
总体而言,我们的src/App.js文件现在将如下所示:
import React from 'react';
import ReactDOM from 'react-dom';

// import Apollo Client libraries
import {

     ApolloClient, ApolloProvider, InMemoryCache } from '@apollo/client';

// global styles
import GlobalStyle from '/components/GlobalStyle';
// import our routes
import Pages from '/pages';

// configure our API URI & cache
const uri = process.env.API_URI;
const cache = new InMemoryCache();

// configure Apollo Client
const client = new ApolloClient({


  uri,
  cache,
  connectToDevTools: true
});

const App = () => (
  <ApolloProvider client={

    client}>
   <GlobalStyle />
   <Pages />
  </ApolloProvider>
);

ReactDOM.render(<App />, document.getElementById('root'));
通过将客户端连接到API服务器,我们现在可以将GraphQL查询和修改集成到我们的应用程序中。
查询API
当我们查询API时,我们是在请求数据。在UI客户端中,我们希望能够查询该数据并将其显示给用户。Apollo使我们能够编写查询以获取数据。然后,我们可以更新React组件以将数据显示给最终用户。我们可以通过编写noteFeed查询来探索查询的用法,该查询将向用户返回最新笔记的摘要,并将其显示在应用程序的主页上。
当我第一次编写查询时,发现以下过程很有用:
-
考虑查询需要返回什么数据。
-
在
GraphQL Playground中编写查询。 -
将查询集成到客户端应用程序。
让我们在构思查询时遵循此过程。如果你继续阅读本书的API部分,你可能会记得,noteFeed查询返回一个包含10个笔记的列表,以及一个游标(指示最后返回的笔记的位置)和hasNextPage布尔值,该布尔值允许我们确定是否有其他笔记要加载。我们可以在GraphQL Playground中查看我们的结构,从而可以查看所有可用的数据选项。对于我们的查询,我们很可能需要以下信息:
{


  cursor
  hasNextPage
  notes {


   id
   createdAt
   content
   favoriteCount
   author {


    id
    username
    avatar
    }
   }
  }
现在,在我们的GraphQLPlayground中,我们可以将其填充到GraphQL查询中。我们将比服务器章节中的查询更加详细,通过命名查询并提供一个可选的名为cursor的变量,要使用GraphQL Playground,请首先确保API服务器正在运行,然后访问http://localhost:4000/api。在GraphQL Playground中,添加以下查询:
query noteFeed($cursor: String) {


   noteFeed(cursor: $cursor) {


    cursor
    hasNextPage
    notes {


     id
     createdAt
     content
     favoriteCount
     author {


      username
      id
      avatar
     }
    }
   }
  }
在GraphQL Playground中,添加一个“query variable”以测试该变量的使用:
{


  "cursor": ""
}
要测试此变量,请将空字符串替换为数据库中任何笔记的ID值(图14-1)。

图14-1我们在GraphQL Playground中的noteFeed查询
现在我们知道查询已正确编写,我们可以放心地将其集成到Web应用程序中。在src/pages/home.js文件中,通过@apollo/client中的gql库导入useQuery库以及GraphQL语法:
// import the required libraries
import {

     useQuery, gql } from '@apollo/client';

// our GraphQL query, stored as a variable
const GET_NOTES = gql`
  query NoteFeed($cursor: String) {
    noteFeed(cursor: $cursor) {
      cursor
      hasNextPage
      notes {
        id
        createdAt
        content
        favoriteCount
        author {
          username
          id
          avatar
        }
      }
    }
  }
`;
现在我们可以将查询集成到我们的React应用程序中。为此,我们将GraphQL查询字符串传递给Apollo的useQueryReact钩子。我们的钩子将返回一个包含以下值之一的对象:
-
data数据查询返回的数据(如果成功)。
-
loading加载状态,在获取数据时将其设置为
true。这使我们可以向用户显示加载指示器。 -
error如果无法获取我们的数据,则会将错误返回到我们的应用程序。
我们可以更新Home组件包括我们的查询:
const Home = () => {


  // query hook
  const {

     data, loading, error, fetchMore } = useQuery(GET_NOTES);

  // if the data is loading, display a loading message
  if (loading) return <p>Loading...</p>;
  // if there is an error fetching the data, display an error message
  if (error) return <p>Error!</p>;

  // if the data is successful, display the data in our UI
  return (
    <div>
      {

    console.log(data)}
      The data loaded!
    </div>
  );
};

export default Home;
如果成功完成所有操作,则应该看到“数据已加载!”消息出现在应用程序主页上(图14-2)。我们还包括一个console.log语句,它将打印我们的数据到浏览器控制台。将数据集成到应用程序中时,查看数据结果的结构是有用的指导。
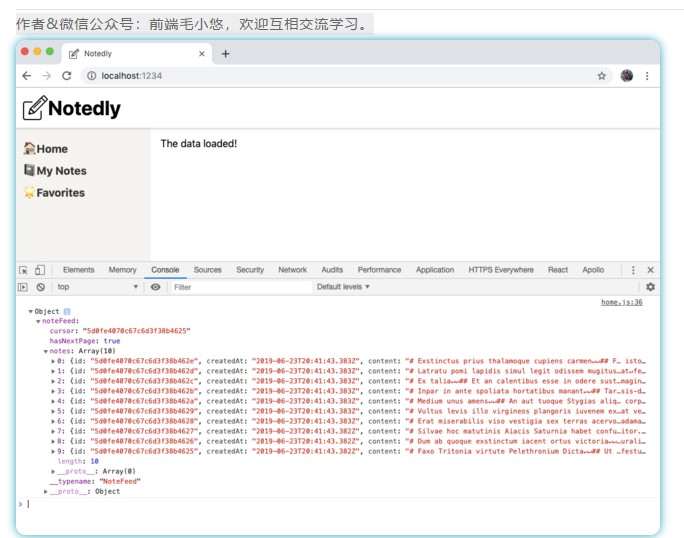
图14-2。如果我们的数据已成功获取,则我们的组件将显示“数据已加载!”消息,数据将打印到控制台。
现在,让我们将接收到的数据集成到应用程序中。为此,我们将使用数据中返回的笔记数组。React要求为每个结果分配一个唯一的键,为此我们将使用单个笔记的ID。首先,我们将为每个笔记显示作者的用户名:
const Home = () => {


  // query hook
  const {

     data, loading, error, fetchMore } = useQuery(GET_NOTES);

  // if the data is loading, display a loading message
  if (loading) return <p>Loading...</p>;
  // if there is an error fetching the data, display an error message
  if (error) return <p>Error!</p>;

  // if the data is successful, display the data in our UI
  return (
    <div>
      {

    data.noteFeed.notes.map(note => (
        <div key={

    note.id}>{

    note.author.username}</div>
      ))}
    </div>
  );
};
使用JavaScript的map()方法
如果你以前没有使用过JavaScript的map()方法,那么语法似乎有些陌生。map()方法,可以在数组中执行遍历动作。当你处理从API返回的数据时,这非常有用,它允许你执行操作,例如以某种方式在模板中显示每个项目。要了解有关map()的更多信息,建议阅读MDN Web文档指南。
如果我们的数据库中有数据,你现在应该在页面上看到用户名列表(图14-3)。

图14-3来自我们数据的用户名,打印到屏幕上。
现在我们已经成功输出了我们的数据,我们可以编写其余的组件了。由于我们的笔记是用Markdown编写的,因此我们导入一个库,该库将允许我们将Markdown呈现到页面上。
在src/pages/home.js中:
import ReactMarkdown from 'react-markdown';
现在,我们可以更新UI,包括作者的头像、作者的用户名、笔记的创建日期,笔记具有的收藏夹数量以及笔记本身的内容。
在src/pages/home.js中:
// if the data is successful, display the data in our UI
return (
  <div>
    {

    data.noteFeed.notes.map(note => (
      <article key={

    note.id}>
      <img src={

    note.author.avatar} alt={

    `${

      note.author.username} avatar`} height="50px" />{

    ' '}
        {

    note.author.username} {

    note.createdAt} {

    note.favoriteCount}{

    ' '}
        <ReactMarkdown source={

    note.content} />
      </article>
    ))}
  </div>
);
React中的空格
React会去除在新行上的元素之间的空格。在我们的标记中使用{’’}是一种手动添加空格的方法。
现在,你应该在浏览器中看到完整的笔记列表。但是,在继续进行样式设计之前,可以进行一些小的重构。这是我们显示笔记的第一页,但是我们知道我们还会做更多事情。在其他页面上,我们将需要显示单个笔记以及其他笔记类型的功能(例如“我的笔记”和“收藏夹”)。让我们继续创建两个新组件:src/components/Note.js和src/components/NoteFeed.js。
在src/components/Note.js中,我们将包括单个笔记的标记。为此,我们将为每个组件函数传递一个包含内容的属性。
import React from 'react'; import ReactMarkdown from 'react-markdown';

const Note = ({ note }) => { return (
    <article>
      <img
        src={note.author.avatar}
        alt="{note.author.username} avatar" height="50px" />{' '}
      {note.author.username} {note.createdAt} {note.favoriteCount}{' '}
      <ReactMarkdown source={note.content} />
    </article>
  );
}; export default Note;
现在,对于src/components/NoteFeed.js组件:
import React from 'react';
import Note from './Note';

const NoteFeed = ({

     notes }) => {


  return (
    <div>
      {

    notes.map(note => (
        <div key={

    note.id}>
          <Note note={

    note} />
        </div>
      ))}
    </div>
  );
};

export default NoteFeed;
最后,我们可以更新src/pages/home.js组件引用我们的NoteFeed:
import React from 'react';
import {

     useQuery, gql } from '@apollo/client';

import Button from '../components/Button';
import NoteFeed from '../components/NoteFeed';

const GET_NOTES = gql`
  query NoteFeed($cursor: String) {
    noteFeed(cursor: $cursor) {
      cursor
      hasNextPage
      notes {
        id
        createdAt
        content
        favoriteCount
        author {
          username
          id
          avatar
        }
      }
    }
  }
`;

const Home = () => {


  // query hook
 const {

     data, loading, error, fetchMore } = useQuery(GET_NOTES);

 // if the data is loading, display a loading message
 if (loading) return <p>Loading...</p>;
 // if there is an error fetching the data, display an error message
 if (error) return <p>Error!</p>;

 // if the data is successful, display the data in our UI
  return <NoteFeed notes={

    data.noteFeed.notes} />;
};

export default Home;
通过这种重构,我们现在可以轻松地在我们的应用程序中重新创建笔记和笔记摘要的实例。
一些风格
现在我们已经编写了组件并可以查看数据,我们可以添加一些样式。最明显的改进机会之一就是我们的“创建日期”显示方式。
为了解决这个问题,我们将使用date-fns库,它提供了一些小的组件来处理JavaScript中的日期。在src/components/Note.js中,导入库并更新日期标记以应用转换,如下所示:
 // import the format utility from `date-fns`
import {

     format } from 'date-fns';

// update the date markup to format it as Month, Day, and Year
{

    format(note.createdAt, 'MMM Do YYYY')} Favorites:{

    ' '}
格式化日期后,我们可以使用样式化组件库来更新笔记布局:
import React from 'react';
import ReactMarkdown from 'react-markdown';
import {

     format } from 'date-fns';
import styled from 'styled-components';

// Keep notes from extending wider than 800px
const StyledNote = styled.article` max-width: 800px;
  margin: 0 auto; `;

// Style the note metadata
const MetaData = styled.div` @media (min-width: 500px) {

      display: flex;
    align-items: top;
  } `;

// add some space between the avatar and meta info
const MetaInfo = styled.div` padding-right: 1em; `;

// align 'UserActions' to the right on large screens
const UserActions = styled.div` margin-left: auto; `;

const Note = ({

     note }) => {


  return (
    <StyledNote>
      <MetaData>
        <MetaInfo>
          <img
            src={

    note.author.avatar}
            alt="{note.author.username} avatar"
            height="50px"
          />
        </MetaInfo>
        <MetaInfo>
          <em>by</em> {

    note.author.username} <br />
          {

    format(note.createdAt, 'MMM Do YYYY')}
        </MetaInfo>
        <UserActions>
          <em>Favorites:</em> {

    note.favoriteCount}
        </UserActions>
      </MetaData>
      <ReactMarkdown source={

    note.content} />
    </StyledNote>
  );
};

export default Note;
我们还可以在NoteFeed.js组件中的笔记之间添加一些空间和浅边框:
 import React from 'react';
import styled from 'styled-components';

const NoteWrapper = styled.div`
  max-width: 800px;
  margin: 0 auto;
  margin-bottom: 2em;
  padding-bottom: 2em;
  border-bottom: 1px solid #f5f4f0;
`;

import Note from './Note';

const NoteFeed = ({

     notes }) => {


  return (
    <div>
      {

    notes.map(note => (
        <NoteWrapper key={

    note.id}>
          <Note note={

    note} />
        </NoteWrapper>
      ))}
    </div>
  );
};

export default NoteFeed;
通过这些更新,我们将布局样式引入了我们的应用程序。
动态查询
当前,我们的应用程序包含三个路由,每个路由都是静态的。这些路由位于静态URL,并且将始终发出相同的数据请求。但是,应用程序通常需要动态路由和基于这些路由的查询。例如,Twitter.com上的每条推文分配了唯一的URL :twitter.com//status/.这使用户可以在Twitter生态系统内以及网络上的任何地方链接和共享单个推文。
当前,在我们的应用笔记中只能在摘要中访问,但是我们希望允许用户查看并链接到各个笔记。为此,我们将在React应用程序中设置动态路由以及GraphQL查询单个笔记。我们的目标是使用户能够访问/note/处的路由。
首先,我们将在src/pages/note.js中创建一个新的页面组件。我们将把props(属性)对象传递给组件,该对象包括通过React Router的match属性。此属性包含有关路由路径如何与URL匹配的信息。这将使我们能够通过以下方式访问URL参数。
import React from 'react';

const NotePage = props => {


  return (
    <div>
      <p>ID: {

    props.match.params.id}</p>
    </div>
  );
};

export default NotePage;
现在,我们可以向src/pages/index.js文件添加相应的路由。该路由将包含一个ID参数,以:id表示:
// import React and routing dependencies
import React from 'react';
import {

     BrowserRouter as Router, Route } from 'react-router-dom';

// import shared layout component
import Layout from '../components/Layout';

// import routes
import Home from './home';
import MyNotes from './mynotes';
import Favorites from './favorites';
import NotePage from './note';

// define routes
const Pages = () => {


  return (
    <Router>
      <Layout>
        <Route exact path="/" component={

    Home} />
        <Route path="/mynotes" component={

    MyNotes} />
        <Route path="/favorites" component={

    Favorites} />
        <Route path="/note/:id" component={

    NotePage} />
      </Layout>
    </Router>
  );
};

export default Pages;
现在,访问 http://localhost:1234/note/123将在我们的页面上打印ID:123。要对其进行测试,请使用你选择的任何内容替换ID参数,例如/note/pizza或/note/GONNAPARTYLIKE1999。
这很酷,但不是很有用。让我们更新我们的src/pages/note.js组件,以对在URL中找到ID的笔记进行GraphQL查询。为此,我们将使用API和NoteReact组件中的note查询:
import React from 'react';
// import GraphQL dependencies
import {

     useQuery, gql } from '@apollo/client';

// import the Note component
import Note from '../components/Note';

// the note query, which accepts an ID variable
const GET_NOTE = gql`
  query note($id: ID!) {
    note(id: $id) {
      id
      createdAt
      content
      favoriteCount
      author {
        username
        id
        avatar
      }
    }
  }
`;

const NotePage = props => {


  // store the id found in the url as a variable
  const id = props.match.params.id;

  // query hook, passing the id value as a variable
  const {

     loading, error, data } = useQuery(GET_NOTE, {

     variables: {

     id } });

  // if the data is loading, display a loading message
  if (loading) return <p>Loading...</p>;
  // if there is an error fetching the data, display an error message
  if (error) return <p>Error! Note not found</p>;

  // if the data is successful, display the data in our UI
  return <Note note={

    data.note} />;
};

export default NotePage;
现在,导航到带有ID参数的URL将呈现相应的笔记或错误消息。最后,让我们更新src/components/NoteFeed.js组件,以在UI中显示指向单个笔记的链接。
首先,在文件顶部,从React Router导入{
Link}:
import {

     Link } from 'react-router-dom';
然后,更新JSX,使其包含指向笔记页面的链接,如下所示:
<NoteWrapper key={

    note.id}>
  <Note note={

    note} />
  <Link to={

    `note/${

      note.id}`}>Permalink</Link>
</NoteWrapper>
这样,我们就在应用程序中使用了动态路由,并使用户能够查看各个笔记。
分页
目前,我们仅检索应用程序主页中的10个最新笔记。如果要显示其他笔记,则需要启用分页。你可能会从本章的开头以及我们的API服务器的开发中回想起,我们的API返回了游标,这是结果页面中返回的最后一个笔记的ID。此外,API返回hasNextPage布尔值,如果在我们的数据库中找到其他笔记,则为true。向我们的API发出请求时,我们可以向其传递一个游标参数,该参数将返回接下来的10个项目。
换句话说,如果我们有25个对象的列表(对应的ID为1–25),则在发出初始请求时,它将返回项目1–10,游标值10和hasNextPage值true。如果我们发送一个游标值为10的请求,我们将收到11-20,游标值为20且hasNextPage值为true。最后,如果我们做的第三请求,传递一个指针的20,我们会在收到物品21-25,用游标的值25和hasNextPage的值为false。这正是我们将在noteFeed查询中实现的逻辑。
为此,让我们更新src/pages/home.js文件以进行分页查询。在我们的用户界面中,当用户单击“查看更多”按钮时,接下来的10条笔记应加载到页面上。我们希望这种情况下不会刷新任何页面。为此,我们需要在查询组件中包含fetchMore参数,并仅在hasNextPage为true时显示Button组件。
现在,我们将其直接写到我们的主页组件中,可以很容易地将其隔离到自己的组件中或成为NoteFeed组件的一部分。
// if the data is successful, display the data in our UI
return (
  // add a <React.Fragment> element to provide a parent element
  <React.Fragment>
    <NoteFeed notes={

    data.noteFeed.notes} />
    {

    /* Only display the Load More button if hasNextPage is true */}
    {

    data.noteFeed.hasNextPage && (
      <Button>Load more</Button>
    )}
  </React.Fragment>
);
React中的条件
在前面的示例中,我们使用带有&&运算符的内联if语句有条件地显示“加载更多”按钮。如果hasNextPage为true,则显示按钮。你可以在官方React文档中阅读有关条件渲染的更多信息。
现在我们可以使用onClick处理程序更新组件。
当用户单击按钮时,我们将要使用fetchMore方法进行附加查询,并将返回的数据附加到我们的页面。
{

    data.noteFeed.hasNextPage && (
  //  onClick peform a query, passing the current cursor as a variable
  <Button
    onClick={

    () =>
      fetchMore({


        variables: {


          cursor: data.noteFeed.cursor
        },
        updateQuery: (previousResult, {

     fetchMoreResult }) => {


          return {


            noteFeed: {


              cursor: fetchMoreResult.noteFeed.cursor,
              hasNextPage: fetchMoreResult.noteFeed.hasNextPage,
              // combine the new results and the old
              notes: [
                ...previousResult.noteFeed.notes,
                ...fetchMoreResult.noteFeed.notes
              ],
              __typename: 'noteFeed'
            }
          };
        }
      })
    }
  >
    Load more
  </Button>
)}
先前的代码可能看起来有些粗糙,所以让我们对其进行分解。我们的组件包括一个onClick处理程序。单击该按钮时,将使用fetchMore方法执行新查询,并传递前一个查询中返回的游标值。返回后,updateQuery被执行,它更新我们的光标和hasNextPage值,并将结果组合到一个数组中。
该__typename是查询名称,它包含在Apollo的结果中。
进行此更改后,我们便可以从笔记摘要中查看所有笔记。滚动到笔记底部,尝试一下。如果你的数据库包含10个以上的笔记,则该按钮将可见。单击“加载更多”将下一个noteFeed结果添加到页面。
结论
在本章中,我们已经介绍了很多基础知识。我们已经设置了Apollo Client来与我们的React应用程序一起使用,并将多个GraphQL查询集成到我们的UI中。GraphQL的强大能力体现在编写单个查询的能力,这些查询恰好返回UI所需的数据。在下一章中,我们将用户身份验证集成到我们的应用程序中,允许用户登录并查看其笔记和收藏夹。
如果有理解不到位的地方,欢迎大家纠错。如果觉得还可以,麻烦您点赞收藏或者分享一下,希望可以帮到更多人。