Oauth认证模式:
- 授权码模式
//A 网站提供一个链接,用户点击后就会跳转到 B 网站
https://b.com/oauth/authorize?
  response_type=code&
  client_id=CLIENT_ID&
  redirect_uri=CALLBACK_URL&
  scope=read
//用户跳转后,B 网站会要求用户登录,然后询问是否同意给予 A 网站授权。用户表示同意,这时 B 网站就会跳回redirect_uri参数指定的网址。跳转时,会传回一个授权码
https://a.com/callback?code=AUTHORIZATION_CODE
//A 网站拿到授权码以后,就可以在后端,向 B 网站请求令牌
https://b.com/oauth/token?
 client_id=CLIENT_ID&
 client_secret=CLIENT_SECRET&
 grant_type=authorization_code&
 code=AUTHORIZATION_CODE&
 redirect_uri=CALLBACK_URL
//B 网站收到请求以后,就会以Json形式返回令牌
{
"access_token":"ACCESS_TOKEN",
"token_type":"bearer",
"expires_in":2592000,
"refresh_token":"REFRESH_TOKEN",
"scope":"read",
"uid":100101,
"info":{...}
} 
最常用的流程,安全性也最高,它适用于那些有后端的 Web 应用。授权码通过前端传送,令牌则是储存在后端,而且所有与资源服务器的通信都在后端完成
- 隐式授权模式/简化模式
//A 网站提供一个链接,要求用户跳转到 B 网站
https://b.com/oauth/authorize?
  response_type=token&
  client_id=CLIENT_ID&
  redirect_uri=CALLBACK_URL&
  scope=read
//用户跳转到 B 网站,登录后同意给予 A 网站授权。这时,B 网站就会跳回redirect_uri参数指定的跳转网址,并且把令牌作为 URL 参数,传给 A 网站。
https://a.com/callback#token=ACCESS_TOKEN这种方式把令牌直接传给前端,是很不安全的。因此,只能用于一些安全要求不高的场景,并且令牌的有效期必须非常短

- 密码模式(A网页要求用户提供用户名和密码,拿到以后直接向后台请求令牌,后台验证身份通过后,直接返回令牌,这种方式需要用户给出自己的用户名/密码,显然风险很大)
https://oauth.b.com/token?
  grant_type=password&
  username=USERNAME&
  password=PASSWORD&
client_id=CLIENT_ID- 客户端凭证模式(A 应用在命令行向 后台发出请求,后台验证通过以后,直接返回令牌,适用于没有前端的命令行应用)
https://oauth.b.com/token?
  grant_type=client_credentials&
  client_id=CLIENT_ID&
  client_secret=CLIENT_SECRET
Spring Security知识
只要添加了如下的依赖,当我们访问任一接口时都会需要登录
        <dependency>
            <groupId>org.springframework.boot</groupId>
            <artifactId>spring-boot-starter-security</artifactId>
        </dependency>
@GetMapping("/hello")
public String hello(){
return "hello";
} 
使用配置类指定用户名和密码
@Configuration
public class MyTestSecurityConfig extends WebSecurityConfigurerAdapter {
@Bean
PasswordEncoder passwordEncoder(){
return NoOpPasswordEncoder.getInstance();
}
@Override
protected void configure(AuthenticationManagerBuilder auth) throws Exception {
auth.inMemoryAuthentication()
.withUser("test1").password("123").roles("admin1")
.and()
.withUser("test2").password("123").roles("admin2");
}
}本文采用的是第三种的密码模式,用于前后端分离项目
1.引入pom依赖
<dependency>
<groupId>org.springframework.boot</groupId>
<artifactId>spring-boot-starter-web</artifactId>
</dependency>
<!--整合oauth需要的依赖,redis用于存储token-->
<dependency>
<groupId>org.springframework.boot</groupId>
<artifactId>spring-boot-starter-data-redis</artifactId>
</dependency>
<dependency>
<groupId>org.springframework.boot</groupId>
<artifactId>spring-boot-starter-security</artifactId>
</dependency>
<dependency>
<groupId>org.springframework.security.oauth</groupId>
<artifactId>spring-security-oauth2</artifactId>
<version>2.3.4.RELEASE</version>
</dependency>2.添加配置信息
spring:
redis:
database: 0 #使用的redis库的编号
host: 127.0.0.1
port: 6379
# password: 123456
jedis:
pool:
max-active: 8 #连接池最大连接数
max-idle: 8 #连接池最大空闲数
max-wait: -1ms #连接池最大阻塞等待时间
min-idle: 0 #连接池最小空闲数3.添加配置类
配置授权服务器
AuthorizationServerConfig
@Configuration
@EnableAuthorizationServer //开启授权服务器
public class AuthorizationServerConfig extends AuthorizationServerConfigurerAdapter {
@Autowired
AuthenticationManager authenticationManager;//用于支持password模式
@Autowired
RedisConnectionFactory redisConnectionFactory;//将令牌信息存储到redis缓存
@Autowired
UserDetailsService userDetailsService;//刷新token
@Bean
PasswordEncoder passwordEncoder(){
// 默认密钥的迭代次数为10,也可以指定具体的次数
// 用户名密码从前端传过来后,通过BCryptPasswordEncoder实例中的encode方法对密码进行加密处理
return new BCryptPasswordEncoder();
}
@Override
public void configure(ClientDetailsServiceConfigurer clients) throws Exception {
//配置客户端用于password认证
clients.inMemory().withClient("password")//客户端的名称,这里随便写
.authorizedGrantTypes("password","refresh_token")//指定授权模式为password模式并使用refresh_token刷新token
.accessTokenValiditySeconds(1800)//token的有效时间
.resourceIds("rid")
.scopes("all")//授权范围
.secret("$2a$10$1Sh2CCF8I/XoKBLn8xTWxuOoY8jx4Gjttxs/afactggQnUftM.yca");//加密后的密码
}
@Override
public void configure(AuthorizationServerEndpointsConfigurer endpoints) throws Exception {
endpoints.tokenStore(new RedisTokenStore(redisConnectionFactory))//保存token到redis
.authenticationManager(authenticationManager)//启用oauth2管理
.userDetailsService(userDetailsService);//用户管理
}
@Override
public void configure(AuthorizationServerSecurityConfigurer security) throws Exception {
security.allowFormAuthenticationForClients();
}
}
配置资源服务器
ResourceServerConfig
@Configuration
@EnableResourceServer //开启资源服务器
public class ResourceServerConfig extends ResourceServerConfigurerAdapter {
@Override
public void configure(ResourceServerSecurityConfigurer resources) throws Exception {
resources.resourceId("rid").stateless(true); //资源id和授权服务器中资源id保持一致并设置资源仅基于令牌认证
}
@Override
public void configure(HttpSecurity http) throws Exception {
//表示用户访问'/admin/**'模式的URL时必须具备admin的角色
//表示用户访问'/user/**'模式的URL时必须具备user的角色
http.authorizeRequests().antMatchers("/admin/**").hasRole("admin")
.antMatchers("/user/**").hasRole("user")
.anyRequest().authenticated();//配置所有的请求必须认证后才可以访问
}
}
配置Security
WebSecurityConfig
@Configuration
public class WebSecurityConfig extends WebSecurityConfigurerAdapter {
@Bean
@Override
public AuthenticationManager authenticationManagerBean() throws Exception {
return super.authenticationManagerBean();
}
@Bean
@Override
protected UserDetailsService userDetailsService() {
return super.userDetailsService();
}
@Override
protected void configure(AuthenticationManagerBuilder auth) throws Exception {
auth.inMemoryAuthentication()
.withUser("admin")
.password("$2a$10$1Sh2CCF8I/XoKBLn8xTWxuOoY8jx4Gjttxs/afactggQnUftM.yca")
.roles("admin")
.and()
.withUser("sang")
.password("$2a$10$1Sh2CCF8I/XoKBLn8xTWxuOoY8jx4Gjttxs/afactggQnUftM.yca")
.roles("user");
}
@Override
protected void configure(HttpSecurity http) throws Exception {
http.antMatcher("/oauth/**").authorizeRequests()
.antMatchers("/oauth/**").permitAll()
.and().csrf().disable();
}
}
添加测试接口
@RestController
public class HelloController {
@GetMapping("/admin/hello")
public String admin(){
return "Hello admin!";
}
@GetMapping("/user/hello")
public String user(){
return "Hello user!";
}
    @GetMapping("/hello")
    public String hello(){
        return "hello";
    }
}测试
发送一个Post请求获取token:http://localhost:8088/oauth/token?username=admin&password=123&grant_type=password&client_id=password&scope=all&client_secret=123
需要注意的是如果token没有过期,每次请求得到的token都是一样的

发送一个Post请求刷新Token:
如果token过期了我们需要刷新token(前提是refresh_token没有过期)

然后我们使用token来访问测试接口
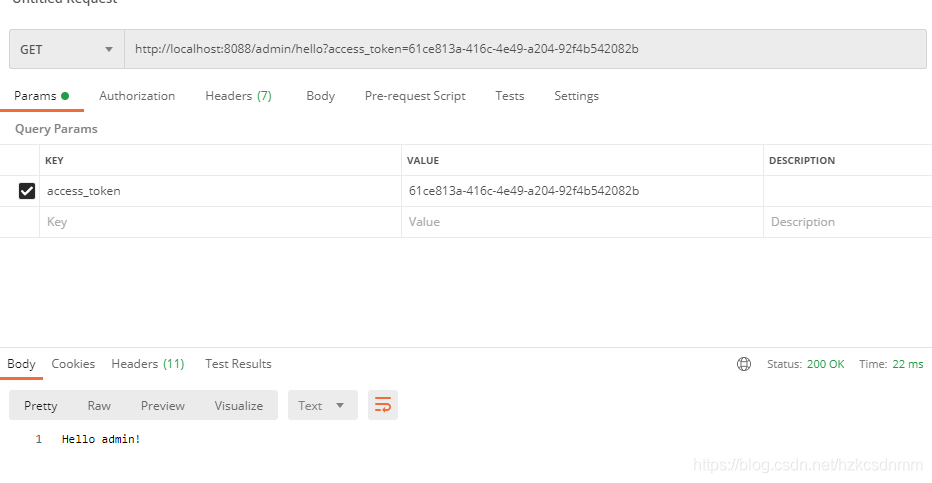
前面我获取token时是使用username=admin获取的,如果我访问/user/hello则会被禁止访问

因为我在配置类中规定了不同的访问路径只能被指定的用户访问

我们可以在redis中看到刚才保存的token信息

但是我们发现这样的话传参未免也太多了吧,这不方便我们使用,所以我们把一些固定的值在后台写死就可以了