生命周期
- beforeCreate 组件刚刚被创建
- created 组件创建完成
- beforeMount 挂载之前
- mounted 挂载之后
- beforeDestory 组件销毁前调用
- destroyed 组件销毁后调用
所有的生命周期都写在以下代码里面:
<script>
export default {


};
</script>
安装
- 在 Windows 上安装 Node.js ;
- 检测 PATH 环境变量是否配置了 Node.js,点击
开始->运行-> 输入"cmd" -> 输入命令"path",如果环境变量里面已经包含了 C:\Program Files\nodejs\ 则表明环境变量已配置; - 检查 Node.js 版本,在命令行中输入
node -v; - 在命令行中输入
npm -v就可以检测 npm 的版本号; - 打开 VS Code,新建一个
终端,就可以输入命令行安装了; - 全局安装 vue-cli:
npm install --global vue-cli/npm install -g @vue/cli/yarn global add @vue/cli; - 嫌弃 npm 太慢可以下载淘宝镜像的
cnpm:npm install -g cnpm --registry=https://registry.npm.taobao.org; - 创建一个新的项目文件夹:
vue create my-project; - 创建一个基于 webpack 模板的新项目:
mkdir webpack-demo && cd webpack-demo->npm init -y->npm install webpack webpack-cli --save-dev; - 安装依赖包:
cd my-project->npm install->npm run dev;(cd my-project->vue add element->npm run serve) - 记得配置路由:
npm install -S axios vue-router; - 这样就创建完毕啦;
感觉上面的那些版本太低了不太行,还是更新一下:
# 全局安装 vue-cli
$ cnpm install --global vue-cli
# 创建一个基于 webpack 模板的新项目
$ vue init webpack my-project
# 这里需要进行一些配置,默认回车即可
This will install Vue 2.x version of the template.

For Vue 1.x use: vue init webpack#1.0 my-project

? Project name my-project
? Project description A Vue.js project
? Author runoob <test@runoob.com>
? Vue build standalone
? Use ESLint to lint your code? Yes
? Pick an ESLint preset Standard
? Setup unit tests with Karma + Mocha? Yes
? Setup e2e tests with Nightwatch? Yes

   vue-cli · Generated "my-project".

   To get started:

     cd my-project
     npm install
     npm run dev

   Documentation can be found at https://vuejs-templates.github.io/webpack
进入项目,安装并运行:
$ cd my-project
$ cnpm install
$ cnpm run dev
 DONE  Compiled successfully in 4388ms

> Listening at http://localhost:8080
另外,在第一次创建项目时可能会报以下错误:
解决办法:
- 找到 powershell,以管理员的身份运行
- 然后输入下面的指令:set-ExecutionPolicy RemoteSigned
3.重新创建项目,就可以了;


选项数据
在 vue 文件里:
<script>
export default {


  data() {


    return {


      msg: "helloword",
      num: 1
    };
  },

  computed: {


    aDouble() {


      return this.num * 2;
    }
  },

  methods: {


    say(h) {


      alert(h);
    }
  },


};
</script>
data 自身是一个方法,可以定义全局变量;而 computed 与 method 是对象,要在对象里面定义方法;method 里的方法是给事件用的;
模板语法
<template>
  <div>
    <div v-html="rawHtml"></div>
    <div v-bind:class="red"></div>
    <div @click="change">修改颜色</div>
    <div v-on:click="say('hi')">点击我</div>
    <div>{

   { message | capitalize}}</div>
  </div>
</template>


<script>
export default {


  data() {


    return {


      msg: "helloword",
      num: 1,
      message: "message",
      rawHtml: "<span>123</span>",
      red: 'red active'
    };
  },

  computed: {


    aDouble() {


      return this.num * 2;
    }
  },

  methods: {


    say(h) {


      alert(h);
    },
    change(){


      this.red = 'blue'
    }
  },

  filters: {


    capitalize() {


      return "123";
    }
  }
};
</script>
在 filters 里面写过滤器函数;
v-bind 指令:
- 动态地绑定一个或多个特性
- 缩写 ‘
:’ - 原始写法
v-bind:class缩写写法:class
计算属性
计算属性也就是 computed;
<template>
  <div>
    <div>{

   {reversedMessage}}</div>
  </div>
</template>


<script>
export default {


  data() {


    return {


      msg: "helloword"
    };
  },

  computed: {


    reversedMessage(){


      return this.msg.split('').reverse().join('');
    }
  }
</script>
class 与 style 绑定
class 绑定
- 绑定1:{ active: isActive, ‘text-danger’: hasError }
- 绑定2:classObject
- 绑定3:[activeClass, errorClass]
<template>
  <div>
    <!-- 第一种绑定方式 -->
    <div v-bind:class="{

     'active' :isActive, 'text-danger' : hasError}">
      class
    </div>

    <!-- 第二种绑定方式 -->
    <div :class="classObject">
      class2
    </div>

    <!-- 第三种绑定方式 -->
    <div :class="[activeClass, errorClass]">
      class3
    </div>
  </div>
</template>

<script>
export default {


  data() {


    return {


      isActive: true,
      hasError: false,
      classObject: {


        'active': true,
        'text-danger': true
      },
      activeClass: 'active',
      errorClass: 'text-danger'
    }
  },
}
</script>
style 绑定
- 绑定1:{ color: isColor, fontSize: ‘16px’ }
- 绑定2:styleObject
- 绑定3:[basestyles, overridingStyles]
<template>
  <div>
     <!-- 第一种绑定方式 -->
    <div v-bind:style="{

       color :activeColor, fontSize : fontSize + 'px'}">
      style1
    </div>

    <!-- 第二种绑定方式 -->
    <div v-bind:style="styleObject">
      style2
    </div>

    <!-- 第三种绑定方式 -->
    <div v-bind:style="[{

       'color': 'red'}, {

       'fontSize': '43px'}]">
      style3
    </div>
  </div>
</template>

<script>
export default {


  data() {


    return {


      activeColor: 'black',
      fontSize: 30,
      styleObject:{


        'color': 'red',
        'fontSize': '43px'
      }
    }
  },
}
</script>
条件渲染
<template>
    <div>
        <h1 v-if="ok">Yes</h1>

        <div v-if="type === A">A</div>
        <div v-else-if="type === B">B</div>
        <div v-else-if="type === C">C</div>
        <div v-else>Not A/B/C</div>

        <div v-show="isShow">123</div>
    </div>
</template>

<script>
export default {


    data() {


        return {


            ok : true,
            type : A,
            isShow : true
        }
    },
}
</script>
列表渲染
v-for指令:
- 用法1:v-for=“item in items” 数组
- 用法2:v-for="(item, index) in items" 数组
- 用法3:v-for=“value, key) in object” 对象
慕课的代码是下面那样的,不过我报错,不知道什么原因:
<template>
  <div>
    <div>列表渲染</div>
    <div>--------------------------------</div>
    <ul id="example-1">
      <li v-for="item in items">{

   { item.message }}</li>
    </ul>

    <div>--------------------------------</div>
    <ul id="example-2">
        <li v-for="(item, index) in items">
            {

   { index }} - {

   { item.message }}
        </li>
    </ul>

    <div>--------------------------------</div>
    <ul id="example-3">
        <li v-for="(value, key) in object">
            {

   { key }} - {

   { value }}
        </li>
    </ul>

  </div>
</template>

<script>
export default {


  data() {


    return {


      items: [{

      message: "Foo" }, {

      message: "Bar" }],
      object: {


          firstName: 'John',
          lastName: 'Doe',
          age: 30
      }
    };
  }
};
</script>
事件处理器
<template>
  <div>
    <div>事件处理器</div>
    <div>--------------------------------</div>
    <div id="example-1">
        <button v-on:click="counter += 1">增加 1</button>
        <p>这个按钮被点击了 {

   { counter }} 次。</p>
    </div>

    <div>--------------------------------</div>
    <div id="example-2">
        <!-- `greet`是在下面定义的方法名 -->
        <button v-on:click="greet">Greet</button>
    </div>

    <div>--------------------------------</div>
    <div id="example-3">
        <!-- `say`是在下面定义的方法名 -->
        <button @click="say('hi')">say</button>
    </div>

    <div>--------------------------------</div>
    <div @click="dothis2">
        <!-- stop:阻止事件冒泡 -->
        <button @click.stop="doThis">dothis</button>
    </div>

  </div>
</template>

<script>
export default {


  data() {


    return {


        counter: 0
    };
  },
  methods: {


      greet(){


          this.counter = this.counter + 1;
          this.counter = this.counter - 1;
          this.counter = this.counter * 2;
      },
      say(h){


          alert(h)
      },
      dothis2(){


          alert('dothis2')
      },
      doThis(){


          alert('dothis')
      }
  },
};
</script>
自定义组件
- 组件写到 components 文件夹下
- 自定义一个倒计时组件
- 组件基本要素:props、$emit 等
- 通过 import 导入自定义组件
首先在 src 的 components 文件夹下建立一个 倒计时组件 countdown:
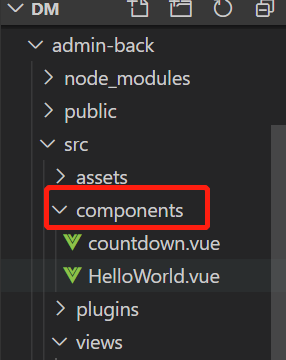
里面代码如下:
<template>
    <p>{

   { time }}</p>
</template>

<script>
export default {


    data() {


        return {


            time: 10
        }
    },
    mounted() {


        var vm = this;
        var t = setInterval(function(){


            vm.time --;
            if(vm.time == 0){


                clearInterval(t);
                vm.$emit("end");
            }
        },1000)
    },
}
</script>
然后再在你 views 里的本来的页面里添加以下代码:
<template>
  <div>
    <div>自定义组件</div>
    <div>--------------------------------</div>

    <countdown></countdown>

  </div>
</template>

<script>
import countdown from '../components/countdown.vue'

export default {


  data() {


    return {


    };
  },
  components: {


      countdown
  },
};
</script>
运行一下就可以看见倒计时啦。
Vue 中的 DOM 操作
this.$refs
以下是代码实例:
<template>
  <div>
    <div>Vue 中的 DOM 操作</div>
    <div>--------------------------------</div>

    <div ref="head"></div>

  </div>
</template>

<script>

export default {


  data() {


    return {


    };
  },
  mounted(){


    //DOM已经生成
    this.$refs.head.innerHTML = 'helloworld';
  }
};
</script>
过渡效果
- 过渡 transition
- 通过样式方式写过渡
-
显示状态 opacity : 1 变到 0
-
隐藏 leave — leave-active — leave-to
-
隐藏 opacity : 0 变到 1
-
显示 enter — enter-active — enter-to
代码实例:
<template>
  <div>
    <div>过渡效果</div>
    <div>--------------------------------</div>

    <div id="demo">
        <button v-on:click="show = !show">
            Toggle
        </button>

        <transition name="fade">
            <p v-if="show">hello</p>
        </transition>
    </div>

  </div>
</template>

<script>

export default {


  data() {


    return {


        show: true
    };
  },
  mounted(){


    //DOM已经生成
    this.$refs.head.innerHTML = 'helloworld';
  }
};
</script>

<style>
    .fade-enter-active, .fade-leave-active {


        transition: opacity .5s
    }
    .fade-enter, .fade-leave-to {


        opacity: 0
    }
</style>
路由 vue - router
- npm install 引入 vue-router 包
- 页面跳转功能
- 用法 1:
<router-link to="/demo1">demo1</router-link> - 用法 2:
to="{ name: 'demo9', params: { userId: 123}}" - 用法 3:
this.$router.push({ path: '/demo1}) - 用法 4:
this.$router.push({ name: 'demo1', params: { userId: 123 }})
代码实例:
<template>
  <div>
    <div>vue-router</div>
    <div>--------------------------------</div>
    <!-- https://router.vuejs.org/zh-ch/ -->

    <router-link to="/register">Register</router-link>

    <div>--------------------------------</div>
    <router-link :to="{ name: 'register', params: {userId: 123}}">params</router-link>

    <div>--------------------------------</div>
    <router-link :to="{ name: 'register', params: {userId: 123}, query: { plan: 'private' }}">query</router-link>

    <div>--------------------------------</div>
    <div @click="toURL">跳转页面</div>

  </div>
</template>

<script>

export default {


  data() {


    return {


    };
  },
  methods: {


      toURL(){


        //   this.$router.push({ path: '/login' })

        //   this.$router.push({ path: '/login', params: { userId: 123 }})

        this.$router.push({

      name: '/login', params: {

      userId: 123 },query: {

      plan: 'private' }})
      }
  },
};
</script>
状态管理 vuex
- npm install 引入 vuex 包
- 全局状态管理,所有页面共享数据
- 设置数据:this.$store.dispatch(‘increment’, 100000);
- 获取数据:this.$store.state.num;
- 在终端输入:npm install vuex --save
- 在 src 目录下新建 store 文件夹
- 在 store 文件夹下新建一个 index.js
- 在 index.js 里面添加如下代码:
import Vue from 'vue'
import Vuex from 'vuex'

Vue.use(Vuex)

export default new Vuex.Store({
    state: {
        count: 0,
        num: 1
    },
    mutations: {
        increment (state, num) {
            state.count ++
            state.num = num;
        }
    },
    actions: {
        increment ({ commit }, obj) {
            commit('increment', obj)
        }
    }
})
- 再在 main.js 里加上如下代码:

- 整个 test.vue 的代码如下:
<template>
  <div>
    <div>状态管理 vuex</div>
    <div>--------------------------------</div>
    <!-- https://vuex.vuejs.org/zh -->

    <div>{

   {msg}}</div>

    <button @click="change">change</button>
  </div>
</template>

<script>

export default {


  data() {


    return {


        msg: '123',
    };
  },
  methods: {


      change() {


          // vuex 取数据
        //   this.msg = this.$store.state.count;

          //修改公共数据
          this.$store.dispatch('inc', 100000);
          this.msg = this.$store.state.num;

      }
  },
};
</script>
Slot 插槽
- 常用于组件调用中
- 在 src 目录下的 components 文件夹中创建一个 slot.vue 文件,文件代码如下:
<template>
  <div>
    <h1>插槽测试</h1>
    <slots>

    </slots>
    <p>我是最底部</p>
    <slot name="bottom">

    </slot>

  </div>
</template>
- 再在 test 文件中写入以下代码:
<template>
  <div>
    <div>Slot 插槽</div>
    <div>--------------------------------</div>

    <slots>
        <div>123</div>
        <p>234</p>

        <p slot="bottom">666</p>
    </slots>


  </div>
</template>

<script>

import slots from '../components/slot.vue';

export default {


    data() {


        return {


        }
    },
    components: {


        slots
    }
}
</script>
vue-resource 请求
(这个我不行,别试了,下面都是废话)
- npm install 引入 vue-resource 包
- this.$http.get(’/someUrl’)
- this.$http.post(’/someUrl’, { foo: ‘bar’ })
- 在终端输入:npm install vue-resource --save
- 在 main.js 里面添加如下代码:

- 在 test.vue 中添加以下代码:
<template>
  <div>
    <div>vue-resource 请求</div>
    <div>--------------------------------</div>
    <!-- https://github.com/pagekit/vue-resource -->
  </div>
</template>

<script>
export default {


  data() {


    return {

     };
  },
  mounted() {


    this.$http.get("/someUrl").then(
      response => {


        // get body data
        console.log(response.body);
      },
      response => {


        // error callback
      }
    );

    this.$http.post("/someUrl", {

      foo: "bar" }).then(
      response => {


        console.log(response.body);
      },
      response => {

     }
    );


    //GET   /someUrl?foo=bar
    this.$http
      .get('/someUrl', {


        params: {

      foo: "bar" },
        headers: {

      "X-Custom": "..." }
      })
      .then(
        response => {


          // success callback
        },
        response => {


          // error callback
        }
      );
  }
};
</script>
移动组件库 Mint UI
官网:http://mint-ui.github.io/docs/#/zh-cn
-
在终端输入:
npm install mint-ui --save/npm install mint-ui -S/npm i mint-ui@1 -S -
在 main.js 里添加如下代码:

-
再在 test.vue 中添加以下代码:
<template>
  <div>
    <div>移动组件库 Mint UI</div>
    <div>--------------------------------</div>
    <!-- http://mint-ui.github.io/docs/#/zh-cn -->

    <mt-tabbar>
      <mt-tab-item id="外卖">
        <img slot="icon" src="../comment.png" />
        外卖
      </mt-tab-item>
      <mt-tab-item id="订单">
        <img slot="icon" src="../comment.png" />
        订单
      </mt-tab-item>
      <mt-tab-item id="发现">
        <img slot="icon" src="../comment.png" />
        发现
      </mt-tab-item>
      <mt-tab-item id="我的">
        <img slot="icon" src="../comment.png" />
        我的
      </mt-tab-item>
    </mt-tabbar>
  </div>
</template>


<script>
import Vue from 'vue/dist/vue.js'
// import { Toast } from "mint-ui";
// import { MessageBox } from "mint-ui";
import {

      Tabbar, TabItem } from "mint-ui";
import 'mint-ui/lib/style.css'

Vue.component(Tabbar.name, Tabbar);
Vue.component(TabItem.name, TabItem);

export default {


  data() {


    return {

     };
  },
  mounted() {


    // Toast("提示信息");
  }
};
</script>