KVM环境部署与使用(附导入qcow2镜像及修改qcow2镜像密码)

KVM环境部署与使用(附导入qcow2镜像及修改qcow2镜像密码)

#对于部署KVM过多的硬性要求是没有的
#在这里我选择使用可视化界面的CentOS8系统 就是想单纯看看这个8的内核有什么新特性
#当然你也可以选择CentOS7版本
#要注意的一点是在虚拟中开启CPU虚拟化

20201015171252265

#检查是否开启CPU虚拟化
[root@localhost ss]# grep --color --perl 'vmx|svm' /proc/cpuinfo
#显示下图种vmx则证明开启 可以进一步部署KVM

在这里插入图片描述

#由于我们需要安装KVM 这里使用网络源安装 不过这个CentOS8中事有KVM的包组的
#网络安装 检查网络是否ping通外网

在这里插入图片描述

#由于我这是一个新的KVM 因此换个国内源 有利于提速
#换源 以下不做解释
[root@localhost ss]# mv /etc/yum.repos.d/CentOS-Base.repo /etc/yum.repos.d/CentOS-Base.repo.backup
[root@localhost ss]# wget -O /etc/yum.repos.d/CentOS-Base.repo https://mirrors.aliyun.com/repo/Centos-8.repo
--2020-10-15 16:58:24--  https://mirrors.aliyun.com/repo/Centos-8.repo
Resolving mirrors.aliyun.com (mirrors.aliyun.com)... 58.216.4.239, 222.186.16.238, 222.186.18.238, ...
Connecting to mirrors.aliyun.com (mirrors.aliyun.com)|58.216.4.239|:443... connected.
HTTP request sent, awaiting response... 200 OK
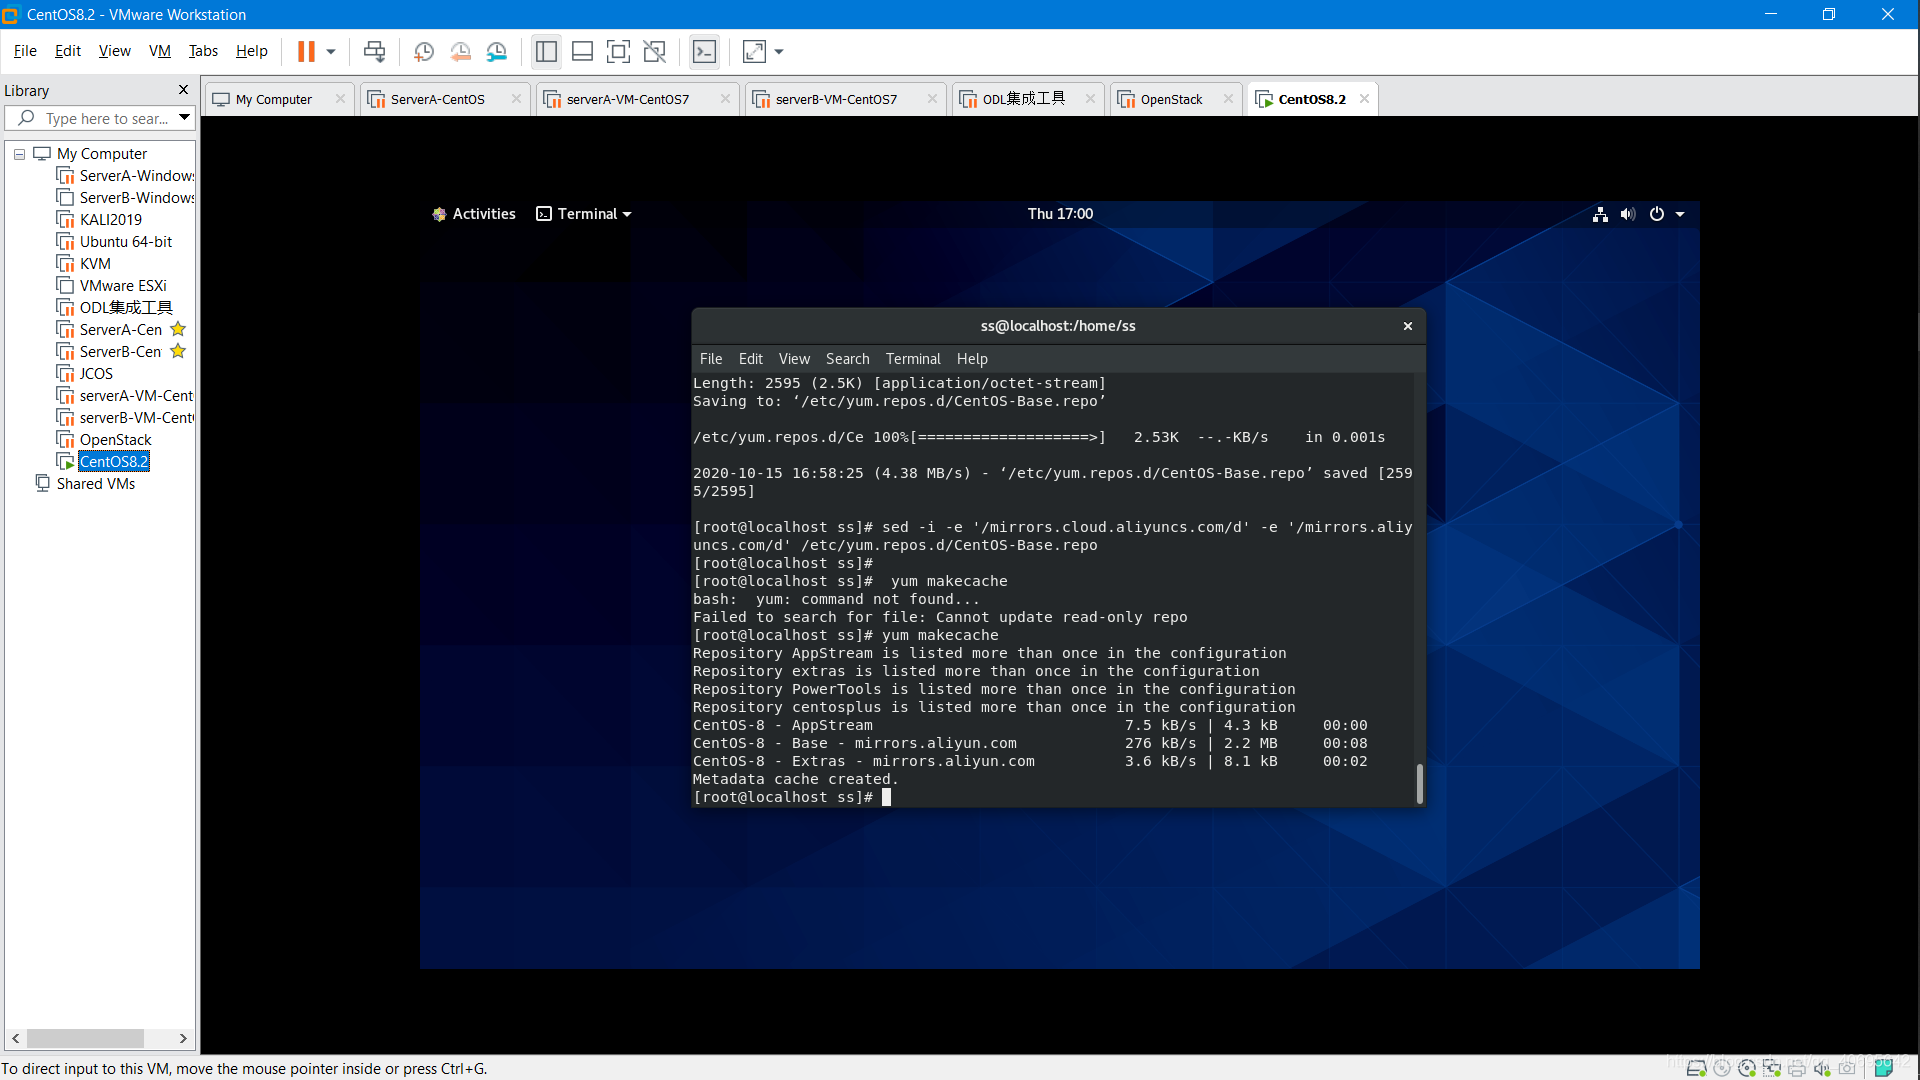
Length: 2595 (2.5K) [application/octet-stream]
Saving to: ‘/etc/yum.repos.d/CentOS-Base.repo’

/etc/yum.repos.d/Ce 100%[===================>]   2.53K  --.-KB/s    in 0.001s  

2020-10-15 16:58:25 (4.38 MB/s) - ‘/etc/yum.repos.d/CentOS-Base.repo’ saved [2595/2595]

[root@localhost ss]# sed -i -e '/mirrors.cloud.aliyuncs.com/d' -e '/mirrors.aliyuncs.com/d' /etc/yum.repos.d/CentOS-Base.repo
[root@localhost ss]# yum makecache
Repository AppStream is listed more than once in the configuration
Repository extras is listed more than once in the configuration
Repository PowerTools is listed more than once in the configuration
Repository centosplus is listed more than once in the configuration
CentOS-8 - AppStream                            7.5 kB/s | 4.3 kB     00:00    
CentOS-8 - Base - mirrors.aliyun.com            276 kB/s | 2.2 MB     00:08    
CentOS-8 - Extras - mirrors.aliyun.com          3.6 kB/s | 8.1 kB     00:02    
Metadata cache created.
[root@localhost ss]# 

在这里插入图片描述

#换源成功后开始安装KVM
#安装kvm
[root@localhost ss]# sudo yum groupinstall "Virtualization Host" -y
[root@localhost ss]# systemctl enable libvirtd
[root@localhost ss]# yum install virt-install virt-manager -y
#安装成功则可输入virt-manager打开
#接下来我们要导入一个让KVM可以利用的镜像 可以事.ios/.qcow2等镜像文件
#这里我们上传一个qcow2文件试试
#上传步骤省去
[root@localhost ss]# virt-install --name centos7-1510 --ram 2048 --vcpus=2 --disk path=centos7_iso_wc_pkg_50.qcow2,bus=ide,format=qcow2  --network=bridge:virbr0 --force --import  --autostart

#参数说明
#name 后面是要新建的虚拟机的名称;
#ram 后面是分配的内存大小(单位MB)
#vcpus= 是分配的cpu个数
#disk=后面的第一个参数是qcow2文件
#autostart的意思是虚拟机随着宿主机的启动而自动启动
#–network=bridge后的br0是网桥名称可以用命令:virsh iface-bridge eth1 br0创建

在这里插入图片描述

#结果出现下面的错误
#出现这个错误的原因是我们直接使用root权限去运行了
#我们执意要用root用户去运行的话我们需要修改/etc/libvirt/qemu.conf中的两处地方
#把user = "root" 和 group = "root"的注释解开
#如下图所示

在这里插入图片描述

在这里插入图片描述

#这个时候再次使用下面命令去创建虚拟机则可成功
[root@localhost ss]# virt-install --name centos7-1510 --ram 2048 --vcpus=2 --disk path=centos7_iso_wc_pkg_50.qcow2,bus=ide,format=qcow2  --network=bridge:virbr0 --force --import  --autostart
#创建成功后弹出一个虚拟机中的虚拟机窗口 即是你创建的虚拟机

在这里插入图片描述

## 注意 我们创建的镜像用户名和密码压根不知道
## 这是由于qcow2的某些原因导致的
#我们要安装一个依赖 然后重新设置密码
#但是在这之前需要先把上面测试创建的镜像干掉
[root@192 ~]# virsh list --all
 Id    Name                           State
----------------------------------------------------
 1     centos7                        running

[root@192 ~]# virsh destroy centos7
Domain centos7 destroyed

[root@192 ~]# virsh undefine centos7
Domain centos7 has been undefined

[root@192 ~]# updatedb 
[root@192 ~]# locate centos7
/root/centos7_iso_wc_pkg_50.qcow2
/var/log/libvirt/qemu/centos7-1510.log
/var/log/libvirt/qemu/centos7.log
[root@192 ~]# rm -rf /var/log/libvirt/qemu/centos7-1510.log
[root@192 ~]# rm -rf /var/log/libvirt/qemu/centos7.log
[root@192 ~]# 

在这里插入图片描述

#如下所示
#不过要注意下面这一段 可能和我的不一样 是由你的镜像导致的 如果挂载后没有/etc/shadow尝试挂载list-filesystems下面显示的其他文件系统
#><fs> list-filesystems
#/dev/sda1: xfs
#/dev/centos/root: xfs
#/dev/centos/swap: swap
#自己生成密码 可以自行设置
[root@192 ~]# yum install libguestfs-tools -y
[root@192 ~]# openssl passwd -1 123456
$1$.ZcnZMFU$qICAeytbSj2Aa/5/JCVTs.
# guestfish --rw -a ./centos7_iso_wc_pkg_50.qcow2
[root@192 ~]# guestfish --rw -a ./centos7_iso_wc_pkg_50.qcow2

Welcome to guestfish, the guest filesystem shell for
editing virtual machine filesystems and disk images.

Type: ‘help’ for help on commands
      ‘man’ to read the manual
      ‘quit’ to quit the shell

><fs> run
><fs> list-filesystems
/dev/sda1: xfs
/dev/centos/root: xfs
/dev/centos/swap: swap
><fs> mount /dev/centos/root /
><fs> vi /
/.autorelabel     /dev              /dev/sda          /etc              /lib64            /opt              /run              /sys              /var              
/bin              /dev/centos/root  /dev/sda1         /home             /media            /proc             /sbin             /tmp              
/boot             /dev/centos/swap  /dev/sda2         /lib              /mnt              /root             /srv              /usr              
><fs> vi /etc/shadow
><fs> cat /etc/shadow
root:$1$.ZcnZMFU$qICAeytbSj2Aa/5/JCVTs.:17989:0:99999:7:::
bin:*:16659:0:99999:7:::
daemon:*:16659:0:99999:7:::
adm:*:16659:0:99999:7:::
lp:*:16659:0:99999:7:::
sync:*:16659:0:99999:7:::
shutdown:*:16659:0:99999:7:::
halt:*:16659:0:99999:7:::
mail:*:16659:0:99999:7:::
operator:*:16659:0:99999:7:::
games:*:16659:0:99999:7:::
ftp:*:16659:0:99999:7:::
nobody:*:16659:0:99999:7:::
avahi-autoipd:!!:17066::::::
systemd-bus-proxy:!!:17066::::::
systemd-network:!!:17066::::::
dbus:!!:17066::::::
polkitd:!!:17066::::::
tss:!!:17066::::::
postfix:!!:17066::::::
sshd:!!:17066::::::

在这里插入图片描述

#修改成功后再次创建然后输入用户名和密码即可登陆系统

在这里插入图片描述

猜你喜欢

转载自blog.csdn.net/qq_40695642/article/details/109120448
今日推荐