文章目录
一、Spring概述
-
Spring框架是一个轻量级的企业级开发的一站式解决方案。所谓解决方案就是可以基于Spring解决Java EE开发的所有问题。Spring框架主要提供了IoC容器、AOP、数据访问、Web开发、消息、测试等相关技术的支持。
-
Spring使用简单的POJO(Plain-Old Java Object,即无任何限制的普通Java对象)来进行企业级开发。每一个被Spring管理的Java对象都称之为Bean,而Spring提供了一个IoC容器来初始化对象,解决对象间的依赖和对象的使用。
-
IoC: Inverse of Control - 控制反转 (以前是用户创建对象,现在交给Spring容器去创建Bean对象)
-
DI: Dependence Injection - 依赖注入 (Spring管理的Bean对象可以相互依赖)
-
利用Spring容器管理Bean
- 采用Spring配置文件管理Bean
- 利用注解精简Spring配置文件
- 利用注解配置类取代Spring配置文件
- 利用Java配置类管理Bean
-
先学习采用Spring配置文件管理Bean。

二、入门案例演示
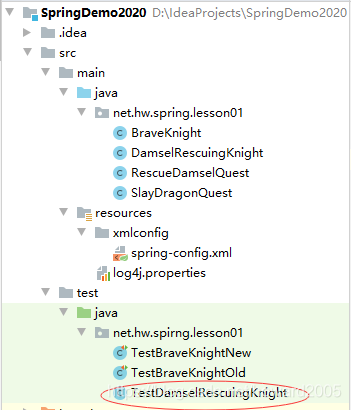
(一)创建Maven项目【SpringDemo2020】


(二)在pom.xml文件里添加依赖
<?xml version="1.0" encoding="UTF-8"?>
<project xmlns="http://maven.apache.org/POM/4.0.0"
         xmlns:xsi="http://www.w3.org/2001/XMLSchema-instance"
         xsi:schemaLocation="http://maven.apache.org/POM/4.0.0 http://maven.apache.org/xsd/maven-4.0.0.xsd">
    <modelVersion>4.0.0</modelVersion>

    <groupId>net.hw.spring</groupId>
    <artifactId>SpringDemo2020</artifactId>
    <version>1.0-SNAPSHOT</version>

    <properties>
        <!-- spring.version -->
        <spring.version>5.2.9.RELEASE</spring.version>
    </properties>

    <dependencies>
        <!--Spring核心-->
        <dependency>
            <groupId>org.springframework</groupId>
            <artifactId>spring-core</artifactId>
            <version>${spring.version}</version>
        </dependency>
        <!--Spring Bean-->
        <dependency>
            <groupId>org.springframework</groupId>
            <artifactId>spring-beans</artifactId>
            <version>${spring.version}</version>
        </dependency>
        <!--Spring容器-->
        <dependency>
            <groupId>org.springframework</groupId>
            <artifactId>spring-context</artifactId>
            <version>${spring.version}</version>
        </dependency>
        <!--Spring测试-->
        <dependency>
            <groupId>org.springframework</groupId>
            <artifactId>spring-test</artifactId>
            <version>${spring.version}</version>
        </dependency>
        <!--单元测试-->
        <dependency>
            <groupId>junit</groupId>
            <artifactId>junit</artifactId>
            <version>4.13</version>
            <scope>test</scope>
        </dependency>
    </dependencies>
</project>
- 场景:勇敢的骑士去完成杀龙的任务。
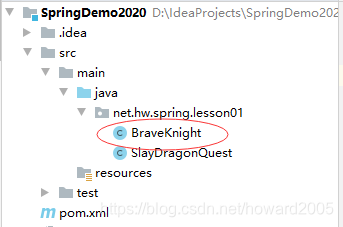
(三)创建杀龙任务类 - SlayDragonQuest
- 在main/java里创建net.hw.spring.lesson01包,然后在里面创建SlayDragonQuest类

package net.hw.spring.lesson01;

/**
 * 功能:杀龙任务类
 * 作者:华卫
 * 日期:2020年09月21日
 */
public class SlayDragonQuest {


    public void embark() {


        System.out.println("执行杀龙任务。");
    }
}
(四)创建勇敢骑士类 - BraveKnight
- 在net.hw.spring.lesson01包里创建BraveKnight类
package net.hw.spring.lesson01;

/**
 * 功能:勇敢骑士类
 * 作者:华卫
 * 日期:2020年09月21日
 */
public class BraveKnight {


    private SlayDragonQuest slayDragonQuest;

    public void setSlayDragonQuest(SlayDragonQuest slayDragonQuest) {


        this.slayDragonQuest = slayDragonQuest;
    }

    public void embarkOnQuest() {


        slayDragonQuest.embark();
    }
}
- 回顾一下传统方式怎么使用这两个类。需要我们自己通过new实例化两个类,然后设置勇敢骑士对象的杀龙任务属性,然后调用勇敢骑士执行任务的方法。
(五)采用传统方式让勇敢骑士完成杀龙任务
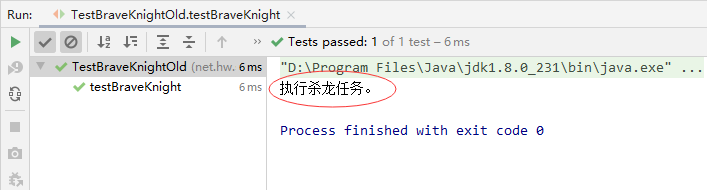
- 在test/java里创建net.hw.spring.lesson01包,然后在里面创建TestBraveKnightOld类

package net.hw.spirng.lesson01;

import net.hw.spring.lesson01.BraveKnight;
import net.hw.spring.lesson01.SlayDragonQuest;
import org.junit.Test;

/**
 * 功能:传统方式测试勇敢骑士类
 * 作者:华卫
 * 日期:2020年09月21日
 */
public class TestBraveKnightOld {


    @Test
    public void testBraveKnight() {


        // 创建杀龙任务对象
        SlayDragonQuest slayDragonQuest = new SlayDragonQuest();
        // 创建勇敢骑士对象
        BraveKnight braveKnight = new BraveKnight();
        // 设置勇敢骑士杀龙任务属性
        braveKnight.setSlayDragonQuest(slayDragonQuest);
        // 勇敢骑士执行任务
        braveKnight.embarkOnQuest();
    }
}
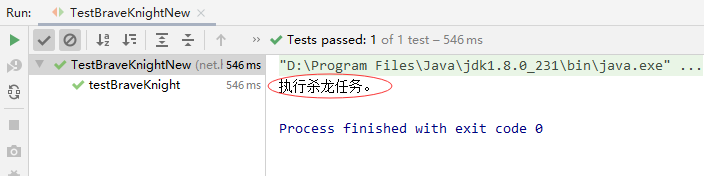
- 运行测试方法testBraveKnight(),查看结果
(六)采用Spring框架让勇敢骑士完成杀龙任务
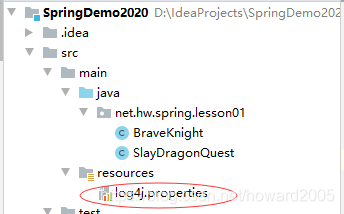
1、在resources目录里创建log4j.properties
log4j.rootLogger=WARN, stdout, logfile
log4j.appender.stdout=org.apache.log4j.ConsoleAppender
log4j.appender.stdout.layout=org.apache.log4j.PatternLayout
log4j.appender.stdout.layout.ConversionPattern=%d %p [%c] - %m%n
log4j.appender.logfile=org.apache.log4j.FileAppender
log4j.appender.logfile.File=target/spring.log
log4j.appender.logfile.layout=org.apache.log4j.PatternLayout
log4j.appender.logfile.layout.ConversionPattern=%d %p [%c] - %m%n
2、创建Spring配置文件spring-config.xml
- 在resources里创建xmlconfig目录,然后在里面创建spring-config.xml


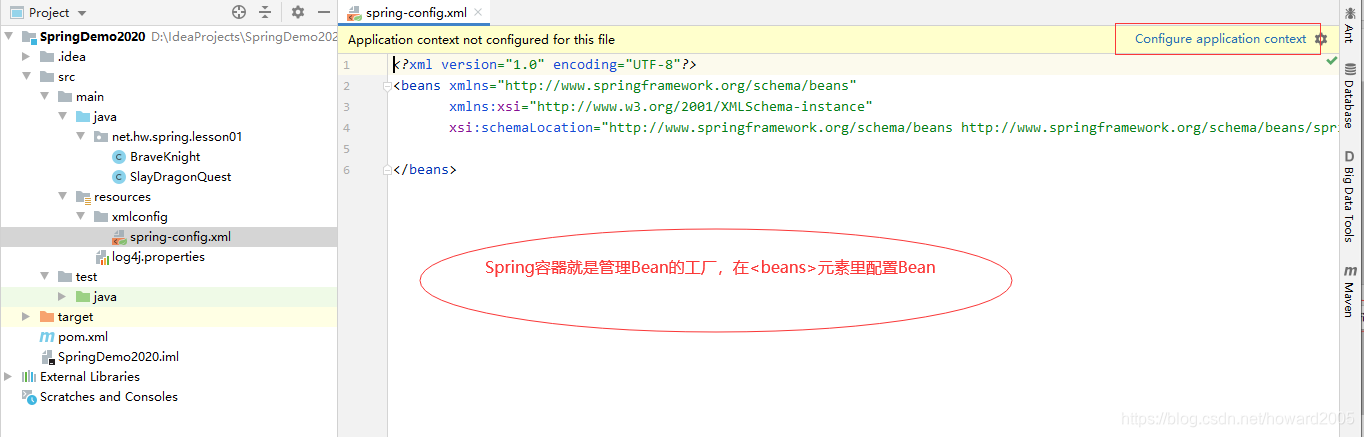
- 单击【Configure application context】(配置应用上下文)

- 单击【Create new application context…】(创建新的应用上下文)
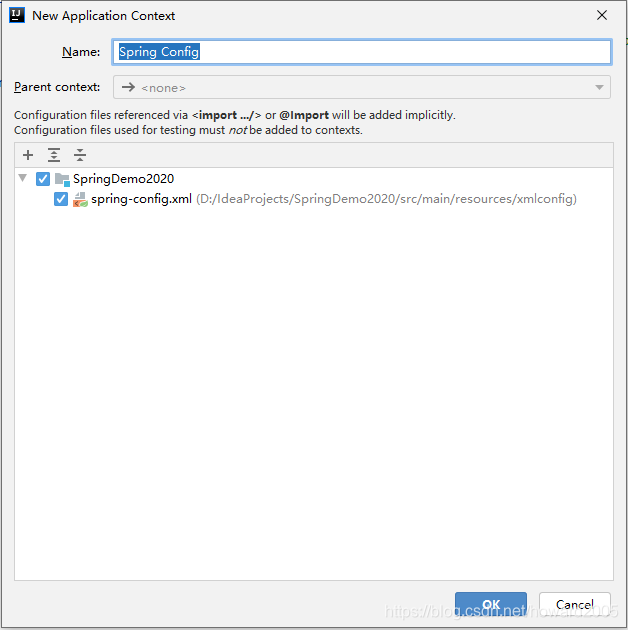

- 在项目结构窗口里查看配置好的spring-config.xml

3、在Spring配置文件里创建Bean
(1)创建杀龙任务Bean
<bean id="slayDragonQuest" class="net.hw.spring.lesson01.SlayDragonQuest"/>
-
id属性 :对应对象名,可以任取,我们可以通过这个id值从Spring容器中获取Bean对象。
-
class属性 :表明Bean对象是基于哪个类来实例化,注意一定要包含包名。
(2)创建勇敢骑士Bean
<bean id="Mike" class="net.hw.spring.lesson01.BraveKnight">
    <property name="slayDragonQuest" ref="slayDragonQuest"/>
</bean>
- property元素:给对象设置属性值
- name属性:Bean对象的属性名
- ref属性:Bean对象的属性值(引用另一个Bean对象)
- 勇敢骑士Bean通过
<property>元素将杀龙任务Bean注入作为其属性。注意,name属性值一定是BraveKnight类的属性名,ref属性值是已定义的杀龙任务Bean的id值。

<?xml version="1.0" encoding="UTF-8"?>
<beans xmlns="http://www.springframework.org/schema/beans"
       xmlns:xsi="http://www.w3.org/2001/XMLSchema-instance"
       xsi:schemaLocation="http://www.springframework.org/schema/beans
       http://www.springframework.org/schema/beans/spring-beans.xsd">

    <bean id="slayDragonQuest" class="net.hw.spring.lesson01.SlayDragonQuest"/>
    <bean id="Mike" class="net.hw.spring.lesson01.BraveKnight">
        <property name="slayDragonQuest" ref="slayDragonQuest"/>
    </bean>
</beans>
- 通过Spring配置文件,创建了两个Bean对象,它们之间存在依赖关系,第一个Bean对象是第二个Bean对象的属性值。
4、创建测试类 - TestBraveKnightNew
- 在test/java/net.hw.spring.lesson01里创建测试类TestBraveKnightNew


package net.hw.spirng.lesson01;

import net.hw.spring.lesson01.BraveKnight;
import org.junit.After;
import org.junit.Before;
import org.junit.Test;
import org.springframework.context.support.ClassPathXmlApplicationContext;

/**
 * 功能:采用Spring容器测试勇敢骑士类
 * 作者:华卫
 * 日期:2020年09月21日
 */
public class TestBraveKnightNew {


    private ClassPathXmlApplicationContext context;

    @Before
    public void init() {


        // 基于Spring配置文件创建应用容器
        context = new ClassPathXmlApplicationContext("xmlconfig/spring-config.xml");
    }

    @Test
    public void testBraveKnight() {


        // 根据名称从应用容器中获取勇敢骑士对象
        BraveKnight braveKnight = (BraveKnight) context.getBean("Mike");
        // 勇敢骑士执行任务
        braveKnight.embarkOnQuest();
    }

    @After
    public void destroy() {


        // 关闭应用容器
        context.close();
    }
}
- 代码说明:首先通过Spring配置文件创建Spring应用容器,然后就可以利用容器的getBean方法通过名称获取容器里的Bean对象,然后调用该对象的方法。
- 运行测试方法,查看结果
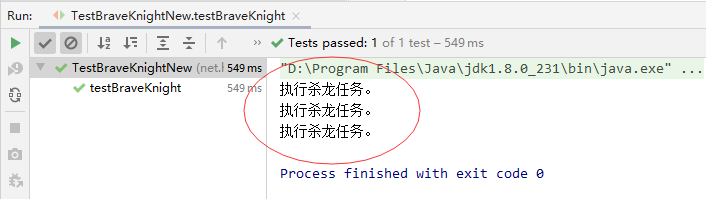
5、在Spring配置文件里再创建两个勇敢骑士Bean
- 基于一个类可以创建多个对象,因此,在spring-config.xml文件里,也可以基于同一个类创建多个Bean。
- 基于BraveKnight类再创建两个Bean,id值分别为knight1和knight2。

6、修改测试类 - TestBraveKnightNew
- 获取新建的两个勇敢骑士Bean,调用执行任务方法

- 执行测试方法,查看结果

- 勇敢骑士Bean采用
属性注入方式将杀龙任务Bean注入作为其属性。
另外还有一种注入方式,叫做构造函数注入。同样通过案例来演示。
(七)采用构造函数注入方式给Bean注入属性
1、创建拯救少女任务类 - RescueDamselQuest
- 在net.hw.spring.lesson01包里创建RescueDamselQuest类

package net.hw.spring.lesson01;

/**
 * 功能:拯救少女任务类
 * 作者:华卫
 * 日期:2020年09月21日
 */
public class RescueDamselQuest {


    public void embark() {


        System.out.println("执行拯救少女任务。");
    }
}
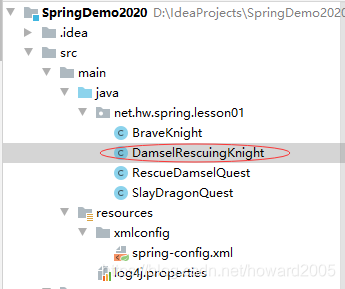
2、创建拯救少女之骑士类 - DamselRescuingKnight
- 在net.hw.spring.lesson01包里创建DamselRescuingKnight类
package net.hw.spring.lesson01;

/**
 * 功能:拯救少女骑士类
 * 作者:华卫
 * 日期:2020年09月21日
 */
public class DamselRescuingKnight {


    private RescueDamselQuest rescueDamselQuest;

    public DamselRescuingKnight(RescueDamselQuest rescueDamselQuest) {


        this.rescueDamselQuest = rescueDamselQuest;
    }

    public void embarkOnQuest() {


        rescueDamselQuest.embark();
    }
}
- 代码说明:通过构造方法来设置骑士要执行的任务。
3、在Spring配置文件里创建拯救少女骑士Bean

<bean id="rescueDamselQuest" class="net.hw.spring.lesson01.RescueDamselQuest"/>
<bean id="damselRescuingKnight" class="net.hw.spring.lesson01.DamselRescuingKnight">
    <constructor-arg ref="rescueDamselQuest"/>
</bean>
4、创建测试类TestDamselRescuingKnightOld
- 在test/java/net.hw.spring.lesson01里创建TestDamselRescuingKnightOld类

package net.hw.spirng.lesson01;
import net.hw.spring.lesson01.DamselRescuingKnight;
import net.hw.spring.lesson01.RescueDamselQuest;
import org.junit.Test;
/**
* 功能:采用传统方式测试拯救少女骑士类
* 作者:华卫
* 日期:2020年09月28日
*/
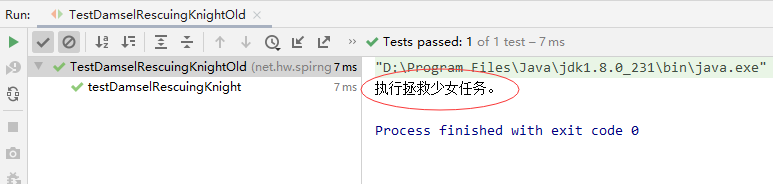
public class TestDamselRescuingKnightOld {
@Test
public void testDamselRescuingKnight() {
// 创建拯救少女任务对象
RescueDamselQuest rescueDamselQuest = new RescueDamselQuest();
// 创建拯救少女骑士对象
DamselRescuingKnight damselRescuingKnight = new DamselRescuingKnight(rescueDamselQuest);
// 拯救少女骑士执行任务
damselRescuingKnight.embarkOnQuest();
}
}
- 运行测试方法,查看结果
5、创建测试类TestDamselRescuingKnightNew
- 在test/java/net.hw.spring.lesson01里创建TestDamselRescuingKnightNew类
package net.hw.spirng.lesson01;
import net.hw.spring.lesson01.DamselRescuingKnight;
import org.junit.After;
import org.junit.Before;
import org.junit.Test;
import org.springframework.context.support.ClassPathXmlApplicationContext;
/**
* 功能:采用Spring容器测试拯救少女骑士类
* 作者:华卫
* 日期:2020年09月28日
*/
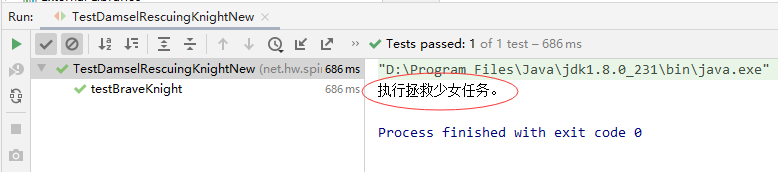
public class TestDamselRescuingKnightNew {
private ClassPathXmlApplicationContext context;
@Before
public void init() {
// 基于Spring配置创建应用容器
context = new ClassPathXmlApplicationContext("xmlconfig/spring-config.xml");
}
@Test
public void testDamselRescuingKnight() {
// 根据名称从应用容器里获取拯救少女骑士对象
DamselRescuingKnight damselRescuingKnight = (DamselRescuingKnight) context.getBean("damselRescuingKnight");
// 拯救少女骑士执行任务
damselRescuingKnight.embarkOnQuest();
}
@After
public void destroy() {
// 关闭应用容器
context.close();
}
}
- 运行测试方法,查看效果
三、思考题
如果我们有几十个类要创建Bean,采用XML配置方式,会不会让Spring配置文件显得很臃肿,怎么解决这个问题呢?能否将一个很大的Spring配置文件根据实际需要拆分成若干个较小的Spring配置文件呢?
- 如果有多个Spring配置文件,比如spring-config01.xml、spring-config02.xml、……
- 那么可以采用
ClassPathXmlApplicationContext context = new ClassPathXmlApplicationContext("xmlconfig/spring-config*.xml");语句基于上述全部Spring配置文件创建一个Spring容器