1.项目创建
创建springboot项目这个就不多说了,相信大家都会
pom引入依赖
        <dependency>
            <groupId>org.springframework.boot</groupId>
            <artifactId>spring-boot-starter-websocket</artifactId>
        </dependency>
        <dependency>
            <groupId>org.springframework.boot</groupId>
            <artifactId>spring-boot-starter-thymeleaf</artifactId>
        </dependency>
        <dependency>
            <groupId>org.springframework.boot</groupId>
            <artifactId>spring-boot-starter-web</artifactId>
        </dependency>
        <dependency>
            <groupId>org.projectlombok</groupId>
            <artifactId>lombok</artifactId>
            <optional>true</optional>
        </dependency>
配置模板引擎与端口
server:
  port: 8081
spring:
  # 模板引擎
  thymeleaf:
    mode: HTML
    encoding: utf-8
    # 禁用缓存
    cache: false
2.编写后端
(1)编写页面路由
@Controller
@RequestMapping
public class IndexController {

    @RequestMapping("/index")
    public String index(ModelMap mmap){
        mmap.put("demo","测试websocket");
        return "index";
    }
}
(2)编写websocket相关功能
主程序
@EnableWebSocket // 开启websocket
@SpringBootApplication
public class DemoApplication {

    public static void main(String[] args) {
        SpringApplication.run(DemoApplication.class, args);
    }

    /**
     * 使用springboot内置容器  需要配置
     */
    @Bean
    public ServerEndpointExporter serverEndpointExporter() {
        return new ServerEndpointExporter();
    }

}
工具类
import javax.websocket.RemoteEndpoint;
import javax.websocket.Session;
import java.util.Map;
import java.util.concurrent.ConcurrentHashMap;

public class WebSocketUtils {
    public static final Map<String, Session> ONLINE_USER_SESSIONS = new ConcurrentHashMap<>();
    // 单用户推送
    public static void sendMessage(Session session, String message) {
        if (session == null) { return; }
        // 异步推送
        RemoteEndpoint.Async async = session.getAsyncRemote();
        if (async == null) { return; }
        async.sendText(message);
    }
    // 全用户推送
    public static void sendMessageAll(String message) {
        ONLINE_USER_SESSIONS.forEach((sessionId, session) -> sendMessage(session, message));
    }
}
websocket主体代码
import lombok.extern.slf4j.Slf4j;
import org.springframework.stereotype.Component;
import javax.websocket.*;
import javax.websocket.server.PathParam;
import javax.websocket.server.ServerEndpoint;
import java.io.IOException;
@Slf4j
@Component // 注册到spring
@ServerEndpoint("/ws/{username}") // 创建websocket服务
public class IndexWebSocket {
/**
* 连接成功响应
*/
@OnOpen
public void openSession(@PathParam("username") String username, Session session) {
WebSocketUtils.ONLINE_USER_SESSIONS.put(username, session);
WebSocketUtils.sendMessageAll("服务器连接成功!");
WebSocketUtils.sendMessage(session, "");
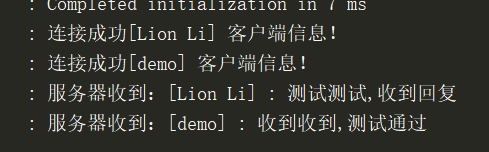
log.info("连接成功" + "[" + username + "] 客户端信息!");
}
/**
* 收到消息响应
*/
@OnMessage
public void onMessage(@PathParam("username") String username, String message) {
log.info("服务器收到:" + "[" + username + "] : " + message);
WebSocketUtils.sendMessageAll("[" + username + "] : " + message);
}
/**
* 连接关闭响应
*/
@OnClose
public void onClose(@PathParam("username") String username, Session session) throws IOException {
//当前的Session 移除
WebSocketUtils.ONLINE_USER_SESSIONS.remove(username);
//并且通知其他人当前用户已经断开连接了
WebSocketUtils.sendMessageAll("[" + username + "] 断开连接!");
log.info("[" + username + "] 断开连接!");
session.close();
}
/**
* 连接异常响应
*/
@OnError
public void onError(Session session, Throwable throwable) throws IOException {
session.close();
}
}3.编写前端
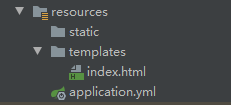
前端页面需要放置在 resources/templates 目录下
页面代码
<!DOCTYPE html>
<html lang="zh" xmlns:th="http://www.thymeleaf.org">
<head>
    <meta charset="UTF-8">
    <title>websocket聊天室</title>
</head>
<body>
<div>
    <div><h1>[[${demo}]]</h1></div>
</div>
<br>
<div>
    <div>
        <label>请输入用户名</label><input id="username" value="">
    </div>
    <div>
        <label>请输入发送内容</label><input id="in_room_msg" value="">
    </div>
    <div>
        <button id="user_add">登录</button>
        <button id="user_send_all">发送消息</button>
        <button id="user_back">断开连接</button>
    </div>
    <div>
        <textarea id="message_content"></textarea>
    </div>
</div>
</body>
<script src="https://cdn.staticfile.org/jquery/3.5.1/jquery.min.js"></script>
<script type="text/javascript">
    $(function () {
        var urlPrefix = 'ws://IP地址:8081/ws/';
        var ws = null;

        var joinfun = function () {
            var username = $("#username").val();
            if (username == '') {
                alert("请输入用户名");
                return;
            }
            var url = urlPrefix + username;
            ws = new WebSocket(url);
            ws.onopen = function () {
                console.log("建立 websocket 连接...");
            };
            ws.onmessage = function (event) {
                //服务端发送的消息
                $('#message_content').append(event.data + '\n');
                // 接到消息之后 任君处置
            };
            ws.onclose = function () {
                $('#message_content').append('用户[' + username + '] 断开连接!');
                console.log("关闭 websocket 连接...");
            }
        };
        joinfun();//自动连接

        // 重新连接
        $('#user_add').click(function () {
            joinfun();
        });

        //客户端发送消息到服务器
        $('#user_send_all').click(function () {
            var msg = $('#in_room_msg').val();
            if (ws) {
                ws.send(msg);
            }
        });
        // 断开连接
        $('#user_back').click(function () {
            if (ws) {
                ws.close();
            }
        });
    });
</script>
</html>
4.测试功能
开启两个页面
访问服务器页面 http://IP地址:8081/index

thymeleaf 标签显示正常


退出两个页面
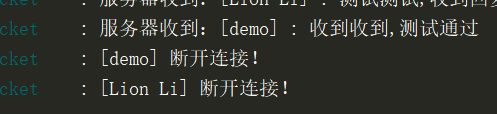
连接 消息发送 退出 均可 测试成功
项目已上传到gitee
如果帮到您了,请帮忙点个star