今天学习做个扫一扫 于是就上百度找找前人的作品,终于找到了,于是就开始搞
我使用的是 最新的android Studio
Android Studio 3.1.2
Build #AI-173.4720617, built on April 14, 2018
JRE: 1.8.0_152-release-1024-b02 amd64
JVM: OpenJDK 64-Bit Server VM by JetBrains s.r.o
Windows 10 10.0
想做的APP样子是: A界面中有个按钮。点击之后跳到扫一扫B界面,扫完了之后,回调到A界面,在A界面弹一个toast
首先 引用:
在build.gradle中的dependencies 添加一句话 implementation 'cn.yipianfengye.android:zxing-library:2.2'
如果其他版本的Android Studio 引入报错 就使用 compile引用 。
dependencies {
    implementation fileTree(dir: 'libs', include: ['*.jar'])
    implementation 'com.android.support:appcompat-v7:27.1.1'
    implementation 'com.android.support.constraint:constraint-layout:1.1.0'
    testImplementation 'junit:junit:4.12'
    androidTestImplementation 'com.android.support.test:runner:1.0.2'
    androidTestImplementation 'com.android.support.test.espresso:espresso-core:3.0.2'
    implementation 'cn.yipianfengye.android:zxing-library:2.2'
}
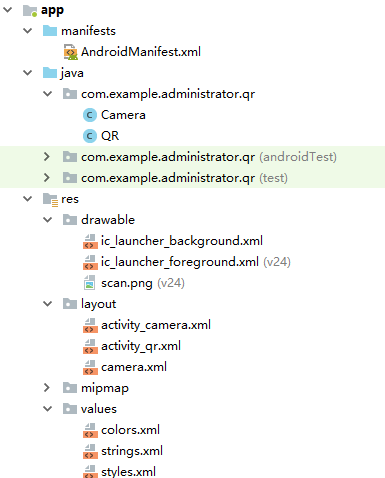
demo中 一共有 三个 layout 两个 class 一张图 我命名为 scan 定义了一个颜色资源
1、打开 colors.xml 添加资源
<item name="scan_color">#ffffff</item>
2、复制图片 scan.png到drawable
3、动手搞A界面
名字activity_camera.xml 布局为:
<?xml version="1.0" encoding="utf-8"?>
<LinearLayout xmlns:android="http://schemas.android.com/apk/res/android"
    xmlns:app="http://schemas.android.com/apk/res-auto"
    xmlns:tools="http://schemas.android.com/tools"
    android:layout_width="match_parent"
    android:layout_height="match_parent"
    tools:context=".QR">


    <Button
        android:id="@+id/bt_QR"
        android:layout_width="wrap_content"
        android:layout_height="wrap_content"
        android:layout_weight="1"
        android:text="扫描二维码" />
</LinearLayout>
QR class代码:
package com.example.administrator.qr;

import android.content.Intent;
import android.support.v7.app.AppCompatActivity;
import android.os.Bundle;
import android.view.View;
import android.widget.Button;
import android.widget.Toast;

import com.uuzuche.lib_zxing.activity.CodeUtils;

import java.nio.charset.CoderResult;

public class QR extends AppCompatActivity {

    @Override
    protected void onActivityResult(int requestCode, int resultCode, Intent data) {
        if(requestCode ==1){
            if(data!=null){
                Bundle bundle = data.getExtras();
                if(bundle==null){
                    return ;

                }
                if(bundle.getInt(CodeUtils.RESULT_TYPE)==CodeUtils.RESULT_SUCCESS){
                    String ret = bundle.getString(CodeUtils.RESULT_STRING);
                    Toast.makeText(this, "扫码成功,结果:"+ret, Toast.LENGTH_SHORT).show();
                }
            }
        }
        super.onActivityResult(requestCode, resultCode, data);
    }

    @Override
    protected void onCreate(Bundle savedInstanceState) {
        super.onCreate(savedInstanceState);
        setContentView(R.layout.activity_qr);
        Button button =  findViewById(R.id.bt_QR);
        button.setOnClickListener(new View.OnClickListener() {
            @Override
            public void onClick(View v) {
                Intent intent = new Intent(QR.this,Camera.class);
                startActivityForResult(intent,1);
            }
        });
    }

}
4、开始搞B界面
名字 activity_camera.xml 布局代码:
<?xml version="1.0" encoding="utf-8"?>
<RelativeLayout xmlns:android="http://schemas.android.com/apk/res/android"
    xmlns:app="http://schemas.android.com/apk/res-auto"
    xmlns:tools="http://schemas.android.com/tools"
    android:layout_width="match_parent"
    android:layout_height="match_parent"
    tools:context=".Camera">
    <FrameLayout
        android:id="@+id/myCamera"
        android:layout_width="match_parent"
        android:layout_height="match_parent">

    </FrameLayout>
    <Button
        android:id="@+id/bt_back"
        android:layout_width="wrap_content"
        android:layout_height="wrap_content"
        android:text="返回" />

    <Button
        android:id="@+id/bt_kaideng"
        android:layout_width="wrap_content"
        android:layout_height="wrap_content"
        android:layout_alignParentLeft="false"
        android:layout_alignParentRight="true"
        android:layout_alignParentTop="true"
        android:text="打开闪光灯" />

    <TextView
        android:id="@+id/textView"
        android:layout_width="wrap_content"
        android:layout_height="wrap_content"
        android:layout_alignBottom="@+id/bt_back"
        android:layout_alignParentTop="true"
        android:layout_alignTop="@+id/bt_back"
        android:layout_centerHorizontal="true"
        android:gravity="fill_vertical"
        android:text="扫一扫"
        android:textColor="@color/encode_view"
        android:textSize="24sp" />


</RelativeLayout>
再弄一个布局 用于替换原始扫一扫的那正方形窗口,如图所示:

名字 camera.xml 布局为:
<FrameLayout xmlns:android="http://schemas.android.com/apk/res/android"
    xmlns:app="http://schemas.android.com/apk/res-auto"
    android:layout_width="fill_parent"
    android:layout_height="fill_parent">

    <SurfaceView
        android:id="@+id/preview_view"
        android:layout_width="wrap_content"
        android:layout_height="wrap_content" />

    <com.uuzuche.lib_zxing.view.ViewfinderView
        android:id="@+id/viewfinder_view"
        android:layout_width="wrap_content"
        android:layout_height="wrap_content"
        app:inner_corner_color="@color/scan_corner_color"  //这个是扫一扫四个角的颜色
        app:inner_corner_length="30dp"
        app:inner_corner_width="2dp"  //这个是扫一扫 四个角的粗细
        app:inner_height="200dp"
        app:inner_margintop="150dp"
        app:inner_scan_bitmap="@drawable/scan"  //这个是扫一扫那条线
        app:inner_scan_iscircle="false"
        app:inner_scan_speed="50"  //这个是那条线 从上往下的速度
        app:inner_width="200dp" />
</FrameLayout>
//这个布局中的id不能更改 否则报空指针
// com.uuzuche.lib_zxing.view.ViewfinderView标签可以根据需要修改
Camera class 代码为:
package com.example.administrator.qr;

import android.content.Intent;
import android.graphics.Bitmap;
import android.support.v7.app.AppCompatActivity;
import android.os.Bundle;
import android.util.Log;
import android.view.WindowManager;

import com.uuzuche.lib_zxing.activity.CaptureFragment;
import com.uuzuche.lib_zxing.activity.CodeUtils;

public class Camera extends AppCompatActivity {

    @Override
    protected void onCreate(Bundle savedInstanceState) {
        super.onCreate(savedInstanceState);
        getSupportActionBar().hide();
        getWindow().setFlags(WindowManager.LayoutParams.ALPHA_CHANGED, WindowManager.LayoutParams.ALPHA_CHANGED);
        setContentView(R.layout.activity_camera);//
        Log.d("bug", "onCreate: "+1);
        CaptureFragment captureFragment = new CaptureFragment();
        Log.d("bug", "onCreate: "+2);
        CodeUtils.setFragmentArgs(captureFragment,R.layout.camera);  //设置自定义扫码界面
        captureFragment.setAnalyzeCallback(analyzeCallback);
        Log.d("bug", "onCreate: "+3);
        //R.id.fl_zxing_container  对应   setContentView 布局中的  Fragment
        getSupportFragmentManager().beginTransaction().replace(R.id.myCamera, captureFragment).commit();  // 替换setContenView设置的布局中的  ID为myCamera

    }
    CodeUtils.AnalyzeCallback analyzeCallback = new CodeUtils.AnalyzeCallback() {
        @Override
        public void onAnalyzeSuccess(Bitmap mBitmap, String result) {
            Intent resultIntent = new Intent();
            Bundle bundle = new Bundle();
            bundle.putInt(CodeUtils.RESULT_TYPE, CodeUtils.RESULT_SUCCESS);
            bundle.putString(CodeUtils.RESULT_STRING, result);
            resultIntent.putExtras(bundle);
            Camera.this.setResult(RESULT_OK, resultIntent);
            Camera.this.finish();
        }

        @Override
        public void onAnalyzeFailed() {
            Intent resultIntent = new Intent();
            Bundle bundle = new Bundle();
            bundle.putInt(CodeUtils.RESULT_TYPE, CodeUtils.RESULT_FAILED);
            bundle.putString(CodeUtils.RESULT_STRING, "");
            resultIntent.putExtras(bundle);
            Camera.this.setResult(RESULT_OK, resultIntent);
            Camera.this.finish();
        }
    };
}
最后添加权限
   <uses-permission android:name="android.permission.CAMERA" />
    <uses-permission android:name="android.permission.FLASHLIGHT" />
    <uses-feature android:name="android.hardware.camera" />
    <uses-feature android:name="android.hardware.camera.autofocus" />
    <uses-permission android:name="android.permission.VIBRATE" />
    <uses-permission android:name="android.permission.WAKE_LOCK" />
    <uses-permission android:name="android.permission.READ_EXTERNAL_STORAGE" />
    <uses-permission android:name="android.permission.INTERNET" />
声明界面
<activity android:name="com.example.administrator.qr.Camera">