基于RMI实现远程方法调用
本文是上一篇文章的后续,详情点击该链接~
RMI(RemoteMethodInvocation) 远程方法调用。
RMI 是从 JDK1.2 推出的功能,它可以实现在一个 Java 应用中可以像调用本地方法一样调用另一个服务器中Java应用(JVM)中的内容。RMI是Java语言的远程调用,无法实现跨语言。
RMI的API介绍
| Remote接口 | java.rmi.Remote | 定义了此接口为远程调用接口。如果接口被外部调用,需要继承此接 口。 |
| RemoteException类 | java.rmi.RemoteException | 继承了Remote接口的接口,如果方法是允许被远程调用的,需要抛出此异常。 |
| UnicastRemoteObject类 | java.rmi.server.UnicastRemoteObject | 此类实现了Remote接口和 Serializable接口。 自定义接口实现类除了实现自定义接口还需要继承此类。 |
| LocateRegistry类 | java.rmi.registry.LocateRegistry | 可以通过 LocateRegistry 在本机上创建 Registry,通过特定的端口就可以访问这个 Registry。 |
| Naming类 | java.rmi.Naming | Naming定义了发布内容可访问 RMI名称。也是通过 Naming获取到指定的远程方法。 |
话不多说 , 上代码!
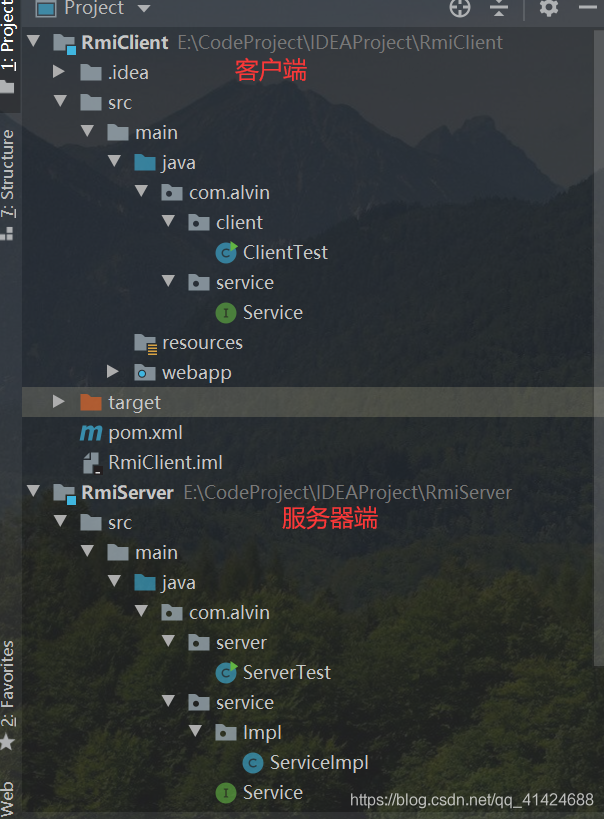
服务端代码
service
//定义允许远程调用接口,该接口必须要实现Remote接口
public interface Service extends Remote {
    //允许被远程调用的方法必须要抛出RemoteException异常
    String rmi(String str)throws RemoteException;
}
service实现类
//接口实现类必须要UnicastRemoteObject
public class ServiceImpl extends UnicastRemoteObject implements Service {
//然后自动添加构造方法,需要将 protected修改为public
public ServiceImpl() throws RemoteException {
}
@Override
public String rmi(String str) throws RemoteException {
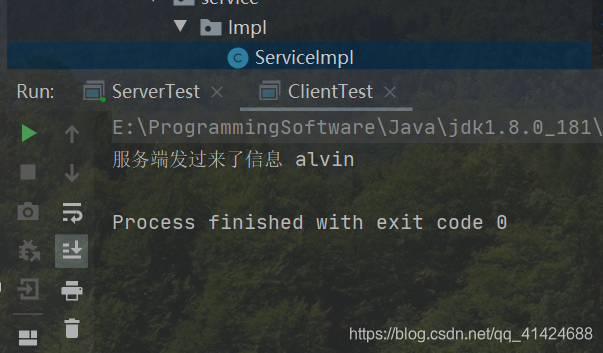
return "服务端发过来了信息 " + str;
}
}
主方法
public class ServerTest {
    public static void main(String[] args) throws RemoteException, AlreadyBoundException, MalformedURLException {
        //将对象实例化
        Service service = new ServiceImpl();
        //创建本地注册表
        LocateRegistry.createRegistry(8888);
        //将对象绑定到注册表当中
        Naming.bind("rmi://localhost:8888/service",service);
    }
}
客户端代码
service
//定义允许远程调用接口,该接口必须要实现Remote接口
public interface Service extends Remote {
    //允许被远程调用的方法必须要抛出RemoteException异常
    String rmi(String str)throws RemoteException;
}
主方法
public class ClientTest {
    public static void main(String[] args) throws RemoteException, NotBoundException, MalformedURLException {
        Service service = (Service) Naming.lookup("rmi://localhost:8888/service");
        String str = service.rmi("alvin");
        System.out.println(str);
    }
}
然后我们就链接上了~
好了,刚刚呢,只是使用了基本的原理,那么现在我们就结合zookeeper来实操一下~
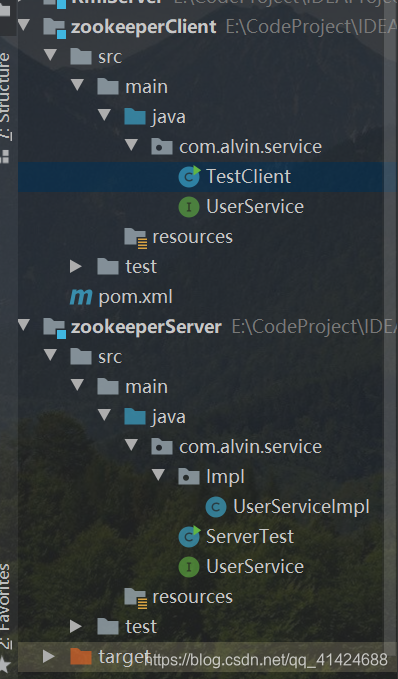
使用Zookeeper作为注册中心实现RPC
我们先导入依赖
客户端和服务端都要导!
	  <dependency>
           <groupId>org.apache.zookeeper</groupId>
           <artifactId>zookeeper</artifactId>
           <version>3.6.0</version>
       </dependency>
UserService接口
//定义允许远程调用接口,该接口必须要实现Remote接口
public interface UserService extends Remote {
    //允许被远程调用的方法必须要抛出RemoteException异常
    String findUsers(String str) throws RemoteException;
}
UserServiceImpl实现类
//接口实现类必须要UnicastRemoteObject
public class UserServiceImpl extends UnicastRemoteObject implements UserService {
//然后自动添加构造方法,需要将 protected修改为public
public UserServiceImpl() throws RemoteException {
}
@Override
public String findUsers(String str) throws RemoteException {
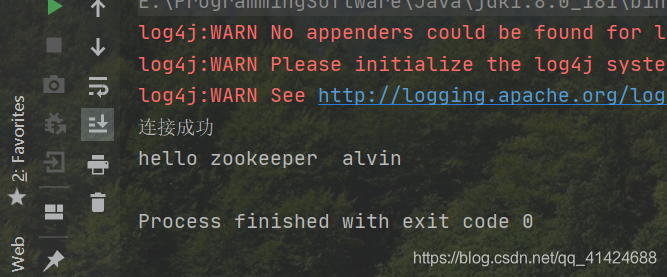
return "hello zookeeper " + str;
}
}
服务端
public class ServerTest implements Watcher {
public static void main(String[] args) throws IOException, AlreadyBoundException, KeeperException, InterruptedException {
//创建链接zookeeper对象
UserService userService = new UserServiceImpl();
LocateRegistry.createRegistry(8888);
String url = "rmi://localhost:8888/user";
Naming.bind(url,userService);
//将url信息放到zookeeper节点中
ZooKeeper zooKeeper = new ZooKeeper
// 192.168.147.128指的是Linux地址,后面的2181指的是zookeeper端口
("192.168.147.128:2181",
//那个150000指的是给zookeeper链接的一个超时时间。单位是毫秒,也就是15秒
//第三个参数指的就是事件通知处理器,选中的那个类需要实现Watcher接口
150000,new ServerTest());
//创建Znode
zooKeeper.create("/alvin/service",
url.getBytes(),
ZooDefs.Ids.OPEN_ACL_UNSAFE, CreateMode.PERSISTENT_SEQUENTIAL);
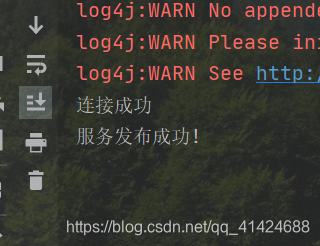
System.out.println("服务发布成功!");
}
//事件通知回调方法
@Override
public void process(WatchedEvent event) {
//做一个链接的判断
if(event.getState() == Event.KeeperState.SyncConnected){
System.out.println("连接成功");
}
}
}
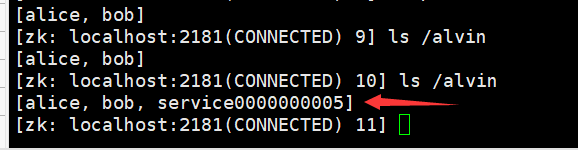
先启动客户端,等服务发布成功后,打开zookeeper我们会看到已经创建成功了~
客户端
public class TestClient implements Watcher {
    public static void main(String[] args) throws IOException, KeeperException, InterruptedException, NotBoundException {
        //将url信息放到zookeeper节点中
        ZooKeeper zooKeeper = new ZooKeeper
                // 192.168.147.128指的是Linux地址,后面的2181指的是zookeeper端口
                ("192.168.147.128:2181",
                        //那个150000指的是给zookeeper链接的一个超时时间。单位是毫秒,也就是15秒
                        //第三个参数指的就是事件通知处理器,选中的那个类需要实现Watcher接口
                        150000,new TestClient());
        byte[]bytes = zooKeeper.getData("/alvin/service0000000005",new TestClient(),null);
        String url = new String(bytes);
        UserService userService = (UserService) Naming.lookup(url);
        String result = userService.findUsers(" alvin");
        System.out.println(result);
    }

    @Override
    public void process(WatchedEvent event) {
        //做一个链接的判断
        if(event.getState() == Event.KeeperState.SyncConnected){
            System.out.println("连接成功");
        }
    }
}