一、概述
AWStats是一个免费、功能强大、特性丰富的日志分析工具,它能分析由WEB、STREAMING、FTP、MAIL等服务生成的日志,并生成先进的统计图表。AWStats作为CGI或从命令行运行,在数个图形网页中显示你日志中包含的所有可能信息。
二、实验准备
服务器:yum安装bind和httpd,并进行基本配置
域名:www.yjs.com
DNS服务器和web服务器ip:192.168.245.140
客户机:192.168.245.10
配置DNS地址为192.168.245.140
三、软件安装
拷贝tar包到/opt目录下解压
[root@sheng opt]# tar xzvf  awstats-7.6.tar.gz
[root@sheng opt]# ll
总用量 3040
drwxr-xr-x 5 sheng sheng      83 12月  3 2016 awstats-7.6
-rw-r--r-- 1 root  root  2955876 8月   5 15:05 awstats-7.6.tar.gz
四、awstats配置
第一步:执行==./awstats_configure.pl命令
[root@sheng opt]# mv awstats-7.6 /usr/local/awstats
[root@sheng opt]# cd /usr/local/awstats/tools

[root@sheng tools]# ./awstats_configure.pl
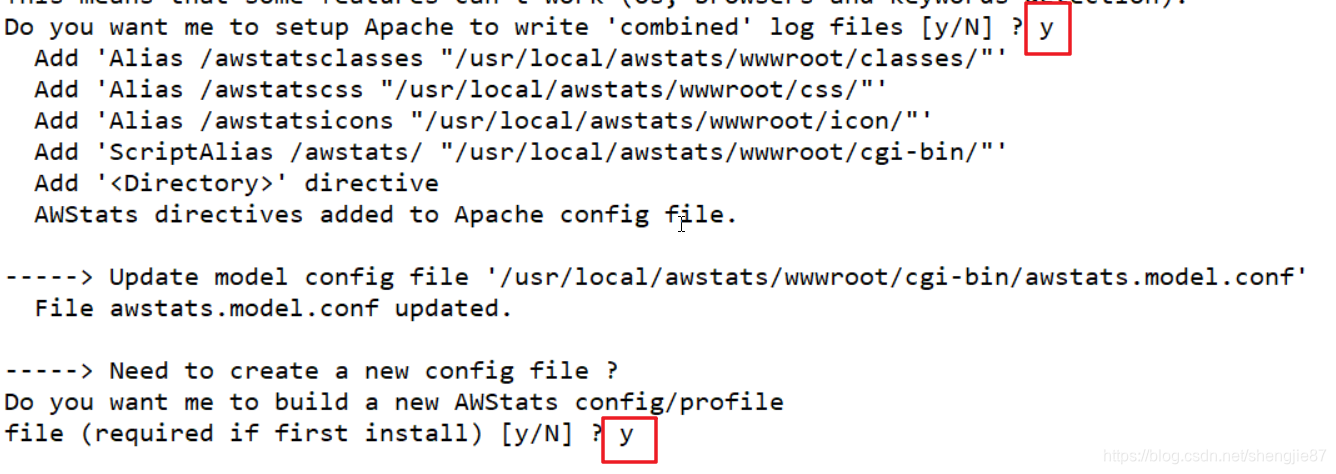
具体设置如图:
1、输入apache配置文件的路径

2、创建awstats的配置文件
3、输入域名,配置文件路径为默认
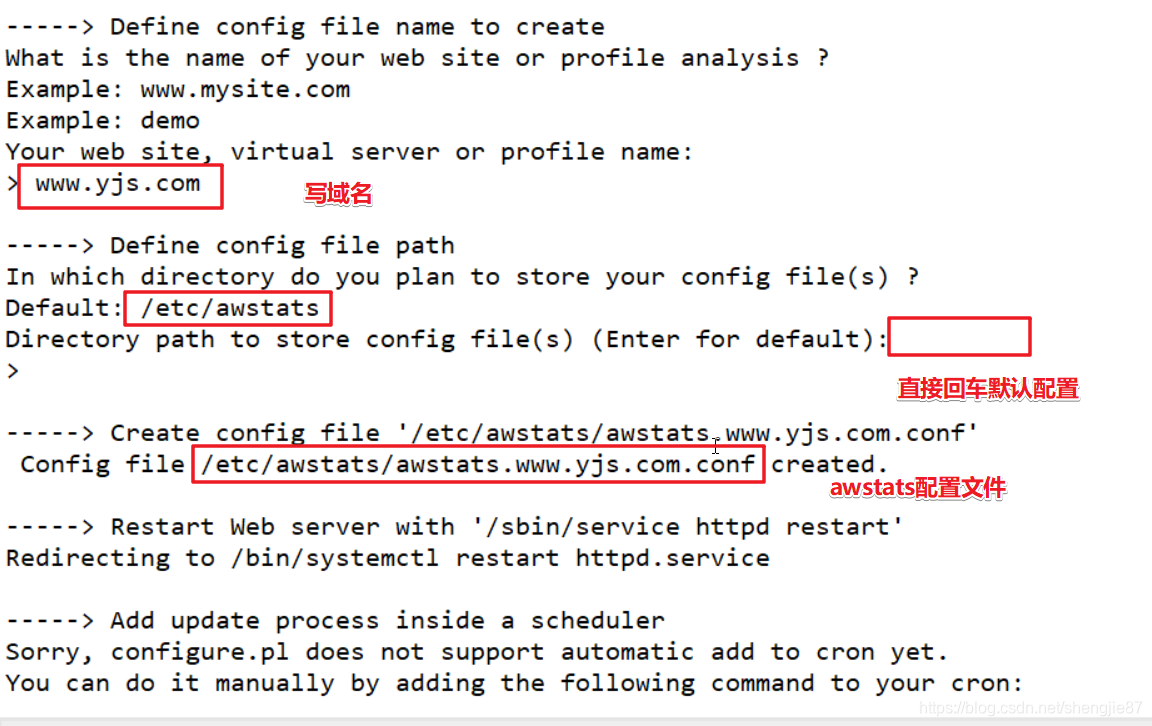
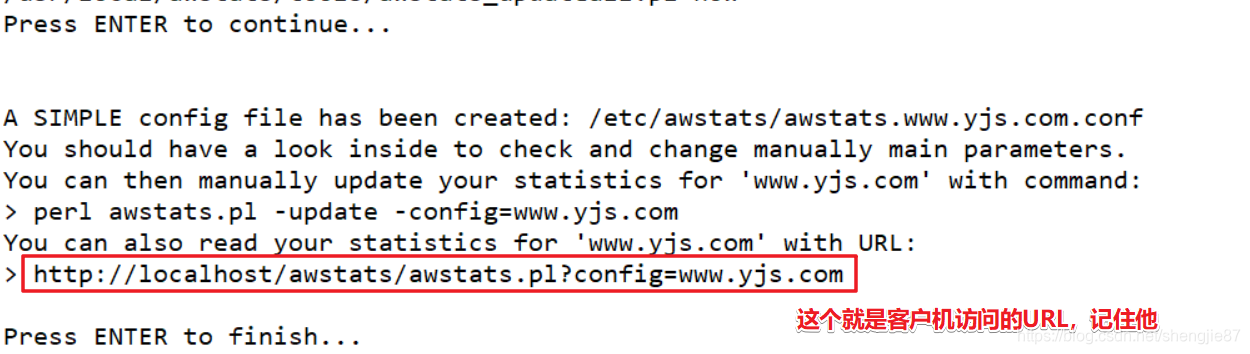
4、确认访问的URL
5、确定apache的配置文件末尾已经写入了有关awstats的配置
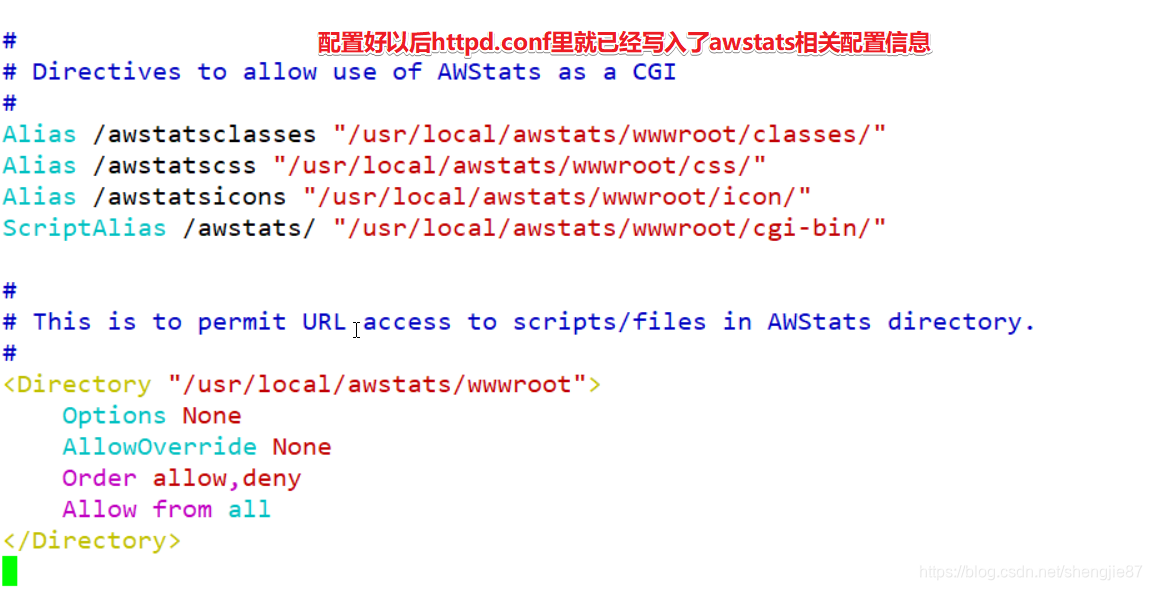
第二步:修改apache配置文件
[root@sheng tools]# vim /etc/httpd/conf/httpd.conf
<Directory "/usr/local/awstats/wwwroot">
    Options None
    AllowOverride None
#    Order allow,deny
#    Allow from all
        Require all granted   <---注释上面2行,添加这一行允许所有访问
</Directory>
第三步:修改awstats的配置文件并创建awstats的数据存放目录
[root@sheng tools]# cd /etc/awstats/
[root@sheng awstats]# ls
awstats.www.yjs.com.conf

[root@sheng awstats]# vim awstats.www.yjs.com.conf <---awstats的配置文件
LogFile="/var/log/httpd/access_log"  <---改为access_log
DirData="/var/lib/awstats"  <----没有这个目录,需要自己手动创建

[root@sheng awstats]# mkdir /var/lib/awstats
第四步:重启httpd服务
[root@sheng awstats]# systemctl restart httpd
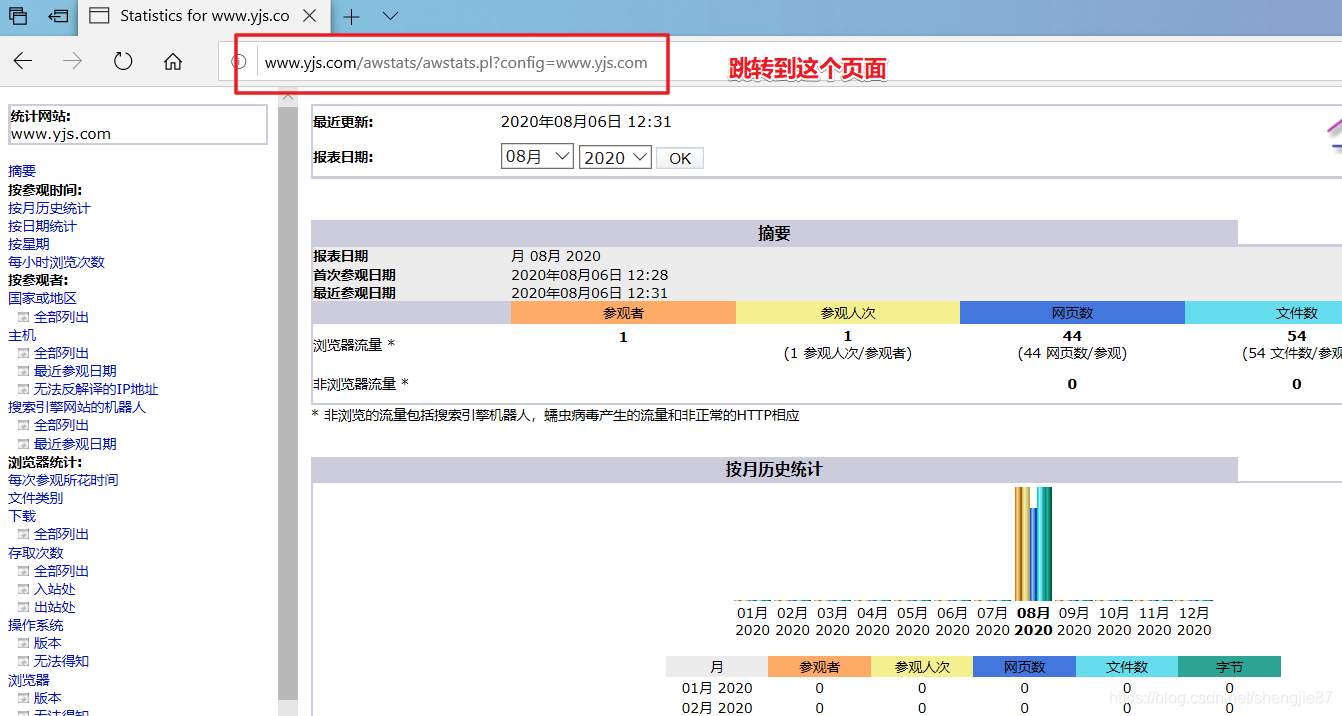
五、验证访问
客户机上访问如下地址,注意要把localhost换成服务器的域名www.yjs.com
http://www.yjs.com/awstats/awstats.pl?config=www.yjs.com

可以看到这里访问量一直是0,因为需要手动刷新数据
[root@sheng tools]# ./awstats_updateall.pl now  <---执行这个命令刷新数据
Running '"/usr/local/awstats/wwwroot/cgi-bin/awstats.pl" -update -config=www.yjs.com -configdir="/etc/awstats"' to update config www.yjs.com
Create/Update database for config "/etc/awstats/awstats.www.yjs.com.conf" by AWStats version 7.6 (build 20161204)
From data in log file "/var/log/httpd/access_log"...
Phase 1 : First bypass old records, searching new record...
Direct access after last parsed record (after line 15)
Jumped lines in file: 15
 Found 15 already parsed records.
Parsed lines in file: 21
 Found 0 dropped records,
 Found 0 comments,
 Found 0 blank records,
 Found 0 corrupted records,
 Found 0 old records,
 Found 21 new qualified records.
刷新数据以后就会出现访问量了,如图:

六、优化配置
1、定时刷新数据
因为需要手动刷新数据特别不方便,所以我们这里可以做个计划任务,让他每五分钟自己刷新一次数据,crontab里的命令需要写绝对路径!
[root@sheng html]# crontab -e

*/5 * * * * /usr/local/awstats/tools/awstats_updateall.pl now
2、设置URL跳转
因为默认URL太长了也不便于记忆,所以这里给默认页面设置一个页面跳转,访问我们设定的网页自动跳转到默认页面
[root@sheng ~]# cd /var/www/html/
[root@sheng html]#
[root@sheng html]# vim aws.html

<html>
 <head>
  <meta http-equiv=refresh content="0;url=http://www.yjs.com/awstats/awstats.pl?config=www.yjs.com">
 </head>
 <body></body>
</html>