功能
- 每天 0:01 自动完成健康打卡
- 自动将打卡结果发送至你的邮箱
参考:https://blog.csdn.net/deng_xj/article/details/104853830?utm_source=app
完整步骤
1、epel 源安装 python3
准备一台能 24h 运行的服务器,首先安装 epel 源:
yum install -y epel-release
查询yum的python3状况:
Repository epel is listed more than once in the configuration
abrt-addon-python3.noarch                 2.1.11-50.el7                epel
boost-python36.x86_64                     1.53.0-30.el7                epel
boost-python36-devel.x86_64               1.53.0-30.el7                epel
boost-python36-static.x86_64              1.53.0-30.el7                epel
boost169-mpich-python3.x86_64             1.69.0-2.el7                 epel
boost169-mpich-python3-devel.x86_64       1.69.0-2.el7                 epel
我们看到,可以安装 python3,python34,python36。那么我以安装python36为例子,下面是安装python36和其对应pip的脚本:
yum install -y python36 python36-pip
安装好之后就可以直接使用,运行 python3 或者 python36 或者 python3.6 命令即可,库安装则使用的是 pip3 或者 pip3.6 命令。
2、安装依赖的库
pip3 install requests
3、自动打卡代码
根据不同用户,你需要修改的地方包括:
- 你学校的打卡 url
- 你的浏览器 cookie 复制过来(登陆一下打卡页面,然后F12去看cookie)
new_body变量对应的请求体,你得抓一下提交打卡信息的时候的 post 请求体,把里面的参数复制过来- 你的邮箱地址。根据SMTP协议,qq邮箱发送邮件需要授权码,操作方法在网上搜索就行
(已经将代码中包含的定位信息、cookie、邮箱等做了处理,非真实信息)
#!/usr/bin/python
# -*- coding: utf-8 -*-
# @Time : 20.7.14 0:58
# @Project : CTask
# @Author : https://hanquan.blog.csdn.net/
# @FileName : main.py
# @Software : PyCharm
import re
import smtplib
import urllib.parse
import urllib.request
from email.mime.text import MIMEText
from email.utils import formataddr
import requests
url = 'https://itsapp.bjut.edu.cn/ncov/wap/default/index'
headers = {
'GET https': '//itsapp.bjut.edu.cn/ncov/wap/default/index HTTP/1.1',
'Host': ' itsapp.bjut.edu.cn',
'Connection': ' keep-alive',
'Upgrade-Insecure-Requests': ' 1',
'User-Agent': ' Mozilla/5.0 (Windows NT 10.0; Win64; x64) AppleWebKit/537.36 (KHTML, like Gecko) Chrome/83.0.4103.116 Safari/537.36',
'Accept': ' text/html,application/xhtml+xml,application/xml;q=0.9,image/webp,image/apng,*/*;q=0.8,application/signed-exchange;v=b3;q=0.9',
'Referer': ' https://itsapp.bjut.edu.cn/ncov/wap/default/index',
'Accept-Language': ' zh-CN,zh;q=0.9,en-US;q=0.8,en;q=0.7,fr;q=0.6',
'Cookie': 'eai-sess=i21lp3fglod18v6u1; UUkey=1c03419d68c6f1877f0442fa7f; Hm_lvt_48b682dd22e46b972e3268=1594623518; Hm_lpvt_48b682d4885d22a902e3268=153458578',
}
request = urllib.request.Request(url=url, headers=headers)
response = urllib.request.urlopen(request)
main = response.read().decode(encoding='UTF-8', errors='strict')
reg_id = r'"id":[\d]+'
reg_created = r'"created":[\d]+'
reg_date = r'"date":"[\d]+"'
reg_ques_id = re.compile(reg_id)
reg_ques_created = re.compile(reg_created)
reg_ques_date = re.compile(reg_date)
queslist_id = reg_ques_id.findall(main)
queslist_created = reg_ques_created.findall(main)
queslist_date = reg_ques_date.findall(main)
print("=====")
print(queslist_id)
print(queslist_created)
print(queslist_date)
print("=====")
new_id = str(queslist_id[0])[5:11]
# print(new_id)
new_created = str(queslist_created[0])[10:20]
# print(new_created)
new_date = str(queslist_date[0])[8:16]
# print(new_date)
new_body = "ismoved=0&jhfjrq=&jhfjjtgj=&jhfjhbcc=&uid=40133&tw=2&sfcxtz=0&sfyyjc=0&jcjgqr=0&jcjg=&sfj8C%BA&province=%E5%8C%97%E4%BA%AC%E5%B8%82&city=%E5%8C%976%2C%22lnessComponent%22%3A%7B%22citycode%22%3A%22010%22%2C%22ad%22pois%22%3A%5B%5D%7D&created=" + new_created + "&date=" + new_date + "&id=" + new_id + "&qksm=&sfzx=0&sfjcwhry=0&sfcyglq=0&gllx=&glksrq=&jcbhlx=&jcbhrq=&sftjwh=0&sftjhb=0&fxyy=&bztcyy=&fjsj=0&sfjchbry=0&sfjcqz=&jcqzrq=&jcwhryfs=&jchbryfs=&xjzd=&szgj=&sfsfbh=0&jhfjsftjwh=0&jhfjsftjhb=0&szsqsfybl=0&sfygtjzzfj=0>jzzfjsj=&sfsqhzjkk=&sqhzjkkys=&dqjzzt=1&ljrq=&ljjtgj=&ljhbcc=&fjrq=&fjjtgj=&fjhbcc=&jrfjjtgj=&jrfjhbcc=&fjyy=&szsqsfty=&sfxxxbb=&fjqszgj=&fjq_province=&fjq_city=&fjq_szdz=&&gwszdd=&sfyqjzgc=&jrsfqzys=&jrsfqzfy="
headers = {
"Host": "itsapp.bjut.edu.cn",
"Connection": "keep-alive",
"Accept": "application/json, text/javascript, */*; q=0.01",
"Origin": "https://itsapp.bjut.edu.cn",
"X-Requested-With": "XMLHttpRequest",
"Sec-Fetch-Dest": "empty",
"User-Agent": "Mozilla/5.0 (Windows NT 6.1; Win64; x64) AppleWebKit/537.36 (KHTML, like Gecko) Chrome/80.0.3987.132 Safari/537.36",
"Content-Type": "application/x-www-form-urlencoded; charset=UTF-8",
"Sec-Fetch-Site": "same-origin",
"Sec-Fetch-Mode": "cors",
"Referer": "https://itsapp.bjut.edu.cn/ncov/wap/default/index",
"Accept-Encoding": "gzip, deflate, br",
"Accept-Language": "zh-CN,zh;q=0.9",
"Cookie": 'eai-sess=i21lp3fglod18v6u1; UUkey=1c03419d68c6f1877f0442fa7f; Hm_lvt_48b682dd22e46b972e3268=1594623518; Hm_lpvt_48b682d4885d22a902e3268=153458578',
}
data = new_body
url2 = 'https://itsapp.bjut.edu.cn/ncov/wap/default/save'
resp = requests.post(url2, headers=headers, data=data, allow_redirects=True)
# 获取服务器状态响应
print(resp.text)
my_sender = '[email protected]' # 发件人邮箱账号
my_pass = '你的邮箱SMTP授权码' # 发件人邮箱授权码
my_user = '[email protected]' # 收件人邮箱账号
def mail():
ret = True
try:
msg = MIMEText('每日疫情签到情况:' + resp.text, 'plain', 'utf-8')
msg['From'] = formataddr(["gly", my_sender]) # 括号里的对应发件人邮箱昵称、发件人邮箱账号
msg['To'] = formataddr(["gly", my_user]) # 括号里的对应收件人邮箱昵称、收件人邮箱账号
msg['Subject'] = "每日疫情签到情况:" + resp.text # 邮件的主题,也可以说是标题
server = smtplib.SMTP_SSL("smtp.qq.com", 465) # 发件人邮箱中的SMTP服务器,端口是25
server.login(my_sender, my_pass) # 括号中对应的是发件人邮箱账号、邮箱密码
server.sendmail(my_sender, [my_user, ], msg.as_string()) # 括号中对应的是发件人邮箱账号、收件人邮箱账号、发送邮件
server.quit() # 关闭连接
except Exception as e: # 如果 try 中的语句没有执行,则会执行下面的 ret=False
ret = False
print(e)
return ret
ret = mail()
if ret:
print("邮件发送成功")
else:
print("邮件发送失败")
4、设置 cron 定时任务
我把上面这个 main.py 放在 /usr/local/testPy 目录了,然后开一个 cron 定时任务:

# 设置定时任务,vim打开
crontab -e

# 设置每天00:01分执行一次,> /dev/null 2>&1目的在于拒收程序指定时间执行后系统自动寄送的信件
# */1 * * * * python3 /usr/local/testPy/main.py      # 示例,每隔一分钟执行一次
1 0 * * * python3 /usr/local/testPy/main.py -> /dev/null 2>&1

# 几个常用命令
tail -f /var/log/cron # 实时监控 cron 日志输出
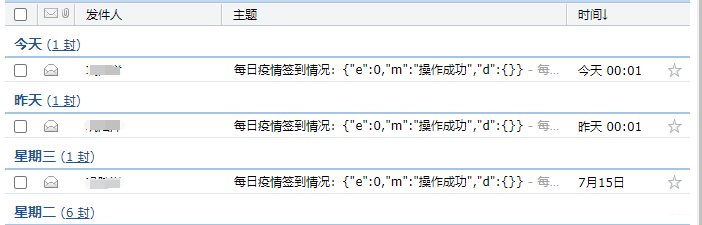
已经运行了一段时间了,目前来看没有什么问题!
最后提示,请大家还是要遵守防疫管控的各项规定,配合并听从各项措施和要求,保证上报信息的及时和准确哦