本文主要内容:
使用OpenCV进行人脸检测(haar、SSD)
使用Dlib进行人脸检测(68点标定)
所有代码已经在Spyder上编译通过的,python版本是3.7
我把所有要用的包都打包分享了,GitHub上面虽然也可以下,但是速度有点慢,分享出来方便一些
我设置下载是不需要积分的,但是好像CSDN后台会根据情况上调积分,需要就尽快下载

参考书目:《Python人脸识别——从入门到工程实践》王天庆著
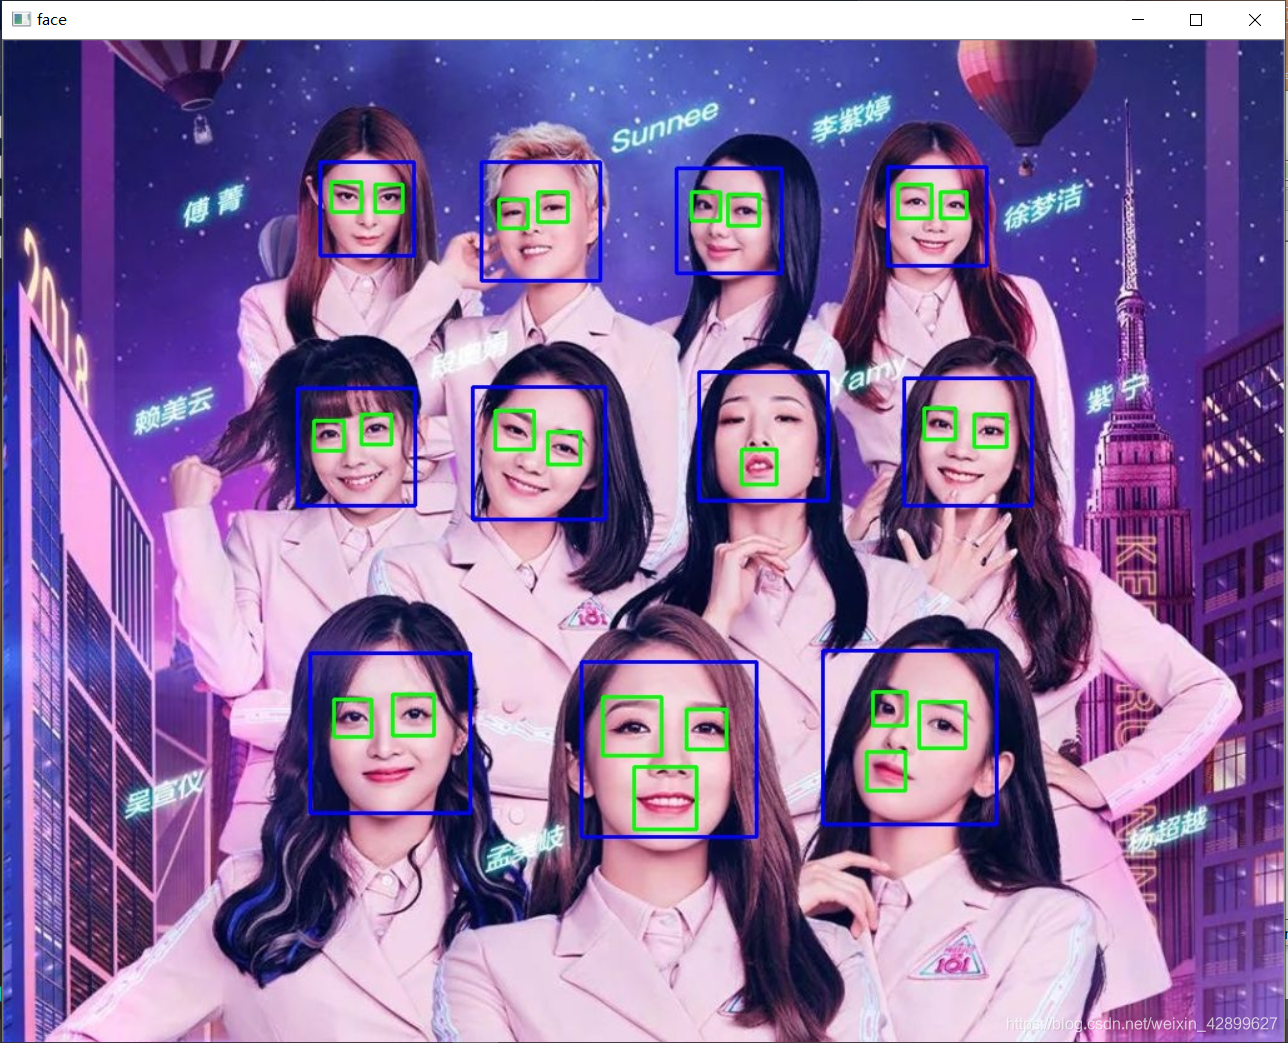
使用OpenCV进行人脸检测
1. haar 级联分类器
import cv2
face_cascade=cv2.CascadeClassifier('../xml/haarcascades/haarcascade_frontalface_default.xml')
eye_cascade=cv2.CascadeClassifier('../xml/haarcascades/haarcascade_eye.xml')
img=cv2.imread('../jpg/huo.jpg')
gray=cv2.cvtColor(img,cv2.COLOR_BGR2GRAY)
faces=face_cascade.detectMultiScale(gray,1.3,5)
for(x,y,w,h) in faces:
    cv2.rectangle(img,(x,y),(x+w,y+h),(255,0,0),2)
    roi_gray=gray[y:y+h,x:x+w]
    roi_color=img[y:y+h,x:x+w]
    eyes=eye_cascade.detectMultiScale(roi_gray)
    for(ex,ey,ew,eh)in eyes:
        cv2.rectangle(roi_color,(ex,ey),(ex+ew,ey+eh),(0,255,0),2)

cv2.imwrite('../jpg/ba_face.jpg',img)
img1=cv2.imread('../jpg/ba_face.jpg')
cv2.imshow('face',img1)
cv2.waitKey(5000)
cv2.destroyAllWindows()
测试结果
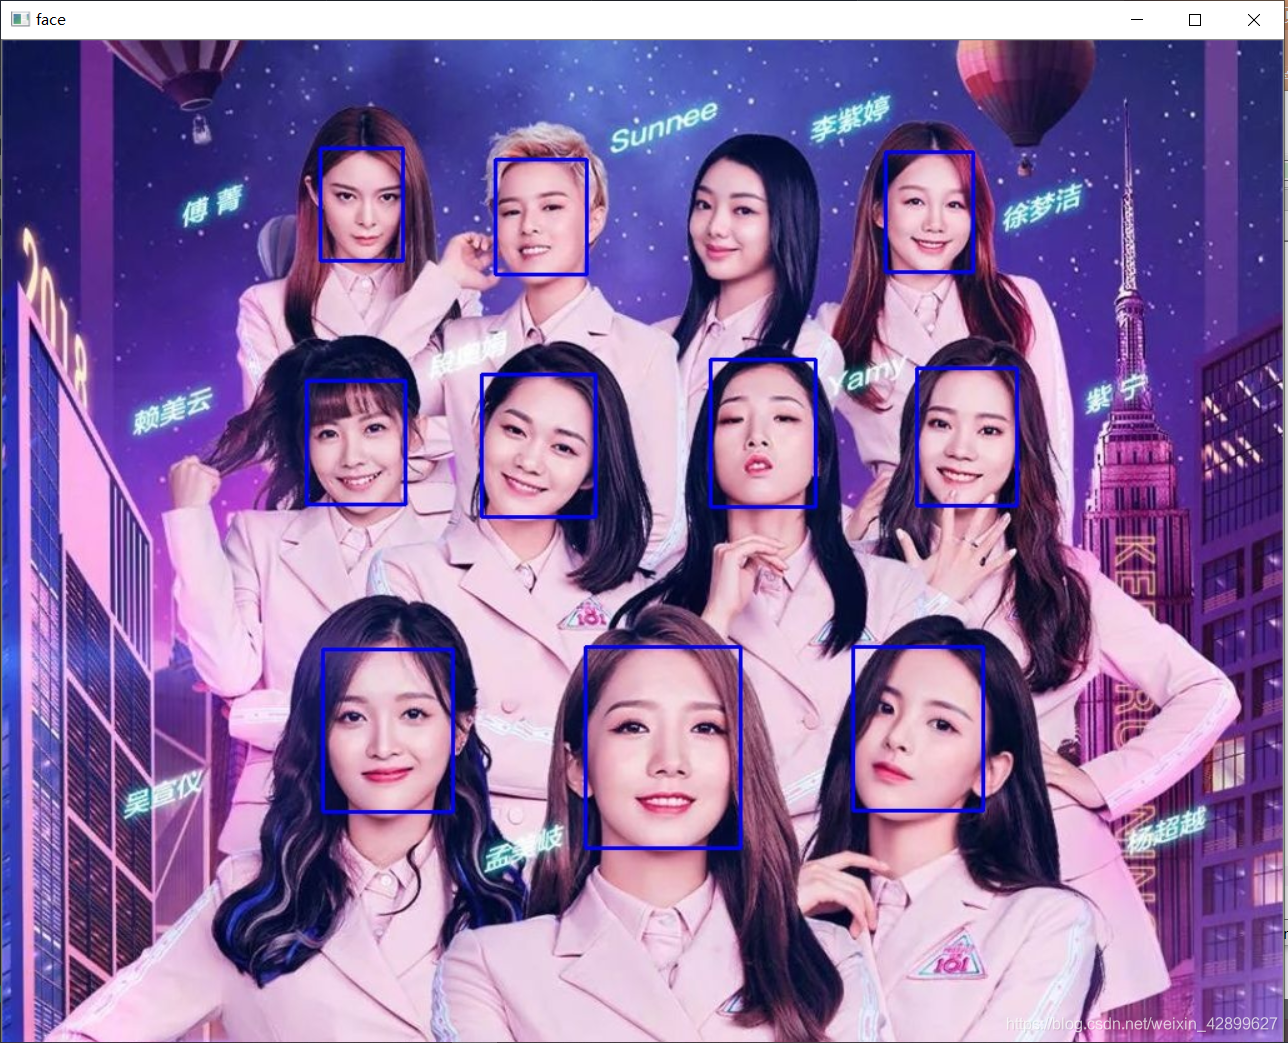
2. SSD 人脸检测器
import cv2
#model_file="../xml/res10_300x300_ssd_iter_140000_fp16.caffemodel"
#config_file="../xml/face_detector/deploy.prototxt"
#net=cv2.dnn.readNetFromCaffe(config_file,model_file)
model_file="../xml/opencv_face_detector_uint8.pb"
config_file="../xml/face_detector/opencv_face_detector.pbtxt"
net=cv2.dnn.readNetFromTensorflow(model_file,config_file)
threshold=0.9

img=cv2.imread('../jpg/huo.jpg')
print(img.shape)
frameHeight=img.shape[0]
frameWidth=img.shape[1]

blob=cv2.dnn.blobFromImage(img,1.0,(300,300),[104,117,123],False,False)

net.setInput(blob)
detections=net.forward()

for i in range(detections.shape[2]):
    detection_score=detections[0,0,i,2]
    if detection_score>threshold:
        x1=int(detections[0,0,i,3]*frameWidth)
        y1=int(detections[0,0,i,4]*frameHeight)
        x2=int(detections[0,0,i,5]*frameWidth)
        y2=int(detections[0,0,i,6]*frameHeight)
        cv2.rectangle(img,(x1,y1),(x2,y2),(255,0,0),2)

cv2.imwrite('../jpg/found_face.jpg',img)
img1=cv2.imread('../jpg/found_face.jpg')
cv2.imshow('face',img1)
cv2.waitKey(5000)
cv2.destroyAllWindows()
测试结果
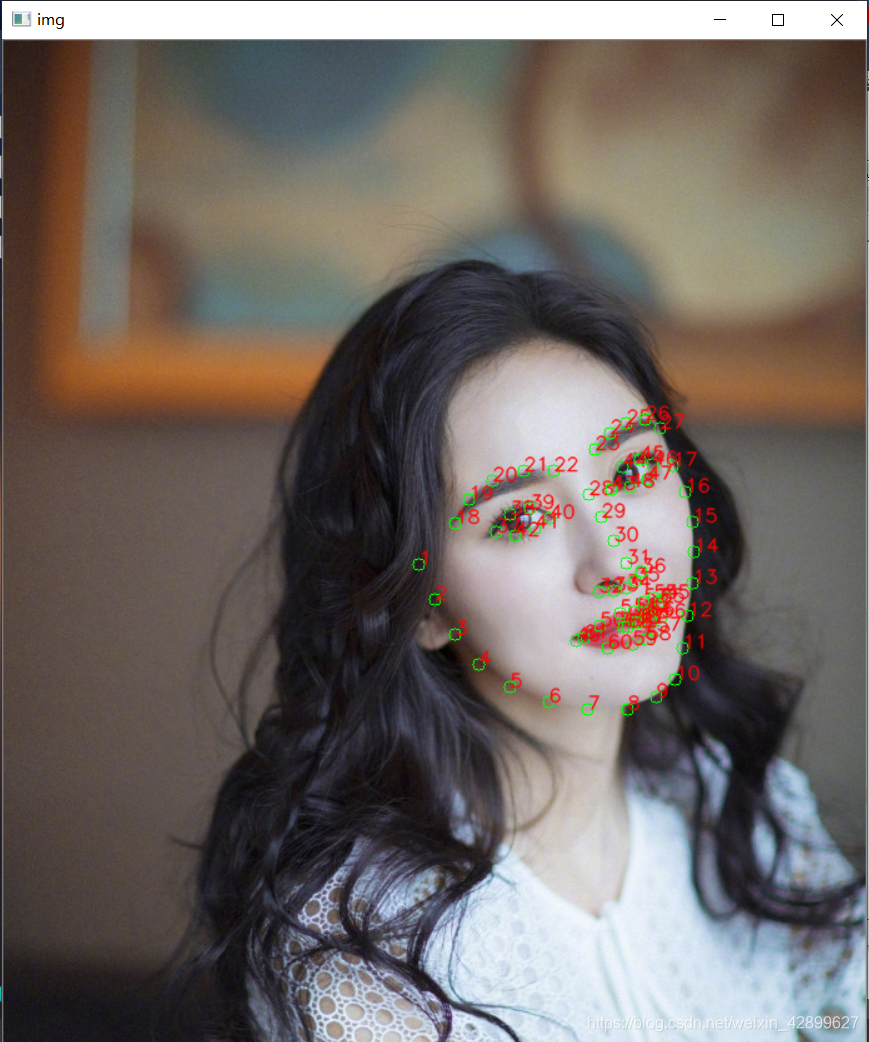
使用Dlib进行人脸检测
68点标定
import dlib
import numpy as np
import cv2

detector = dlib.get_frontal_face_detector()
predictor = dlib.shape_predictor('../xml/shape_predictor_68_face_landmarks.dat')

img = cv2.imread('../jpg/mi1.jpg')
img_gray = cv2.cvtColor(img, cv2.COLOR_RGB2GRAY)

rects = detector(img_gray, 0)
for i in range(len(rects)):
    landmarks = np.matrix([[p.x, p.y] for p in predictor(img,rects[i]).parts()])
    for idx, point in enumerate(landmarks):
        pos = (point[0, 0], point[0, 1])

        cv2.circle(img, pos, 5, color=(0, 255, 0))

        font = cv2.FONT_HERSHEY_SIMPLEX
        cv2.putText(img, str(idx+1), pos, font, 0.5, (0, 0, 255), 1,cv2.LINE_AA)

cv2.imshow("img", img)
cv2.waitKey(5000)
cv2.destroyAllWindows()
代码参考网址:https://blog.csdn.net/qq_39438636/article/details/79304130
测试效果