OAuth2协议
什么是oauth协议呢?OAuth(Open Authorization,开放授权)是为用户资源的授权定义了一个安全、开放及简单的标准,第三方无需知道用户的账号及密码,就可获取到用户的授权信息。
生活场景:快递小哥想要进入小区送快递,暂时认为小区是不允许外人进入的。快递小哥进不去怎么办呢?如果这个时候把自己的门禁卡给了快递小哥,那么快递小哥就有自己全部的权限,进小区,权限太多了,而且如果想收回自己 的门禁卡还是很麻烦的。这个时候就是快递小哥请求门岗保安小哥进入小区,保安小哥给你打电话问是否进行授权,如果授权则给一次进入的机会。
开发场景:qq登录,微信登录。都是这种认证协议。
在此,仿照微信公众号网页登录授权。完成基本功能。
微信公众号网页授权文档:公众号网页登录,尽量与其功能一致。
快速启动
qq登录或者微信登录,一般都是对接人家的资源,如何开发自己的开放平台呢?spring security对oauth2协议进行了一系列的封装,可以分方便的实现自己的认证服务器。
引入jar
<?xml version="1.0" encoding="UTF-8"?>
<project xmlns="http://maven.apache.org/POM/4.0.0"
         xmlns:xsi="http://www.w3.org/2001/XMLSchema-instance"
         xsi:schemaLocation="http://maven.apache.org/POM/4.0.0 http://maven.apache.org/xsd/maven-4.0.0.xsd">
    <modelVersion>4.0.0</modelVersion>

    <groupId>org.example</groupId>
    <artifactId>spring-auth-open</artifactId>
    <packaging>pom</packaging>
    <version>1.0-SNAPSHOT</version>
    <modules>
        <module>mall-open</module>
        <module>mall-auth</module>
    </modules>
    <parent>
        <groupId>org.springframework.boot</groupId>
        <artifactId>spring-boot-starter-parent</artifactId>
        <version>2.3.1.RELEASE</version>
        <relativePath/> <!-- lookup parent from repository -->
    </parent>

    <properties>
        <java.version>1.8</java.version>
    </properties>

    <dependencies>
        <dependency>
            <groupId>org.springframework.boot</groupId>
            <artifactId>spring-boot-starter-web</artifactId>
        </dependency>

        <dependency>
            <groupId>org.springframework.boot</groupId>
            <artifactId>spring-boot-starter-test</artifactId>
            <scope>test</scope>
            <exclusions>
                <exclusion>
                    <groupId>org.junit.vintage</groupId>
                    <artifactId>junit-vintage-engine</artifactId>
                </exclusion>
            </exclusions>
        </dependency>
        <dependency>
            <groupId>org.springframework.restdocs</groupId>
            <artifactId>spring-restdocs-mockmvc</artifactId>
            <scope>test</scope>
        </dependency>
        <dependency>
            <groupId>org.springframework.boot</groupId>
            <artifactId>spring-boot-starter-security</artifactId>
        </dependency>

        <!-- MySQL -->
        <dependency>
            <groupId>mysql</groupId>
            <artifactId>mysql-connector-java</artifactId>
            <version>5.1.47</version>
        </dependency>

        <dependency>
            <groupId>org.springframework.boot</groupId>
            <artifactId>spring-boot-starter-jdbc</artifactId>
        </dependency>
        <!--认证平台jar-->
        <dependency>
            <groupId>org.springframework.security.oauth.boot</groupId>
            <artifactId>spring-security-oauth2-autoconfigure</artifactId>
            <version>2.3.1.RELEASE</version>
        </dependency>
        <!-- https://mvnrepository.com/artifact/org.springframework.security.oauth/spring-security-oauth2 -->
        <dependency>
            <groupId>org.springframework.security.oauth</groupId>
            <artifactId>spring-security-oauth2</artifactId>
            <version>2.3.1.RELEASE</version>
        </dependency>
    </dependencies>

    <build>
        <plugins>
            <plugin>
                <groupId>org.springframework.boot</groupId>
                <artifactId>spring-boot-maven-plugin</artifactId>
            </plugin>
        </plugins>
    </build>


</project>
当前spring boot 版本不提供对实现OAuth 2.0授权服务器的支持。可以使用spring-security-oauth2提供了此功能,但是以后会完全被spring-security替代。在此之前可以使用spring-security-oauth2-autoconfigure来进行授权服务器的开发。spring-security-oauth2相关文档
配置认证服务器
@Configuration
@EnableAuthorizationServer
public class OAuth2Config extends AuthorizationServerConfigurerAdapter {
    @Autowired
    PasswordEncoder passwordEncoder;


    public void configure(ClientDetailsServiceConfigurer clients) throws Exception {
        //这里是简单使用,所以写死即可如果配置信息要从数据库里拿的话,可以 使用 clients.jdbc()
        clients.inMemory()
                .withClient("test-client")// 这里是clientId 类似在微信申请的appid
                .secret(passwordEncoder.encode("noonewilleverguess")) // 这里类似微信申请的secret
                               .scopes("resource:read") // 支持的授权类型
                .authorizedGrantTypes("authorization_code","password","refresh_token"); // 支持的认证方式 这里有5种类型
    }
}
至此就配置好了授权码授权,启动服务之后需要先登录,表单登录或者其他登录都可以,登录成功之后类似微信授权时,是登录状态。登录成功之后
response_type=code-这告诉授权服务器该应用程序正在启动授权代码流。client_id-应用程序的公共标识符,在开发人员首次注册该应用程序时获得。redirect_uri-告诉授权服务器在批准请求后将用户发送回何处。scope-一个或多个用空格分隔的字符串,指示应用程序请求的权限。您正在使用的特定OAuth API将定义其支持的范围。state-应用程序生成一个随机字符串,并将其包含在请求中。然后,应在用户授权应用后检查是否返回了相同的值。这用于防止CSRF攻击。
访问成功进入

先不管页面怎样,看里面的功能,再想想在微信授权时,其实里面的功能是一样的,这个页面的意思是test-client申请获取read的权限,是否授权。点击approve进行授权即可。
这个时候就会跳入redirect_uri配置的地址并且携带code和state,上面链接配置的是百度的地址,所以授权之后会跳入这个地址。
https://www.baidu.com/?code=m8yTrv&state=1234
通过post请求携带参数即可获取token。
注:code只能使用一次。Authorization要添加client-id和secret


高级配置
一.数据库保存clientId和secret
clientId类似微信的appid,在正常的生产环境一定是保存在数据库的。
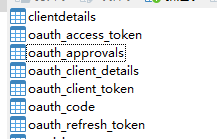
1.创建数据表
官方提供了数据表的基本信息,官方sql下下载
2.配置数据库连接,
如下配置仅供参考,自己测试,我就一切从简了。
spring:
  datasource:
    driverClassName: com.mysql.jdbc.Driver
    url: jdbc:mysql://192.168.31.40:3306/auth_server
    username: root
    password: root
3.配置使用数据库保存clientId等信息
clients有两个方法,inMemory()在内存中保存,jdbc(Datasource datasource)在数据库中保存。
@Component
public class AuthServerConfig extends AuthorizationServerConfigurerAdapter {
	@Autowired
    DataSource dataSource;
	@Autowired
    private PasswordEncoder passwordEncoder;
    public void configure(ClientDetailsServiceConfigurer clients) throws Exception {
        //clients.inMemory()
        clients.jdbc(dataSource).passwordEncoder(passwordEncoder);
    }
}
注意加密PasswordEncoder,默认会对secret进行加密操作,如果不需要加密的话,可自己生成一个不加密的实现。如下,可生成不加密的PasswordEncoder,成产环境慎用。
    @Bean
    public PasswordEncoder passwordEncoder(){
        // 密码不加密
        return new PasswordEncoder() {
            @Override
            public String encode(CharSequence charSequence) {
                return charSequence.toString();
            }

            @Override
            public boolean matches(CharSequence charSequence, String s) {
                return charSequence.toString().equals(s);
            }
        };
    }
4.测试数据库配置是否生效
4.1数据库插入记录。
oauth_client_details表
| client_id | client_secret | scope | authorized_grant_types |
|---|---|---|---|
| test | test | snsapi_base,snsapi_userinfo | client_credentials |
scope为授权类型,
- snsapi_base 静默授权,不需要用户手动点击授权,但是只能获取到openid
- snsapi_userinfo 弹出授权页面,可通过openid拿到昵称、性别、所在地。并且, 即使在未关注的情况下,只要用户授权,也能获取其信息
client_credentials为此应用允许登录的类型。
- authorization_code code登录
- refresh_token 是否允许刷新token
- password 账号密码登录
- client_credentials client登录
这些认证类型的更多说明可到 -->https://oauth.net/2/查看。
4.2启动测试**
启动成功之后,通过curl {client_id}:{client_secret}@localhost:8080/oauth/token -dgrant_type=client_credentials -dscope=any 进行测试。记得更换变量。
C:\Users\admin>curl test:test@localhost:8080/oauth/token
-dgrant_type=client_credentials -dscope=snsapi_base
{"access_token":"574c0329-49ad-4ba8-af8e-787ec6534334"
,"token_type":"bearer","expires_in":43199,"scope":"snsapi_base"}
返回access_token即可说明数据库配置成功。
curl没有安装也没事,通过postman也可以进行测试。

至此数据库配置基本完成。
二.配置静默授权
微信公众号登录时,scope为snsapi_base的时候,是不需要用户授权的。效果是不需要有此页面,直接进行地址的跳转,并且获取code。

此配置比较简单,只需要在数据库的oauth_client_details表中autoapprove字段中添加snsapi_base,即可说明在授权类型为snsapi_base的时候自动批准授权。
三.授权域名回调处理
在微信公众号配置的时候,有一个微信授权域名回调配置。

说明,在code认证的时候redirect_uri只能回调已经配置好的域名。
在oauth_client_details表中的web_server_redirect_uri字段进行配置即可。但是和微信配置有一点不同,就是这里配置的地址必须全部匹配才可以,默认不是域名匹配,比如配置为http://localhost:8080/test,那么回调地址只能填写此地址。
修改为域名匹配即可
匹配源码在DefaultRedirectResolver.redirectMatches。只需要修改此匹配逻辑即可。创建RedirectResolverConfig类并且继承DefaultRedirectResolver,重写匹配逻辑,我这里是复制的原有逻辑,去除了后缀匹配。
public class RedirectResolverConfig extends DefaultRedirectResolver {
    protected boolean redirectMatches(String requestedRedirect, String redirectUri) {
        UriComponents requestedRedirectUri = UriComponentsBuilder.fromUriString(requestedRedirect).build();
        String requestedRedirectUriScheme = (requestedRedirectUri.getScheme() != null ? requestedRedirectUri.getScheme() : "");
        String requestedRedirectUriHost = (requestedRedirectUri.getHost() != null ? requestedRedirectUri.getHost() : "");
        String requestedRedirectUriPath = (requestedRedirectUri.getPath() != null ? requestedRedirectUri.getPath() : "");
        UriComponents registeredRedirectUri = UriComponentsBuilder.fromUriString(redirectUri).build();
        String registeredRedirectUriScheme = (registeredRedirectUri.getScheme() != null ? registeredRedirectUri.getScheme() : "");
        String registeredRedirectUriHost = (registeredRedirectUri.getHost() != null ? registeredRedirectUri.getHost() : "");
        String registeredRedirectUriPath = (registeredRedirectUri.getPath() != null ? registeredRedirectUri.getPath() : "");
        boolean portsMatch = true ? (registeredRedirectUri.getPort() == requestedRedirectUri.getPort()) : true;
        return registeredRedirectUriScheme.equals(requestedRedirectUriScheme) &&
                hostMatches(registeredRedirectUriHost, requestedRedirectUriHost) &&
                portsMatch;
        	// Ensure exact path matching
	//这里是后缀匹配逻辑,去掉即可。			//registeredRedirectUriPath.equals(StringUtils.cleanPath(requestedRedirectUriPath));
    }
}
让此配置生效
  @Component
public class AuthServerConfig extends AuthorizationServerConfigurerAdapter {
	@Override
    public void configure(AuthorizationServerEndpointsConfigurer endpoints)
     throws Exception {
        // 配置自定义匹配规则
        RedirectResolver redirectResolver = new RedirectResolverConfig();
        endpoints.redirectResolver(redirectResolver);
    }
}
四.自定义code生成
默认的code生成之后,在内存中,当然也可以在数据库中默认提供了两个codeService
- InMemoryAuthorizationCodeServices 通过ConcurrentHashMap来存储code
- JdbcAuthorizationCodeServices 通过oauth_code表来存储code
1.使用数据库保存code
默认是在内存中保存,如果想配置在数据库中保存,在继承AuthorizationServerConfigurerAdapter的配置类中配置即可。
    @Override
    public void configure(AuthorizationServerEndpointsConfigurer endpoints)
    throws Exception {
        // 配置自定义匹配规则
        RedirectResolver redirectResolver = new RedirectResolverConfig();
        endpoints.redirectResolver(redirectResolver).authorizationCodeServices(new JdbcAuthorizationCodeServices(dataSource)); //使用数据库保存code
    }
2.自定义code存储
code属于频繁生成,频繁调用的信息,时效性较短,个人认为在redis进行保存更加合适。配置redis来保存code。
引入redis包,
   <dependency>
            <groupId>org.springframework.boot</groupId>
            <artifactId>spring-boot-starter-data-redis</artifactId>
   </dependency>
自行修改配置,如果全部都是本地的默认配置,不配置也可以。
spring:
	redis:
        database: 0
        host: 127.0.0.1
        port: 6379
创建rediscodeService,存储方式自行处理,这里实例简单的例子。
可通过重写createAuthorizationCode方法按照自己的规则生成code。
public class RedisAuthorizationCodeServices
extends RandomValueAuthorizationCodeServices implements AuthorizationCodeServices {
    private RedisTemplate redisTemplate;
    public RedisAuthorizationCodeServices(RedisTemplate redisTemplate) {
        this.redisTemplate = redisTemplate;
    }

    @Override
    // 存储code信息
    protected void store(String code, OAuth2Authentication authentication) {
        redisTemplate.opsForValue().set(code,authentication,60, TimeUnit.SECONDS);
    }

    @Override
    // 读取并且删除code信息
    protected OAuth2Authentication remove(String code) {
        Object obj = redisTemplate.opsForValue().get(code);
        if(obj!=null){
            redisTemplate.delete(code);
            return (OAuth2Authentication)obj;
        }
        return null;
    }
    @Override
    // 生成code
    public String createAuthorizationCode(OAuth2Authentication authentication) {
        return super.createAuthorizationCode(authentication);
    }
}
配置redis存储生效。
    @Autowired
    private RedisTemplate redisTemplate;
	@Override
    public void configure(AuthorizationServerEndpointsConfigurer endpoints)
    throws Exception {
        // 配置自定义匹配规则
        RedirectResolver redirectResolver = new RedirectResolverConfig();
        endpoints.redirectResolver(redirectResolver)
        .authorizationCodeServices(new RedisAuthorizationCodeServices(redisTemplate));//.tokenGranter(codeTokenGranter);
    }
参考文档:
https://docs.spring.io/spring-security-oauth2-boot/docs/2.3.1.RELEASE/reference/html5/
https://projects.spring.io/spring-security-oauth/docs/oauth2.html
另外,注意spring boot版本信息。