前言
在SpringBoot项目中,大家使用最多的就是Starter了。那何为Starter呢?可以理解为一个可拔插式的插件(组件)。引入一个Starter,它会帮你合并依赖,无需过多的配置和依赖,SpringBoot会自动扫描并加载相应的模块。例如,如果你想使用jdbc插件,可以引入依赖spring-boot-starter-jdbc;如果你想使用mongodb,可以引入依赖spring-boot-starter-data-mongodb。
Starter的功能:
- 整合了模块需要的依赖库
- 为开发者提供对模块的配置
- 提供自动配置类对模块内的Bean进行自动装配
1:Starter工程命名规则
Spring官方定义的Starter通常命名遵循的格式为spring-boot-starter-{name},例如spring-boot-starter-data-mongodb。Spring官方建议,非官方Starter命名应遵循{name}-spring-boot-starter的格式,例如,myjson-spring-boot-starter。
2:自定义Starter功能
为用户提供的Java对象转换为JSON形式,并且为JSON字符串添加前辍与后辍,而且用户可以动态改变前辍与后辍,即可定义在yml或properties配置文件中。
例如,有个以下的类的对象:
package com.nobody;

public class Person {

    private String name;

    private int age;

    private String address;

    public Person(String name, int age, String address) {
        super();
        this.name = name;
        this.age = age;
        this.address = address;
    }

    public String getName() {
        return name;
    }

    public void setName(String name) {
        this.name = name;
    }

    public int getAge() {
        return age;
    }

    public void setAge(int age) {
        this.age = age;
    }

    public String getAddress() {
        return address;
    }

    public void setAddress(String address) {
        this.address = address;
    }

}
Person p = new Person("Mr.nobody", 18, "拉斯维加斯");
用户输入该类的一个对象p时,application.yml配置文件中配置的前辍为@,后辍为%,则最终生成的字符串为:
@{"address":"拉斯维加斯","age":18,"name":"Mr.nobody"}%
3:实现
3.1:新建Maven工程,并且在pom.xml文件中引入需要的依赖

<project xmlns="http://maven.apache.org/POM/4.0.0" xmlns:xsi="http://www.w3.org/2001/XMLSchema-instance" xsi:schemaLocation="http://maven.apache.org/POM/4.0.0 http://maven.apache.org/xsd/maven-4.0.0.xsd">
  <modelVersion>4.0.0</modelVersion>
  <groupId>com.nobody</groupId>
  <artifactId>myjson-spring-boot-starter</artifactId>
  <version>0.0.1-SNAPSHOT</version>
  <name>myjson-spring-boot-starter</name>
  <description>Demo project for Spring Boot</description>

  <parent>
  	<groupId>org.springframework.boot</groupId>
    <artifactId>spring-boot-starter-parent</artifactId>
    <version>2.1.12.RELEASE</version>
  </parent>

  <dependencies>
	<dependency>
	    <groupId>org.springframework.boot</groupId>
	    <artifactId>spring-boot-configuration-processor</artifactId>
	</dependency>

	<dependency>
	    <groupId>org.springframework.boot</groupId>
	    <artifactId>spring-boot-autoconfigure</artifactId>
	</dependency>

	<dependency>
	    <groupId>com.alibaba</groupId>
	    <artifactId>fastjson</artifactId>
	    <version>1.2.62</version>
	</dependency>
  </dependencies>

</project>
如果Starter使用者的工程使用的是yml配置文件,则spring-boot-configuration-processor依赖项可不引入,引入其主要是为了兼容properties配置文件。
3.2:编写业务类,实现Java对象转换为带有指定前后缀的JSON字符串
package com.nobody.service;

import com.alibaba.fastjson.JSON;

public class MyJsonService {

    private String prefixName;

    private String suffixName;

    /**
     * 将Java对象转为JSON字符串
     *
     * @param o 需要转换的Java对象
     * @return 转换后的字符串
     */
    public String objectToMyJson(Object o) {
        return prefixName + JSON.toJSONString(o) + suffixName;
    }

    public String getPrefixName() {
        return prefixName;
    }

    public void setPrefixName(String prefixName) {
        this.prefixName = prefixName;
    }

    public String getSuffixName() {
        return suffixName;
    }

    public void setSuffixName(String suffixName) {
        this.suffixName = suffixName;
    }

}
3.3:编写配置类,写好配置和默认配置项,指明配置项前缀
package com.nobody.service.config;

import org.springframework.boot.context.properties.ConfigurationProperties;

/**
 * 配置类(类名一般为模块名+Properties) nobody.json Starter使用者通过yml配置文件动态修改属性值的变量名前缀
 *
 * @author Μr.ηobοdy
 *
 * @date 2020-05-20
 *
 */
@ConfigurationProperties(prefix = "nobody.json")
public class MyJsonProperties {

    // Starter使用者没在配置文件中配置prefixName属性的值时的默认值
    public static final String DEFAULT_PREFIX_NAME = "@";

    // Starter使用者没在配置文件中配置suffixName属性的值时的默认值
    public static final String DEFAULT_SUFFIX_NAME = "@";

    private String prefixName = DEFAULT_PREFIX_NAME;

    private String suffixName = DEFAULT_SUFFIX_NAME;

    public String getPrefixName() {
        return prefixName;
    }

    public void setPrefixName(String prefixName) {
        this.prefixName = prefixName;
    }

    public String getSuffixName() {
        return suffixName;
    }

    public void setSuffixName(String suffixName) {
        this.suffixName = suffixName;
    }

}
3.4:编写自动装配类,使用@Configuration和@Bean来进行自动装配
package com.nobody.service.config;

import org.springframework.beans.factory.annotation.Autowired;
import org.springframework.boot.autoconfigure.condition.ConditionalOnClass;
import org.springframework.boot.autoconfigure.condition.ConditionalOnMissingBean;
import org.springframework.boot.context.properties.EnableConfigurationProperties;
import org.springframework.context.annotation.Bean;
import org.springframework.context.annotation.Configuration;

import com.nobody.service.MyJsonService;

/**
 * 自动配置类
 *
 * @author Μr.ηobοdy
 *
 * @date 2020-05-21
 *
 */
@Configuration // 标识本类是配置类
@ConditionalOnClass(MyJsonService.class) // 只有指定的class在classpath上时才能被注册
@EnableConfigurationProperties(MyJsonProperties.class) // 激活@ConfigurationProperties
public class MyJsonConfiguration {

    private MyJsonProperties myJsonProperties;

    /**
     * 自动注入配置类
     *
     * @param myJsonProperties
     */
    @Autowired
    public MyJsonConfiguration(MyJsonProperties myJsonProperties) {
        this.myJsonProperties = myJsonProperties;
    }

    @Bean
    @ConditionalOnMissingBean(MyJsonService.class)
    public MyJsonService myJsonService() {
        MyJsonService myJsonService = new MyJsonService();
        myJsonService.setPrefixName(myJsonProperties.getPrefixName());
        myJsonService.setSuffixName(myJsonProperties.getSuffixName());
        return myJsonService;
    }


}
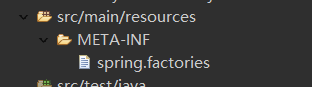
3.5:在src/main/resources/META-INF目录下新建spring.factories文件,输入以下内容:
org.springframework.boot.autoconfigure.EnableAutoConfiguration=\
com.nobody.service.config.MyJsonConfiguration
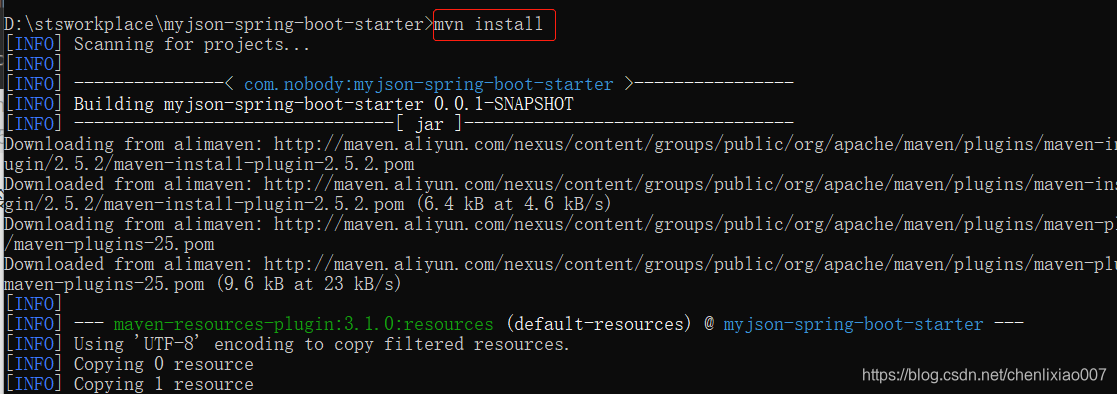
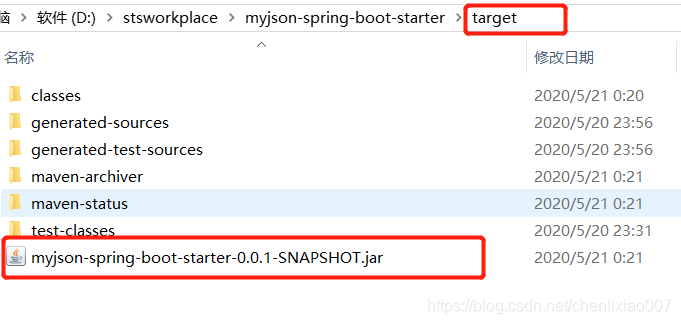
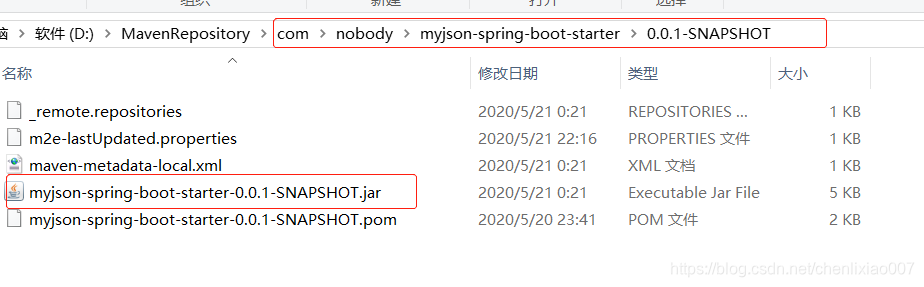
3.6:使用mvn install命令进行构建打包,会在工程的target目录下生成一个jar包,并且在maven本地仓库也会生成jar包。
4:使用Starter
经过上面几个步骤,我们自定义的Starter就开发好了,以下是在其他工程进行引入使用。在需要引用此Starter的工程的pom.xml文件中引入依赖。
<dependency>
   <groupId>com.nobody</groupId>
   <artifactId>myjson-spring-boot-starter</artifactId>
   <version>0.0.1-SNAPSHOT</version>
</dependency>
在需要用到的类中进行使用
package com.nobody.controller;

import org.springframework.beans.factory.annotation.Autowired;
import org.springframework.web.bind.annotation.GetMapping;
import org.springframework.web.bind.annotation.RequestMapping;
import org.springframework.web.bind.annotation.RestController;

import com.nobody.domain.Person;
import com.nobody.service.MyJsonService;

@RestController
@RequestMapping("demo")
public class DemoController {

    // 注入我们Starter中的服务类
    @Autowired
    private MyJsonService myJsonService;

    @GetMapping()
    public String test() {
        Person p = new Person("Mr.nobody", 18, "拉斯维加斯");
        // 调用服务方法
        return myJsonService.objectToMyJson(p);
    }
}
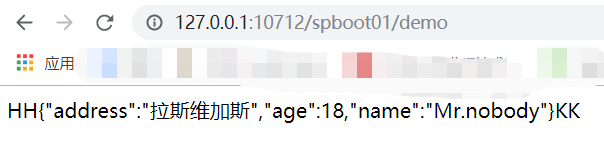
启动工程,在浏览器中访问此接口,得到如下结果:

如果我们在application.yml文件中添加以下配置信息,然后在访问接口的结果:
nobody:
  json:
    prefixName: HH
    suffixName: KK