一、工作原理
1、master开启bin-log日志
2、master设置授权给其他主机来同步自己的bin-log日志
3、slave通过授权的用户密码来同步master bing-log的内容至relay-bin中,再从relay-log中读取并写到自己的sql。
二、环境:
master:192.168.1.11
slave:192.168.1.12
mysql版本:版本要一致
2、环境:
master:192.168.1.11
slave:192.168.1.12
mysql版本:版本要一致
三、安装mariadb
安装前先卸载之前的版本
[root@localhost ~]# rpm -qa|grep mariadb|xargs rpm -e –nodeps
安装
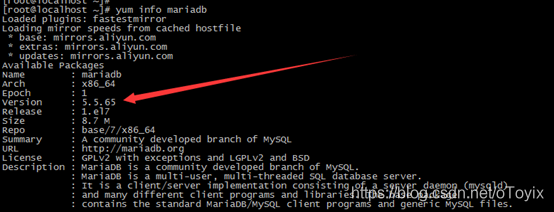
[root@localhost ~]# yum install mariadb mariadb-server –y
[root@localhost ~]# rpm -qa|grep mariadb
mariadb-libs-5.5.65-1.el7.x86_64
mariadb-5.5.65-1.el7.x86_64
mariadb-server-5.5.65-1.el7.x86_64
启动
[root@localhost ~]# systemctl start mariadb
[root@localhost ~]# ps -ef|grep mariadb
mysql    18043 17881  7 13:33 ?        00:00:01 /usr/libexec/mysqld --basedir=/usr --datadir=/var/lib/mysql --plugin-dir=/usr/lib64/mysql/plugin --log-error=/var/log/mariadb/mariadb.log --pid-file=/var/run/mariadb/mariadb.pid --socket=/var/lib/mysql/mysql.sock
root     18085  2482  0 13:33 pts/1    00:00:00 grep --color=auto mariadb
四、关闭selinux及配置防火墙
[root@localhost ~]# vim /etc/selinux/config
SELINUX=disabled
[root@localhost ~]# setenforce 0
[root@localhost ~]# firewall-cmd --zone=public --add-port=3306/tcp --permanent
success
[root@localhost ~]# firewall-cmd --reload
success
[root@localhost ~]# firewall-cmd --zone=public --list-ports
3306/tcp
五、配置主从
1、主服务器
配置my.cnf
[root@localhost ~]# vim /etc/my.cnf #添加两行
[mysqld]
log-bin=mariadb-bin
server-id=1
重启
[root@localhost ~]# systemctl restart mariadb
查看状态及配置同步用户权限等
[root@localhost ~]# mysql
Welcome to the MariaDB monitor.  Commands end with ; or \g.
Your MariaDB connection id is 2
Server version: 5.5.65-MariaDB MariaDB Server

Copyright (c) 2000, 2018, Oracle, MariaDB Corporation Ab and others.

Type 'help;' or '\h' for help. Type '\c' to clear the current input statement.

MariaDB [(none)]> show master status;		查看主状态
+--------------------+----------+--------------+------------------+
| File               | Position | Binlog_Do_DB | Binlog_Ignore_DB |
+--------------------+----------+--------------+------------------+
| mariadb-bin.000001 |      245 |              |                  |
+--------------------+----------+--------------+------------------+
1 row in set (0.00 sec)
MariaDB [(none)]> show master logs;		查看主日志
+--------------------+-----------+
| Log_name           | File_size |
+--------------------+-----------+
| mariadb-bin.000001 |       245 |
+--------------------+-----------+
1 row in set (0.00 sec)
MariaDB [(none)]> grant replication slave on *.* to "tongbu"@"192.168.1.%" identified by "123456";    授权,让192.168.1.0网段的主机使用tongbu用户来同步服务器上的所有服务器
Query OK, 0 rows affected (0.00 sec)

MariaDB [(none)]> FLUSH PRIVILEGES; 刷新权限
Query OK, 0 rows affected (0.00 sec)
2、从服务器
安装步骤同上
配置my.cnf
[root@localhost ~]# vim /etc/my.cnf
[mysqld]
server-id=2   增加此一行
重启
[root@localhost ~]# systemctl restart mariadb
开始同步
[root@localhost ~]# mysql
Welcome to the MariaDB monitor.  Commands end with ; or \g.
Your MariaDB connection id is 2
Server version: 5.5.65-MariaDB MariaDB Server

Copyright (c) 2000, 2018, Oracle, MariaDB Corporation Ab and others.

Type 'help;' or '\h' for help. Type '\c' to clear the current input statement.

MariaDB [(none)]> change master to master_host="192.168.1.11",
    -> master_user="tongbu",
    -> master_password="123456",
    -> master_log_file="mariadb-bin.000001",
    -> master_log_pos=474;
Query OK, 0 rows affected (0.05 sec)

MariaDB [(none)]> slave start;
Query OK, 0 rows affected (0.00 sec)

MariaDB [(none)]> show slave status\G
*************************** 1. row ***************************
               Slave_IO_State: Waiting for master to send event
                  Master_Host: 192.168.1.11
                  Master_User: tongbu
                  Master_Port: 3306
                Connect_Retry: 60
              Master_Log_File: mariadb-bin.000001
          Read_Master_Log_Pos: 474
               Relay_Log_File: mariadb-relay-bin.000002
                Relay_Log_Pos: 531
        Relay_Master_Log_File: mariadb-bin.000001
             Slave_IO_Running: Yes
            Slave_SQL_Running: Yes
              Replicate_Do_DB:
          Replicate_Ignore_DB:
           Replicate_Do_Table:
       Replicate_Ignore_Table:
      Replicate_Wild_Do_Table:
  Replicate_Wild_Ignore_Table:
                   Last_Errno: 0
                   Last_Error:
                 Skip_Counter: 0
          Exec_Master_Log_Pos: 474
              Relay_Log_Space: 827
              Until_Condition: None
               Until_Log_File:
                Until_Log_Pos: 0
           Master_SSL_Allowed: No
           Master_SSL_CA_File:
           Master_SSL_CA_Path:
              Master_SSL_Cert:
            Master_SSL_Cipher:
               Master_SSL_Key:
        Seconds_Behind_Master: 0
Master_SSL_Verify_Server_Cert: No
                Last_IO_Errno: 0
                Last_IO_Error:
               Last_SQL_Errno: 0
               Last_SQL_Error:
  Replicate_Ignore_Server_Ids:
             Master_Server_Id: 1
1 row in set (0.00 sec)
同步成功
六、测试
主服务器创建数据库tb
MariaDB [(none)]> create database tb charset utf8;
Query OK, 1 row affected (0.00 sec)
从库查看,是否有tb库的存在

测试成功
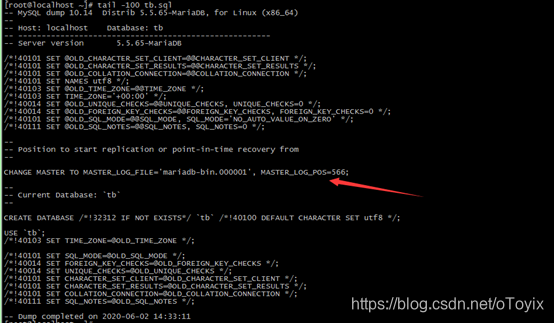
注、mysqldump 4条常用备份语句
语句一:备份单一库
[root@localhost src]# mysqldump -uroot -B tb >tb.sql 有密码需要加上-p
语句二:备份所有数据库
[root@localhost src]# mysqldump -uroot --all-databases >all.sql
语句三:备份数据库,且记录pos点,如此,在从库还原后,直接从pos点开启同步
[root@localhost ~]# mysqldump -uroot -p -B tb --master-data >tb.sql
语句四、刷新日志,导出事件与函数
mysqldump -uroot -p1 -B zabbix --master-data --flush-logs -E -R > zabbix.sql
-----------------end