SSH服务

服务:在开机时就可以按定义的规则定义
具体的软件实现:
openssh
dropbear
安全是指后续安全,第一次链接是否安全就很难保证
密钥登录比密码登录安全,主要是因为他使用了非对称加密,登录过程中需要用到密钥对。整个登录流程如下:
- 远程服务器持有公钥,当有用户进行登录,服务器就会随机生成一串字符串,然后发送给正在进行登录的用户。
- 用户收到远程服务器发来的字符串,使用与远程服务器公钥配对的私钥对字符串进行加密,再发送给远程服务器。
- 服务器使用公钥对用户发来的加密字符串进行解密,得到的解密字符串如果与第一步中发送给客户端的随机字符串一样,那么判断为登录成功。
第一次链接会询问是否确认信息
不用输入yes的设置:
[root@localhost ~]#vim /etc/ssh/ssh_config
 #   StrictHostKeyChecking ask  将ask 改为 no
自动化运维工具不需要一个个敲Yes和No就可以使用这个方法
对方的公钥存放位置:
[root@localhost ~]#cd .ssh
[root@localhost .ssh]#ls
known_hosts
[root@localhost .ssh]#cat known_hosts
服务器非22号端口的链接方式:
# 1.查看sshd的监听端口号
[root@localhost ~]#ss -ntlp
users:(("sshd",2665,7))
LISTEN      0      128                                  :::22                                  :::*      users:(("sshd",2282,4))
LISTEN      0      128                                   *:22                                   *:*
# 放在互联网中,一定要改端口号
[root@localhost ~]# vim /etc/ssh/sshd_config
#Port 22   此处更改端口号
#AddressFamily any
#ListenAddress 0.0.0.0
#ListenAddress ::


# 改完后重启服务
[root@localhost ~]# service sshd restart
Stopping sshd:                                             [  OK  ]
Starting sshd:                                             [  OK  ]


# 重新链接设置端口号
SSH基于KEY验证

# 第一步生成用户的公钥私钥(每个用户都是不同的)
[root@localhost ~]#su - flamenca
Last login: Sat May  9 19:03:49 CST 2020 on :0
# 作为flamenca的身份登录准备链接Centos 6
[flamenca@localhost ~]$ssh-keygen
# 生成ssh通讯的钥匙对
Generating public/private rsa key pair.
Enter file in which to save the key (/home/flamenca/.ssh/id_rsa):
# 钥匙对的位置/home/flamenca/.ssh/id_rsa
Created directory '/home/flamenca/.ssh'.
Enter passphrase (empty for no passphrase):
# 加口令是非常重要的步骤,防止你的账号被盗取后连接用
Enter same passphrase again:
Your identification has been saved in /home/flamenca/.ssh/id_rsa.
Your public key has been saved in /home/flamenca/.ssh/id_rsa.pub.
The key fingerprint is:
SHA256:s3ipSEWhR2aSykzsqNS//ptK2DkFjvZI7D0b8/KqFL0 [email protected]
The key's randomart image is:
+---[RSA 2048]----+
| .  ..=          |
|  o .* .         |
| *....o          |
|..*.+o.          |
|o  *.o..S        |
|. + Bo+. +       |
|   =.Eo +        |
|  ...+Bo.        |
|   .+=B*.        |
+----[SHA256]-----+

[flamenca@localhost ~]$cd .ssh
[flamenca@localhost .ssh]$ll
total 8
-rw------- 1 flamenca flamenca 1679 May 16 16:58 id_rsa
-rw-r--r-- 1 flamenca flamenca  412 May 16 16:58 id_rsa.pub
[flamenca@localhost .ssh]$

# 将公钥文件复制到对方机器上
[flamenca@localhost .ssh]$ssh-copy-id -i /home/flamenca/.ssh/id_rsa.pub [email protected]
/bin/ssh-copy-id: INFO: Source of key(s) to be installed: "/home/flamenca/.ssh/id_rsa.pub"
The authenticity of host '192.168.33.129 (192.168.33.129)' can't be established.
RSA key fingerprint is SHA256:trXxHROmwY2wHYD93uZq6NQxLRBZ652bqOUClL9M4eE.
RSA key fingerprint is MD5:64:d4:85:21:86:ed:15:f7:62:60:5d:33:c3:c8:e2:f0.
Are you sure you want to continue connecting (yes/no)? yes
/bin/ssh-copy-id: INFO: attempting to log in with the new key(s), to filter out any that are already installed
/bin/ssh-copy-id: INFO: 1 key(s) remain to be installed -- if you are prompted now it is to install the new keys
[email protected]'s password:

Number of key(s) added: 1

Now try logging into the machine, with:   "ssh '[email protected]'"
and check to make sure that only the key(s) you wanted were added.

# 此时,成功后将不在需要手工输入密码。考文件也不需要输入密码

# 检查一下对方主机的文件
[root@localhost ~]# cd .ssh
[root@localhost .ssh]# ll
total 8
-rw-------. 1 root root 412 May 16 10:02 authorized_keys
-rw-r--r--. 1 root root 396 May  9 12:42 known_hosts
[root@localhost .ssh]# cat authorized_keys
ssh-rsa AAAAB3NzaC1yc2EAAAADAQABAAABAQDBZyuEfBDT3r1ra0As1pX0rlPttjhCY5RJWgcnznWt0/6xwp3Tm8QKHd6KKA96xUR9D4auMJqhpcjQ7QRW/cpuQWbtV3SOgXhLQxt0KaXZwDudBpBL1glqMYJXeWyp2a7/XGcu/m9kxNxUjPIVFmPAHbN8hBX5IykeWoO2BmTAqHGCE8lUjubEUxbQ8TcvoPYamUlkTArt2u6HOYRI3Yty2J42kxR3ljkVQR4Zzj7XoCqd7jjzqf/3eTMhRIJ69w2Bj9s0Gtj7wTt2P4qzEpTw03ty3z7/LIgSD9eoFMFj90BjdremS2FZ5lMJ321K/txo/aYkSr/r98L5GvI0INqj [email protected]


# 重设私钥加密口令代码
[flamenca@localhost .ssh]$ssh-keygen -p -f id_rsa
Enter new passphrase (empty for no passphrase):
Enter same passphrase again:
Your identification has been saved with the new passphrase.

[flamenca@localhost .ssh]$cat id_rsa
-----BEGIN RSA PRIVATE KEY-----
# 被加密了
Proc-Type: 4,ENCRYPTED
DEK-Info: AES-128-CBC,D3FE9B37751FC1504C07EB3AEBDD70FE
...


# 此时以后连接都要输入私钥口令
[flamenca@localhost .ssh]$ssh [email protected]
Enter passphrase for key '/home/flamenca/.ssh/id_rsa':
Last login: Sat May 16 09:27:29 2020 from 192.168.33.1


# 但至少当连接多台主机时,只需要记住自己的口令即可,不需要记住对方主机的密码

# 传文件虽然也不方便,但是依然有解决方法
#
# 增加代理
[flamenca@localhost .ssh]$ssh-agent bash
[flamenca@localhost .ssh]$ssh-add
Enter passphrase for /home/flamenca/.ssh/id_rsa:
Identity added: /home/flamenca/.ssh/id_rsa (/home/flamenca/.ssh/id_rsa)


# 此时我们的代理程序就接管了输入密码的过程
# 此进程在后台运行
# 注意:每次登陆都要启动一次该代理程序
[flamenca@localhost .ssh]$ps aux |grep ssh-agent
root       2392  0.0  0.0  72468   776 ?        Ss   15:39   0:00 /usr/bin/ssh-agent /bin/sh -c exec -l /bin/bash -c "env GNOME_SHELL_SESSION_MODE=classic gnome-session --session gnome-classic"
flamenca   4547  0.0  0.0  72468   964 ?        Ss   17:24   0:00 ssh-agent bash
flamenca   4609  0.0  0.0 112716   964 pts/0    S+   17:25   0:00 grep --color=auto ssh-agent

[flamenca@localhost .ssh]$ssh [email protected]
Last login: Sat May 16 10:23:57 2020 from 192.168.33.128
[root@localhost ~]#
ssh基于key的expect自动化脚本:
#!/bin/bash
#
############################################################

# @Author:	Flamenca
# @Date:	2020-05-16 17:46:40
# @File Name:	sshkey_expect.sh
# @Last Modified time:	2020-05-16 18:04:50
# @Description:	SSH基于key的expect自动化脚本
# @mail:	[email protected]

############################################################
# 设置密码
PASS=123123

# 第一步:先自动生成钥匙对,密码为空,并提示,
ssh-keygen -t rsa -P "" -f /root/.ssh/id_rsa &> /dev/null && echo "ssh key is created!"

# 因为要用到expect,所以先检查是否安装expect如果未安装,则安装,反之直接运行
rpm -q expect &> /dev/null || yum -y install expect &> /dev/null

# 第二步:复制公钥文件到远程去,因为目标主机的数量可能非常多,所以我们将目标主机的IP写入文件host.txt中通过while读入并循环执行expect程序


while read IP; do
	#statements
	expect <<EOF
		set timeout 20
		spawn ssh-copy-id -i /root/.ssh/id_rsa.pub root@$IP
		expect {
			"yes/no" {send "yes\n";exp_continue }
			"password" {send "$PASS\n"}
		}
		expect eof
	EOF
	echo $IP is ready
done < host.txt
SSH的基于Key验证登录

在XShell中找到: 工具 > 新建用户秘钥生成向导


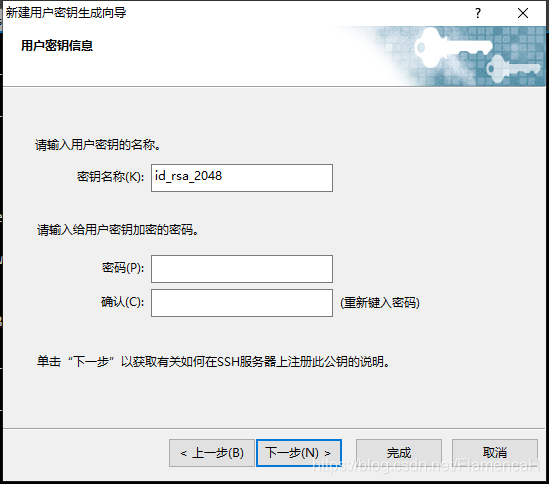

之后将文件保存在桌面,发送到Linux主机中

将公钥添加至 .ssh/authorized_keys

在XShell中选择登录方法为:Public Key
用户密钥:选中刚生成的密钥
就可以登录了
rsync命令
rsync -av /etc/ IP:/data

# 注意:/etc 是复制文件夹本身
# /etc/ 是复制文件内的内容
sftp命令
sftp> pwd	远端工作目录

sftp> !pwd	本地当前目录

sftp> cd /.	改服务器路径

sftp> lcd /. 改本地路径