这里只贴代码,具体操作项目详情请参见:https://aistudio.baidu.com/aistudio/projectdetail/410609
!pip install paddlehub==1.6.0 -i https://pypi.tuna.tsinghua.edu.cn/simple
# 待预测图片
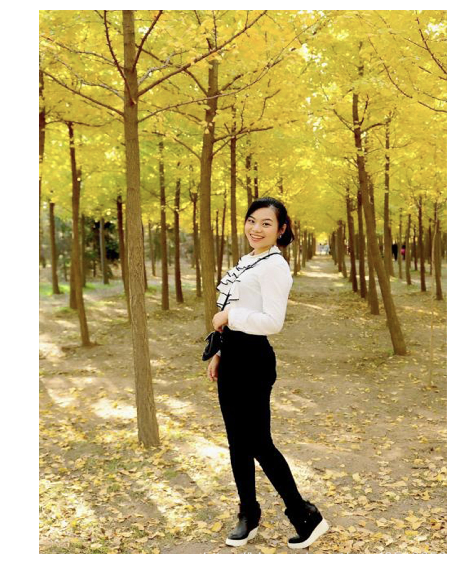
test_img_path = ["./ren5.jpg"]
import matplotlib.pyplot as plt
import matplotlib.image as mpimg
img = mpimg.imread(test_img_path[0])
# 展示待预测图片
plt.figure(figsize=(10,10))
plt.imshow(img)
plt.axis('off')
plt.show()
#若是待预测图片存放在一个文件中,如左侧文件夹所示的test.txt。每一行是待预测图片的存放路径。
!cat test.txt
with open('test.txt', 'r') as f:
test_img_path=[]
for line in f:
test_img_path.append(line.strip())
print(test_img_path)
#二、加载预训练模型
import paddlehub as hub
module = hub.Module(name="ultra_light_fast_generic_face_detector_1mb_640")
#module = hub.Moudle(name="ultra_light_fast_generic_face_detector_1mb_640")
#三、预测 PaddleHub对于支持一键预测的module,可以调用module的相应预测API,完成预测功能。
import numpy as np
from PIL import Image
import matplotlib.patches as patches
input_dict = {"image": test_img_path}
# execute predict and print the result
results = module.face_detection(data=input_dict)
for result in results:
print(result)
pil_im1 = Image.open('./ren5.jpg')
pil_im2 = Image.open('./mi.jpg')
plt.figure("girlfriend1")
plt.imshow(pil_im1)
#box = (37,90,200,236)
box = (800,800,1312,1312)
region = pil_im1.crop(box)#cut from the picture
plt.figure("girlfriend2")
plt.imshow(region)
region = region.transpose(Image.ROTATE_270)#rotate the image
pil_im1.paste(pil_im2, box)
plt.figure("girlfriend3")
plt.imshow(pil_im1)
实现效果图:
原图
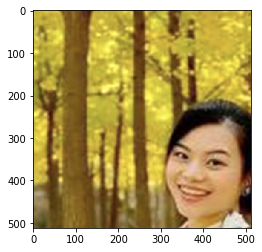
通过人脸检测出脸的坐标位置:
然后最后在人脸坐标处贴入想要的遮挡物:
