前面我们介绍了在kibana,curl,es-head,hive中对es的操作,本篇介绍如何使用python操作ES。
ELK系列(一)、安装ElasticSearch+Logstash+Kibana+Filebeat-v7.7.0
ELK系列(二)、在Kibana中使用RESTful操作ES库
ELK系列(四)、Logstash读取nginx日志写入ES中
ELK系列(五)、Logstash修改@timestamp时间为日志的产生时间
ELK系列(六)、修改Nginx日志为Json格式并使用Logstash导入至ES
ELK系列(七)、Filebeat+Logstash采集多个日志文件并写入不同的ES索引中
ELK系列(八)、使用Filebeat+Redis+Logstash收集日志数据
ELK系列(十)、ES中文分词器IK插件安装和配置远程词库热加载
ELK系列(十一)、ElasticSearch7.7.0插件es-head安装及使用
ELK系列(十二)、使用SQL查询ElasticSearch7.7.0
ELK系列(十三)、在Hive中操作ES的索引数据,创建/查询/更新/插入
----------------------------------------在Python中操作ES----------------------------------
环境
使用pip安装elasticsearch包:
pip install elasticsearch==7.7.0使用
引包
这里分别介绍使用elasticsearch包和request包查询ES的方式:
使用request包可以补充elasticsearch包里不方便或者还没有实现的功能,作为对elasticsearch包的一个补充,建议组合使用。
from elasticsearch import Elasticsearch
import requests
ElasticSearch包
获取ES对象
#获取es连接
def get_es_engine(host,port,user=None,pwd=None):
    if user and pwd:
        es = Elasticsearch(host+':'+str(port), http_auth=(user, pwd), maxsize=15)  # 有XPACK安全认证的ES集群
    else:
        es = Elasticsearch(host+':'+str(port), maxsize=15)#无安全认证的集群
    return es
状态
es.ping()
es.info()
查询
#查单个记录,指定index,type,id
es.get(index='test2',id=1,doc_type='_doc')

#根据条件查询,body里是DSL
bd={
  "query":{
    "bool":{
      "should": [
        {
          "match_phrase_prefix":{
            "email":"yikai"
          }
        }
      ]
    }
  }
}
es.search(body=bd,index='test2')
#查看索引数据是否存在
es.exists(index='test2',id=1,doc_type='_doc')
Out[132]: True
es.exists(index='test2',id=2,doc_type='_doc')
Out[133]: False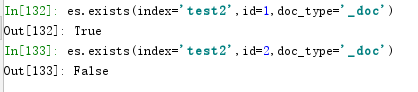
更新
指定ID单条更新:
#指定ID进行更新单条记录
data={
    "doc":{
        "age":77
    }
}
es.update(index='test2',id=3,doc_type='_doc',body=data)
根据DSL条件批量更新:
data_all={
    "query": {
        "match_all": {}
    },
    "script": {
      "source": "ctx._source.age = params.age;",
      "lang": "painless",
      "params" : {
          "age": "88"
      }
    }
}
es.update_by_query(index='test2',body=data_all)

#语法参考
#https://www.elastic.co/guide/en/elasticsearch/painless/current/index.html
新增
插入一条记录:
data_ins={
          "name" : "Rick.Wang",
          "company" : "CSDN",
          "age" : "10",
          "email" : "[email protected]"
        }

es.index(index='test2',body=data_ins,doc_type='_doc',id=8)
删除
指定ID删除记录:
es.delete(index='test2',doc_type='_doc',id=8)
根据DSL条件批量删除:
bd= {'query': {'bool': {'should': [{'match_phrase_prefix': {'email': 'yikai'}}]}}}

es.delete_by_query(index='test2',body=bd)
清空
清空索引不删除索引,等同于关系型数据库里的truncate table:
trunc={
  "query": {"match_all": {}}
}
es.delete_by_query(index='test2',body=trunc)

使用BULK命令批量操作
批量插入
#JSON数据不能有回车换行
batch_data= [
     {"index": {}},
     {"name": "王义凯", "age": 11, "email":"[email protected]", "company":"CSDN1"},
     {"index": {}},
     {"name": "wang,yi-kai", "age": 22, "email":"[email protected]", "company":"CSDN2"},
     {"index": {}},
     {"name": "Rick.Wang", "age": 33, "email":"[email protected]", "company":"CSDN3"},
     {"index": {}},
     {"name": "义凯王", "age": 44, "email":"[email protected]", "company":"CSDN4"},
 ]
es.bulk(index='test2',doc_type='_doc',body=batch_data)

批量插入更新删除
使用bulk命令可批量对不同的索引进行插入更新删除等操作:
#批量对不同的索引进行增删改查操作,每个json一行
batch_action=[
    {"index": {"_index": "test2", "_type": "_doc", "_id": "999"}},
    {"name": "rick99", "age": 99, "email":"[email protected]", "company":"CSDN9" },
	{"index": {"_index": "test2", "_type": "_doc", "_id": "888"}},
    {"name": "rick88", "age": 88, "email":"[email protected]", "company":"CSDN8" },
    {"delete": {"_index": "test2", "_type": "_doc", "_id": "999"}},
    {"create": {"_index" : "test2", "_type" : "_doc", "_id": "000"}},
    {"name": "rick00", "age": 100, "email":"[email protected]", "company":"CSDN0" },
    {"update": {"_index": "test2", "_type": "_doc", "_id": "888"}},
    {"doc": {"age": "888"}}
 ]
es.bulk(index='test2',doc_type='_doc',body=batch_action)

使用bulk批量操作的时候,对于不同的操作类型,一定要在前面加上与之对应的操作头信息({“index”: {}}, {‘delete’: {…}}, …),否则会报TransportError(400, u’illegal_argument_exception’)的错误。
Request包
前面介绍过ES支持Restful接口,我们可以使用curl命令对其进行操作,同样我们也可以使用python里的request包访问操作ES库。
GET查询
使用get函数查询ES数据:
import requests
es_http = 'http://localhost:9200'
index='test2'
type='_doc'
id='888'
auth=('elastic','r12345635x')  #tuple格式的账号密码,如果没有开启xpack安全认证可忽略此参数

#查询指定的id数据
res=requests.get(es_http+'/'+index+'/'+type+'/'+id,auth=auth) #如果没有安全认证则不需要auth参数
res.text

#查询该索引下所有数据
res=requests.get(es_http+'/'+index+'/_search',auth=auth)
res.text

#使用DSL查询数据
bd={
  "query":{
    "bool":{
      "should": [
        {
          "match_phrase_prefix":{
            "name":"rick.wang"
          }
        }
      ]
    }
  }
}
res=requests.get(es_http+'/'+index+'/_search/?pretty',auth=auth,json=bd)#pretty是为了格式化json样式,看起来更好看,可以忽略
print(res.text)


POST
使用POST方法可以与在Kibana中进行一样的操作,比如插入一条记录,比如根据DSL批量更新:
#使用POST方法往ES中插入数据
data={"name": "rick999", "age": 999, "email":"[email protected]", "company":"CSDN999" }
res = requests.post(es_http+'/'+index+'/_doc/999',auth=auth,json=data)
res.text

res = requests.get(es_http+'/'+index+'/_doc/999',auth=auth)
res.text


#使用POST方法根据DSL对ES进行操作
bd={
    "query": {
        "match_all": {}
    },
    "script": {
      "source": "ctx._source.age = params.age;",
      "lang": "painless",
      "params" : {
          "age": "99"
      }
    }
}
res = requests.post(es_http+'/'+index+'/_update_by_query',auth=auth,json=bd)
res.text

PUT
使用PUT可以创建索引
res = requests.put(es_http+'/'+'new_index',auth=auth)
res.text
DELETE
使用DELETE方法可以删除索引 删除数据等
#往新创建的索引里插入一条记录
data={"name": "rick999", "age": 999, "email":"[email protected]", "company":"CSDN999" }
requests.post(es_http+'/'+'new_index'+'/_doc/999',auth=auth,json=data)
#判断ID为999的是否存在
es.exists(index='new_index',id=999,doc_type='_doc')

#使用DELETE方法删除ID为999的记录
requests.delete(es_http+'/'+'new_index'+'/_doc/999',auth=auth)
#判断ID为999的是否存在
es.exists(index='new_index',id=999,doc_type='_doc')

#使用DELETE方法删除new_index的索引
res=requests.delete(es_http+'/'+'new_index',auth=auth) #删除索引
res.text
希望本文对你有帮助,请点个赞鼓励一下作者吧~ 谢谢!