Unity3d学习之路——简单打飞碟游戏(适配模式)
游戏要求与规则:
- 改进飞碟(Hit UFO)游戏:
游戏内容要求:
在上一次打飞碟游戏上按 adapter模式 设计图修改飞碟游戏,
使它同时支持物理运动与运动学(变换)运动
实现效果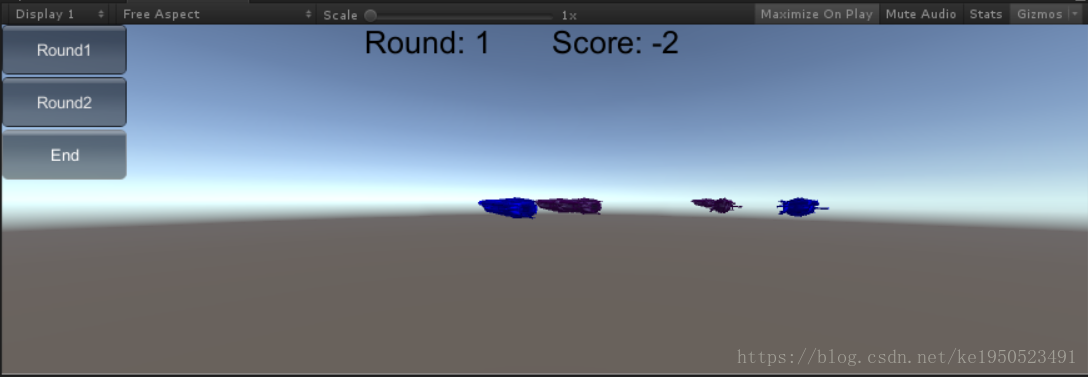
说真的,界面跟上次可以说是一样,UI差到不行。。。虽然如老师所说这门课重点在面向对象编程训练以及各种设计模式的练习,但既然是3d游戏制作,关于游戏制作这方面还是要好好学习的(听说做游戏的赚钱很多->_-> 老师说买游戏引擎更赚钱)
实现内容及过程
首先,既上次的作业以及博客,上次谈到只实现了MVC模式,因为没对动作分离管理很好的了解,但这次为了迎合作业的需求,我努力去理解学习动作分离管理,现在对它还是有点理解了,虽然说不上很精通。
尝试过在网上搜动作管理,但基本没什么关于动作分离管理模式的介绍,再仔细看了老师的ppt和别人的博客去理解。对于动作分离管理,按我的理解是游戏中的对象就让它保留属性就好了,将它要执行的动作分离出来独自给动作管理类来管理,首先就要有动作管理基类和动作基类了,这两个类的代码是已给好的了,也基本不要改,然后具体的动作就继承基类去实现,对应的具体动作管理类也是继承动作管理基类去实现。动作管理基类主要是注册动作和删除已执行完的动作。
//动作基类
public class SSAction : ScriptableObject
{

    public bool enable = false;
    public bool destroy = false;

    public GameObject gameobject { get; set; }
    public Transform transform { get; set; }
    public ISSActionCallback callback { get; set; }

    protected SSAction() { }

    public virtual void Start()
    {
        throw new System.NotImplementedException();
    }

    // Update is called once per frame
    public virtual void Update()
    {
        throw new System.NotImplementedException();
    }


}
//动作管理基类
using System.Collections;
using System.Collections.Generic;
using UnityEngine;
public class SSActionManager : MonoBehaviour
{
private Dictionary<int, SSAction> actions = new Dictionary<int, SSAction>(); //保存所以已经注册的动作
private List<SSAction> waitingAdd = new List<SSAction>(); //动作的等待队列,在这个对象保存的动作会稍后注册到动作管理器里
private List<int> waitingDelete = new List<int>(); //动作的删除队列,在这个对象保存的动作会稍后删除
// Update is called once per frame
protected void Update()
{
//把等待队列里所有的动作注册到动作管理器里
foreach (SSAction ac in waitingAdd) actions[ac.GetInstanceID()] = ac;
waitingAdd.Clear();
//管理所有的动作,如果动作被标志为删除,则把它加入删除队列,被标志为激活,则调用其对应的Update函数
foreach (KeyValuePair<int, SSAction> kv in actions)
{
SSAction ac = kv.Value;
if (ac.destroy)
{
waitingDelete.Add(ac.GetInstanceID());
}
else if (ac.enable)
{
ac.Update();
}
}
//把删除队列里所有的动作删除
foreach (int key in waitingDelete)
{
SSAction ac = actions[key];
actions.Remove(key);
DestroyObject(ac);
}
waitingDelete.Clear();
}
//注册一个动作
public void RunAction(GameObject gameobject, SSAction action, ISSActionCallback manager)
{
action.gameobject = gameobject;
action.transform = gameobject.transform;
action.callback = manager;
waitingAdd.Add(action);
action.Start();
}
}说真的,虽然有点懂动作分离是干什么的了,但我还没在哪些地方见过这种管理模式(好吧,可能是我见识少),我个人觉得这样分离,类的数目不就增多了吗,不就增加类与类之间的联系了吗?不如写好一个类,定义好该类的实例的属性和方法,那这样每个对象就有自己的方法来管理自己的行为和动作,这样思路不是更清晰吗?可能有人觉得当一个动作出现在大多数对象中用动作分离比较好?我觉得一个游戏中不同对象的动作重复性不是很高吧。
所以这次我把在定义在飞碟里的动作分离出来独立实现飞碟的飞的动作以及对应的动作管理基类:
//飞的动作
public class FlyAction : SSAction {

    private static GameObject role;
    public static FlyAction GetSSAction(GameObject role_, Vector3 emitPosition_, Vector3 emitDirection_)
    {
        Fly(role_,emitPosition_,emitDirection_);
        FlyAction action = ScriptableObject.CreateInstance<FlyAction>();

        return action;
    }
    // Use this for initialization
    public override void Start () {

    }

    // Update is called once per frame
    public override void Update () {
        if(role != null && (role.GetComponent<GameModel>().is_outOfEdge() || role.GetComponent<GameModel>().getState() == false))
        {
            this.destroy = true;
            this.callback.SSActionEvent(this);
        }
    }

    public static void Fly(GameObject role_,Vector3 emitPosition_,Vector3 emitDirection_)
    {
        role = role_;
        role_.transform.position = emitPosition_;
        role_.GetComponent<Rigidbody>().AddForce(3000 * emitDirection_);
    }
}
//对应的动作管理基类
public class FlyActionManager : SSActionManager,ISSActionCallback {

    private FlyAction fly;
    public SceneController sceneController;

    // Use this for initialization
    protected  new void Start () {
        sceneController = SceneController.getInstance();
       // sceneController.flyActionManager = this;
    }

    // Update is called once per frame
    public void Fly(GameObject role_, Vector3 emitPosition_, Vector3 emitDirection_)
    {
        fly = FlyAction.GetSSAction(role_, emitPosition_, emitDirection_);
        this.RunAction(role_, fly, this);
    }
   public void SSActionEvent(SSAction source,
        SSActionEventType events = SSActionEventType.Competeted,
        int intParam = 0,
        string strParam = null,
        Object objectParam = null)
    { }
}
- 然后到这节课的适配器模式了,推荐一篇教程和一篇文章:菜鸟教程、设计模式-适配器模式的三种形式。
一开始看了,看文字是看懂了,看代码感觉还是有点迷。我的理解是如果想在已写好的一个项目或者代码里添加一个功能,通常是一个类或接口之类的,但又想尽量少改动甚至不改动(不改动好像不太可能)原来的代码。所以就封装一个适配器类,可以这样说,输入是新加的类或接口,输出是匹配原来代码的类或接口。在本次作业里,我原本实现的动作是物理运动的了,所以新增的是运动学的运动:
public class KinematicsAction : SSAction {

    public static float speed = 100.0f;
    private static GameObject role;
    private static Vector3 emitDirection;
    public static KinematicsAction GetSSAction(GameObject role_, Vector3 emitPosition_, Vector3 emitDirection_)
    {
        Fly(role_, emitPosition_, emitDirection_);
        KinematicsAction action = ScriptableObject.CreateInstance<KinematicsAction>();

        return action;
    }
    // Use this for initialization
    public override void Start()
    {

    }

    // Update is called once per frame
    public override void Update()
    {

       // transform.position += Vector3.forward * Time.deltaTime * speed;

        if (role != null && (role.GetComponent<GameModel>().is_outOfEdge() || role.GetComponent<GameModel>().getState() == false))
        {
            this.destroy = true;
            this.callback.SSActionEvent(this);
        }
    }

    public static void Fly(GameObject role_, Vector3 emitPosition_, Vector3 emitDirection_)
    {
        role = role_;
        role_.transform.position = emitPosition_;
        role_.transform.Translate(emitDirection_ * Time.deltaTime * speed);
        role.GetComponent<Rigidbody>().velocity = emitDirection_*100;
    }
}
这里其实不应该用到“Rigidbody”刚体的,原因是因为我没想到办法当选择是运动学运动时,让它每一帧的position变化。
对应的动作管理类,基本是和FlyActionManager一样的,只是对应的动作类名改一下而已:
public class KinematicsActionManager : SSActionManager ,ISSActionCallback{

    private KinematicsAction fly;
    public SceneController sceneController;

    // Use this for initialization
    protected new void Start()
    {
        sceneController = SceneController.getInstance();
       // sceneController.flyActionManager = this;
    }
    protected new void Update()
    {
        if(fly!=null)
            fly.Update();//用法可能不太正规
    }

    // Update is called once per frame
    public void Fly(GameObject role_, Vector3 emitPosition_, Vector3 emitDirection_)
    {
        fly = KinematicsAction.GetSSAction(role_, emitPosition_, emitDirection_);
        this.RunAction(role_, fly, this);
    }
    public void SSActionEvent(SSAction source,
         SSActionEventType events = SSActionEventType.Competeted,
         int intParam = 0,
         string strParam = null,
         Object objectParam = null)
    { }
}- 接下来是适配器了:
//一个接口
public interface ActionManagerInterface
{
    void Fly(GameObject role_, Vector3 emitPosition_, Vector3 emitDirection_);
}
//适配器类
public class ActionAdapter : MonoBehaviour , ActionManagerInterface{
private FlyActionManager flyActionManager;
private KinematicsActionManager kinematics;
private SceneController sceneController;
// Use this for initialization
void Start () {
sceneController = SceneController.getInstance();
sceneController.flyActionManager = this;
flyActionManager = gameObject.AddComponent<FlyActionManager>() as FlyActionManager;
kinematics = gameObject.AddComponent<KinematicsActionManager>() as KinematicsActionManager;
}
public void Fly(GameObject role_, Vector3 emitPosition_, Vector3 emitDirection_)
{
if(sceneController.getIsPhysics())
{
flyActionManager.Fly(role_, emitPosition_, emitDirection_);
}
else
{
kinematics.Fly(role_, emitPosition_, emitDirection_);
}
}
// Update is called once per frame
void Update () {
}
}可以看到里面有FlyActionManager和KinematicsActionManager的引用,就是将这两个类接入这个适配器类,然后由适配器对接SceneController类,所以在SceneController类中有了以下这一句代码:
//SceneController.cs
public ActionManagerInterface flyActionManager;
场景如果需要飞碟飞的话就传给这个接口,由适配器决定哪种运动方式(当然会有变量判断是物理学还是运动学运动):
public bool isPhysics;然后将该脚本挂到相机上就会有个选择框了

同样,这个博客是用来分享一下自己的所学,不具有很大的参考价值,如需更好的学习,可以移步到大神的博客中。
下面是我的代码传送门