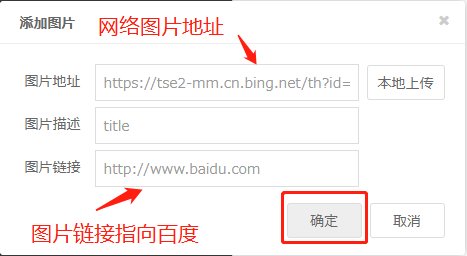
前端用户在写文章时,有时候会需要往文章中插入图片,editormd开源项目也提供了“添加图片”的功能,当用户点击添加图片按钮后,会弹出一个窗口,图片的来源支持两种:一种是本地图片,另一种是网络图片;添加后的图片,我们还可以给它添加链接,业务对图片进行描述。
- 网络图片
随便从网上找一个图片,复制图片地址,黏贴至“图片地址”栏里,完善图片的其他两个信息。
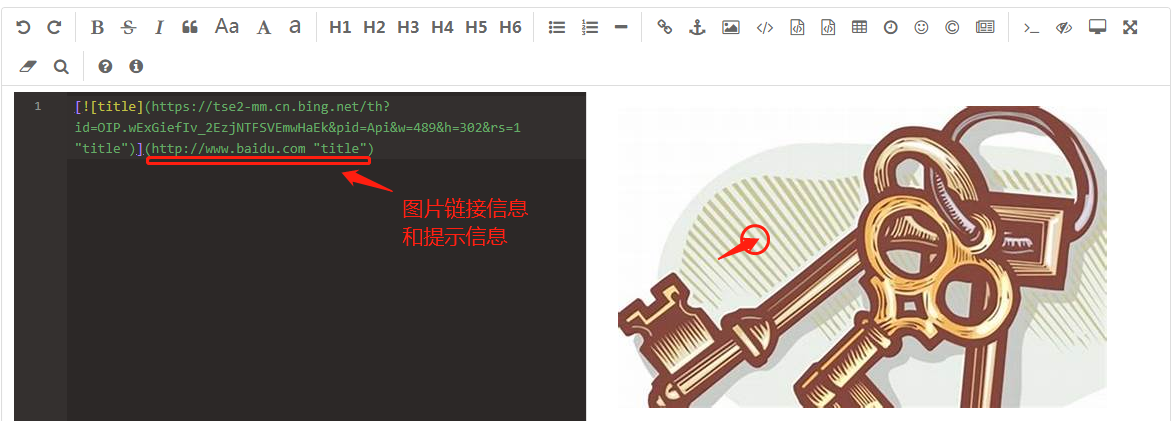
点击确定后,editormd编辑器里就会多出一行图片的信息,右边预览里就会显示一张图片,并且点击图片会跳转到百度。
- 本地图片
本地图片的上传相对网络图片来说要复杂的多,需要后端服务器处理用户上传过来的图片,并保存到服务器指定文件夹中。本地图片上传的服务器后端地址,需要在前端edit-post.html模板中指定。
* 前端代码:
 1 //初始化编辑器
 2 var testEditor;
 3 $(function () {
 4     testEditor = editormd("editormd", {
 5         width: "100%",
 6         height: 740,
 7         path: '/static/editormd/lib/',
 8         theme: "",
 9         previewTheme: "",
10         editorTheme: "pastel-on-dark",
11         markdown: "",
12         codeFold: true,
13         saveHTMLToTextarea: true, // 保存 HTML 到 Textarea
14         searchReplace: true,
15         htmlDecode: "style,script,iframe|on*", // 开启 HTML 标签解析,为了安全性,默认不开启
16         emoji: true,
17         taskList: true,
18         tocm: true, // Using [TOCM]
19         tex: true,                   // 开启科学公式TeX语言支持,默认关闭
20         flowChart: true,             // 开启流程图支持,默认关闭
21         sequenceDiagram: true,       // 开启时序/序列图支持,默认关闭,
22         //配置本地图片上传参数
23         imageUpload: true,
24         imageFormats: ["jpg", "jpeg", "gif", "png", "bmp", "webp"],
25         imageUploadURL: "{{ url_for('main.upload') }}", //指定图片要上传到哪个视图函数
26         onload: function () {
27             //图片上传成功后,可以做点什么。
28         }
29     });
30 });
31 //获取编辑器内容
32 var blogcontent = encodeURIComponent(testEditor.getMarkdown());
* 后端代码:
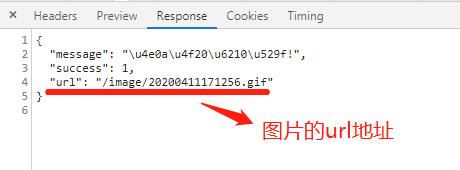
后端收到前端发过来的请求中包括一个变量为“editormd-image-file”的图片数据,后端处理函数upload()会将上传的文件获取,并解析保存到指定的后台文件夹中。处理结果有两种:1.失败:返回带两个参数的json数据,2.成功:返回三个参数的json数据,其中包括图片的url地址。图片获取处理函数image(name)中,我们对前端隐藏了实际的图片物理路径,而是通过处理函数来提供接口访问。

后台返回给前端用户的json数据
 1 # -*- coding:utf-8 -*-
 2 from flask import url_for, request, Response
 3 from . import main
 4 from flask_login import current_user, login_required
 5 import os
 6
 7 @main.route('/upload', methods=['POST'])
 8 @login_required
 9 def upload():
10     file = request.files.get('editormd-image-file')
11     if not file:
12         result = {
13             'success':0,
14             'message':'上传失败'
15         }
16     else:
17         ext = os.path.splitext(file.filename)[1]
18         filename = datetime.now().strftime('%Y%m%d%H%M%S') + ext
19         # 服务器后台处理文件夹和文件时,不能使用url_for()方法,需要服务器上的实际物理路径
20         current_path = os.path.abspath(os.path.dirname(__file__))
21         father_path = os.path.abspath(os.path.dirname(current_path) + os.path.sep)
22         # windows上的路径时‘\’的
23         filedir = os.path.join(father_path, 'static\\asset\\img\\')
24         # 将图片保存到当前用户所在的目录下
25         filepath = os.path.join(filedir, current_user.username)
26         if not os.path.exists(filepath): # 文件夹不存在,则创建
27             os.mkdir(filepath)
28         file.save(os.path.join(filepath, filename))
29         result = {
30             'success':1,
31             'message':'上传成功!',
32             'url':url_for('main.image', name=filename)
33         }
34     return result
35 # 隐藏后端静态文件目录的效果
36 @main.route('/image/<name>', methods=['GET'])
37 def image(name):
38     current_path = os.path.abspath(os.path.dirname(__file__))
39     father_path = os.path.abspath(os.path.dirname(current_path) + os.path.sep)
40     filedir = os.path.join(father_path, 'static\\asset\\img\\')
41     filepath = os.path.join(filedir, current_user.username)
42     with open(os.path.join(filepath, name), 'rb') as f:
43         resp=Response(f.read(), mimetype="image/jpeg")
44     return resp
本地图片的上传,在上面代码下,能很好地进行处理,效果如下:
- keep going.