前端页面通常由前端开发人员编写好,作为后端开发,只要能定位到自己需要写代码的地方,实现相应的需求即可。
完整项目我已经上传到了码云上,供大家学习参考。
定位 HTML
1、找到 Vue.js 需要接管的区域
<div class="wrapper" id="app">
    <!-- 省略的代码 -->
</div>
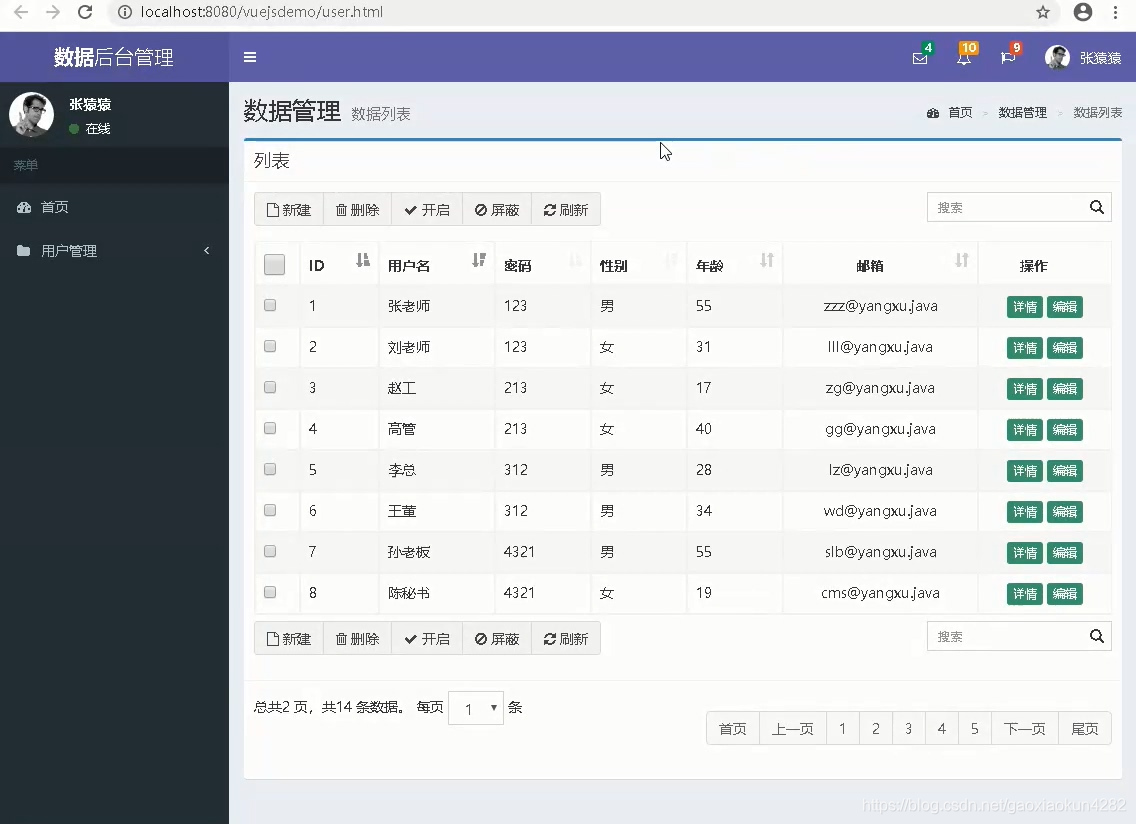
2、通过 findAll 方法查询出所有用户后,需要展示到页面中,找到页面中展示所有用户地方。通常情况下应该使用 for 循环遍历,对应 Vue.js 中的 v-for。点击按钮后执行某个功能,就用到了 Vue.js 中的 @click
<tbody>
<tr v-for="u in userList">
    <td><input name="ids" type="checkbox"></td>
    <td>{{u.id}}</td>
    <td>{{u.username}}
    </td>
    <td>{{u.password}}</td>
    <td>{{u.sex}}</td>
    <td>{{u.age}}</td>
    <td class="text-center">{{u.email}}</td>
    <td class="text-center">
        <button type="button" class="btn bg-olive btn-xs">详情</button>
        <button type="button" class="btn bg-olive btn-xs" @click="findById(u.id)">编辑</button>
    </td>
</tr>
</tbody>
3、通过 findById 查询出来一个用户的信息,通常是在页面中选取了某个用户,需要对其信息进行修改,在修改前要先查询出这个用户的信息,然后再进行修改。填入对象的各个属性值就用到了 Vue.js 中的 v-model,v-model 是双向数据绑定
<div class="form-horizontal">
    <div class="form-group">
        <label class="col-sm-2 control-label">用户名:</label>
        <div class="col-sm-5">
            <input type="text" class="form-control" v-model="user.username">
        </div>
    </div>
    <div class="form-group">
        <label class="col-sm-2 control-label">密码:</label>
        <div class="col-sm-5">
            <input type="text" class="form-control" v-model="user.password">
        </div>
    </div>
    <div class="form-group">
        <label class="col-sm-2 control-label">性别:</label>
        <div class="col-sm-5">
            <input type="text" class="form-control" v-model="user.sex">
        </div>
    </div>
    <div class="form-group">
        <label class="col-sm-2 control-label">年龄:</label>
        <div class="col-sm-5">
            <input type="text" class="form-control" v-model="user.age">
        </div>
    </div>
    <div class="form-group">
        <label class="col-sm-2 control-label">邮箱:</label>
        <div class="col-sm-5">
            <input type="text" class="form-control" v-model="user.email">
        </div>
    </div>
</div>
4、修改完成后再提交,就用到了 updateUser
<div class="modal-footer">
    <button type="button" class="btn btn-outline" data-dismiss="modal">关闭</button>
    <button type="button" class="btn btn-outline" data-dismiss="modal" @click="update">修改</button>
</div>
使用 Vue.js 完成前端的功能
user.js
new Vue({
    el:"#app",
    data:{
        user:{
            id:"",
            username:"",
            password:"",
            email:"",
            age:"",
            sex:""
        },
        userList:[]
    },
    methods:{
        findAll:function(){
            //在当前方法中定义一个变量,表明是vue对象
            var _this = this;
            axios.get('/vuejsdemo/user/findAll.do')
                .then(function (response) {
                    // handle success
                    _this.userList = response.data; //响应数据给userList赋值
                    console.log(response);
                })
                .catch(function (error) {
                    // handle error
                    console.log(error);
                });
        },
        findById:function(userid){
            //在当前方法中定义一个变量,表明是vue对象
            var _this = this;
            axios.get('/vuejsdemo/user/findById.do',{params:{id:userid}})
                .then(function (response) {
                    // handle success
                    _this.user = response.data;
                    $("#myModal").modal("show");
                    console.log(response);
                })
                .catch(function (error) {
                    // handle error
                    console.log(error);
                });
        },
        update:function(user){
            //在当前方法中定义一个变量,表明是vue对象
            var _this = this;
            axios.post('/vuejsdemo/user/updateUser.do', _this.user)
                .then(function (response) {
                    _this.findAll();
                    console.log(response);
                })
                .catch(function (error) {
                    console.log(error);
                });
        }
    },
    created(){
        this.findAll(); //当我们页面加载的时候触发请求,查询所有
    }
});
访问 http://localhost:8080/vuejsdemo/user.html 可以看到功能实现的效果:


