猜猜我的星座App
1 Android常用控件


1.1 TextView控件
1.1.1 简介
TextView控件常被用来显示一段文字、电话号码、URL链接、E-Mail地址,可以称为文本控件。
1.1.2属性
| 属性 | 作用 | 示例 |
|---|---|---|
| android:id | 定义了控件的唯一标识ID | android:"+id/textView1" |
| android:layout_width | 控件的宽度 | “wrap_content”:根据需要显示的内容进行调整,自适应,有多少字显示多宽。“match_parent”:扩充至其父亲的宽度//可能会和手机屏一样宽 |
| android:layout_height | 控件的高度 | 与layout_width使用方式类似 |
| android:text | 显示的内容 | android:text=“HelloAndroid” |
| android:textColor | 文本颜色 | android:textColor="#FF0B07"//前2位标识红色,后分别为绿色,蓝色 |
| android:textSize | 字体大小 | android:textSize="20sp"代表大小为20 |
| android:singleleLine | 是否单行显示 | android"singleLine="true"为单行显示,值为“false”代表不是单行显示 |
(ps:一个取色器的网站:https://link.fobshanghai.com/rgbcolor.htm)


1.1.3 扩展属性
| 属性 | 作用 | 示例 |
|---|---|---|
| android:autoLink | 决定是否将某些文本显示为超链接的形式 | none:左右蚊子均显示为普通文本形式,没有超链接;web:网站URL链接会显示为超链接的形式,单击之后可以浏览网页;email:E-mail地址回西安市委超链接的形式,单击之后可以发送邮件;phone:电话显示为超链接的形式,单击之后可以拨号;map:地图地址显示为超链接的形式;all:网站URL、E-mail、电话、地图地址的内容均显示为超链接。 |
- 属性:可以在界面中直观的改变文本的效果----布局界面
- 方法:在布局界面中看不到效果,必须在运行程序后看到效果的----类文件
1.1.4 TextView的使用方法
查看软件版本信息


//低版本Android书写代码时绑定控件需要强制类型转换,高版本则不用
textView_11 = (TextView)findViewByld(R.id.textView_1); ----低版本
textView_11 = findViewByld(R.id.textView_1);----高版本


- MainActivity.main文件中初始生成代码如图

- 定义刚才布局文件里的两个文本控件,发现TextView变红,鼠标放在上面提示按Alt+Shift+Enter后自动导入TextView的包


- 通过类文件改变了textView_1的字体大小和颜色


1.1.5总结
//把定义的对象与界面中的控件关联在一起
TextView textView_11 = findViewById(R.id.textView_1);
//textView_1为界面文件中该View的id
//文本控件的方法
textView_11.setTextSize(40);//设置字体大小
textView_11.setTextColor(Color.rgb(255,0,0)); //设置字体颜色
String str1 = textView_12.getText().toString();//获取文本内容并转为字符
textView_11.setText(str1+"附加部分");//用字符串设置文本内容
- 类文件MainActivity-----方法
功能代码是写到类文件里面的,我们通过方式实现了动态改变了控件所显示的文本内容。 - 布局文件activity_main-----属性
 注意上图外边框
<TextView……></TextView> 和<TextView……/>两种写法

1.2 EditText控件
1.2.1简介
- EditText是一个编辑框组件,它是用户和Android应用进行数据交互的窗口,有了它用户就可以输入数据,然后Android应用就可以得到用户输入的数据。
1.2.2 属性
| 属性 | 作用 | 示例 |
|---|---|---|
| android:id | 定义了控件的唯一标识ID | android:"+id/textView1" |
| android:layout_width | 控件的宽度 | “wrap_content”:根据需要显示的内容进行调整,自适应,有多少字显示多宽。“match_parent”:扩充至其父亲的宽度//可能会和手机屏一样宽 |
| android:layout_height | 控件的高度 | 与layout_width使用方式类似 |
| android:background | 指定背景的颜色 | android:background="#ffcccc"输入框背景色 |
| android:singleleLine | 设置文本单行输入 | android"singleLine =“true”设置单行输入,一旦设置为true,则文字不会自动换行 |
| android:maxLines | 输入内容的最大行数 | android:maxLines =“2” |
| android:inputType | 指定当前文本框显示内容的文本类型 | android:inputType=“text”:输入普通字符 |
| android:inputType=“textPassword”:密码格式; | ||
| android:inputType=“number”:数字格式; | ||
| android:inputType=“phone”:拨号键盘; | ||
| android:inputType=“datetime”:日期时间键盘; | ||
| android:hint | 暗示编辑框中要输入的内容 | android:hint="请输入密码” |
1.2.3 控件的方法
| 方法 | 作用 | 示例 |
|---|---|---|
| getText() | 获得EditText控件中用户输入的信息 | String str = edittext.getText().toString(); |
| setText(CharSequence text) | 设定输入的内容 | edittext.setText(“HelloAndroid”); |
| setTextSize() | 设置输入字体的大小 | edittext.setTextSize(40); |
| setTextColor() | 设置输入字体的颜色 | edittext.setTextColor(Color.rgb(0,0,255)) |


加上android:maxLine=“2”后,最多只显示2行


 如图,开始在类方法中更改控件
 改后,在用户名处再次输入“齐雪雪”

 - 上图这种写法是错误的,因为程序运行起来后,第三行并没有绑定控件时就取值将发生错误
 改变顺序后
改变顺序后

1.2.4 总结
//方法1:设置输入文字的大小
edit_1.setTextSize(45);
//方法2:设置输入文字的颜色
edit_1.setTextColor(Color.rgb(0,0,0));
//方法3:设定输入的文本内容
edit_3.setText("我把第三行改了");
//方法4:获得输入的文本内容,无法获得用户输入的内容,只能获得方法中设定好的内容
String str2 = edit_3.getText().toString();
edit_1.setText(str2+"在edit_1上+edit_3");

1.3 Button控件
1.3.1简介
- Button是程序用于和用户进行交互的一个重要控件,用户单击Button后一般会触发一系列处理,常被称为“按钮控件”
1.3.2属性

1.3.3方法
//方法一:设置控件所显示的文字内容
btn_1.setText("我可以被单击")
//方法二:获取文本控件内容
String str1 = btn_1.getText().toString();
btn_1.setText("你相信吗?"+str1+“试一下?”);
//方法三:设定Button控件的文字大小
btn_1.setTextSize(30);
//方法四:设置Button控件的文字颜色
btn_1.setTextColor(Color.RED);
1.3.4 监听器
 单击第一个
单击第一个View.OnClickListener{……}自动生成以下代码


- 单击后效果如图

1.3.5 总结

1.3.6 课后作业
要求:
1.做一个类似qq的登录界面,界面下方添加一个TextView控件
2.在登录界面中输入用户名和密码,单击登陆按钮,获取输入的用户名和密码,并将获取的内容显示到TextView控件里面
//activity_main.xml
<?xml version="1.0" encoding="utf-8"?>
<LinearLayout xmlns:android="http://schemas.android.com/apk/res/android"
    xmlns:app="http://schemas.android.com/apk/res-auto"
    xmlns:tools="http://schemas.android.com/tools"
    android:layout_width="match_parent"
    android:layout_height="match_parent"
    android:orientation="vertical"
    tools:context=".MainActivity">


    <EditText
        android:id="@+id/editText_1"
        android:layout_width="400dp"
        android:layout_height="wrap_content"
        android:hint="请输入用户名"
        android:singleLine="true"
        android:textSize="30dp"

        android:gravity="left"
        android:paddingTop="200dp"
        android:paddingLeft="130dp" >
    </EditText>

    <EditText
        android:id="@+id/editText_2"
        android:layout_width="match_parent"
        android:layout_height="wrap_content"
        android:hint="请输入密码"
        android:inputType="textPassword"


        android:singleLine="true"
        android:textSize="30dp"
        android:textColor="#ff33cc"

        android:gravity="left"
        android:paddingTop="50dp"
        android:paddingLeft="140dp"
        />

    <Button
        android:id="@+id/button_1"
        android:layout_width="wrap_content"
        android:layout_height="100dp"
        android:layout_gravity="center"
        android:paddingTop="40dp"

        android:text="登陆"

        android:textSize="40sp"
        android:textStyle="bold" />

    <TextView
        android:id="@+id/textView_1"
        android:layout_height="300dp"
        android:layout_width="300dp"


    />

</LinearLayout>
//MainActivity.java
public class MainActivity extends AppCompatActivity {
//第一步,定义对象,在activity_main.xml中我们有两个文本控件
    TextView textView_1;

/*
* 第一步:定义对象
* 第二步:绑定控件
* 第三步:学习文本控件的方法*/
EditText edit_1,edit_2;
Button btn_1;
String str1,str2;
    @Override
    protected void onCreate(Bundle savedInstanceState) {
        super.onCreate(savedInstanceState);
        setContentView(R.layout.activity_main);


        //第二步,通过id号进行绑定
        textView_1 = findViewById(R.id.textView_1);
        edit_1=findViewById(R.id.editText_1);
        edit_2=findViewById(R.id.editText_2);
        btn_1 = findViewById(R.id.button_1);
        //第三步,按钮单击事件
        btn_1.setOnClickListener(new View.OnClickListener() {
            @Override
            public void onClick(View v) {
                //书写按钮被单击后的逻辑
               str1 = edit_1.getText().toString();
               str2 = edit_2.getText().toString();
               textView_1.setText("用户名为"+str1+"密码为"+str2);

            }
        });

    }
}

- 改进


<?xml version="1.0" encoding="utf-8"?>
<LinearLayout xmlns:android="http://schemas.android.com/apk/res/android"
    xmlns:app="http://schemas.android.com/apk/res-auto"
    xmlns:tools="http://schemas.android.com/tools"
    android:layout_width="match_parent"
    android:layout_height="match_parent"
    android:orientation="vertical"
    tools:context=".MainActivity">


    <EditText
        android:id="@+id/editText_1"
        android:layout_width="250dp"
        android:layout_height="50dp"
        android:layout_marginLeft="100dp"
        android:layout_marginTop="200dp"
        android:layout_marginBottom="25dp"
        android:background="#ffcccc"
        android:textColor="#ff33ff"
        android:gravity="center"
        android:hint="请输入用户名"
        android:singleLine="true"
        android:textSize="30dp"></EditText>
    <EditText
        android:id="@+id/editText_2"
        android:layout_width="250dp"
        android:layout_height="50dp"
        android:hint="请输入密码"
        android:inputType="textPassword"
        android:layout_marginLeft="100dp"
        android:layout_marginBottom="40dp"
        android:gravity="center"
        android:singleLine="true"
        android:textSize="30dp"
        android:textColor="#ff33cc"
        android:background="#ffcccc"


        />

    <Button
        android:id="@+id/button_1"
        android:layout_width="120dp"
        android:layout_height="60dp"
        android:layout_gravity="center"


        android:text="登陆"
        android:textColor="#6600cc"
        android:background="#99ccff"
        android:textSize="30sp"
         />

    <TextView
        android:id="@+id/textView_1"
        android:layout_height="200dp"
        android:layout_width="300dp"
        android:gravity="center"
        android:layout_gravity="center"
        android:layout_marginTop="30dp"

    />

</LinearLayout>
1.4 ImageView控件
1.4.1 简介
- ImageView控件:用来在界面上显示图片
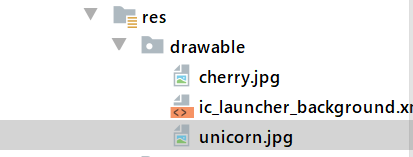
- 存放位置如图,直接复制要用的图片,粘贴到该路径下

1.4.2属性
- 当出现以下报错时
 - 点击此处小魔法棒,则控件可被约束


1.4.3 方法
//ImageView控件的方法
//方法1:设定控件要显示的图片
img_1.setImageResource(R.drawable.dileitu);


1.4.4 单击改变图片
//activity_main.xml
<?xml version="1.0" encoding="utf-8"?>
<LinearLayout xmlns:android="http://schemas.android.com/apk/res/android"
xmlns:app="http://schemas.android.com/apk/res-auto"
xmlns:tools="http://schemas.android.com/tools"
android:layout_width="match_parent"
android:layout_height="match_parent"
android:orientation="vertical"
tools:context=".MainActivity">
<ImageView
android:id="@+id/imageView_1"
android:layout_width="wrap_content"
android:layout_height="wrap_content"
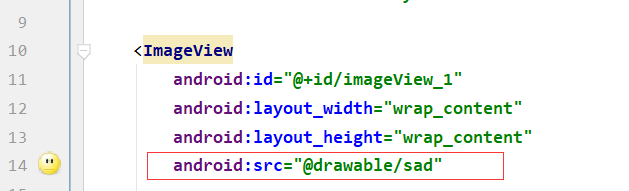
android:src="@drawable/sad"
android:layout_gravity="center"
android:layout_marginTop="50dp"/>
<TextView
android:id="@+id/textView_1"
android:layout_height="wrap_content"
android:layout_width="wrap_content"
android:text="平静脸文本"
android:layout_gravity="center"
android:textSize="40dp"
android:textColor="#03A9F4"
/>
<Button
android:id="@+id/button_1"
android:layout_height="wrap_content"
android:layout_width="wrap_content"
android:layout_gravity="center"
android:text="平静脸按钮"
android:textSize="40dp"
android:textColor="#03A9F4"
android:background="#FFC107"
/>
</LinearLayout>

//MainActivity.java
package com.example.mytext3application;

import androidx.appcompat.app.AppCompatActivity;

import android.os.Bundle;
import android.view.View;
import android.widget.Button;
import android.widget.ImageView;
import android.widget.TextView;

public class MainActivity extends AppCompatActivity {
//第一步,定义对象
    ImageView img_1;
    TextView txt_1;
    Button btn_1;
    @Override
    protected void onCreate(Bundle savedInstanceState) {
        super.onCreate(savedInstanceState);
        setContentView(R.layout.activity_main);


        //第二步:绑定控件
        img_1=findViewById(R.id.imageView_1);
        txt_1=findViewById(R.id.textView_1);
        btn_1=findViewById(R.id.button_1);


        btn_1.setOnClickListener(new View.OnClickListener() {
            @Override
            public void onClick(View v) {
                //第三步:ImageView控件的方法
                img_1.setImageResource(R.drawable.slime);
                txt_1.setText("微笑脸文本");
            }
        });
    }
}
- 程序运行后

- 单击按钮后

1.4.5本章总结
1.图片放在哪里注意目前水平,不要乱删图片,记得粘贴paste操作png格式的图片即可,不然就是血的教训,搞得乱七八糟
图片的名字只能是小写字母,不能含有大写字母和数字
 2.图片怎么放到界面中
 3.代码中如何动态更改图片

1.5 DatePicker控件
1.5.1 简介
- DatePicker控件:“日期选择器”,它的作用一般是用来选择日期的。
1.5.2 属性
| 属性 | 作用 | 示例 |
|---|---|---|
| android:calendarViewShown | 是否显示日历 | android:calendarViewShown = “false” |
| android:startYear | 设置可选开始年份 | android:startYear=“1970” 默认:1900 |
| android:endYear | 设置可选结束年份 | android:endYear=“2019” 默认:2100 |
| android:maxDate | 设置可选最大日期 | android:maxDate=“01/01/2030” |
| android:minDate | 设置可选最小日期 | android:minDate=“12/30/1980” |
1.5.3 方法
| 属性 | 作用 | 示例 |
|---|---|---|
| intgetYear() | 获得当前控件选择的年份 | datepicker_1.getYear() |
| int getMonth() | 获得当前控件选择的月份(0-11) | date_picker.getMonth()+1 |
| int getDayOfMonth | 获得当前控件选择的日 | date_picker.getDayOfMonth() |
1.5.4 操作演示
- 如图,默认显示当前日期
 - 点击年份可以选择
 - 拉动日历框可拖动
 - 添加方法来获取日期在文本框内显示
从DatePicker上获取的月份比实际的月份小1,获取的月份0到11,代表实际的1到12个月,要想显示与实际月份一样,把获得的月份加1就可以了。

- 改后,给month+1

- 在更改日期选项后,想要使文本控件随之更新

- 观看效果,文本中日期可随时更新

1.5.5总结
//activity_main.xml
<?xml version="1.0" encoding="utf-8"?>
<LinearLayout xmlns:android="http://schemas.android.com/apk/res/android"
    xmlns:app="http://schemas.android.com/apk/res-auto"
    xmlns:tools="http://schemas.android.com/tools"
    android:layout_width="match_parent"
    android:layout_height="match_parent"
    android:orientation="vertical"
    tools:context=".MainActivity">

    <TextView
        android:id="@+id/textView_1"
        android:layout_width="wrap_content"
        android:layout_height="wrap_content"
        android:text="显示日期"
        android:textColor="#0000ff"
        android:textSize="35sp"
        android:layout_gravity="center"
        android:layout_margin="50dp"
        />
    <DatePicker
        android:id="@+id/datePicker_1"
        android:layout_height="wrap_content"
        android:layout_width="wrap_content">
    </DatePicker>

</LinearLayout>
//MainActivity.java
package com.example.qxdatepicker;

import androidx.appcompat.app.AppCompatActivity;

import android.os.Bundle;
import android.widget.DatePicker;
import android.widget.TextView;

public class MainActivity extends AppCompatActivity {

    DatePicker datePicker_1;
    TextView textView_1;
    @Override
    protected void onCreate(Bundle savedInstanceState) {
        super.onCreate(savedInstanceState);
        setContentView(R.layout.activity_main);

        //第二步:绑定控件

        datePicker_1=findViewById(R.id.datePicker_1);
        textView_1 = findViewById(R.id.textView_1);

        //第三步:DatePicker控件的方法
       int yearx = datePicker_1.getYear();
       int monthx = datePicker_1.getMonth();//0-11,1-12
       int dayx = datePicker_1.getDayOfMonth();
       textView_1.setText(yearx+"年"+(1+monthx)+"月"+dayx+"日");


       //第四步:DatePicker的init方法
        datePicker_1.init(yearx, monthx, dayx, new DatePicker.OnDateChangedListener() {
            @Override
            public void onDateChanged(DatePicker view, int year, int monthOfYear, int dayOfMonth) {
                textView_1.setText(year+"年"+(1+monthOfYear)+"月"+dayOfMonth+"日");
            }
        });
    }
}


2 App之间的通信
2.1 简介

2.2 Intent 页面之间跳转步骤
1.创建Intent对象
Intent myintent = new Intent(packageContext , cls);
//Intent为一个关键字,参数1:跳转的源位置,参数2:跳转的目的位置
//类似于Button btn_1 = findViewById(R.id.button_1);
2.启动Intent,完成跳转
startActivity(myintent)
2.3 Intent 页面之间跳转过程
01 在项目中至少有两个页面
02 用Intent意图,完成页面之间的跳转
03 在页面跳转时传递数值

2.3.1新建一个页面


 这里新建activity出错
解决办法:清空Android Studio缓存:“File”---->“Invalidate Caches / Restart…”---->"Invalidate and Restart"然后等待重启即可

 效果如下,点击按钮“开始游戏”


2.3.2 跳转过程传值
在第一个页面添加输入框来接收用户输入的值
 在类中传递
在类中传递
 在第二个页面添加文本控件来显示


2.4 总结
效果演示
 输入任意内容

 总结:
总结:
1.如何出现多个页面
2.如何实现页面跳转
3.如何在跳转的过程中传递数值
4.思考:传值类型:数字、逻辑值
3 作业
- 1.做一个登录界面,单击登录按钮,将输入的用户名和密码传递到第二页
- 2.思考:如果在跳转的过程中不是跳转到自己创建的页面,而是跳转到诸如百度、短信编辑页面、拨打电话页面,我们又该如何操作呢?
实现后效果


 代码如下
代码如下
//activity_main.xml
<?xml version="1.0" encoding="utf-8"?>
<LinearLayout xmlns:android="http://schemas.android.com/apk/res/android"
    xmlns:app="http://schemas.android.com/apk/res-auto"
    xmlns:tools="http://schemas.android.com/tools"
    android:layout_width="match_parent"
    android:layout_height="match_parent"
    android:orientation="vertical"
    android:background="@drawable/cherry"
    tools:context=".MainActivity">

    <EditText
        android:id="@+id/editText_1"
        android:layout_width="match_parent"
        android:layout_height="wrap_content"
        android:layout_gravity="center"
        android:layout_marginTop="200dp"
        android:hint="请输入用户名"
        android:background="#ffb6c1"
        android:textSize="40dp"
        />
    <EditText
        android:id="@+id/editText_2"
        android:layout_width="match_parent"
        android:layout_height="wrap_content"
        android:layout_gravity="center"
        android:layout_marginTop="20dp"
        android:hint="请输入密码"
        android:inputType="textPassword"
        android:background="#ffb6c1"
        android:textSize="40dp"
        />

    <Button
        android:id="@+id/button_1"
        android:layout_width="wrap_content"
        android:layout_height="wrap_content"
        android:text="开始游戏"
        android:layout_gravity="center"
        android:layout_marginTop="30dp"
        android:textSize="30dp"
        android:textColor="#ff1493"
        android:background="#ffc0cb"
        />


</LinearLayout>
//activity_second.xml
<?xml version="1.0" encoding="utf-8"?>
<LinearLayout xmlns:android="http://schemas.android.com/apk/res/android"
    xmlns:app="http://schemas.android.com/apk/res-auto"
    xmlns:tools="http://schemas.android.com/tools"
    android:layout_width="match_parent"
    android:layout_height="match_parent"
    android:orientation="vertical"
    android:background="@drawable/unicorn"
    tools:context=".SecondActivity">


    <TextView
        android:id="@+id/textView_2"
        android:layout_width="wrap_content"
        android:layout_height="wrap_content"
        android:textSize="40dp"
        android:layout_gravity="center"
        android:layout_marginTop="200dp"
        android:textColor="#ff00ff">

    </TextView>
</LinearLayout>
//MainActivity.java
package com.example.qxdatepicker;

import androidx.appcompat.app.AppCompatActivity;


import android.content.Intent;
import android.os.Bundle;
import android.view.View;
import android.widget.Button;
import android.widget.DatePicker;
import android.widget.EditText;
import android.widget.TextView;

import java.util.Calendar;

public class MainActivity extends AppCompatActivity {

 //定义对象
        Button btn_1;
        EditText edit_1;
        EditText edit_2;
    @Override
    protected void onCreate(Bundle savedInstanceState) {
        super.onCreate(savedInstanceState);
        setContentView(R.layout.activity_main);

        //第二步:绑定控件
        btn_1=findViewById(R.id.button_1);
        edit_1=findViewById(R.id.editText_1);
        edit_2=findViewById(R.id.editText_2);
        //第三步,按钮单击事件
        btn_1.setOnClickListener(new View.OnClickListener() {
            @Override
            public void onClick(View v) {
                //填写页面跳转的逻辑
                Intent intent = new Intent(MainActivity.this,SecondActivity.class);
                intent .putExtra("abc",edit_1.getText().toString());//键,值
                intent.putExtra("passwd",edit_2.getText().toString());//键,值
                startActivity(intent);
            }
        });

    }

}
//SecondActivity.java
package com.example.qxdatepicker;

import androidx.appcompat.app.AppCompatActivity;
import android.os.Bundle;
import android.widget.TextView;

public class SecondActivity extends AppCompatActivity {
    //定义对应
    TextView txt_2;
    @Override
    protected void onCreate(Bundle savedInstanceState) {
        super.onCreate(savedInstanceState);
        setContentView(R.layout.activity_second);
         //绑定控件
        txt_2=findViewById(R.id.textView_2);
        //接收数据
        String str1 = getIntent().getStringExtra("abc");
        String str2 = getIntent().getStringExtra("passwd");
        txt_2.setText("用户名是"+str1+"密码是"+str2);


    }
}
注意res包下必须有这两个背景图片
4 猜猜我的星座项目案例


运行结果如图
 点击开始测算按钮
跳转到第二页

//activity_main.xml
<?xml version="1.0" encoding="utf-8"?>
<LinearLayout xmlns:android="http://schemas.android.com/apk/res/android"
    xmlns:app="http://schemas.android.com/apk/res-auto"
    xmlns:tools="http://schemas.android.com/tools"
    android:layout_width="match_parent"
    android:layout_height="match_parent"
    android:orientation="vertical"
    android:background="@drawable/taluopai"
    tools:context=".MainActivity">


    <TextView
        android:layout_width="wrap_content"
        android:layout_height="wrap_content"
        android:text="星座简介"
        android:layout_gravity="center"
        android:textSize="20dp"
        android:layout_marginTop="30dp"
        android:background="#ffffcc"
        android:textColor="#ff66cc"/>
    <TextView
        android:layout_width="300dp"
        android:layout_height="wrap_content"
        android:layout_gravity="center"
        android:textSize="16dp"
        android:text="在西方占星学上,黄道12星座是宇宙方位的代名词,一个人出生时,各星体落入黄道上的位置,说明了一个人的先天性格及天赋。黄道12星座象征心理层面,反映出一个人行为的表现的方式。于是将黄道分成12个星座,称为黄道12星座。"
        android:layout_marginTop="15dp"
        android:textColor="#ff66cc"
        android:background="#ffffcc"
        android:textStyle="bold"
        />
    <Button
        android:id="@+id/button_1"
        android:layout_width="wrap_content"
        android:layout_height="wrap_content"
        android:layout_gravity="center"
        android:layout_marginTop="10dp"
        android:text="开始测算"
        android:textSize="20dp"
        android:background="#ffffcc"
        android:textColor="#ff66cc"/>
    <EditText
        android:id="@+id/editText_1"
        android:layout_width="wrap_content"
        android:layout_height="wrap_content"
        android:hint="请输入你的姓名"

        android:layout_marginLeft="58dp"
        android:textSize="15dp"
        android:layout_marginTop="5dp"
        android:background="#ffffcc"
        android:textColor="#ff66cc"/>
    <TextView
        android:layout_width="wrap_content"
        android:layout_height="wrap_content"
        android:text="请选择你的生日"
        android:textSize="15dp"
        android:layout_marginTop="5dp"
        android:layout_marginLeft="58dp"
        android:layout_marginBottom="10dp"
        android:background="#ffffcc"
        android:textColor="#ff66cc"/>
    <DatePicker
        android:id="@+id/datePicker_1"
        android:layout_width="wrap_content"
        android:layout_height="wrap_content"
        android:layout_gravity="center"/>


</LinearLayout>
//MainActivity.java
package com.example.starapplication;

import androidx.appcompat.app.AppCompatActivity;

import android.content.Intent;
import android.os.Bundle;
import android.view.View;
import android.widget.Button;
import android.widget.DatePicker;
import android.widget.EditText;
import android.widget.ImageView;
import android.widget.TextView;

public class MainActivity extends AppCompatActivity {

    //第一步:定义对象
    DatePicker datePicker_1;
    EditText editText_1;
    Button btn_1;

    @Override
    protected void onCreate(Bundle savedInstanceState) {
        super.onCreate(savedInstanceState);
        setContentView(R.layout.activity_main);
        //第二步:绑定控件
       datePicker_1=findViewById(R.id.datePicker_1);
       editText_1=findViewById(R.id.editText_1);
        btn_1=findViewById(R.id.button_1);

        //第三步:按钮单击事件
        btn_1.setOnClickListener(new View.OnClickListener() {
            @Override
            public void onClick(View v) {
                Intent intent = new Intent(MainActivity.this,SecondActivity.class);
                intent.putExtra("name",editText_1.getText().toString());
                intent.putExtra("year",datePicker_1.getYear());
                intent.putExtra("month",datePicker_1.getMonth());
                intent.putExtra("day",datePicker_1.getDayOfMonth());
                startActivity(intent);
            }
        });

    }
}
第一个页面就完成啦!
当文字内容很多时,放在该目录下,打开


4.2 项目运行效果
 选择出生日期,输入姓名


4.3项目源码
注意!drawable目录下一定要有对应名称的图片
//activity_main.xml
<?xml version="1.0" encoding="utf-8"?>
<LinearLayout xmlns:android="http://schemas.android.com/apk/res/android"
    xmlns:app="http://schemas.android.com/apk/res-auto"
    xmlns:tools="http://schemas.android.com/tools"
    android:layout_width="match_parent"
    android:layout_height="match_parent"
    android:orientation="vertical"
    android:background="@drawable/taluopai"   //drawable下第一处图片名称
    tools:context=".MainActivity">


    <TextView
        android:layout_width="wrap_content"
        android:layout_height="wrap_content"
        android:text="星座简介"
        android:layout_gravity="center"
        android:textSize="20dp"
        android:layout_marginTop="30dp"
        android:background="#ffffcc"
        android:textColor="#ff66cc"/>
    <TextView
        android:layout_width="300dp"
        android:layout_height="wrap_content"
        android:layout_gravity="center"
        android:textSize="16dp"
        android:text="在西方占星学上,黄道12星座是宇宙方位的代名词,一个人出生时,各星体落入黄道上的位置,说明了一个人的先天性格及天赋。黄道12星座象征心理层面,反映出一个人行为的表现的方式。于是将黄道分成12个星座,称为黄道12星座。"
        android:layout_marginTop="15dp"
        android:textColor="#000000"

        android:textStyle="bold"
        />
    <Button
        android:id="@+id/button_1"
        android:layout_width="wrap_content"
        android:layout_height="wrap_content"
        android:layout_gravity="center"
        android:text="开始测算"
        android:textSize="20dp"
        android:background="#ffffcc"
        android:textColor="#ff66cc"/>
    <EditText
        android:id="@+id/editText_1"
        android:layout_width="wrap_content"
        android:layout_height="wrap_content"
        android:hint="请输入你的姓名"

        android:layout_marginLeft="58dp"
        android:textSize="25dp"
        android:background="#ffffcc"
        android:textColor="#ff66cc"/>
    <TextView
        android:layout_width="wrap_content"
        android:layout_height="wrap_content"
        android:text="请选择你的生日"
        android:textSize="25dp"
        android:layout_marginLeft="58dp"
        android:layout_marginBottom="10dp"
        android:background="#ffffcc"
        android:textColor="#ff66cc"/>
    <DatePicker
        android:id="@+id/datePicker_1"
        android:layout_width="wrap_content"
        android:layout_height="wrap_content"
        android:layout_gravity="center"
        android:startYear="1970"
        android:endYear="2020"
        />

</LinearLayout>

//MainActivity.java
package com.example.starapplication;

import androidx.appcompat.app.AppCompatActivity;

import android.content.Intent;
import android.os.Bundle;
import android.view.View;
import android.widget.Button;
import android.widget.DatePicker;
import android.widget.EditText;
import android.widget.ImageView;
import android.widget.TextView;

public class MainActivity extends AppCompatActivity {

    //第一步:定义对象
    DatePicker datePicker_1;
    EditText editText_1;
    Button btn_1;

    @Override
    protected void onCreate(Bundle savedInstanceState) {
        super.onCreate(savedInstanceState);
        setContentView(R.layout.activity_main);
        //第二步:绑定控件
       datePicker_1=findViewById(R.id.datePicker_1);
       editText_1=findViewById(R.id.editText_1);
        btn_1=findViewById(R.id.button_1);

        //第三步:按钮单击事件
        btn_1.setOnClickListener(new View.OnClickListener() {
            @Override
            public void onClick(View v) {
                Intent intent = new Intent(MainActivity.this,SecondActivity.class);
                intent.putExtra("name",editText_1.getText().toString());
                intent.putExtra("year",datePicker_1.getYear());
                intent.putExtra("month",datePicker_1.getMonth());
                intent.putExtra("day",datePicker_1.getDayOfMonth());
                startActivity(intent);
            }
        });

    }
}
//activity_second.xml
<?xml version="1.0" encoding="utf-8"?>
<LinearLayout xmlns:android="http://schemas.android.com/apk/res/android"
    xmlns:app="http://schemas.android.com/apk/res-auto"
    xmlns:tools="http://schemas.android.com/tools"
    android:layout_width="match_parent"
    android:layout_height="match_parent"
    android:orientation="vertical"
    android:background="@drawable/beijing"  //drawable下第二处图片名称
    tools:context=".SecondActivity">


    <TextView
        android:id="@+id/textView_getname"
        android:layout_width="wrap_content"
        android:layout_height="wrap_content"
        android:layout_gravity="center"
        android:textSize="20dp"
        android:layout_marginTop="20dp"
        android:textColor="#ff66cc"
        android:background="#ffffcc"
        android:textStyle="bold"
        android:text="显示获取的姓名"
        />
    <TextView
        android:id="@+id/textView_getbirth"
        android:layout_width="wrap_content"
        android:layout_height="wrap_content"
        android:layout_gravity="center"
        android:textSize="20dp"
        android:text="显示获取到的生日"
        android:layout_marginTop="15dp"
        android:layout_marginBottom="15dp"
        android:textColor="#ff66cc"
        android:background="#ffffcc"
        android:textStyle="bold"
    />
    <ImageView
        android:id="@+id/imageView_imgstar"
        android:layout_width="150dp"
        android:layout_height="150dp"
        android:src="@drawable/ic_launcher_background"  //drawable下第三处图片名称,此图片为系统自带,无需paste粘贴
        android:layout_gravity="center"
        />
    <TextView
        android:id="@+id/textView_xingge"
        android:layout_width="wrap_content"
        android:layout_height="wrap_content"
        android:layout_gravity="center"
        android:textSize="20dp"
        android:text="显示获取到的星座性格"
        android:layout_marginTop="15dp"
        android:layout_marginBottom="15dp"
        android:textColor="#ff66cc"
        android:background="#ffffcc"
        android:textStyle="bold"
        />
</LinearLayout>

//SecondActivity.java
package com.example.starapplication;

import androidx.appcompat.app.AppCompatActivity;

import android.content.SharedPreferences;
import android.os.Bundle;
import android.widget.ImageView;
import android.widget.LinearLayout;
import android.widget.TextView;

public class SecondActivity extends AppCompatActivity {
   //定义对象
    TextView txt_name,txt_birth,txt_xingge;
    ImageView imgView_2;

    @Override
    protected void onCreate(Bundle savedInstanceState) {
        super.onCreate(savedInstanceState);
        setContentView(R.layout.activity_second);

        //第二步:绑定控件
        txt_name=findViewById(R.id.textView_getname);
        txt_birth=findViewById(R.id.textView_getbirth);
        txt_xingge=findViewById(R.id.textView_xingge);
        imgView_2=findViewById(R.id.imageView_imgstar);
        //第三步:接受第一页传递过来的值并且显示到对应的文本控件里面
        String str1 = getIntent().getStringExtra("name");
        int myyear = getIntent().getIntExtra("year",0);
        int mymonth = getIntent().getIntExtra("month",0);
        int myday = getIntent().getIntExtra("day",0);
        txt_name.setText("你好"+str1);
        txt_birth.setText("你的出生日期为"+myyear+"年"+(1+mymonth)+"月"+myday+"日");

        int[] imgarr={R.drawable.changfa,R.drawable.baixue,R.drawable.ailisi,R.drawable.huiguniang,
                R.drawable.shuangzizi,R.drawable.xiaohongmao,R.drawable.diaochan,R.drawable.xiaomeirenyu,
                R.drawable.shuimeiren, R.drawable.yeshou,R.drawable.yingyue,R.drawable.muzhi};//一定要在drawable下有这些名称的图片,//drawable下最后一处图片名称
        int[] xingge={R.string.白羊座,R.string.金牛座,R.string.双子座,R.string.巨蟹座,
                R.string.狮子座,R.string.处女座,R.string.天秤座, R.string.天蝎座,
                R.string.射手座,R.string.摩羯座, R.string.水瓶座,R.string.双鱼座};
        //如何根据选择的年月日从数组里找到对应的图片和文字呢?
        int i = find(mymonth,myday);
        imgView_2.setImageResource(imgarr[i]);
        txt_xingge.setText(xingge[i]);

    }

    private int find(int mymonth, int myday) {
        int i = 0;
        mymonth=mymonth+1;
        if(mymonth==3&&myday>=21||mymonth==4&&myday<=19) { i = 0; }
        if(mymonth==4&&myday>=20||mymonth==5&&myday<=20) { i = 1; }
        if(mymonth==5&&myday>=21||mymonth==6&&myday<=21) { i = 2; }
        if(mymonth==6&&myday>=22||mymonth==7&&myday<=22) { i = 3; }
        if(mymonth==7&&myday>=23||mymonth==8&&myday<=22) { i = 4; }
        if(mymonth==8&&myday>=23||mymonth==9&&myday<=22) { i = 5; }
        if(mymonth==9&&myday>=23||mymonth==10&&myday<=23) { i = 6; }
        if(mymonth==10&&myday>=24||mymonth==11&&myday<=22) { i = 7; }
        if(mymonth==11&&myday>=23||mymonth==12&&myday<=21) { i = 8; }
        if(mymonth==12&&myday>=22||mymonth==1&&myday<=19) { i = 9; }
        if(mymonth==1&&myday>=20||mymonth==2&&myday<=18) { i = 10; }
        if(mymonth==2&&myday>=19||mymonth==3&&myday<=20) { i = 11; }
        return i;
    }
}

//strings.xml
<resources>
    <string name="app_name">StarApplication</string>

    <string name = "白羊座">★白羊座属性★
        阳性、火象星座,
        守护行星:火星
白羊座给人精力旺盛和办事能力很强的印象,脸部特徵为轮廓深刻鲜明,额头和颧骨高耸,下巴结实有力,唇形紧闭。眉毛浓密,眼光锐利、直接,鼻子较长。性格善变、易怒;是个天生的斗士,身手矫健;在意中人面前会流露出孩子气。
★白羊座传说★
菲利塞斯(Phrixus)乃奈波勒(Nepele)之子,蒙上奸污碧雅蒂(Biadice)的不白之冤,而被判处死刑,临刑之前一只金色的公羊及时将他和妹妹海(Helle)一起背走。不幸的是,妹妹因不胜颠簸,一时眼花落下羊背,菲利塞斯则安然获救,他将公羊献给宙斯当祭礼,宙斯将它的形象化为天上的星座。後来杰生为了夺取这金羊的羊毛,还展开了一段精彩的冒险故事。
★白羊座优点★
深爱自由,不喜欢受到外界的压抑。有企图心和冒险精神,勇於尝试,精力旺盛,一旦确定目标就会全力以赴。
★白羊座缺点★
缺乏耐性、暴躁、冲动、自私、以自我为中心、尖酸刻薄、好斗、粗枝大叶而不细心。
    </string>
    <string name = "金牛座">
        ★金牛座属性★
       阴性、土象星座,
       守护行星:金星
金牛座的长相整体而言显得精壮结实,一头浓密的头发,眼光稳定,脖子像公牛一般粗壮,再配上坚定的嘴唇及下巴,看来世故而稳重。正面性格有耐性、持久、实际、热情;负面性格则有懒惰、贪婪、顽固。
★金牛座传说★
传说素以风流着称的众神之王宙斯看上欧萝芭(Europa,後来化为欧洲),为了避开天后海的耳目,自己化身为白牛,将欧萝芭驮在背上,以遂其所愿,事後宙斯又回复原形,将他的化身大公牛置於天上,成为众星座之一。
★金牛座优点★
有主见、意志坚定、热情、友善、有耐心及责任感、可以信赖、实际、可靠、具有商业头脑和牢靠的价值观、富美感,喜欢美食和精致昂贵的奢侈品。
★金牛座缺点★
贪婪、顽固、嫉妒心重、占有欲强、懒惰、古板、缺乏应变力、自我放纵、易怒。
    </string>
    <string name = "双子座">
        ★双子座属性★
       阳性、风象星座,
       守护行星:水星
双子座的长相充满智慧而令人觉得生动有活力,椭圆形的脸型,十分柔和,五官很少会过分夸张。弧形优美的眉毛下,是一双灵动好奇的眼睛,鼻梁瘦长,颧骨较高,下颚稍尖,嘴唇虽大却不果决。生性轻浮善变,并有双重性格,但却因为多才多艺且生气蓬勃,而深受异性垂青。
★双子座传说★
神话故事中几乎找不到和双子星座有关的传说。在埃及它的名称为「孪子星」,是以这星座中最明亮的两颗星卡斯达(Castor)和波利克斯(Pollux)命名,埃及人观念中的孪子座为幼童,而非一般常见的成人形象。
★双子座优点★
适应力强、机智、敏捷、喜欢忙碌和变化、主动、活泼而健谈、聪慧且多才多艺、具有写作和语言方面的天才、对时尚有着敏锐的感受力,能够永久维持着年轻和时髦的外貌。
★双子座缺点★
怀疑心重、善变、双重性格、缺乏耐性、狡猾、不安份、过人的精力未能发时则脾气暴躁且喋喋不休。
    </string>
    <string name ="巨蟹座">
        ★巨蟹座属性★
       阴性、水象星座
       守护行星:月亮
巨蟹座的标准性格为坚贞与毅力,脸型圆圆的、肉肉的,眉头经常深锁,因而有明显的纹路,可充份看出其忧郁的天性。眼睛充满感情,狮子鼻、嘴角略微下垂,粗短的颈子和圆圆的下巴给人善解人意的母性的感觉。
★巨蟹座传说★
巨蟹座最早脱胎於巴比伦的传说。在埃及,这星座的象徵为两只乌龟,有时被称为「水的星座」;有时又被称为Allul(阿璐儿,一种不明的水中生物)。可见这星座和水关系之密切,但详尽的传说却已散佚。
★巨蟹座优点★
善良、热心、敏感、富有同情心;长於记忆、脑筋敏锐、领悟力好、适应力佳、有高度的想像力;具强烈的母性或父性的本能、保护色彩浓厚、谨慎、节俭;有坚强意志力和耐力,不屈不挠;理财观念甚佳;爱国;忠於爱情,重视家庭的温暖与安定,擅理家务,重视家庭的和谐,是所有星座中最具家庭观念的星座。
★巨蟹座缺点★
天性多疑且情绪化致难以取悦、嫉妒心强并有恋母情结、可能因过度敏感而导致自怜、个性善变、不稳定、有时因生活态度太认真而失之无趣、心胸狭窄、苛刻、贪吃、邋遢、喜欢被奉承。
    </string>
    <string name ="狮子座">
        ★狮子座属性★
       阳性、火象星座,
       守护行星:太阳
狮子座的前额宽广,眉骨突出,鹰钩鼻,下巴线条清楚,嘴型宽而坚毅,整张脸孔给人的第一个印象是蕴涵着力量,特别是他的双眼总是炯然有神,透露着坚忍不拔的神情,庄重而高贵的态度,俨然有王者之风。
       ★狮子座传说★
传说中和这星座有关的表徵是位於希腊之尼米安(Nimean)谷地的一头狮子,在一次搏斗中被海克利思杀死。
       ★狮子座优点★
为人博爱、热心、慷慨、有领导能力、花钱大方、思想开阔、具创新的能力、对戏剧和表演具有天份。
       ★狮子座缺点★
  主观意识太强、自以为是、偏狭、无法容忍与自己相左的观点、自视过高、势利、权力欲过强、仗势欺人、好管闲事。
    </string>
    <string name ="处女座">
         ★处女座属性★
       阴性、土象星座,
       守护行星:水星
  处女座的人看起来乾乾净净、伶俐过人,拥有一双眼神柔和且观察入微的眼睛,嘴型优美,下颚宽阔,整体而言,散发着清新而高雅的气质。喜欢批评他人。
       ★处女座传说★
  根据罗马神话,处女座又名艾思翠诗(Astraes),为天神邾比特和希蜜丝女神的女儿,是正义女神。黄金时代末期,人类触犯了她,於是大怒之下回到天庭。
       ★处女座优点★
  谦虚、喜欢整洁、处事小心、头脑清晰而分析能力强、能明辨是非。
       ★处女座缺点★
  喜欢鸡蛋里挑骨头、要求太高以致吹毛求疵、多愁善感、小题大作、古板、难以取悦。
    </string>
    <string name ="天秤座">
         ★天秤座属性★
       阳性、风象星座
       守护行星:金星
  天秤座大多目光柔和、鼻子略尖、嘴巴宽阔但唇型优美,头发柔而细软,颈部线条优雅,五官细致,整体长相给人协调的印象。
       ★天秤座传说★
  是希腊神话里女祭司手中那个掌管善恶的天秤飞到天上而变成的。大约西元前二000年此星座和巴比伦宗教主宰生死的审判有关,天秤是用来衡量灵魂的善恶之用。
       ★天秤座优点★
  外型高雅、擅长交际,个性平易近人、注重罗曼蒂克的浪漫情调、为理想主义者,具有迷人的性格特徵,对和谐而愉快的生活环境十分珍惜。
       ★天秤座缺点★
  容易生气,个性轻浮、善变,做事犹疑不定、优柔寡断而难以做下决定,喜欢卖弄风情,对事情没有主见,容易受骗。
    </string>
    <string name ="天蝎座">
          ★天蝎座属性★
       阴性、水象星座,守护行星:冥王星(传统上为火星)
  天蝎座天生由於皮肤颜色比较黑,因而凸显出眼光特别锐利、明亮。他们的额头宽阔,眉毛粗浓,颧骨平坦而多肉,嘴型明显而看来坚毅,下巴则坚硬、有力。整体而言,其长相容易给人精力旺盛、果决、热情的印象。
       ★天蝎座传说★
  天后朱娜命天蝎从阴暗的地底爬出来,攻击欧立安(Orion,戴安娜所锺情的猎人,後化为猎户星座)。另外一次,天蝎施放毒气攻击正驾着太阳神马车经过的菲顿,而使丘比特有机会发射雷电,将奔跑中的太阳车击毁。
       ★天蝎座优点★
  天蝎座人有谋略、富洞悉事物重点的能力。情绪十分敏感、感情细腻而具有丰富的想像力,果决、实际而热情,主观意见强、意志坚定、有毅力,一般人容易厌倦而逃避的事情,往往能坚忍固执的做下去。机敏、聪明、悟力高。富直觉能力。
       ★天蝎座缺点★
  天蝎座有干涉别人事物的倾向,冲动、急进、善妒、易怒、顽固、倔强、难驾驭、多疑、善变、心机较深、太感情用事、好冒险,常有狂妄的梦想。对於食物美酒常会过度纵欲,个性阴险、冷漠,时常利用诡计与机智去击败敌人。
    </string>

    <string name ="射手座">
        ★射手座属性★
       阳性、火象星座,守护行星:木星
  射手座的眼睛灵活生动而有神,鼻子具有希腊鼻直而长的特徵,唇型优美,下巴较尖,圆的脸上五官精致,头发鬈曲浓密,气质高贵不凡,。思想开明且能兼容并蓄,但有时则不够圆滑和喜欢渲染夸大,充分表现出极不传统的射手座性格。
       ★射手座传说★
  射手座呈现的是半人半马的型态,具有动物和人类双重面目,是个着名的先知、医生和学者。他是希腊着名大英雄杰生(Jason)、亚齐里斯(Achilles)和亚尼斯(Aeneas)的抚养者。传说他是卡罗拉斯(Cronus)和斐莱(Philyra)之子,也是宙斯的父亲。他是在受惊吓後,把自己变为马身,其母斐莱受不了儿子半人半马的怪模样,便变成了一棵菩提树。
       ★射手座优点★
  乐观、活泼、坦率、自尊心强、多才多艺、有很高的智慧,颇富直觉与鼓舞他人的力量,思想开明、适应力强,有很好的判断力,有处理紧急事务的才能,擅长哲学思考,富崇高的正义感,非常敏感而聪慧,喜爱自由、诚恳、正直、可靠、慎重。
       ★射手座缺点★
  个性敏感而有点浮躁,好吹嘘、喜夸张、没有责任感、反覆无常、有不安分的倾向、盲目而过分乐观、粗心、偏激、行事有些笨拙。
    </string>
    <string name ="摩羯座">
        ★摩羯座属性★
        阴性、土象星座,
        守护行星:土星
   摩羯座额头上的皱纹、蹙紧的浓眉及锐利的眼神,使他看来严肃而略显阴沉,令人有难以亲近的印象。
  ★摩羯座传说★
  汉密斯的儿子潘恩是半神之一,半神虽不如天神,但却仍远比人类卓越。牧神潘恩的丑,是连亲娘也嫌的,他头上长有山羊的耳朵和犄角,上半身是长毛的人形,下半身却是山羊的姿态,他最喜欢音乐,经常吹奏自己所制的苇笛。
  有一次,诸神在尼罗河岸设酒宴时,突然出现了一个怪物,诸天神都大惊失色,变成各种形态逃进河中,潘恩也急忙跳进水中避难,但由於过度惊慌失措,而无法完全变成一条鱼...这就是「摩羯星座」的由来。
  古代巴比伦有一名为依亚(Ea)的神仙,据说是「深海中的羚羊」,和摩羯座鱼尾羊身的形象相当吻合。
  ★摩羯座优点★
  保守、谨慎、实际、有责任感、可靠,机智、有主见、尊敬权威、看重自己,谨慎、有抱负、有耐心、守纪律。
  ★摩羯座缺点★
  悲观、善变、外表冷漠严肃、不易亲近、墨守成规、吝啬。
    </string>

    <string name ="水瓶座">
        ★水瓶座属性★
  水瓶座属性阳性、风象星座,
  守护行星:天王星(传统上为土星)
  水瓶座大多有着一双灵动的眼睛,高耸的鼻子和面积不小的嘴唇下颚线条柔和,略呈圆形,外表综合来说堪堪称得上是英俊美丽,却并不特别突出。生性悲天悯人,富有改革精神及高贵的情操,可惜有缺乏热情的缺点。
  ★水瓶座传说★
  特洛伊的王子干尼梅德(Ganymede)是个黄金般的美少年,有一天他在牧羊时,突然被宙斯(Juze)变成的老鹰捉到奥林帕斯(Olympus),负责嫁给海克力斯的西碧公主原所担任的斟酒工作。在古代的罗马,当太阳的位置在这个星座的第一个月为雨季,所以定名为水瓶。
  ★水瓶座优点★
  求知欲强、独立、博爱、友善、忠实、可靠、有创意、有远见、有智慧思想新颖、头脑敏锐、善於观察、富有改革精神。
  ★水瓶座缺点★
  个性怪异、过份执着、标新立异、易夸大问题、固执、墨守成规、不知变通、过於理想主义、倔强、偏激、叛逆、不合群。
    </string>

    <string name ="双鱼座">
        ★双鱼座属性★
  双鱼座属性阴性、水象星座
  守护行星:海王星
  双鱼座多半有浓密的棕色头发,而其温和、敏感的特质则全都显现在椭圆型的脸孔上。有弧形优美的额头、一双大而温润的眼睛、小巧的鼻子、丰满的双颊、尖型的下巴和充满感性的嘴唇以及优美的颈项,四肢匀称而纤细。
  ★双鱼座传说★
  维纳斯和丘比特有一次被巨人泰峰(Typhon)所追逐,双双跳入幼发拉底河中,化身为鱼逃走。蜜妮华(Mineave,典娜的别名)将鱼化为星辰置於天上,以纪念这件事。另有一说是其为困绑人鱼仙女阿蜜妮坦(Aminitum)和希玛(Simmah)的丝带。
  ★双鱼座优点★
  天真、清纯、温柔而富於直觉、谦虚、敏感、善解人意、感情丰富、脱俗、适应力强、仁慈、富有同情心、多才多艺。
  ★双鱼座缺点★
  粗心、浮躁、缺乏自信而意志薄弱、优柔寡断、散漫、不切实际。
    </string>
</resources>