技术汇总
前端
jsp 、jstl表达式、el表达式、JQuery框架。
后端
servlet、Tomcat服务器
完整代码及jar包
百度云链接:https://pan.baidu.com/s/1WiDbwTRcS5lR90rwiByRiQ
提取码:di7e
目录层级解析
src
    + dao
    	数据访问层层,操作数据库的最底层,只有最简单的CRUD操作。
    + domain
    	数据库实体类的包,存放着数据库的实体类以及javaBean对象的类。
    + service
    	业务逻辑层,调用dao中对数据库的简单操作,将各种简单操作组合,变成能满足我们各种需求的方法。
    + utils
    	工具类,包括数据库连接池的工具类以及各种测试代码。
    + web
    	表示层,完成与前端jsp及HTML界面的交互、资源共享与界面的跳转。
web
    + css
    + js
    + img
    + WEB-INF
    	存放着servlet的配置文件web.xml
    	# lib
    		存放各种jar包的目录
功能详解
登录
登录分析

使用用户输入的用户名及密码作为参数传递并查询数据库,如果返回了一个user对象,说明用户的账号密码正确,否则错误。
public User login(User requser) {
        String sql ="select * from user where username=? and password=?";
        try {
            User user = template.queryForObject(sql,
                    new BeanPropertyRowMapper<User>(User.class),
                    requser.getUsername(), requser.getPassword());
            return user;
        }catch (Exception e){
            e.printStackTrace();
            return null;
        }
    }
登录界面如图:
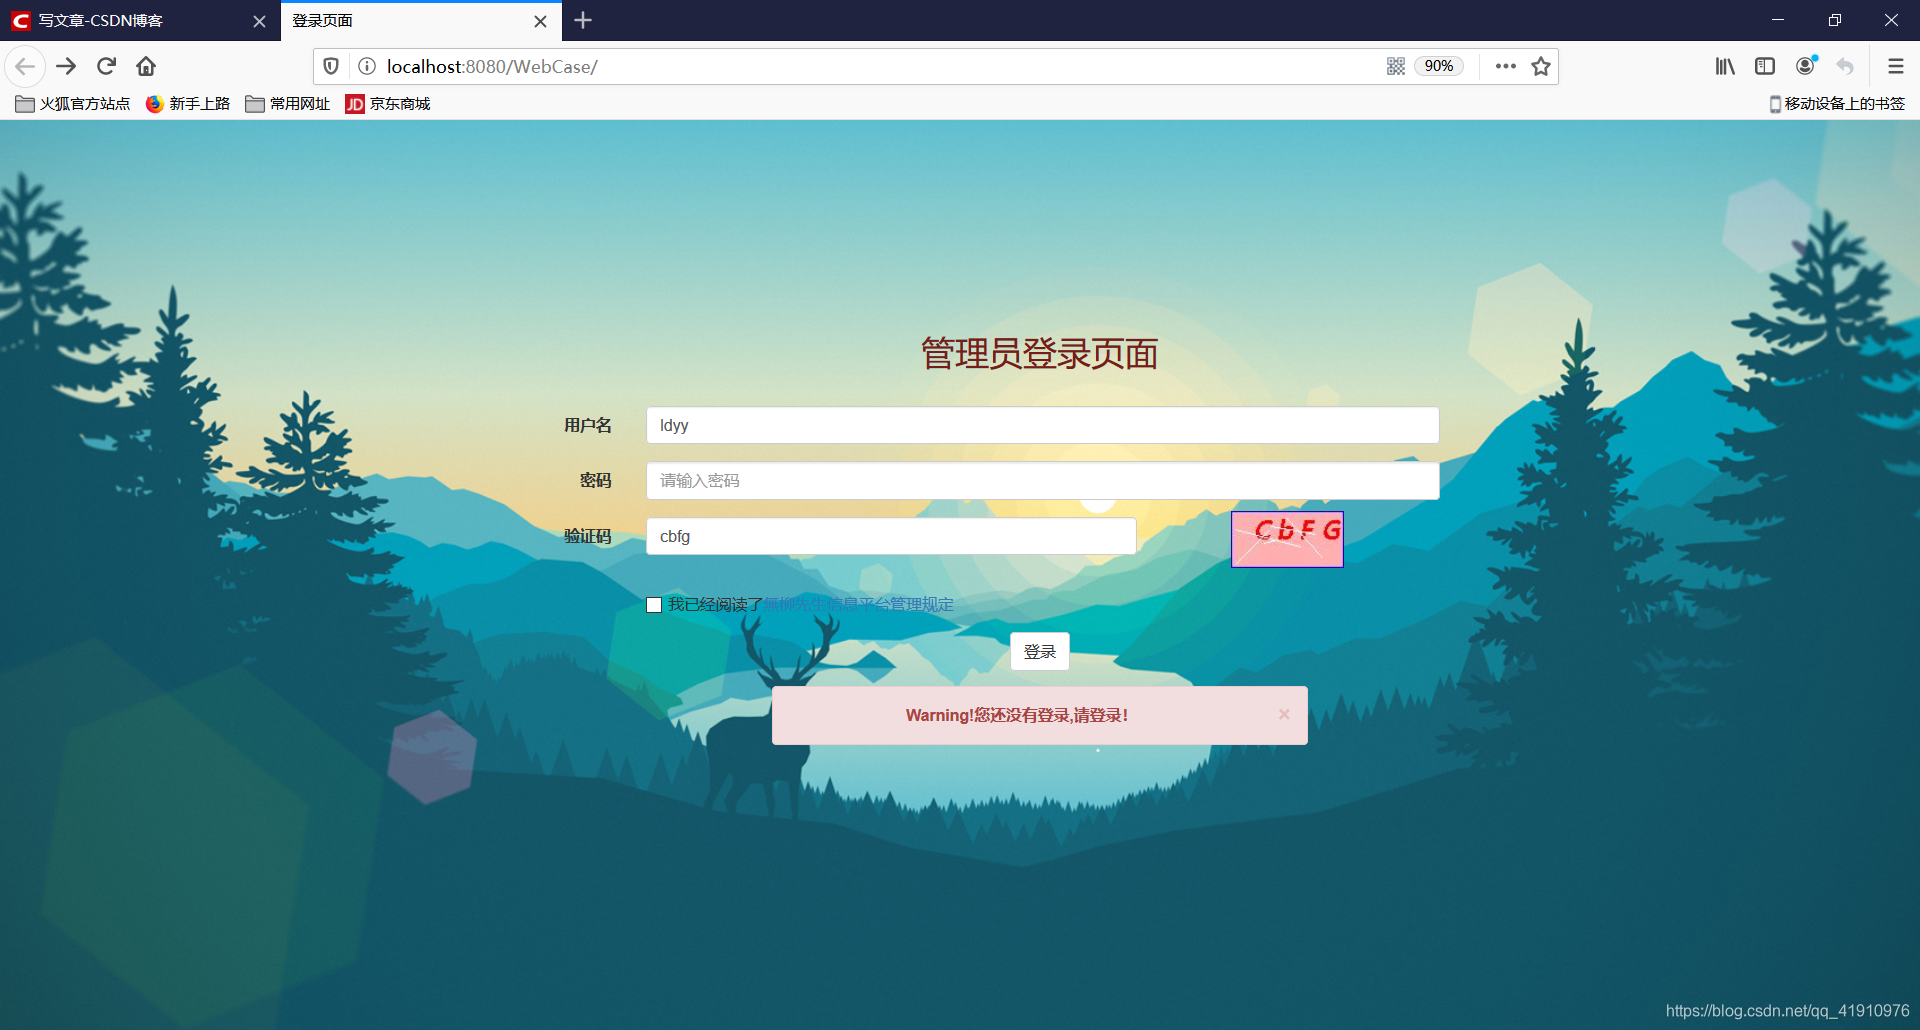
验证码
验证码分析:
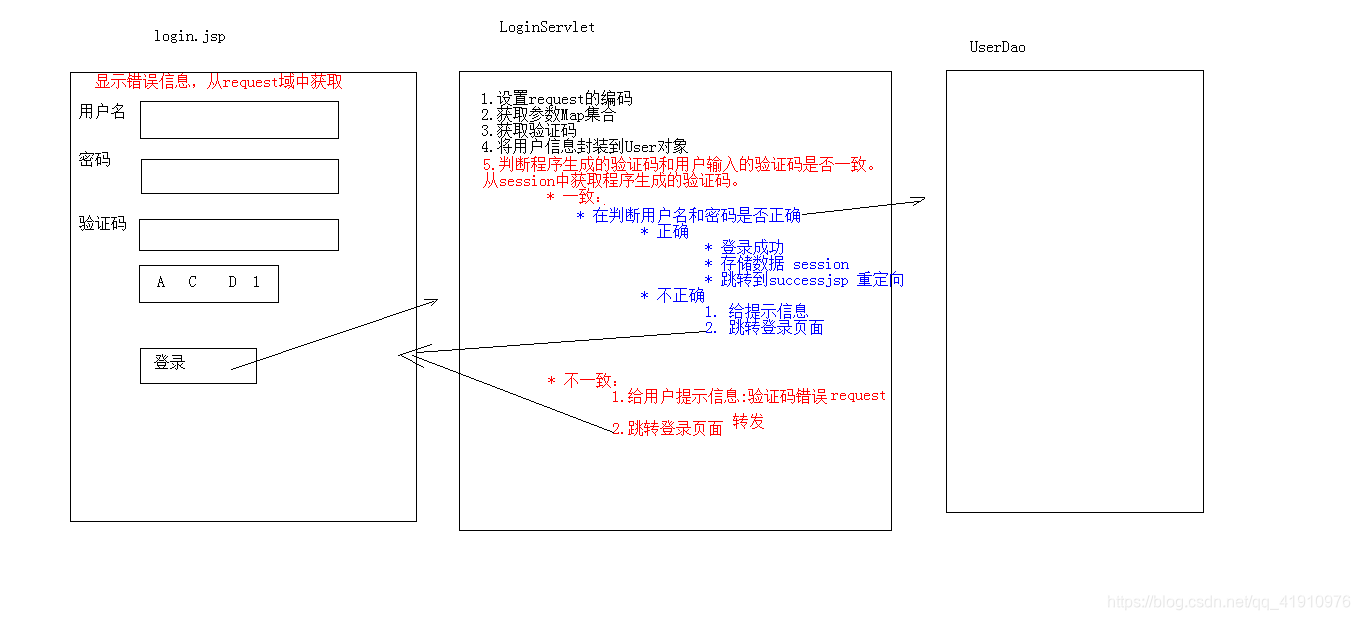
为了防止恶意注册和减轻服务器校验的压力,引入了验证码的校验机制,在LoginServlet中。每次校验账户会先判断验证码是否正确,如果验证码正确,才会校验用户账户。
验证码的创建如下:
        int width =100;
        int height =50;
        //创建一个对象,在内存中代表一个图片
        BufferedImage image = new BufferedImage(width,height,BufferedImage.TYPE_INT_BGR);
        //美化图片
        //获取画笔对象
        Graphics g =image.getGraphics();
        g.setColor(Color.PINK);
        g.fillRect(0,0,100,50);
        //画一个边框
        g.setColor(Color.BLUE);
        g.drawRect(0,0,width-1,height-1);
        //设置画笔大小,和字体
        g.setFont(new Font("微软雅黑", Font.BOLD | Font.ITALIC, 22));
        //写字符串
        String str = "ABCDEFGHIJKLMNOPQRSDUVWXYZabcdefghijklmnopqrsduvwxyz1234567890";
        Random ran = new Random();
        g.setColor(Color.RED);
        StringBuilder buff = new StringBuilder();
        //生产随机角标
        for(int i=1;i<=4;i++) {
            int index = ran.nextInt(str.length());
            char ch =str.charAt(index);
            buff.append(ch);
            g.drawString(ch+"",width/5*i,height/2);
        }
        HttpSession session = request.getSession();
        session.setAttribute("checkCode", buff.toString());
        //干扰线
        g.setColor(Color.WHITE);
        for(int j=0;j<5;j++){
            int x1=ran.nextInt(width);
            int x2=ran.nextInt(width);
            int y1=ran.nextInt(height);
            int y2=ran.nextInt(height);
            g.drawLine(x1,y1,x2,y2);
登录状态检测
该功能使用filter过滤器使没有登录的用户无法访问后面的页面,只有在用户登录后才能访问。
登录校验分析:

实现方法:
当用户成功登录时,会存储一个session对象在服务器中,过滤器只需要判断服务器中有没有该session对象即可,如果没有session对象,那么会自动跳转到登录界面,并且给出提示。
代码如下:
public void doFilter(ServletRequest req, ServletResponse resp, FilterChain chain) throws ServletException, IOException {
        HttpServletRequest request = (HttpServletRequest) req;
        String uri = request.getRequestURI();
        if (uri.contains("index") || uri.contains("/css/") || uri.contains("/js/") || uri.contains("/img/") || uri.contains("login") || uri.contains("checkCode")) {
            chain.doFilter(req, resp);
        }
        else {
            if(request.getSession().getAttribute("user")!=null){
                chain.doFilter(req, resp);
            }else {
                request.setAttribute("login_mgs", "您还没有登录,请登录!");
                request.getRequestDispatcher("/index.jsp").forward(req,resp);
            }
        }
    }
添加
添加功能分析:
 从表单中获取数据,作为参数传递,调用dao层的方法添加用户,返回数据库数据改变行数。如果该值为1,表示添加成功,否则添加失败。添加失败时,转发到添加页面,在提示框中给出添加失败提示。
添加功能dao层代码:
public int add(String[] add_in) {
        String sql ="insert into information value(null,?,?,?,?,?,?)";
        Object[] objs ={add_in[0],add_in[1],add_in[2],add_in[3],add_in[4],add_in[5]};
        try{
            return template.update(sql,objs);
        }catch (Exception e){
            e.printStackTrace();
            return 0;
        }
    }
删除
删除功能分析:
 用户点击删除按钮,会将该用户的id传入servlet,调用dao层删除该条信息。
为了避免误删的情况,做了警告框的提示,再次确定后,从数据库中删除该条记录。
前端代码如下:
<c:forEach items="${requestScope.pageBean.list}" var="information" varStatus="s">
<tr>
<td>
<label>
<input name="uid" value="${information.id}" type="checkbox" class="ssv3-checkbox"/>
</label>
</td>
<td>${s.count}</td>
<td>${information.name}</td>
<td>${information.gender}</td>
<td>${information.age}</td>
<td>${information.address}</td>
<td>${information.qq}</td>
<td>${information.email}</td>
<td>
<a class="btn btn-default btn-sm update" href="javaScript:updateUserInformation(${information.id})">修改</a>
<a class="btn btn-default btn-sm remove" href="javaScript:removeUserInformation(${information.id});">删除</a>
</td>
</tr>
</c:forEach>
遍历从数据库中查询到的存储user对象的集合list,并在删除按钮上添加了该条user信息的id。
删除选中
删除选中功能分析:
 在每条用户信息前都加入了一个复选框,可以在一个页面内实现一次删除多条记录。
在表头的复选框上加入了全选和全不选的事件。
删除选中前端代码:
<a id="selBox_sel" class="btn btn-primary" href="javascript:void(0);">删除选中</a>

document.getElementById("selBox_sel").onclick=function () {
            if(confirm("您确定要删除选中的条目吗?")){
                var flag =false;
                var uids = document.getElementsByName("uid");
                for (const uid of uids) {
                    if(uid.checked){
                        flag = true;
                    }
                }
                if(flag){
                    document.getElementById("sel_form").submit();
                }
            }
        }
删除选中如图:

点击删除选中,遍历所有复选框被选中的用户,执行删除操作。
修改
修改功能分析:

点击修改按钮时跳转到修改页面,回显当前用户的信息(用el表达式从request域中取出相应的数据,置为value,显示在屏幕上),对于name,默认不能修改,将文本框的属性置为 readonly。
前端代码如下:
<div class="container" style="width: 400px;">
<h3 style="text-align: center;">修改联系人</h3>
<form action="${pageContext.request.contextPath}/updateServlet?id=${requestScope.userInf.id}" method="post">
<div class="form-group">
<label for="name">姓名:</label>
<input type="text" class="form-control" id="name" name="name" readonly="readonly" value="${requestScope.userInf.name}" />
</div>
<div class="form-group">
<c:if test="${requestScope.userInf.gender=='男'}">
<label>性别:
<input type="radio" name="gender" value="男" checked />男
<input type="radio" name="gender" value="女" />女
</label>
</c:if>
<c:if test="${requestScope.userInf.gender=='女'}">
<label>性别:
<input type="radio" name="gender" value="男" />男
<input type="radio" name="gender" value="女" checked />女
</label>
</c:if>
</div>
<div class="form-group">
<label for="age">年龄:</label>
<input type="text" class="form-control" id="age" name="age" value="${requestScope.userInf.age}" />
</div>
<div class="form-group">
<label for="address">籍贯:</label>
<select id="address" name="address" class="form-control" >
<option value="湖北武汉">湖北武汉</option>
<option value="湖南长沙">湖南长沙</option>
<option value="江苏南京">江苏南京</option>
<option value="四川成都">四川成都</option>
<option value="贵州贵阳">贵州贵阳</option>
<option value="云南昆明">云南昆明</option>
<option value="广西南宁">广西南宁</option>
<option value="西藏拉萨">西藏拉萨</option>
<option value="浙江杭州">浙江杭州</option>
<option value="江西南昌">江西南昌</option>
<option value="广东广州">广东广州</option>
<option value="福建福州">福建福州</option>
...
</select>
</div>
<div class="form-group">
<label for="qq">QQ:</label>
<input id="qq" type="text" class="form-control" name="qq" value="${requestScope.userInf.qq}"/>
</div>
<div class="form-group">
<label for="email">Email:</label>
<input id="email" type="text" class="form-control" name="email" value="${requestScope.userInf.email}"/>
</div>
<div class="form-group">
<div style="width: 70%;margin: auto" class="alert alert-info alert-dismissible" role="alert">
<button type="button" class="close" data-dismiss="alert" aria-label="Close"><span aria-hidden="true">×</span></button>
<strong>Warning!${requestScope.update_mgs}</strong>
</div>
</div>
<div class="form-group" style="text-align: center">
<input class="btn btn-primary" type="submit" value="提交" />
<input id="reset" class="btn btn-default" type="reset" value="重置" />
<input id="back" class="btn btn-default" type="button" value="返回"/>
</div>
</form>
</div>
分页查询功能
分页查询功能分析(默认每页十条数据):


登录成功后默认跳转到显示所有信息的主页面,如下图:
 分页查询dao代码:
	//查询数据库记录数
	@Override
    public int findTotalCount() {
        String sql="select count(*) from information";
        return template.queryForObject(sql,Integer.class);
    }
	//查询该页显示的user并封装为List集合
    @Override
    public List<Information> findByPage(int start , int rows) {
        String sql ="select * from information limit ? , ?";
        return template.query(sql , new BeanPropertyRowMapper<>(Information.class),start,rows);
    }
条件查询
条件查询功能分析:
 提取表单中的内容,组合为一组模糊查询的条件,若是不填,该条件为null。调用dao层查询数据库,返回该模糊查询的记录总数以及该页面应该显示的user集合List,遍历list集合输出到页面上,即为所得。
查询数据库代码如下:
	//重写上述的方法,返回最大记录数
    @Override
    public int findTotalCount(List<Object> list) {
        //System.out.println(list.toString());
        String sql="select count(*) from information where name like ? and address like ? and email like ?";
        return  template.queryForObject(sql,Integer.class,list.toArray());
    }
    //重写上述方法,返回该页显示的user封装成的List集合
    @Override
    public List<Information> findByPage(int start, int rows, List<Object> list) {
        list.add(start);
        list.add(rows);

        String sql ="select * from information where name like ? and address like ? and email like ? limit ? , ?" ;

        return template.query(sql,new BeanPropertyRowMapper<Information>(Information.class), list.toArray());
    }
mySQL表如下:
user表
CREATE TABLE user(
id INT PRIMARY KEY AUTO_INCREMENT,
username VARCHAR(20) NOT NULL,
PASSWORD VARCHAR(32) NOT NULL
);
information表
CREATE TABLE information(
id INT PRIMARY KEY AUTO_INCREMENT,
NAME VARCHAR(10) NOT NULL,
gender VARCHAR(4) NOT NULL,
age INT NOT NULL,
address VARCHAR(32) NOT NULL,
qq VARCHAR(20) NOT NULL,
email VARCHAR(32) NOT NULL
);