写在前面
GaussDB的产品,最初GaussDB的产品定义有三大产品线系列GaussDB 100、GaussDB 200、GaussDB300,简单介绍下:
1)GaussDB 100:主要以OLTP为主。目前该产品已经应用在招商银行。在 2020年6月,将会开源单机版本;
2)GaussDB 200:以OLAP为主,兼顾OLTP。该产品以 PostgreSQL 为出发点,面向 MPP 研发,目前已经在工商银行得到上线应用。
3)GaussDB 300:以 HTAP 为方向,是企业级分布式HTAP数据库(Hybrid Transaction and Analytical Process,混合事务和分析处理),民生银行尝试使用。
2019年10月左右,华为 GaussDB 的命名再次调整:
GaussDB 100 ,更名为 GaussDB T ,以 OLTP 和集群为方向;
GaussDB 200 合并 300 的部分设计,更名为 GaussDB A,以分析型为主方向;
GaussDB 300,型号取消,涉及功能并入 100 或 200 。
以下是官网下载地址:
https://support.huawei.com/enterprise/zh/software/index.html
01环境准备
说说我的环境:windows10开虚机,CentOS7.4(目前最高支持到此版本,请特别注意版本) ,大约10G内存 ,4 core
你要是是CentOS系统的话,可以使用命令:
[root@GaussDB200 ~]# cat /etc/redhat-release
CentOS Linux release 7.4.1708 (Core)
[root@GaussDB200 ~]#
再次说明请特别注意版本,不然后面还是白搭!!!
CentOS-7-x86_64-DVD-1708.iso (我是使用的这个 直接谷歌就方便下载到)
[root@localhost ~]# free -h
              total        used        free      shared  buff/cache   available
Mem:           9.4G        165M        9.1G        8.5M        136M        9.0G
Swap:           15G          0B         15G
[root@localhost ~]#

[root@localhost ~]#  cat /proc/cpuinfo | grep name | cut -f2 -d: | uniq -c
      4  Intel(R) Core(TM) i5-5200U CPU @ 2.20GHz
[root@localhost ~]#
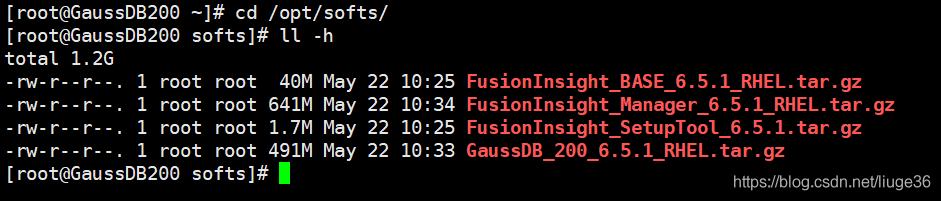
1.1 软件准备:
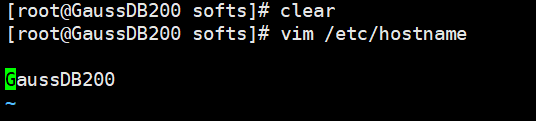
1.2 修改主机名:(修改后reboot一下)
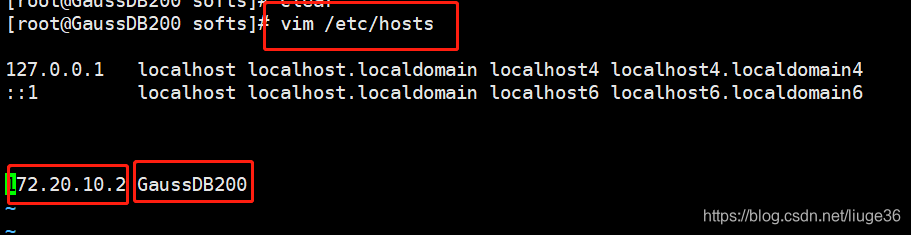
1.3 修改hosts文件:
1.4 修改OS参数:
vim /etc/sysctl.conf
vm.min_free_kbytes = (free -k|grep Mem|awk ‘{print $2}’)*5%

官方解释:强制Linux虚拟内存保留空闲空间的最小值,系统总内存的5%
1.5 安装依赖包:(防止缺包情况)
yum install -y OpenIPMI openldap \
openldap-clients openldap-servers perl-Perlilog procmail python-dateutil \
python-dmidecode python-gudev python-simplejson pytz \
sdparm
提示:官方要求GaussDB200至少需要3个节点来安装,但此为测试练手使用,所以修改了参数文件的节点数,如需要部署多节点,配置文件请使用官方配置文件生成器进行生成
1.6 检查OS编码格式是否为en_US.UTF-8
否的话,需要修改vim /etc/locale.conf
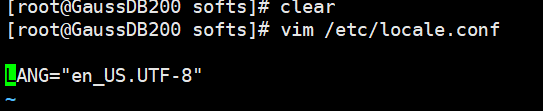
修改之后,reboot一下生效。
1.7 挂载操作系统镜像(补充):以root用户登录主机,执行命令:mount 虚拟光盘文件名 /media/ -o loop
如:sudo mount -t iso9660 -o loop /opt/softs/CentOS-7-x86_64-DVD-1708.iso /media/
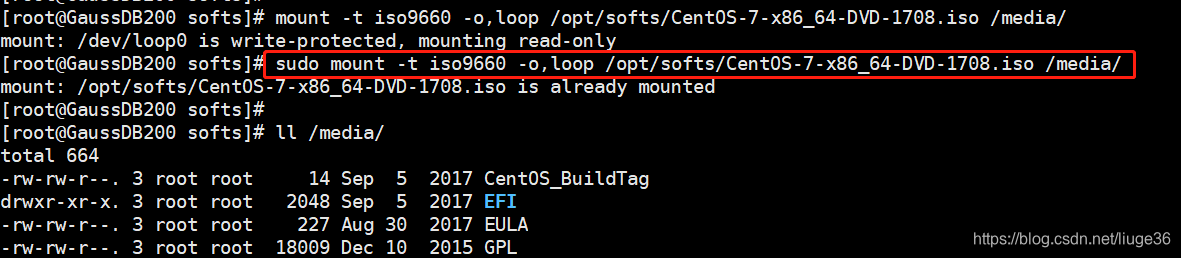
注意:挂在使用的镜像必须与服务器系统同版本,如挂载提示readonly方式挂载,可在命令前加sudo 进行重试。根节点下media内有文件则证明挂载成功。
02安装GaussDB 200
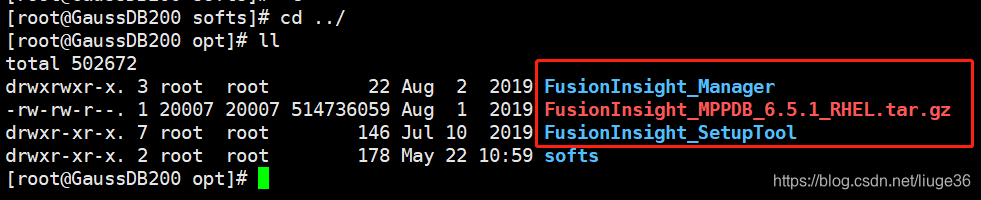
2.1 解压/opt/softs 目录下准备的几个文件到/opt
[root@GaussDB200 softs]# tar -zxvf GaussDB_200_6.5.1_RHEL.tar.gz -C ../
[root@GaussDB200 softs]# tar -zxvf FusionInsight_Manager_6.5.1_RHEL.tar.gz -C ../
[root@GaussDB200 softs]# tar -zxvf FusionInsight_SetupTool_6.5.1.tar.gz -C ../
查看解压结果
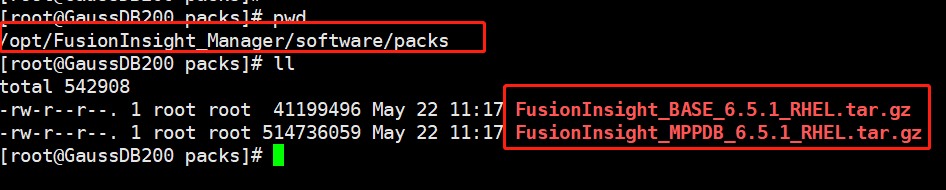
2.2 拷贝安装包
将除Manager外的其他部件包拷贝至/opt/FusionInsight_Manager/software/packs 路径下
使用
mkdir -p /opt/FusionInsight_Manager/software/packs 创建目录结果
[root@GaussDB200 opt]# cp FusionInsight_MPPDB_6.5.1_RHEL.tar.gz /opt/FusionInsight_Manager/software/packs/
[root@GaussDB200 softs]# cp FusionInsight_BASE_6.5.1_RHEL.tar.gz /opt/FusionInsight_Manager/software/packs/
得到如下结果:
2.3 进行预安装配置
将要安装GaussDB 200的节点上的“/opt/FusionInsight_SetupTool/preset”文件夹拷贝至节点的“/opt”目录下,此步骤为必须强制执行,并执行sh /opt/preset/preset.sh命令 如:
[root@GaussDB200 ~]# cd /opt/
[root@GaussDB200 opt]# ll
total 502672
drwxrwxr-x. 3 root  root         22 Aug  2  2019 FusionInsight_Manager
-rw-rw-r--. 1 20007 20007 514736059 Aug  1  2019 FusionInsight_MPPDB_6.5.1_RHEL.tar.gz
drwxr-xr-x. 7 root  root        146 Jul 10  2019 FusionInsight_SetupTool
drwxr-xr-x. 2 root  root        178 May 22 10:59 softs
[root@GaussDB200 opt]# cp -r /opt/FusionInsight_SetupTool/preset/ /opt/
[root@GaussDB200 opt]# ll
total 502672
drwxrwxr-x. 3 root  root         22 Aug  2  2019 FusionInsight_Manager
-rw-rw-r--. 1 20007 20007 514736059 Aug  1  2019 FusionInsight_MPPDB_6.5.1_RHEL.tar.gz
drwxr-xr-x. 7 root  root        146 Jul 10  2019 FusionInsight_SetupTool
drwxr-xr-x. 4 root  root        100 May 22 11:34 preset
drwxr-xr-x. 2 root  root        178 May 22 10:59 softs
[root@GaussDB200 opt]# sh /opt/preset/preset.sh
start to preSet
success to preSet.
[root@GaussDB200 opt]#
2.4 编辑FusionInsight_SetupTool相关配置文件
执行命令:vim /opt/FusionInsight_SetupTool/preinstall/preinstall.ini
## Description: FusionInsight Preinstall Configuration

## Type:        List
## Default:     ""
#
# Description: A list of host names or IP addresses.
# Examples:
#   g_hosts="10.18.40.[1-5]"
#   g_hosts="10.18.[10-12].[1-200],192.188.45.[1-5,40],host[1-100]"
#
g_hosts="192.168.31.72"

## Type:        Integer
## Default:     0
#
#
# Description: Disk formatting options.
#              0 Don't Format
#              1 Format the disk (Don't force)
#              2 Force to format the disk
#              3 Don't Format, Just install diskmgt
#
g_parted=0

## Type:        List
## Default:     ""
#
# Description: Disk format configuration.
#              if g_parted is 1 or 2, g_parted_conf not null
# Examples:
#
#   g_parted_conf="
#   10.18.40.[1-3]:master.ini;
#   10.18.40.[4-10],host[1-100]:slave.ini;
#   host[101-200]:test.ini
#   "
#   g_parted_conf="10.18.40.[4-5]:master.ini;10.18.40.[6-7]:slave.ini;10.18.40.8:null.ini"
#
# Remarks: 1.Partition configuration file (master.ini, slave.ini, null.ini ..)
#            in partition/ini directory.
#
#          2.Partition configuration file support custom.
#
#          3.Nodes this don't need to format must be configured to null.ini.
g_parted_conf="192.168.31.72:null.ini"

## Type:        List
## Default:     ""
#
# Description: hostname configuration. g_hostname_conf not null
# Examples:
#
#   g_hostname_conf="
#   10.18.40.1:10.18.41.1:host1;
#   10.18.40.2:10.18.41.2:;
#   10.18.40.3:10.18.41.3:host3;
#   "
#   g_hostname_conf="10.18.40.1:10.18.41.1:host1;10.18.40.2:10.18.41.2:;10.18.40.3:10.18.41.3:host3;"
#
# Remarks: 1. g_hostname_conf="OMIP:BusinessIP:HostName"
#
#          2. If you do not intend to configure the host name , then set the host name empty.
#             g_hostname_conf="OMIP:BusinessIP:"
#             g_hostname_conf=";10.18.40.2:10.18.41.2:"
#
g_hostname_conf="192.168.31.72:192.168.31.72:GaussDB200"

## Type:        Boolean
## Default:     1
#
#
# Description: Add missing RPM packages.
#              0  No.
#              1  Yes.
#
g_add_pkg=1

## Type:        Directory
## Default:     ""
#
# Description: The Source of RPM packages
#              if g_add_pkg is 1, g_pkgs_dir not null.
# Examples:
#
#   g_pkgs_dir="redhat-6.4:/media/redhat/;suse-11.1:/media/suse11-1/"
#
#   g_pkgs_dir="redhat-6.4:/media/"
#
#   g_pkgs_dir="suse-11.1:/media/"
#
#   g_pkgs_dir="centos-6.4:/media/"
#
#   g_pkgs_dir="euleros-2.0sp2:/media/"
#
#   g_pkgs_dir="euleros-2.0:/media/"
#
# Remarks: Mount iso file command:
#          mount rhel-server-6.4-x86_64-dvd.iso /media/ -o loop
#
g_pkgs_dir="centos-7.4:/media/"

## Type:        Boolean
## Default:     1
#
#
# Description: turn off swap.
#              0  No, do nothing.
#              1  Yes, will turn off swap.
#
g_swap_off=1

## Type:        String
## Default:     "root"
#
# Description:  SSH service login name.
#
g_user_name="root"

## Type:        Integer
## Default:     22
#
# Description: SSH service port.
#
g_port=22

## Type:        File
## Default:     "/tmp/fi-preinstall.log"
#
# Description:  Log file.
#
g_log_file="/opt/guassdb-log/fi-preinstall.log"

## Type:        Boolean
## Default:     1
#
#
# Description: check before preinstall.
#              0  No.
#              1  Yes.
#
g_check=1

## Type:        Boolean
## Default:     1
#
#
# Description: Open the debug mode.
#              0  No.
#              1  Yes.
#
g_debug=0

## Type:        Boolean
## Default:     0
#
# Description: disable/enable WCE
#              0 disable WCE
#              1 enable WCE
#
g_wce_conf=0

## Type:        String
## Default:     ""
#
# Description:  Check the processor type.
#
# Examples:
#
#   g_platform="x86_64"
#
#   g_platform="aarch64"
#
g_platform="x86_64"

## Type:        String
## Default:     ""
#
# Description:  install products type.
#
# Examples:
#
#   g_optimize="default"
#
#
g_optimize="default"

## Type:        Boolean
## Default:     "0"
#
# Description:  use kms encrypt luks
#               0 no
#               1 yes
#
# Examples:
#   g_kms_conf=0
#
g_kms_conf=0

## Type:        Boolean
# Default:      0
#
#
# Description: open the core dump
#              0  No
#              1  Yes
g_core_dump=0

## Type:        String
# Default:      "/var/log/core"
#
#
# Description: core dump file dir
# e.g. "/var/log/core"
#
g_core_dump_dir="/var/log/core"
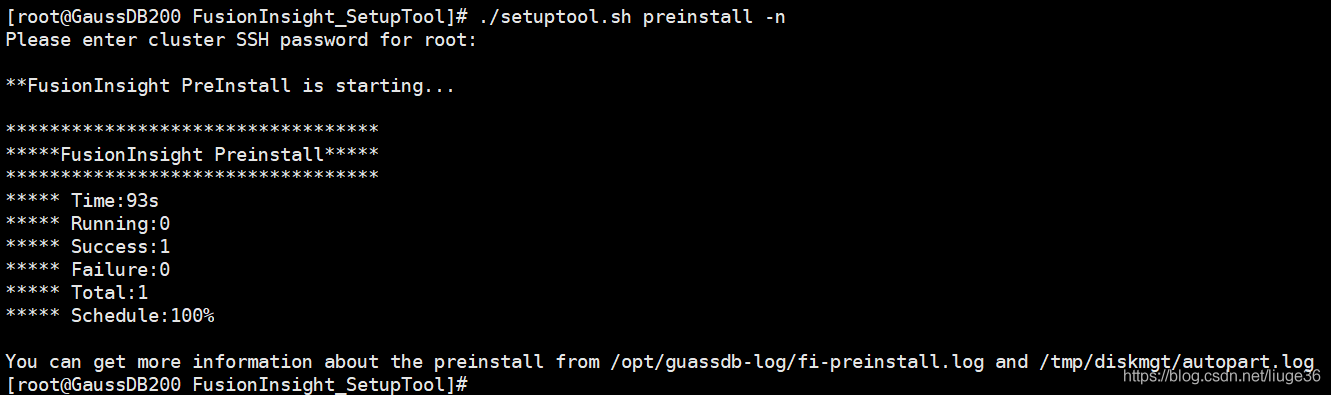
2.5 配置并检查安装环境
[root@host0 FusionInsight_SetupTool]# cd /opt/FusionInsight_SetupTool
# 执行自动检测脚本
[root@host0 FusionInsight_SetupTool]# ./setuptool.sh preinstall -n

一定要加-n 参数,setuptool.sh 脚本中有解释该选项作用

when the -n parameter is used, the precheck.sh script will not be
executed after the preinstall.sh script is executed。

如果这里不加-n 会自动调用 precheck.sh,因为本案例是单服务器安装GaussDB 200,不满足官方推荐的 3个节点,故无法通过precheck.sh预安装验证,所以要加-n跳过。
2.6 安装FusionInsight_Manager
2.6.1 进入Manager安装目录
[root@GaussDB200 ~]#  cd /opt/FusionInsight_Manager/software
[root@GaussDB200 software]# vim install.ini
[HA]
    ha_mode=single
    local_ip1=172.20.10.6
    local_ip2=
    local_ip3=
    local_ip4=
    peer_ip1=
    peer_ip2=
    peer_ip3=
    peer_ip4=
    ws_float_ip=
    ws_float_ip_interface=
    ws_float_ip_netmask=
    ws_gateway=
    om_float_ip=
    om_float_ip_interface=
    om_float_ip_netmask=
    om_gateway=
    ntp_server_ip=
    om_mediator_ip=
    sso_ip=
    sso_port=
    #配置集群服务的home目录
    bigdata_home=/opt/GaussDB200/app
    #配置集群的数据目录
    bigdata_data_home=/opt/GaussDB200/data
    cluster_nodes_scale=
    tls_protocol_min=
    realm_parse_ip=
    kerberos_realm=
[/HA]
2.6.2 创建上述目录
[root@GaussDB200 ~]# mkdir -p /opt/GaussDB200/app
[root@GaussDB200 ~]# mkdir -p /opt/GaussDB200/data
[root@GaussDB200 ~]#
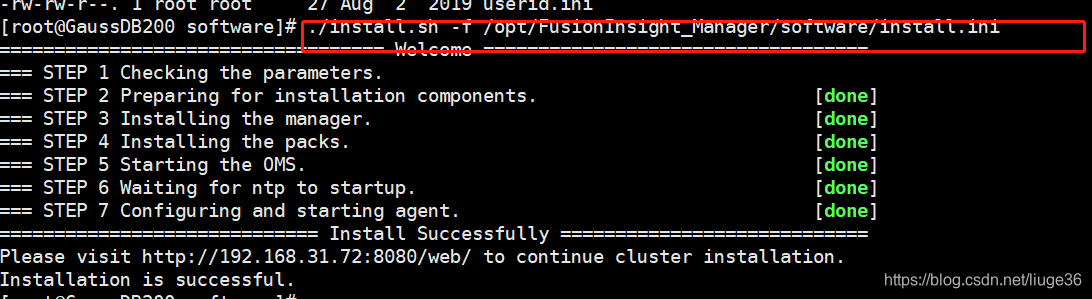
2.6.3 执行如下命令开始安装
高能预警:这一步比较吃内存和cpu
./install.sh -f /opt/FusionInsight_Manager/software/install.ini
上面这一步,我在公司的时候没能跑出来结果,CPU温度一直很高,跑失败了
没错,这里我回到了家里(注意IP发生了变化,其余操作一样)。就出现了这样的场景

这个物理外挂效果还是蛮不错滴~
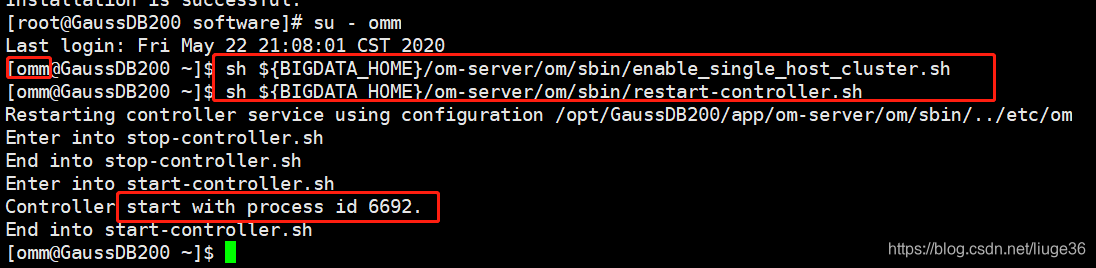
2.6.4 切换至OMM用户
su - omm
- 执行单机实例配置脚本
sh ${BIGDATA_HOME}/om-server/om/sbin/enable_single_host_cluster.sh
- 重启controller
sh ${BIGDATA_HOME}/om-server/om/sbin/restart-controller.sh
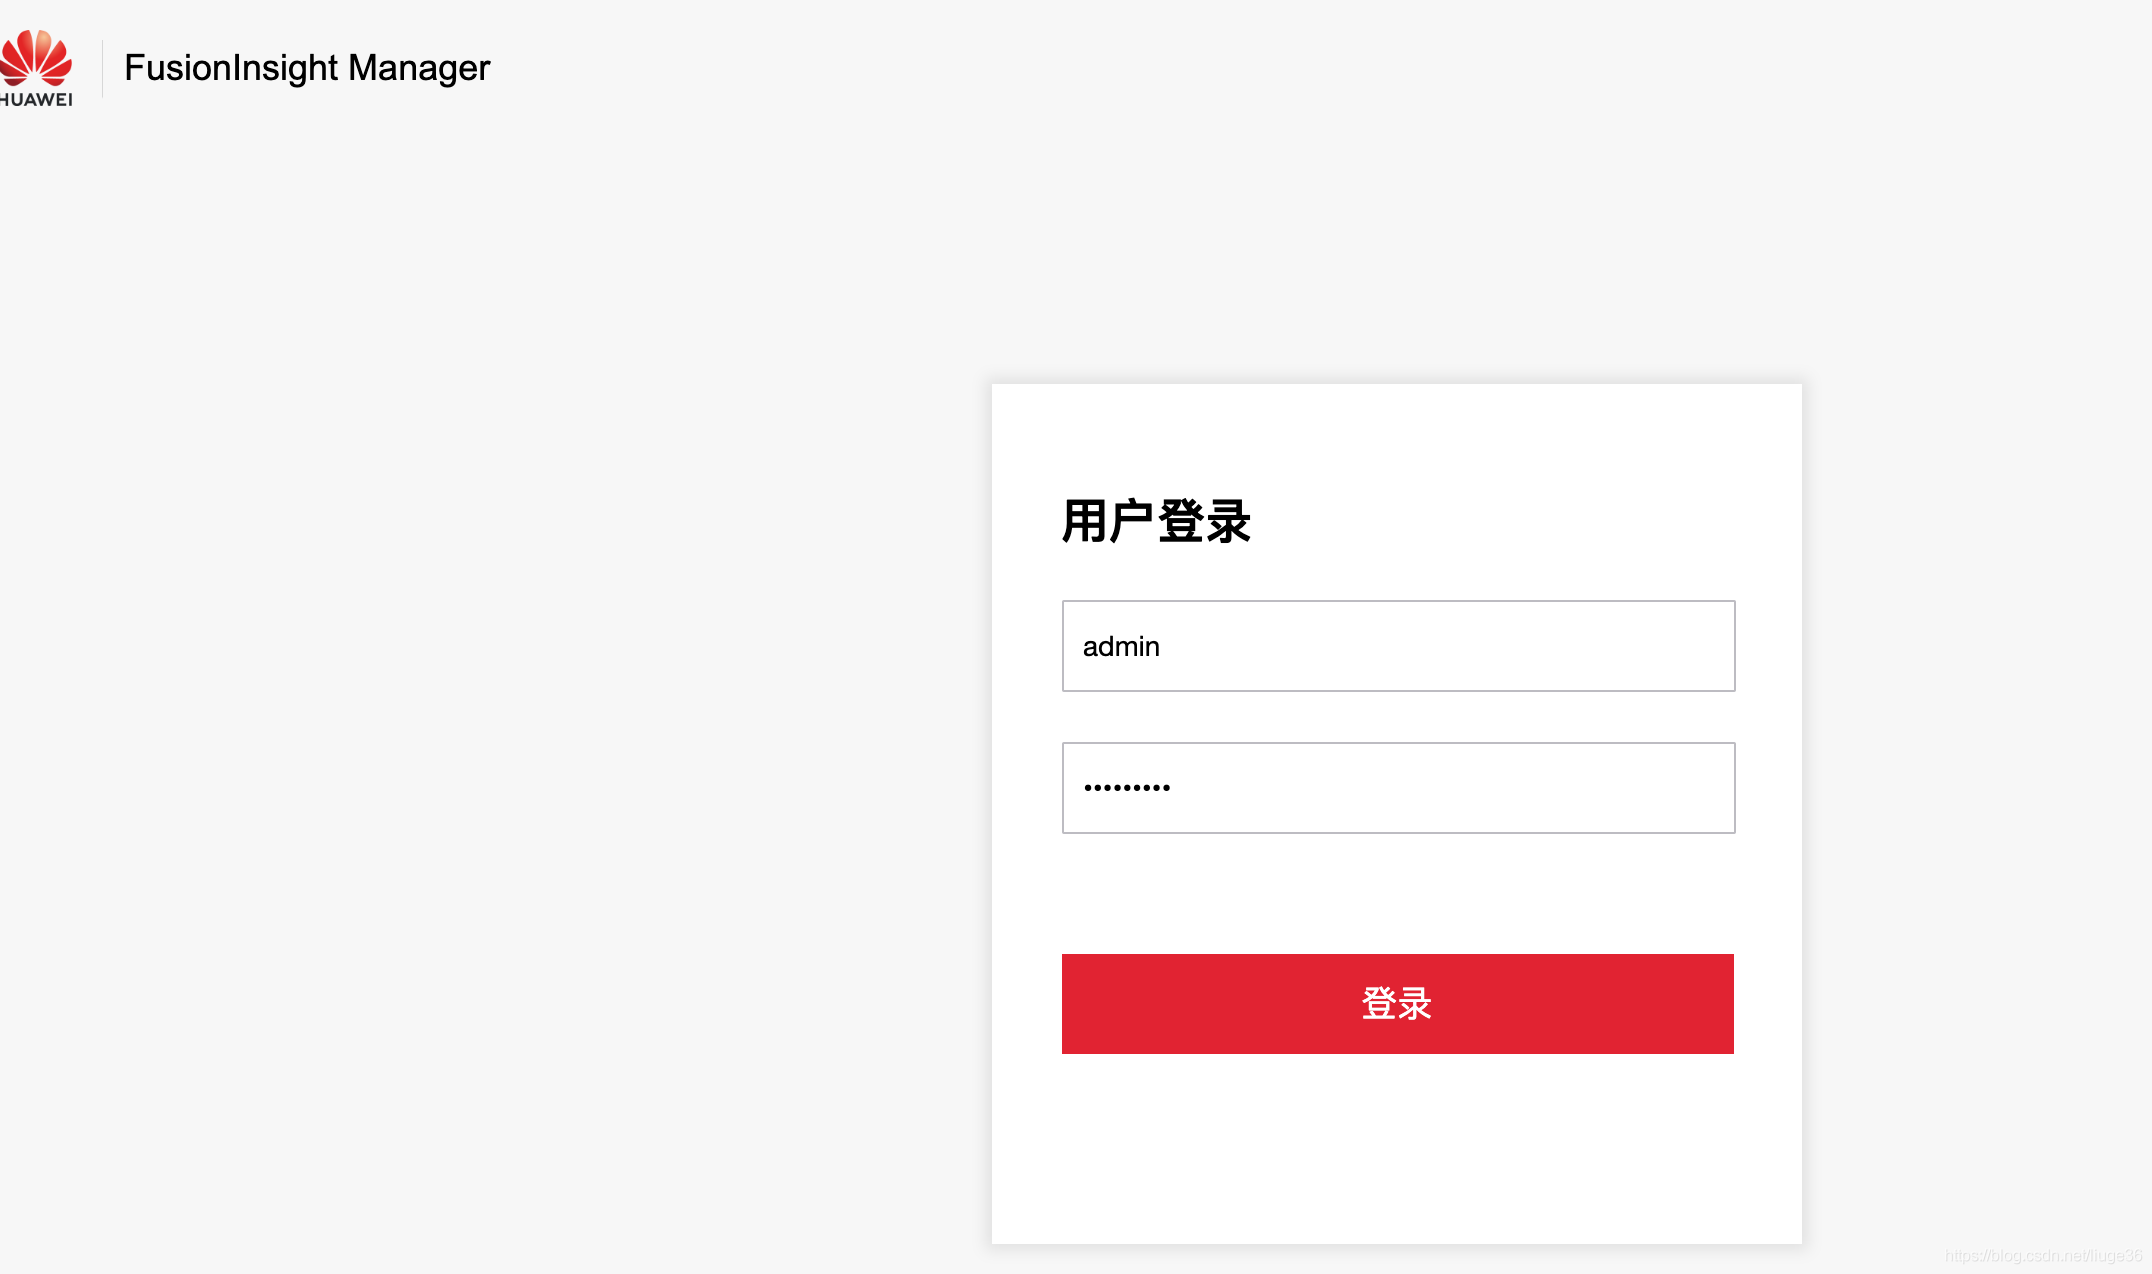
03 进入登录界面,安装集群与服务
输入上面提示的集群链接:http://192.168.31.72:8080/web/ 默认密码admin/Admin@123
第一步会提示修改密码,请按步骤操作
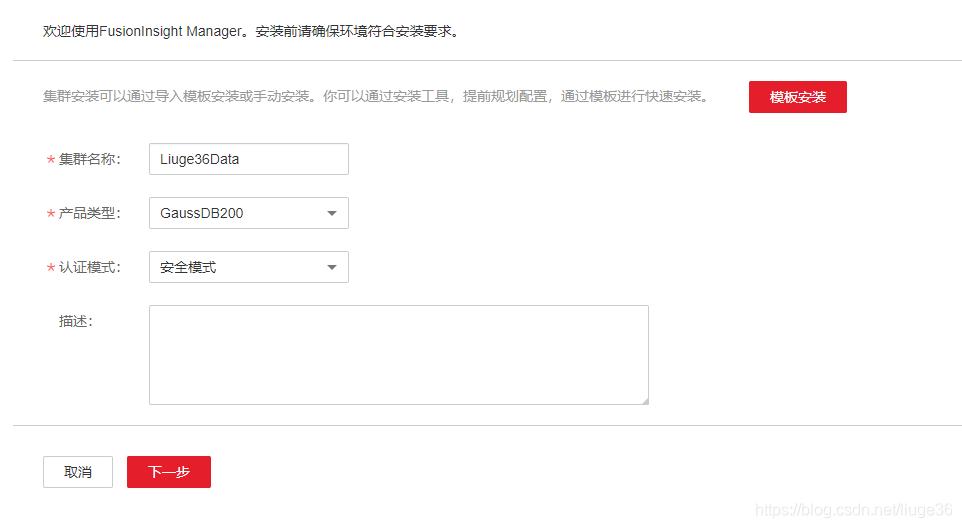
第二步点击创建集群,
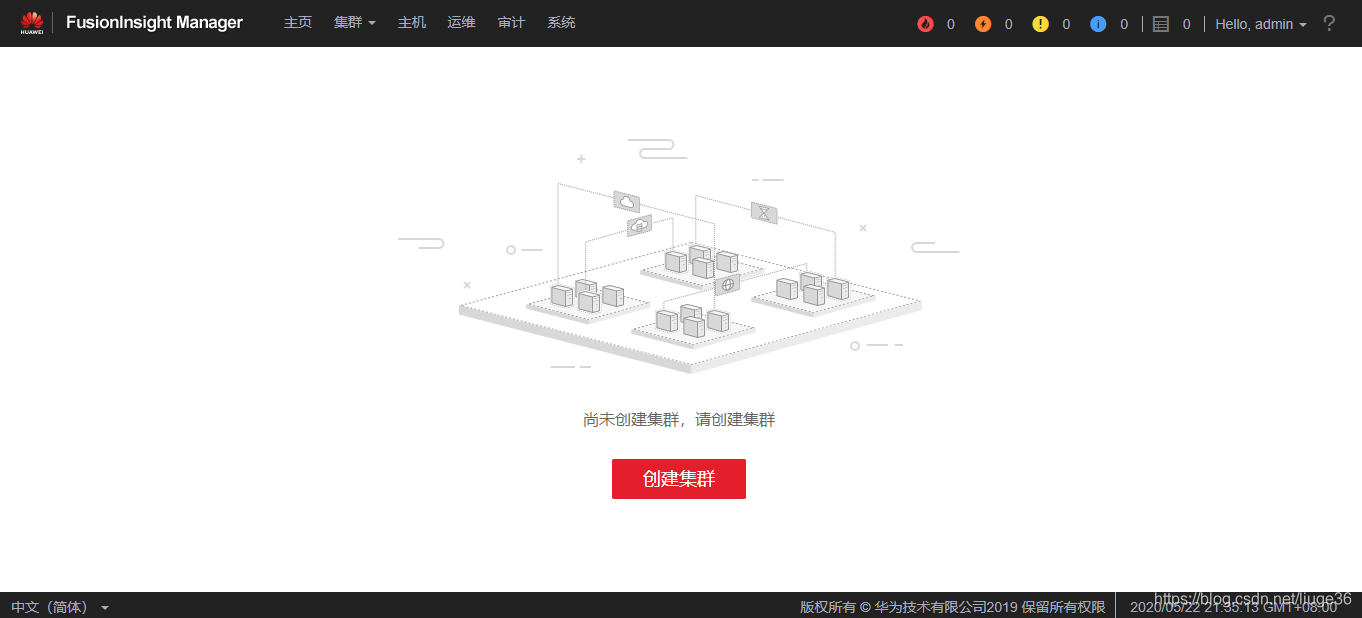
请参照图片进行配置,如无特殊操作,默认下一步。
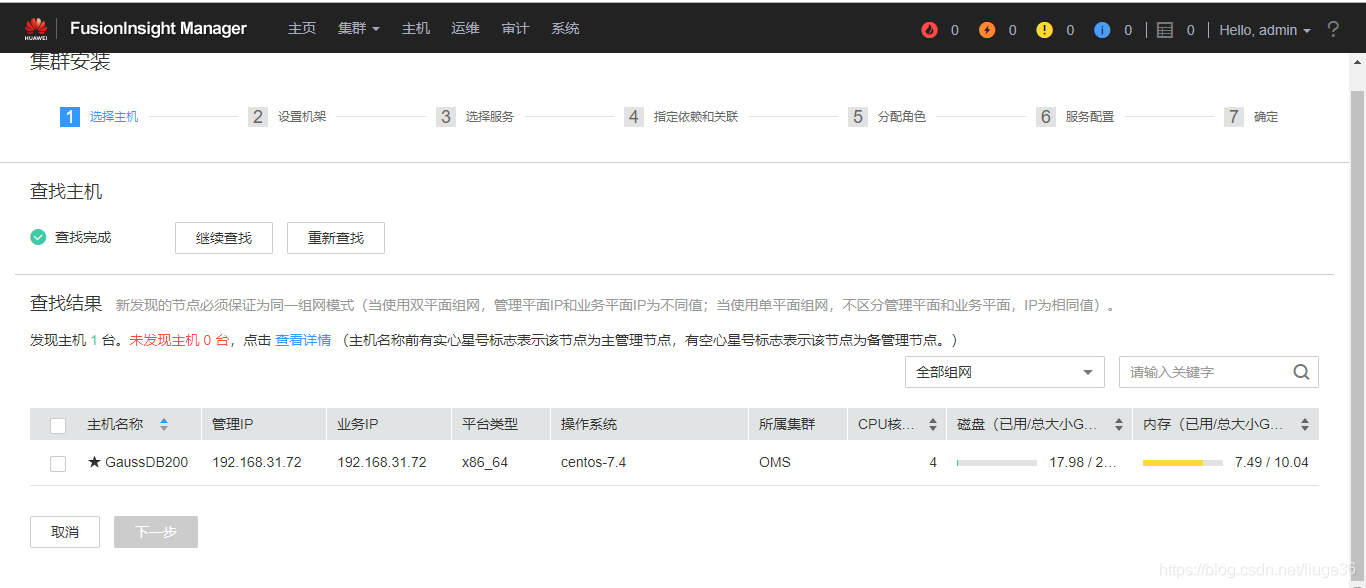
点击下一步,接着,查找主机(输入你的IP和root的密码)
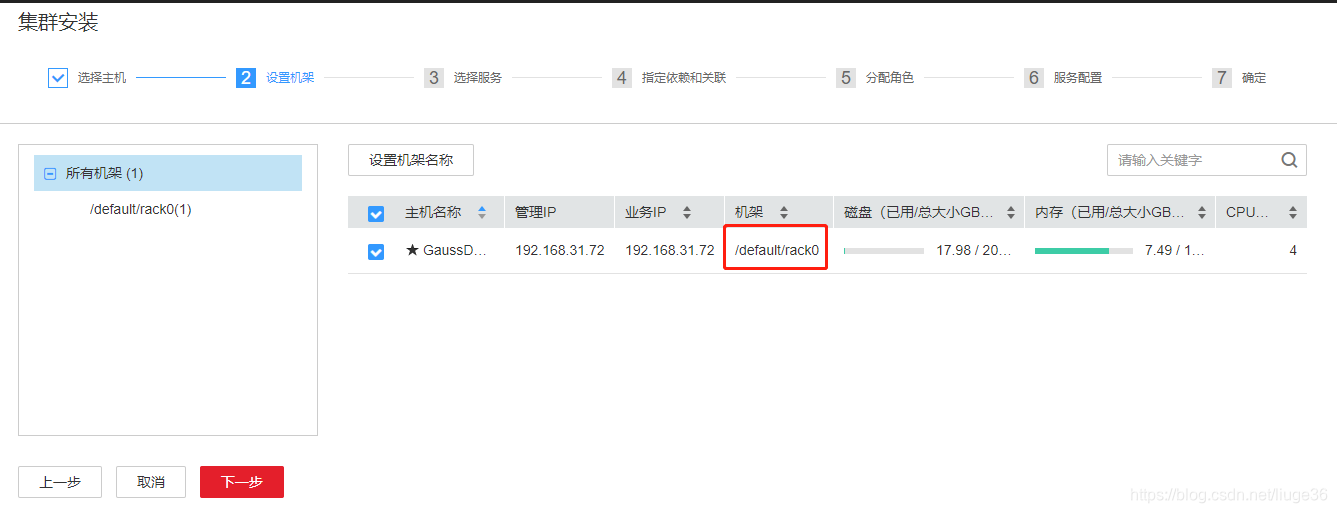
设置机架(默认就好)
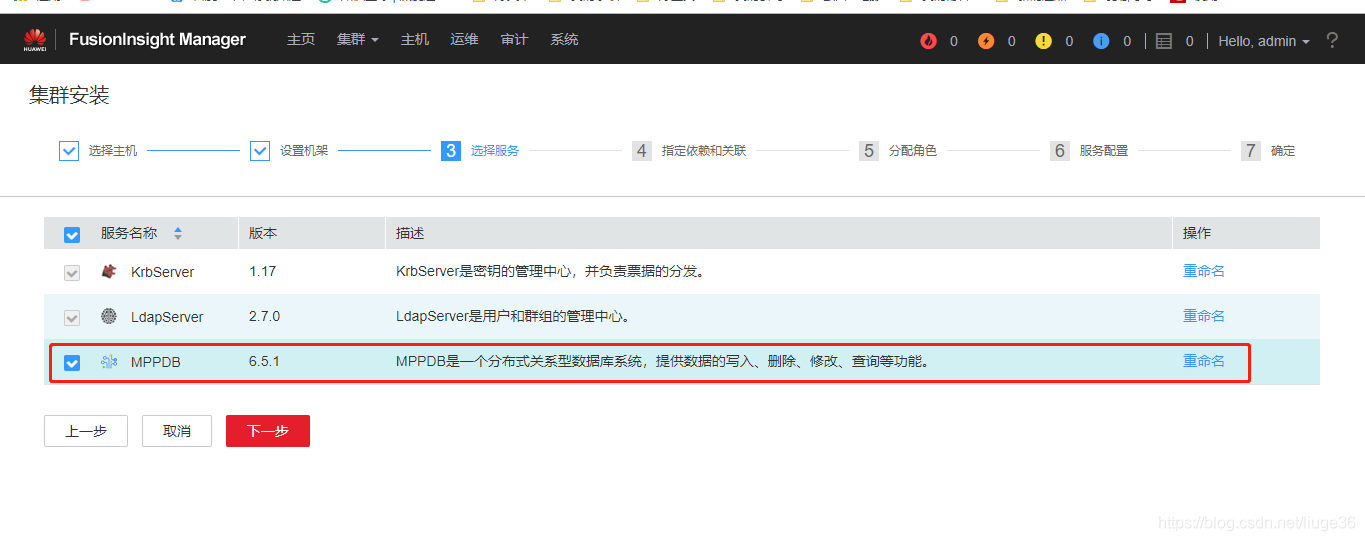
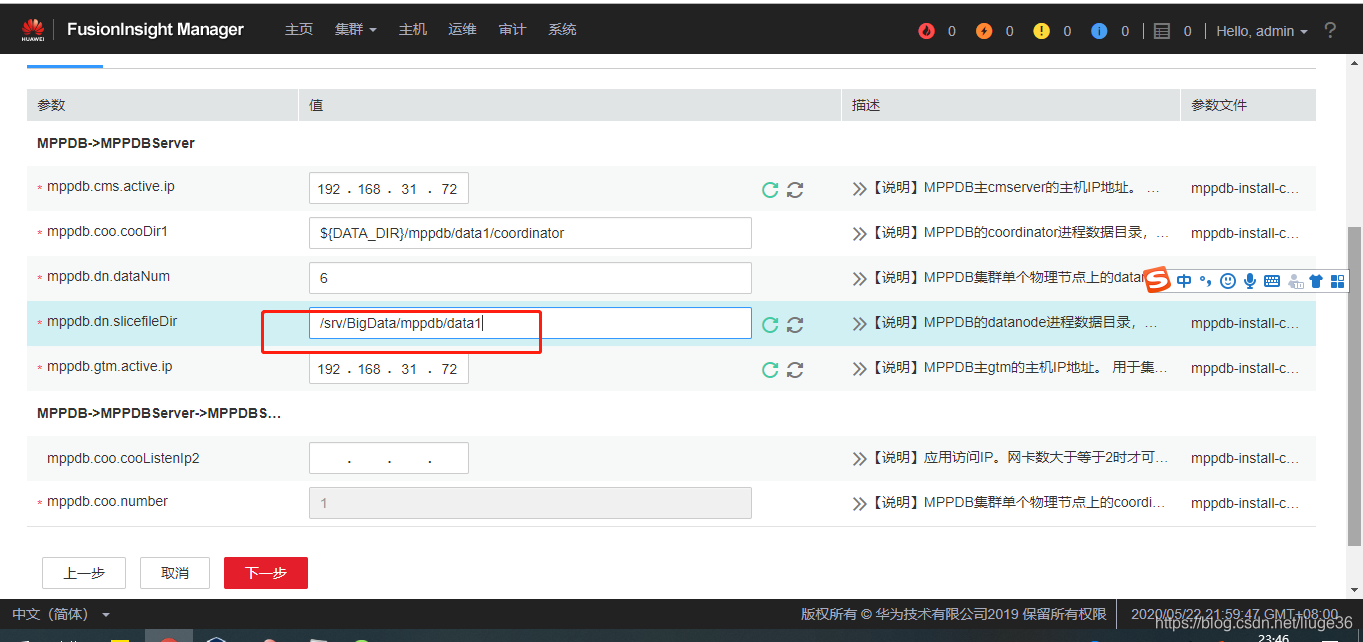
安装服务
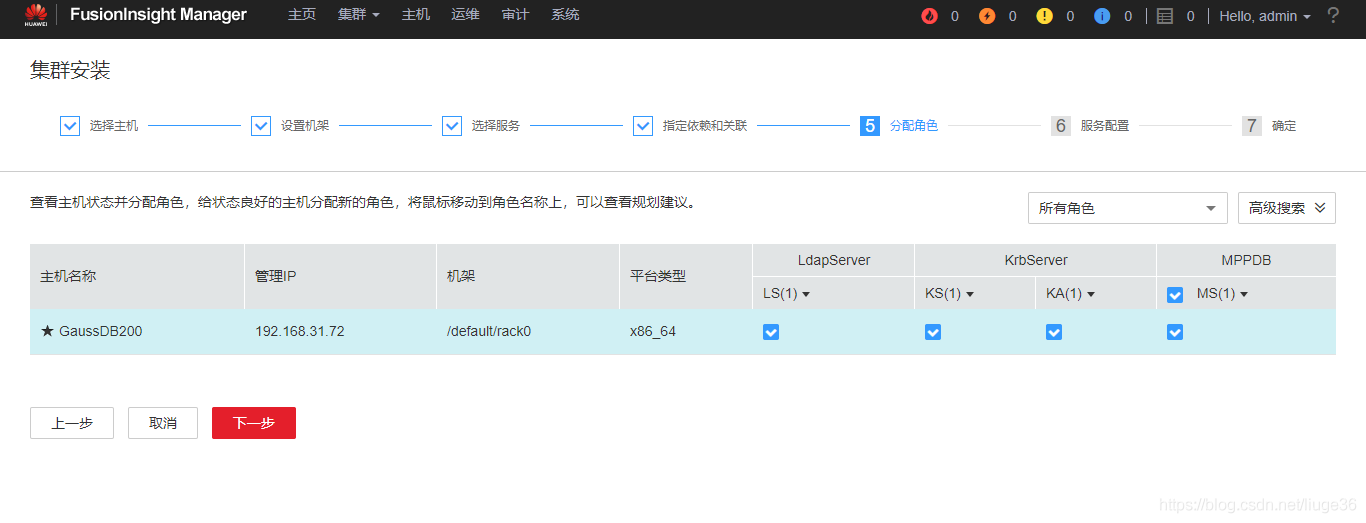
分配角色

[omm@GaussDB200 ~]$ cat /opt/FusionInsight_SetupTool/preinstall/partition/ini-plugin/conf/mppdb1.conf
ver=1.0
name=mppdb
dir=/srv/BigData/mppdb/data1
size=max  #unit: G
filesystem=default #ext3/ext4
user=2000
group=wheel
permission=700
notify=mpp_notify.sh
notifytimeout=120    #unit: second
raid=nonraid         #nonraid#raid0#raid1
description=
  [omm@GaussDB200 ~]$
/srv/BigData/mppdb/data1
静静等待~
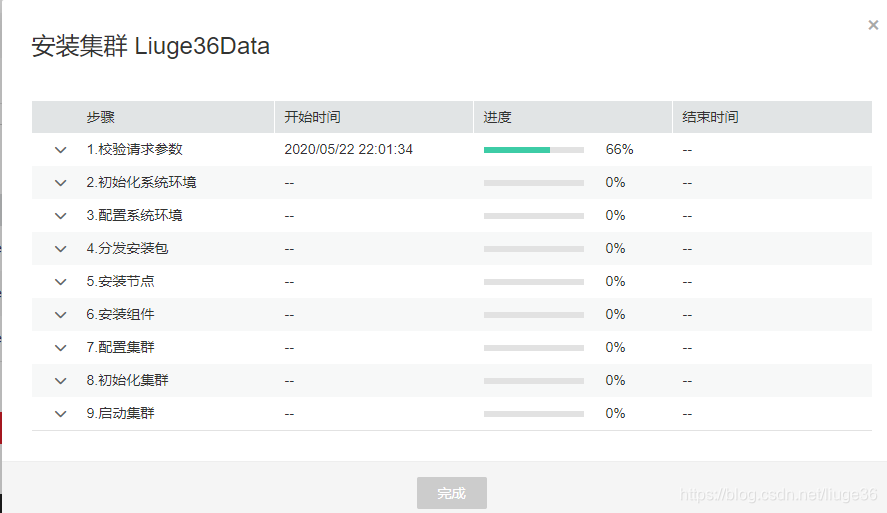
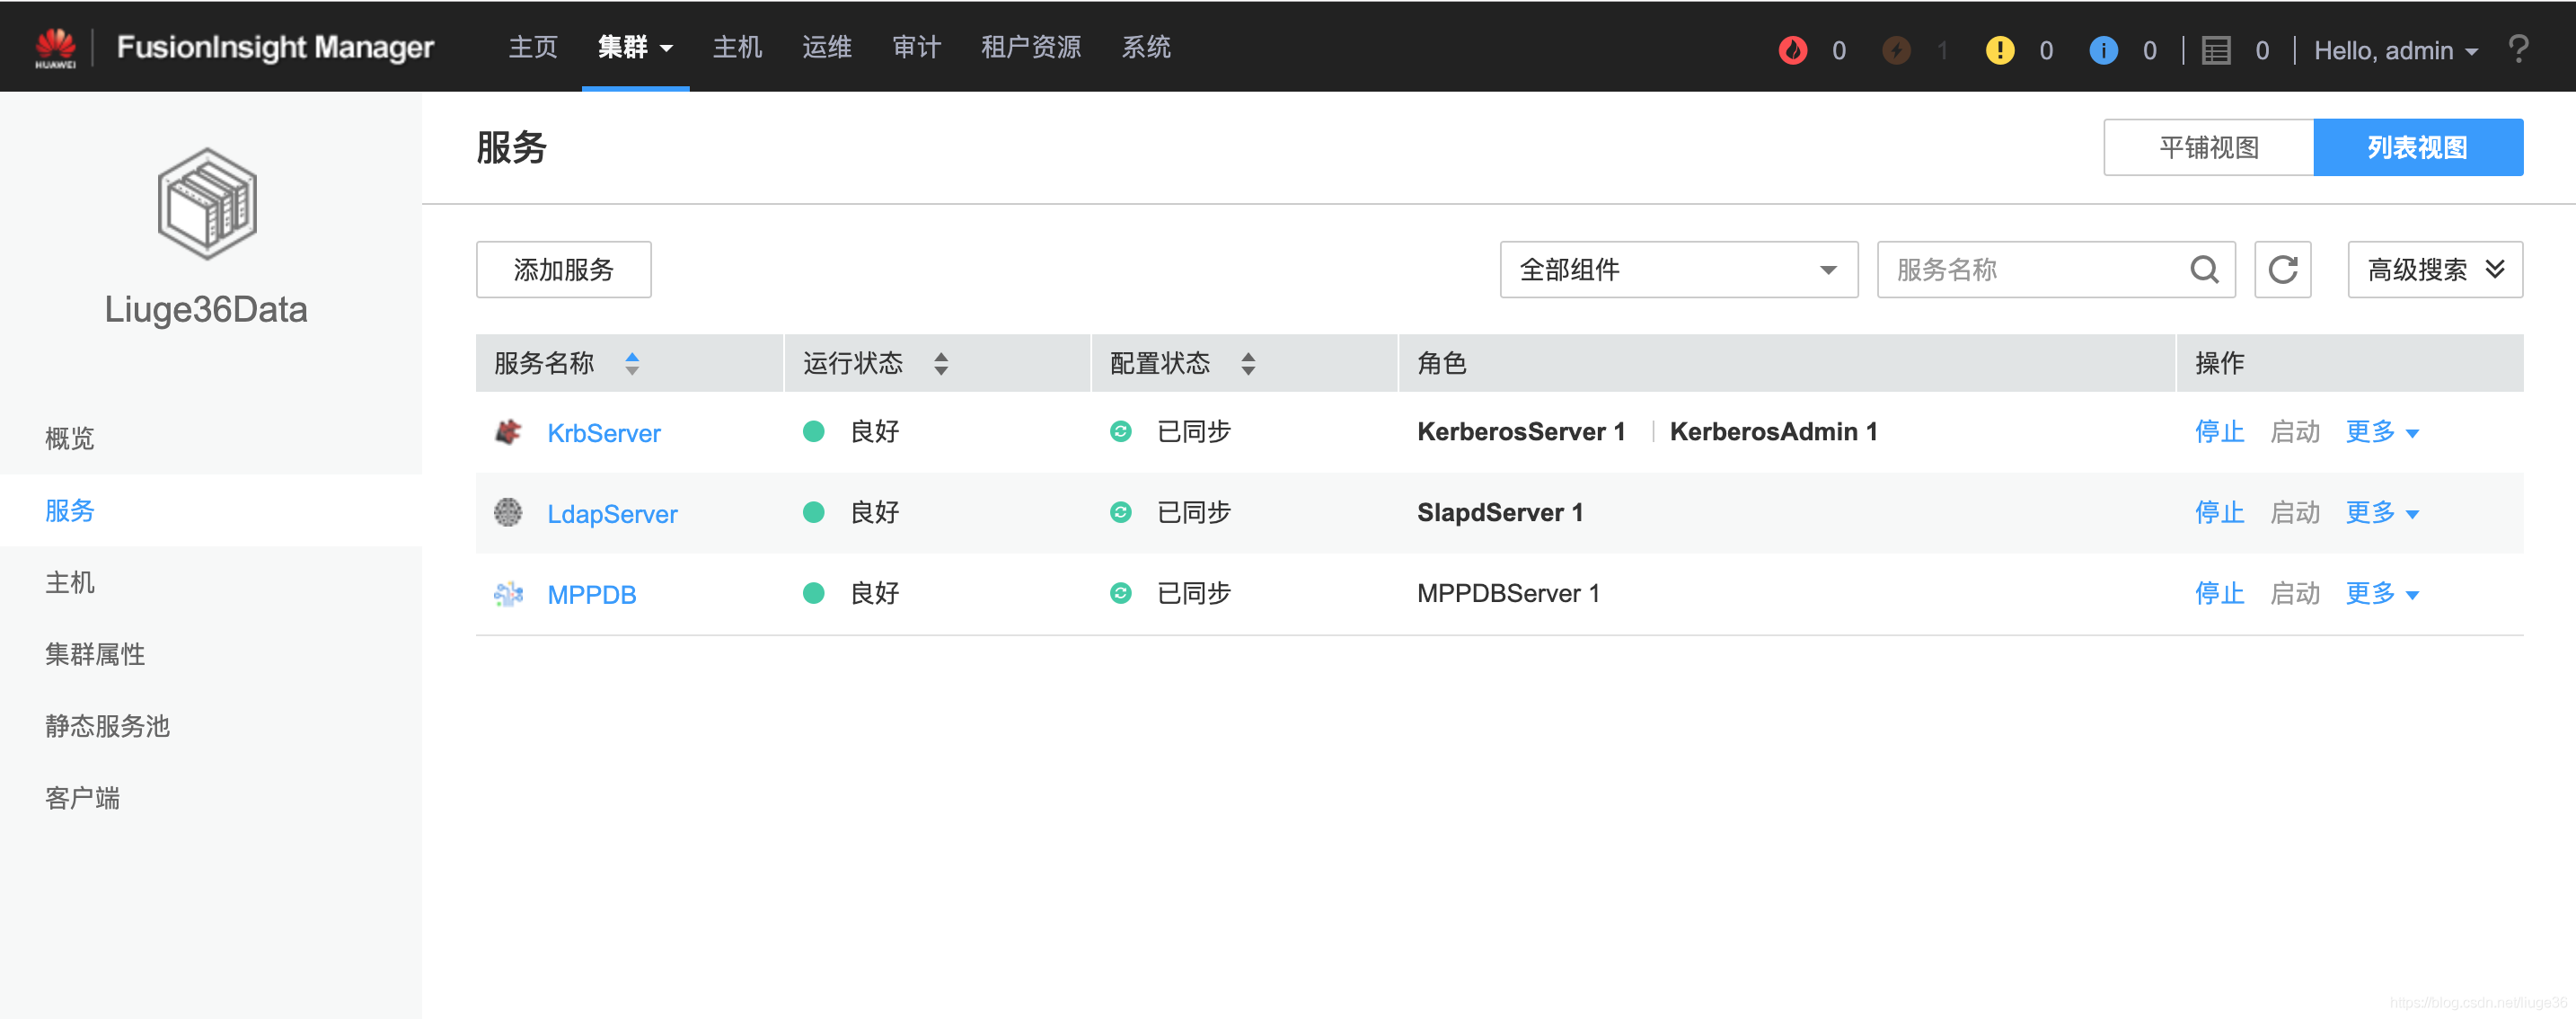
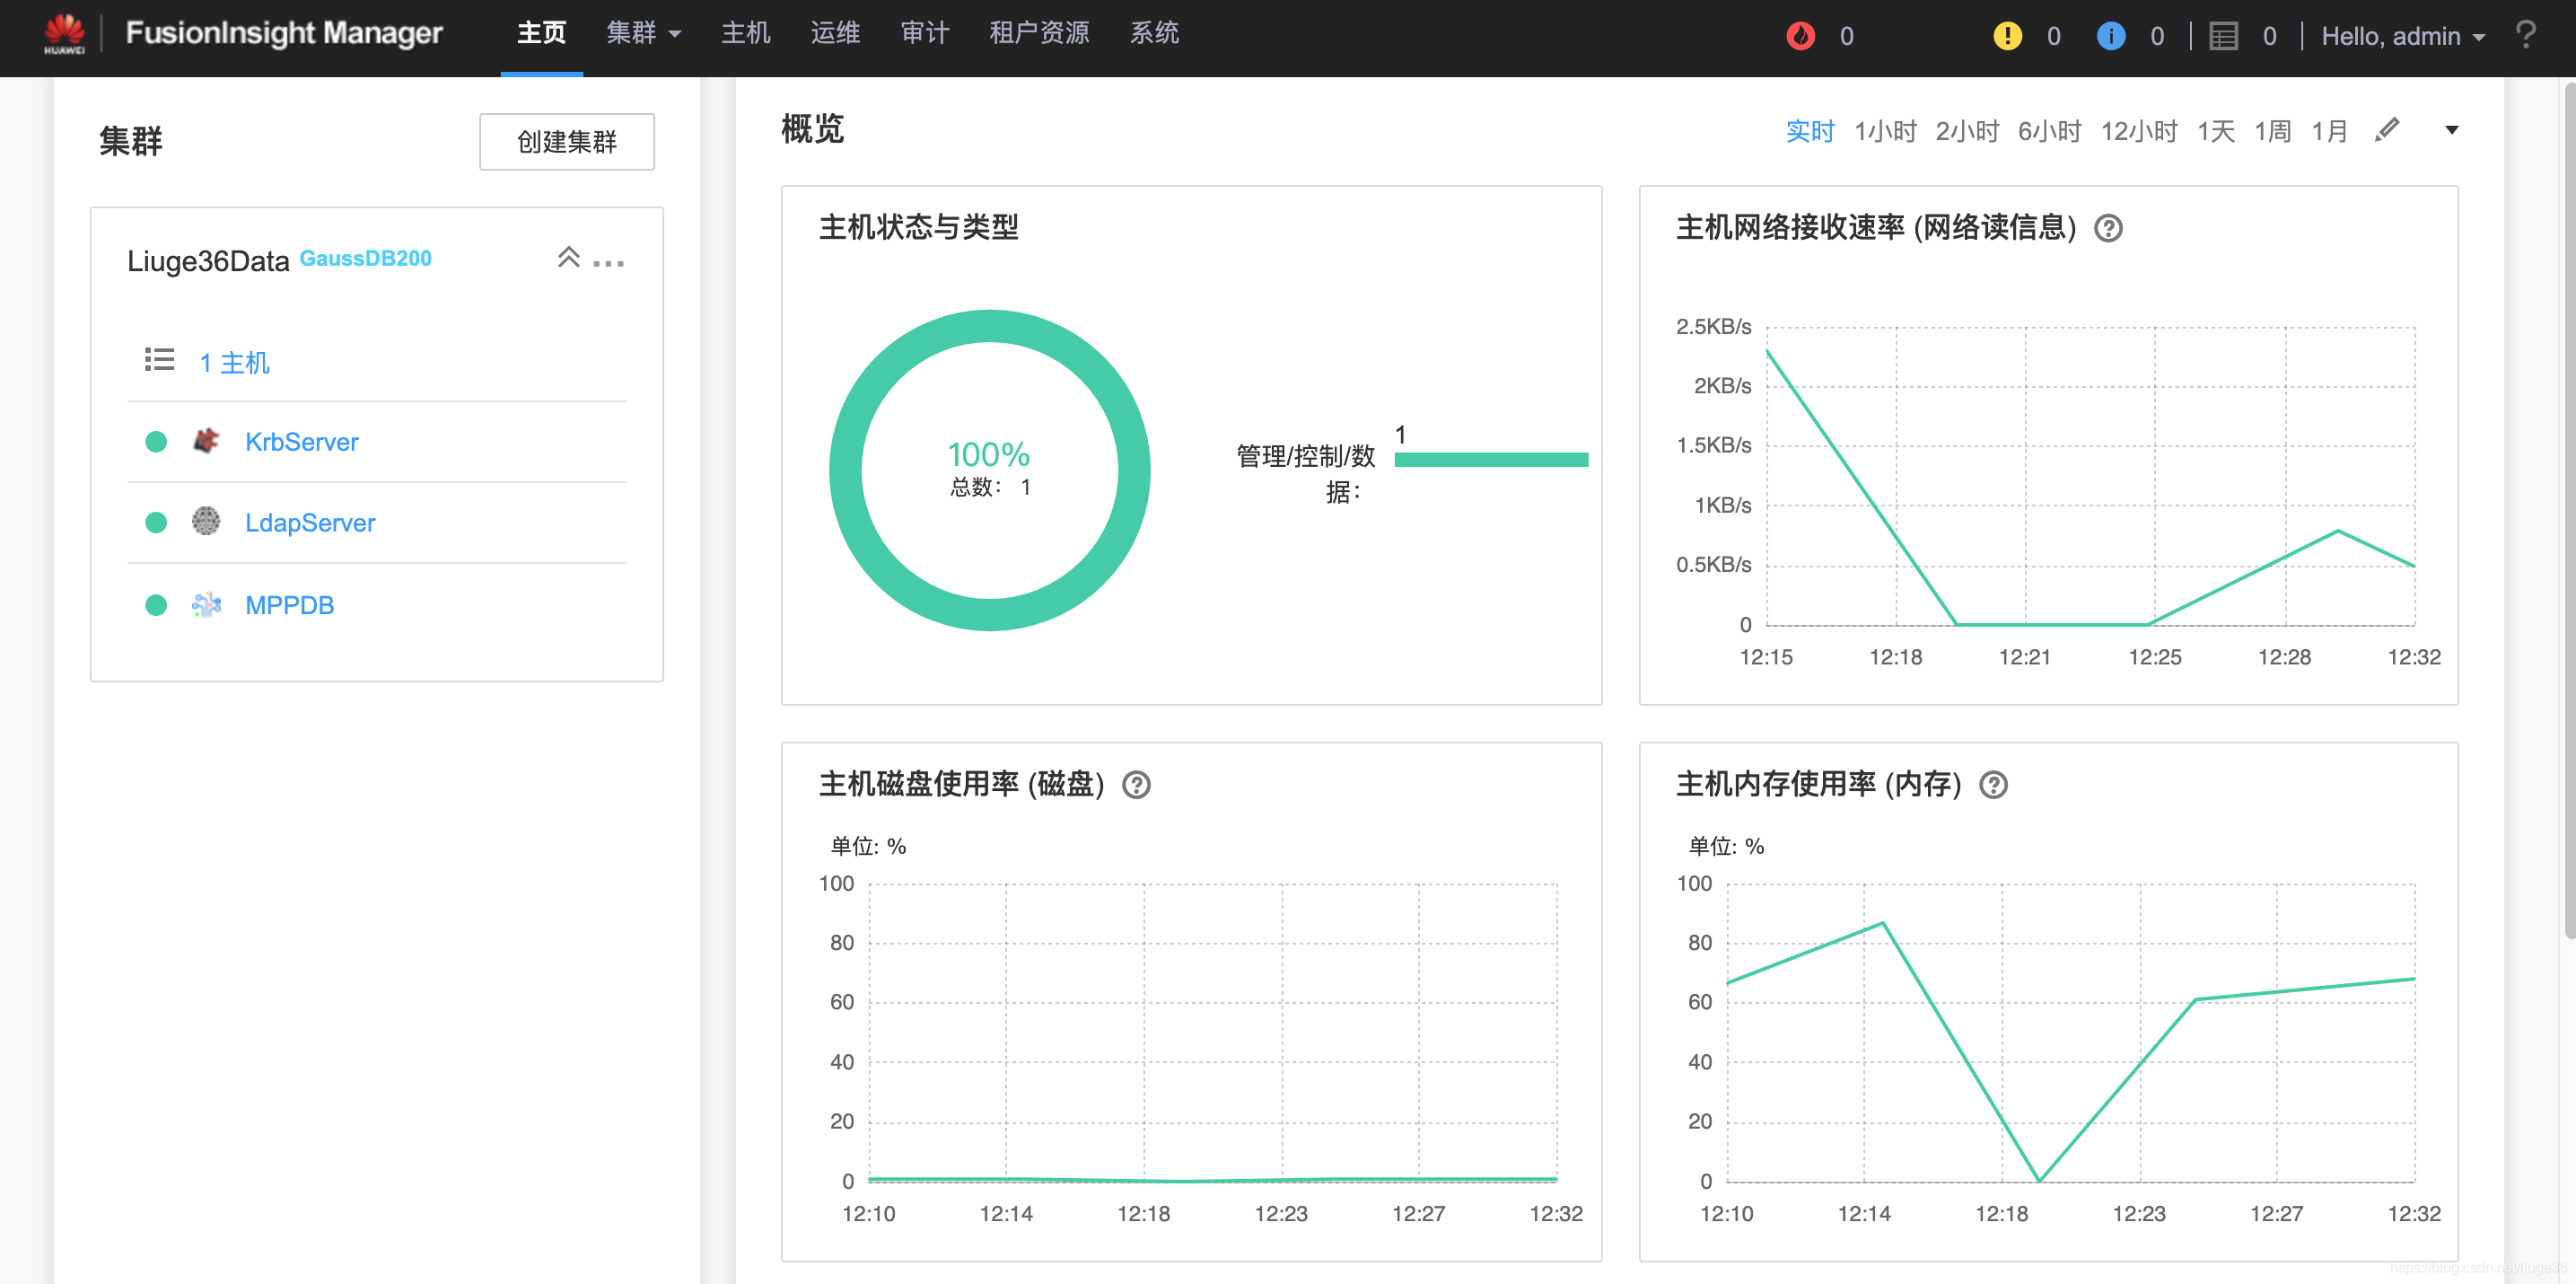
至此,GaussDB200单机部署实例已完成。
04 GaussDB的连接与使用
说明:这里的操作参考官方文档,文档你可以直接在官网获取,跟着文档操作也是可以的。我这里也是一样的。
4.1 确认连接信息
用户omm登录安装有MPPDB服务的任一主机,执行命令启动环境变量:
[omm@GaussDB200 ~]$ source ${BIGDATA_HOME}/mppdb/.mppdbgs_profile
[omm@GaussDB200 ~]$
4.2 执行命令查询集群各实例情况:
gs_om -t status --detail
[omm@GaussDB200 ~]$ gs_om -t status --detail
[  CMServer State   ]

node          node_ip         instance                                    state
---------------------------------------------------------------------------------
1  GaussDB200 192.168.31.148  1    /opt/GaussDB200/app/mppdb/cm/cm_server Primary

[   Cluster State   ]

cluster_state   : Normal
redistributing  : No
balanced        : Yes

[ Coordinator State ]

node          node_ip         instance                                          state
---------------------------------------------------------------------------------------
1  GaussDB200 192.168.31.148  5001 /opt/GaussDB200/data/mppdb/data1/coordinator Normal

[ Central Coordinator State ]

node          node_ip         instance                                          state
---------------------------------------------------------------------------------------
1  GaussDB200 192.168.31.148  5001 /opt/GaussDB200/data/mppdb/data1/coordinator Normal

[     GTM State     ]

node          node_ip         instance                           state
---------------------------------------------------------------------------
1  GaussDB200 192.168.31.148  1001 /opt/GaussDB200/app/mppdb/gtm P Primary
[  Datanode State   ]

node          node_ip         instance                              state
---------------------------------------------------------------------------------------
1  GaussDB200 192.168.31.148  6001 /srv/BigData/mppdb/data1/master1 P Primary Normal
1  GaussDB200 192.168.31.148  6002 /srv/BigData/mppdb/data1/master2 P Primary Normal
1  GaussDB200 192.168.31.148  6003 /srv/BigData/mppdb/data1/master3 P Primary Normal
1  GaussDB200 192.168.31.148  6004 /srv/BigData/mppdb/data1/master4 P Primary Normal
1  GaussDB200 192.168.31.148  6005 /srv/BigData/mppdb/data1/master5 P Primary Normal
1  GaussDB200 192.168.31.148  6006 /srv/BigData/mppdb/data1/master6 P Primary Normal
[omm@GaussDB200 ~]$
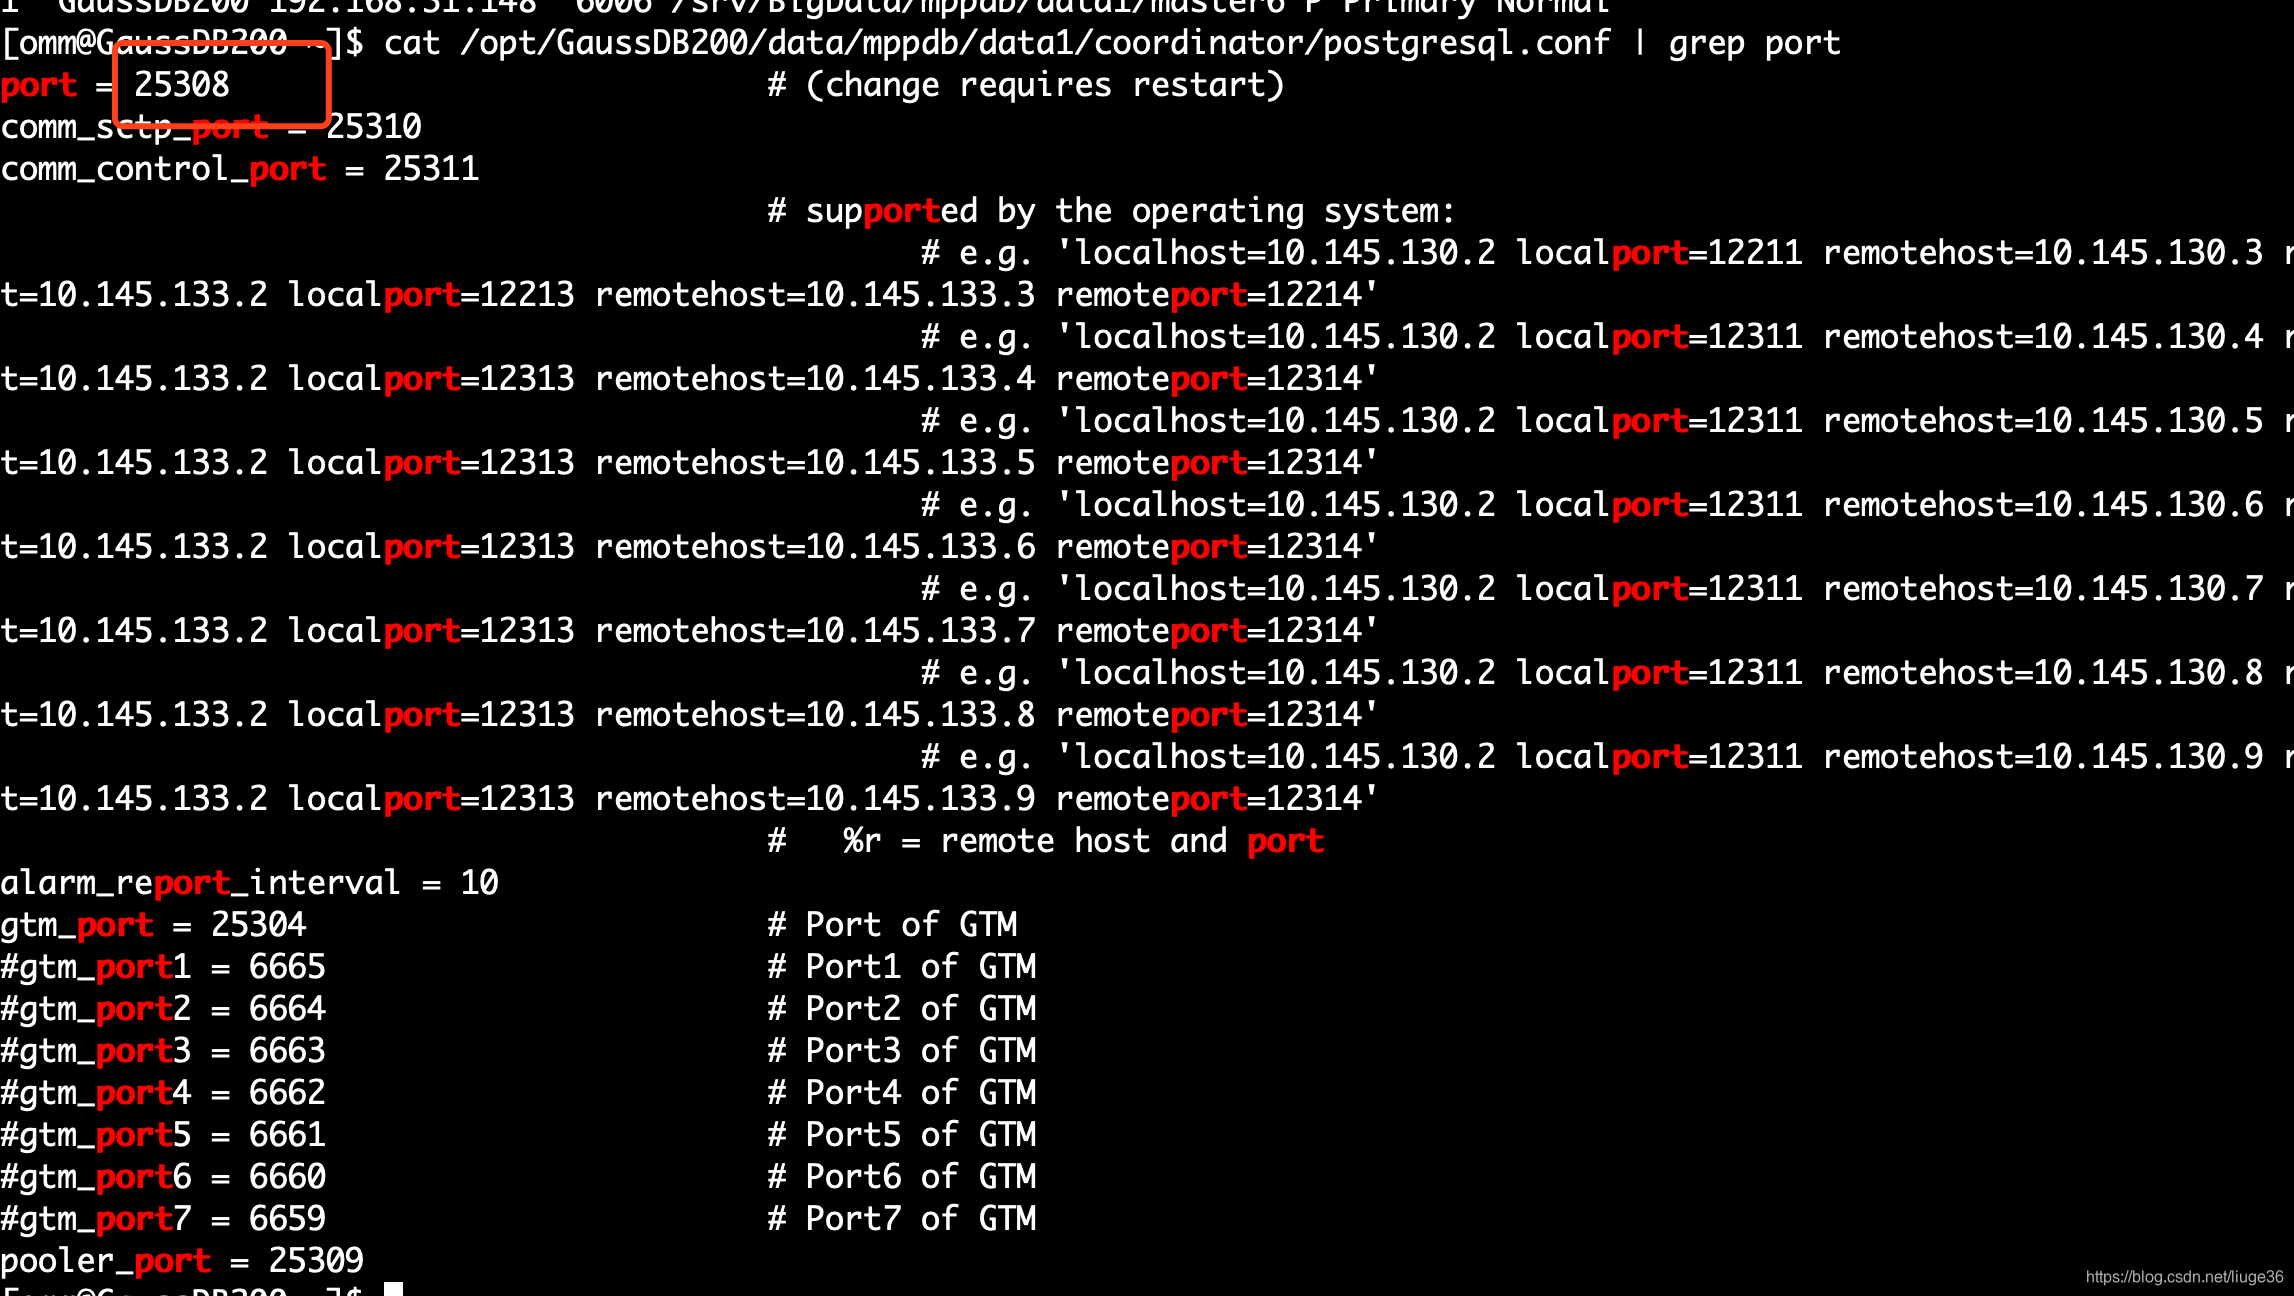
4.3 确认CN的端口号
在2查到的CN数据路径下的postgresql.conf文件中查看端口号信息。
示例如下:
cat /opt/GaussDB200/data/mppdb/data1/coordinator/postgresql.conf | grep port
查看如下:25308为CN的端口号
4.4 gsql连接使用
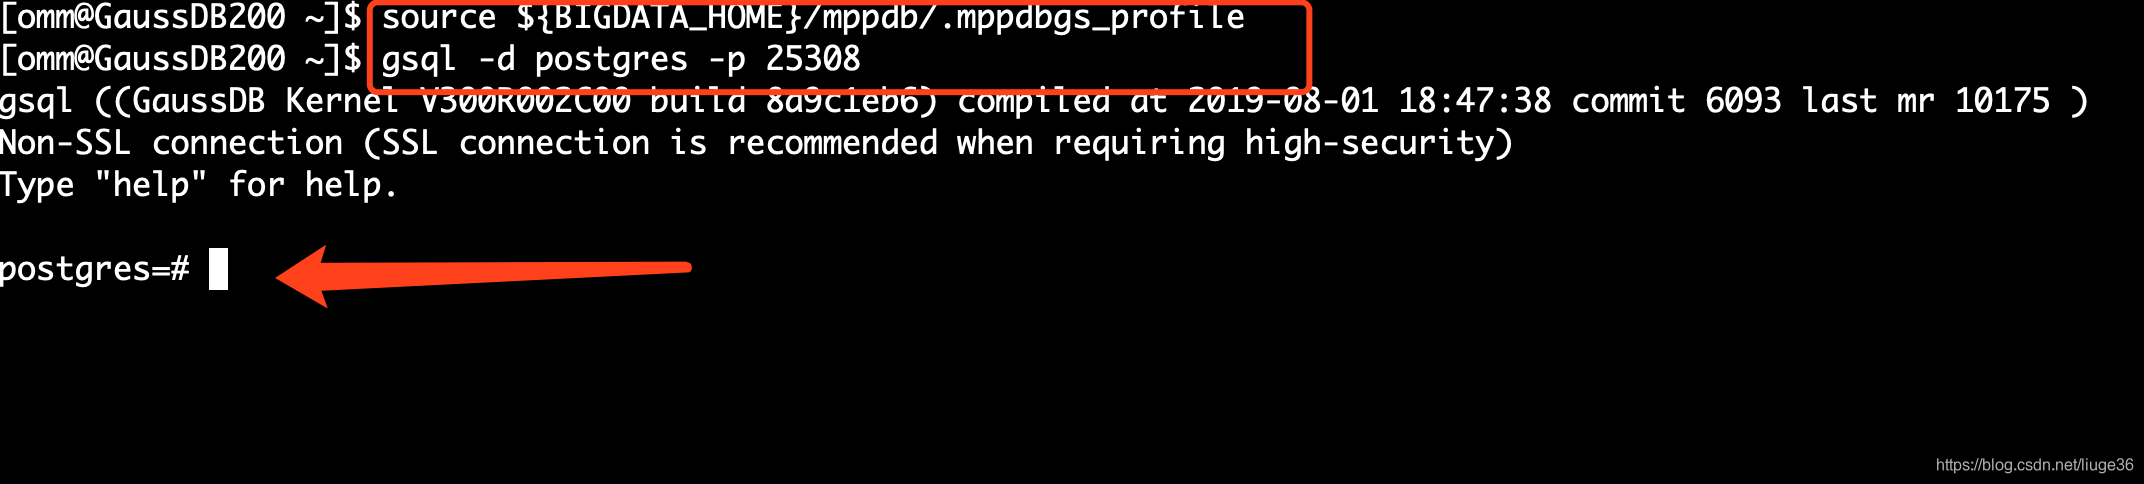
1.用户omm登录CN所在主机,执行命令启动环境变量:
[omm@GaussDB200 ~]$ source ${BIGDATA_HOME}/mppdb/.mppdbgs_profile
[omm@GaussDB200 ~]$
2.连接数据库
gsql -d postgres -p 25308
其中,postgres为集群安装完成后默认生成的数据库。
一开始可以连接到此数据库 进行 新数据库的创建。
25308为CN的端口号,需根据集群的实际情况做替换。
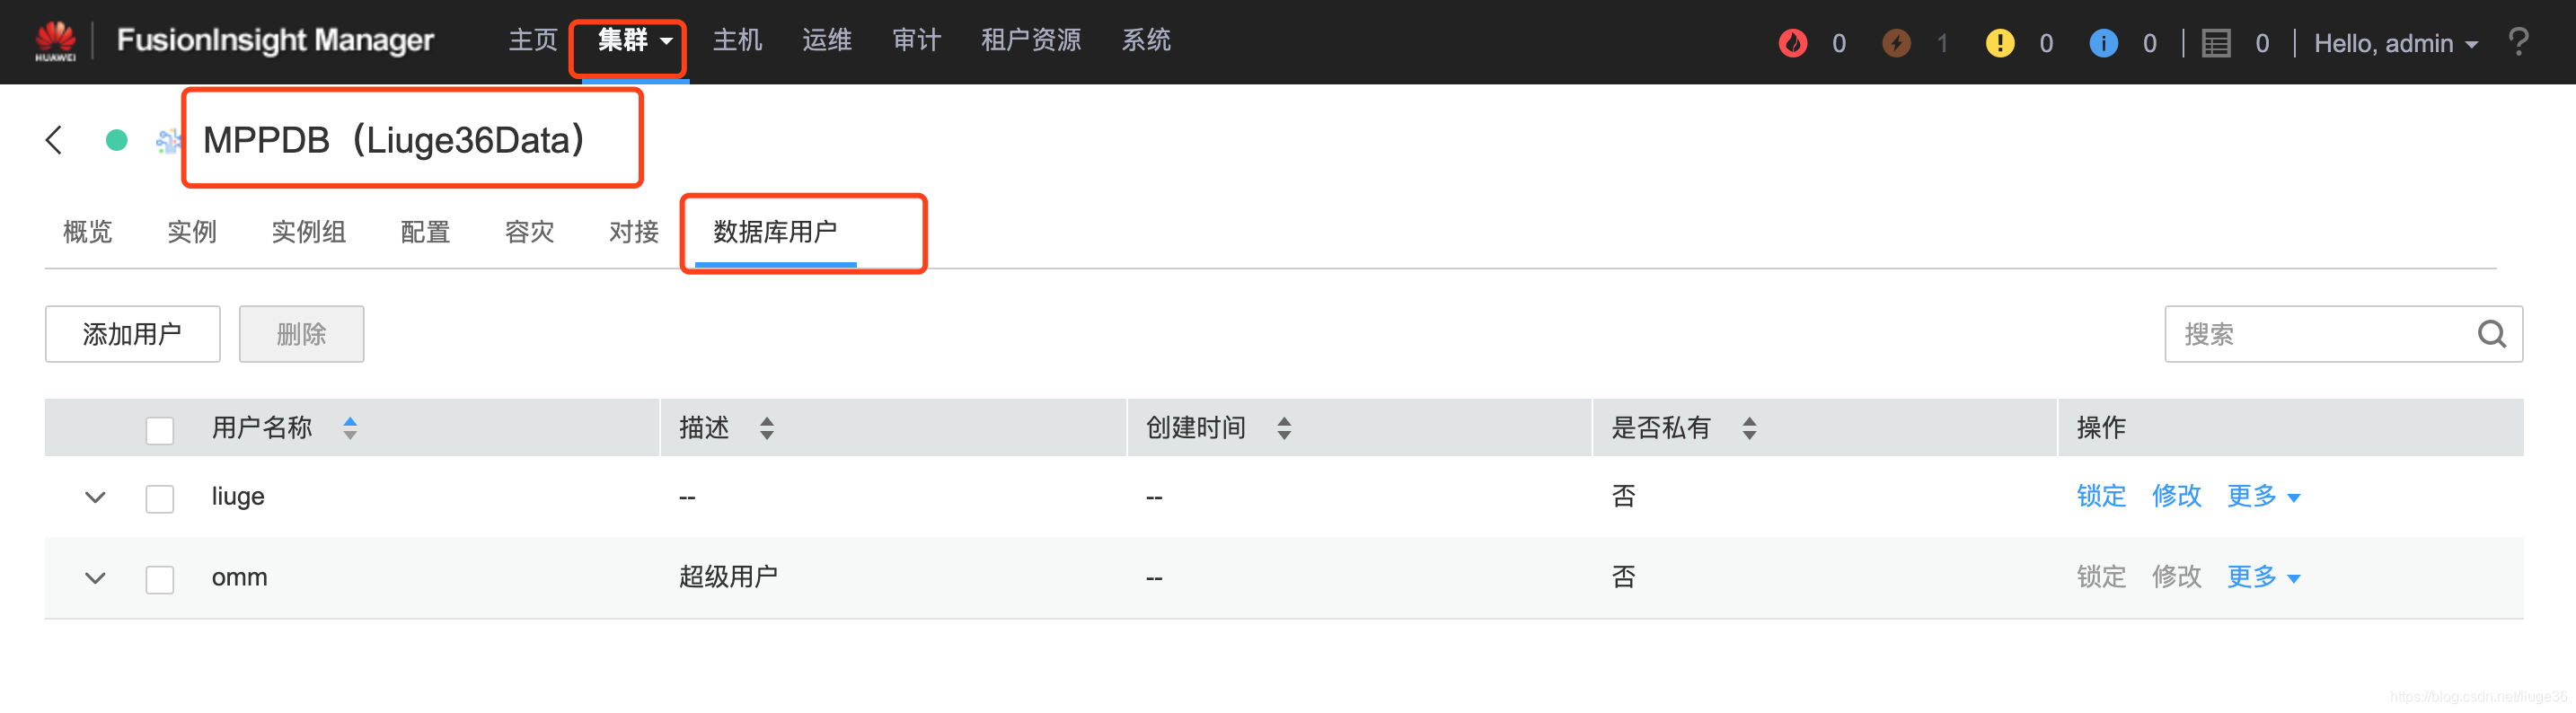
3.创建数据库用户
默认只有集群安装时 创建的管理员用户 可以访问 初始数据库。
创建自己的数据库用户帐号:
postgres=# CREATE USER liuge WITH PASSWORD "Bigdata@123";
CREATE ROLE
postgres=#
如上,显示CREATE ROLE表示成功
4.创建数据库
postgres=# CREATE DATABASE db_liugedata;
CREATE DATABASE
postgres=#
如上,显示CREATE DATABASE表示成功
- 切换用户和数据库
创建完 db_liugedata 数据库后,就可以 \q 退出postgres数据库,使用新用户 liuge 连接到新数据库 db_liugedata 执行接下来的创建表等操作。
当然,也可以选择继续在默认的postgres数据库下做后续的操作。
postgres=#\q
[omm@GaussDB200 ~]$ gsql -d db_liugedata -p 25308 -U liuge -W Bigdata@123
gsql ((GaussDB Kernel V300R002C00 build 8a9c1eb6) compiled at 2019-08-01 18:47:38 commit 6093 last mr 10175 )
Non-SSL connection (SSL connection is recommended when requiring high-security)
Type "help" for help.

db_liugedata=>
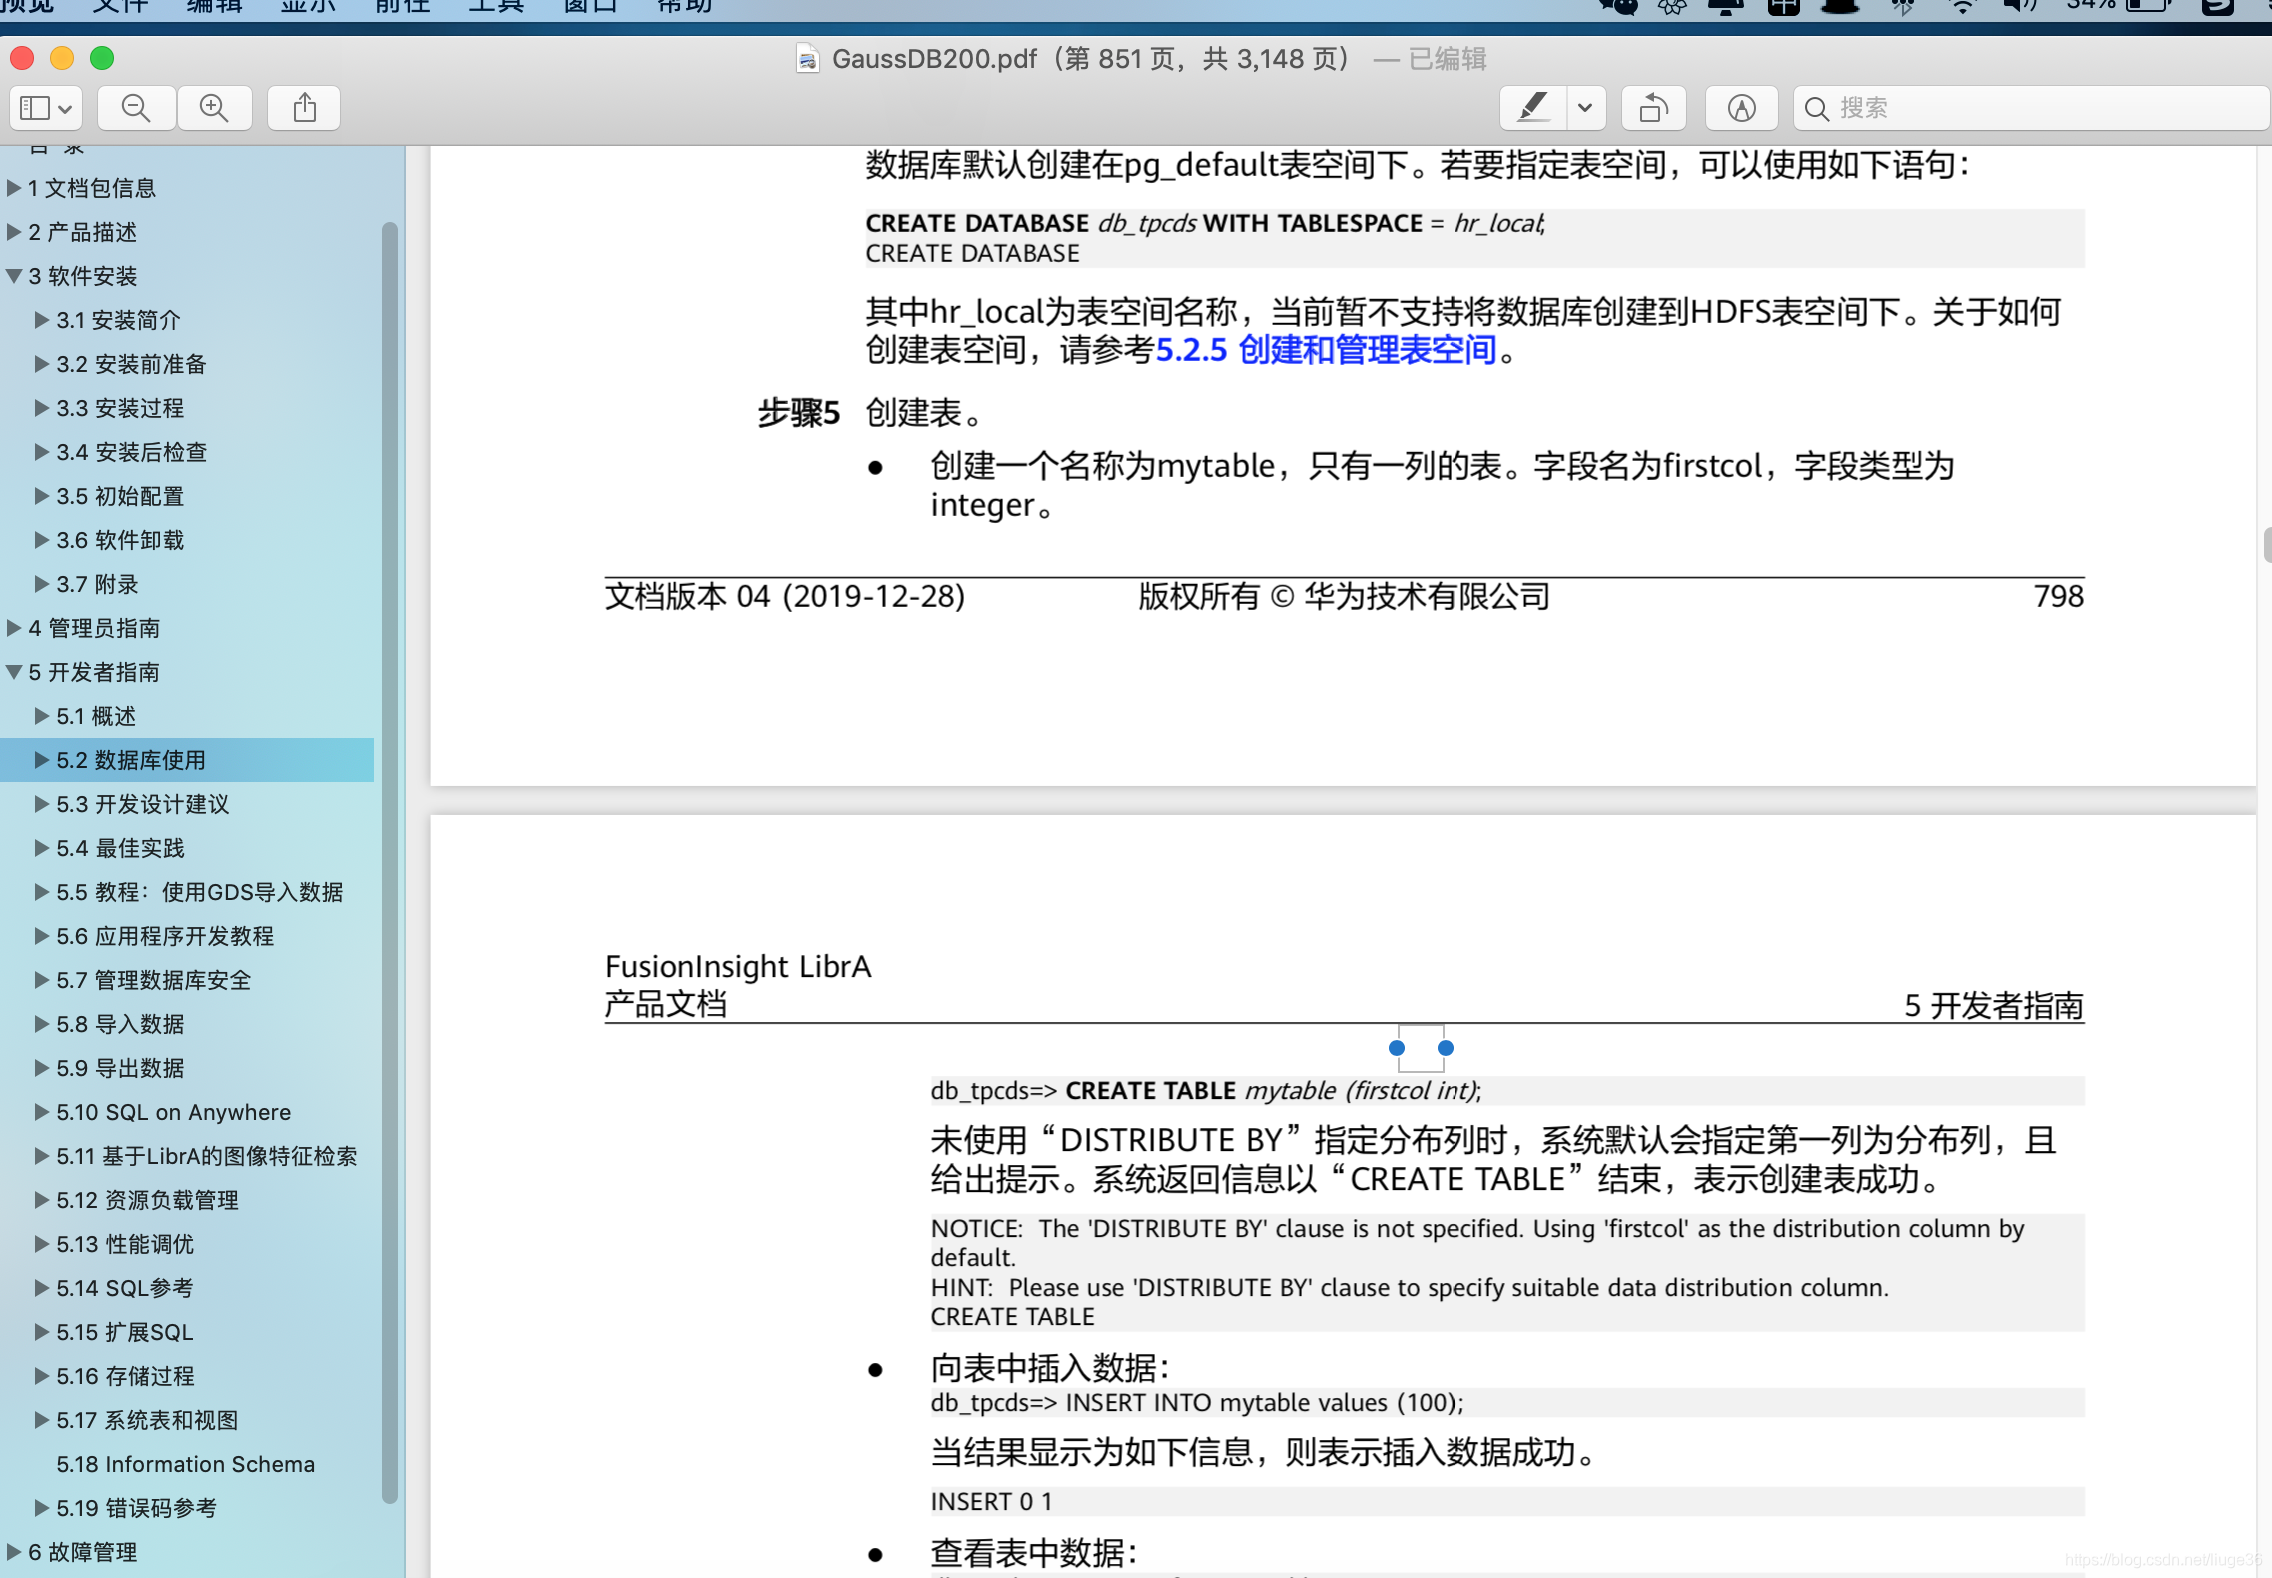
- 创建表
建一个名称为mytable,只有一列的表。字段名为firstcol,字段类型为integer。
db_liugedata=> CREATE TABLE mytable (firstcol int);
NOTICE:  The 'DISTRIBUTE BY' clause is not specified. Using 'firstcol' as the distribution column by default.
HINT:  Please use 'DISTRIBUTE BY' clause to specify suitable data distribution column.
CREATE TABLE
db_liugedata=>
未使用“DISTRIBUTE BY”指定分布列时,系统默认会指定第一列为分布列,且给出提示系统返回信息以“CREATE TABLE”结束,表示创建表成功。
- 插入数据
db_liugedata=> SELECT * from mytable;
 firstcol
----------
(0 rows)

db_liugedata=> INSERT INTO mytable values (36);
INSERT 0 1
db_liugedata=> SELECT * from mytable;
 firstcol
----------
       36
(1 row)

db_liugedata=>
以上就是一些简单的数据库操作,更多的操作,可以会直接看官方文档。
4.5 远程连接使用
1.以操作系统用户omm登录CN所在主机,执行命令启动环境变量:
[omm@GaussDB200 ~]$  source ${BIGDATA_HOME}/mppdb/.mppdbgs_profile
[omm@GaussDB200 ~]$
a.使用如下命令查看CN目前的listen_addresses配置:
gs_guc check -Z coordinator -I all -c "listen_addresses"
得到如下效果:
[omm@GaussDB200 ~]$ gs_guc check -Z coordinator -I all -c "listen_addresses"
expected guc information: GaussDB200: listen_addresses=NULL: [/opt/GaussDB200/data/mppdb/data1/coordinator/postgresql.conf]
gs_guc check: GaussDB200: listen_addresses='localhost,192.168.31.148': [/opt/GaussDB200/data/mppdb/data1/coordinator/postgresql.conf]

Total GUC values: 1. Failed GUC values: 0.
The value of parameter listen_addresses is same on all instances.
    listen_addresses='localhost,192.168.31.148'

[omm@GaussDB200 ~]$
b. 使用如下命令把要添加的IP追加到listen_addresses后面,多个配置项之间用英文逗号分隔。例如,追加IP地址192.168.31.35。
gs_guc set -I all -Z coordinator -c "listen_addresses='localhost,192.168.0.100,192.168.31.35'"
得到如下效果:

c. 执行如下命令重启集群
gs_om -t stop && gs_om -t start
此时,请求主机的ip已被放入白名单中,接下来需要配置下连接配置。
- 配置每个用户请求每个数据库的配置信息
背景:如果 本地主机需要远程连接数据库,必须在数据库系统的配置文件中增加此主机的信息,并且进行客户端接入认证。
配置文件(默认名称为pg_hba.conf)存放在数据库的数据目录里。
hba(host-based authentication)表示是基于主机的认证。
基于主机的认证:服务器端根据客户端的IP地址、用户名及要访问的数据库来查看配置文件从而判断用户是否通过认证。
“pg_hba.conf”文件的格式是一行写一条信息,表示一个认证规则,空白和注释(以#开头)被忽略。
示例:
以操作系统用户omm登录CN所在主机,执行命令启动环境变量:
source ${BIGDATA_HOME}/mppdb/.mppdbgs_profile
配置客户端认证方式,允许客户端以“liuge”用户连接到本机,此处远程连接禁止使用“omm”用户。
例如,下面示例中配置允许IP地址为192.168.31.35的客户端访问本机。
gs_guc set -Z coordinator -N all -I all -h "host all jack 192.168.31.35/32 sha256
o -Z coordinator表示实例类型为coordinator。
o -N all表示集群的所有主机。
o -I all表示主机的所有实例。
o -h表示指定需要在“pg_hba.conf”增加的语句。
o all表示允许客户端连接到任意的数据库。
o test表示连接数据库的用户
o sha256为加密算法(加密密码)
使用Data_Studio 连接工具进行连接(我这里没有下载这个工具,后面再测试~)
05常用命令介绍
[root@GaussDB200 ~]# su - omm
Last login: Fri May 22 23:26:36 CST 2020
[omm@GaussDB200 ~]$ cd /opt/GaussDB200/app/om-server
[omm@GaussDB200 om-server]$ status_app
IAM is not running.
CEP is not running.
PMS is not running.
FMS is not running.
[omm@GaussDB200 om-server]$
[omm@GaussDB200 om-server]$ cd om/sbin/
[omm@GaussDB200 sbin]$ ./status-oms.sh
HAMode
single

NodeName                                 HostName                                 HAVersion                StartTime                HAActive             HAAllResOK           HARunPhase
192-168-31-72                            GaussDB200                               V100R001C01              2020-05-23 08:50:02      active               normal               Activing

NodeName                                 ResName                                  ResStatus                ResHAStatus              ResType
192-168-31-72                            acs                                      Unknown                  Unknown                  Single_active
192-168-31-72                            aos                                      Unknown                  Unknown                  Single_active
192-168-31-72                            cep                                      Unknown                  Unknown                  Single_active
192-168-31-72                            controller                               Unknown                  Unknown                  Single_active
192-168-31-72                            feed_watchdog                            Normal                   Normal                   Double_active
192-168-31-72                            floatip                                  Normal                   Normal                   Single_active
192-168-31-72                            fms                                      Unknown                  Unknown                  Single_active
192-168-31-72                            gaussDB                                  Active_normal            Normal                   Active_standby
192-168-31-72                            heartBeatCheck                           Normal                   Normal                   Single_active
192-168-31-72                            httpd                                    Abnormal                 Non_steady               Single_active
192-168-31-72                            iam                                      Unknown                  Unknown                  Single_active
192-168-31-72                            ntp                                      Active_normal            Normal                   Active_standby
192-168-31-72                            okerberos                                Unknown                  Unknown                  Double_active
192-168-31-72                            oldap                                    Raising_active           Non_steady               Active_standby
192-168-31-72                            pms                                      Unknown                  Unknown                  Single_active
192-168-31-72                            tomcat                                   Unknown                  Unknown                  Single_active
[omm@GaussDB200 sbin]$
重启manager:
[omm@GaussDB200 sbin]$ sh restart-oms.sh
[2020-05-23 08:53:55] [INFO] Enter into stop-oms.sh with user omm
stop HA successfully.
[2020-05-23 08:54:23] [INFO] End stop-oms.sh with user omm
[2020-05-23 08:54:23] [INFO] Enter into start-oms.sh with user omm
Warning: HA monitor has been running already.
start HA successfully.
[2020-05-23 08:55:22] [INFO] End start-oms.sh with user omm
[omm@GaussDB200 sbin]$
刷一遍
[omm@GaussDB200 sbin]$ sh ${BIGDATA_HOME}/om-server/om/sbin/enable_single_host_cluster.sh
[omm@GaussDB200 sbin]$ sh ${BIGDATA_HOME}/om-server/om/sbin/restart-controller.sh
Restarting controller service using configuration /opt/GaussDB200/app/om-server/om/sbin/../etc/om
Enter into stop-controller.sh
End into stop-controller.sh
Enter into start-controller.sh
Controller start with process id 15475.
End into start-controller.sh
[omm@GaussDB200 sbin]$
参考:https://mp.weixin.qq.com/s/srqkcw2jUUgCluw_rlGlog
http://www.shidunkai.cn/articles/2020/05/03/1588481450482.html#toc_h3_11