1.在华为模拟器ensp上设置两个普通路由器,两个交换机,两台PC
先打开ensp ,新建2个路由器和2个pc用户,分别用网线连接,如下图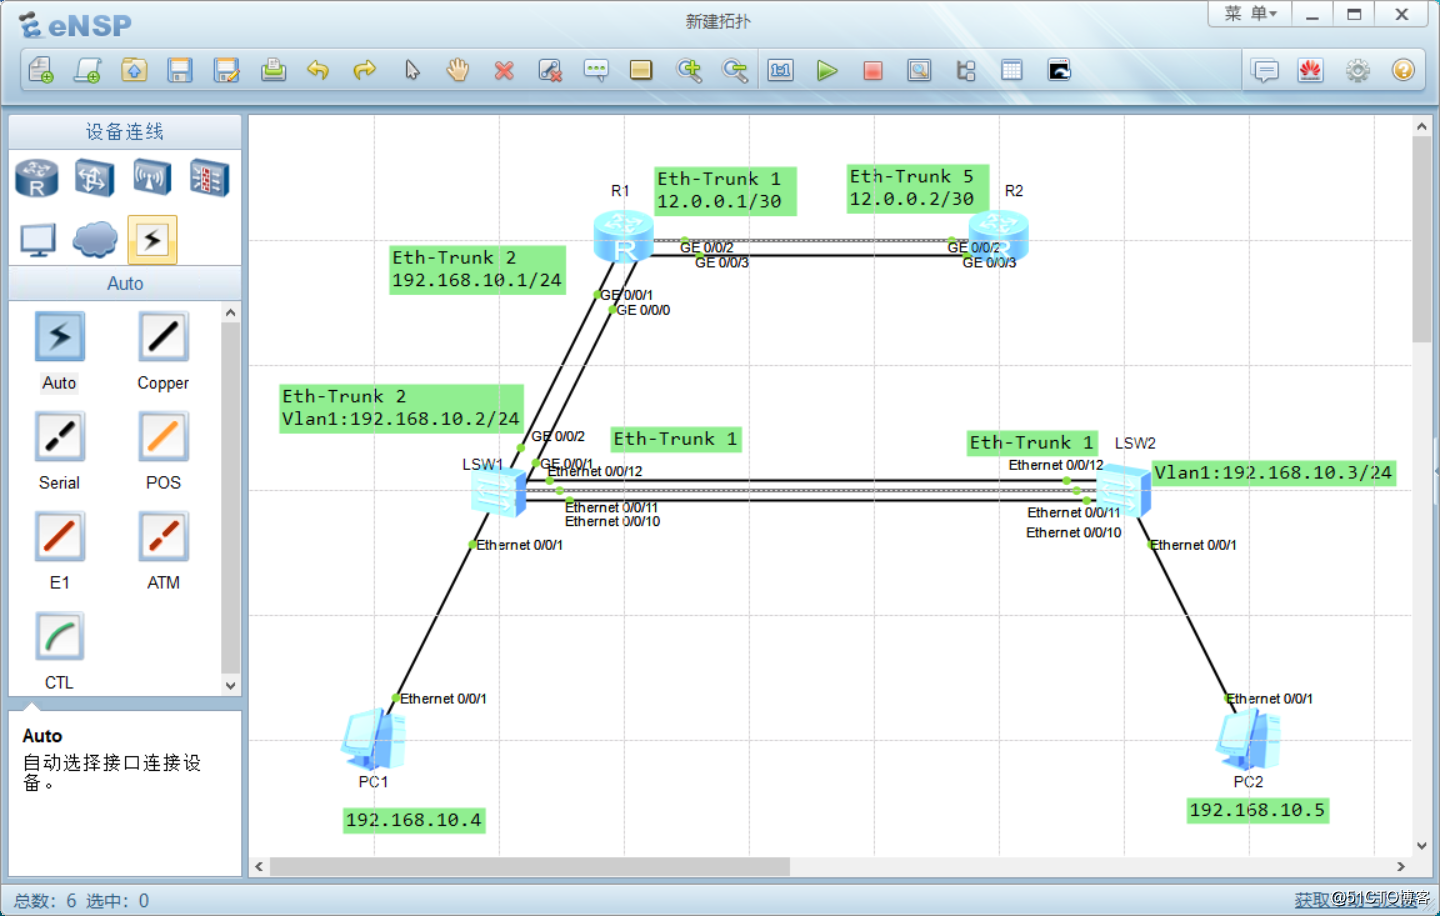
- 配置LSW1 的优先级以及冗余配置
[Huawei]sySname SW1
[SW1]lacp priority 1000
[SW1]int Eth-Trunk 1
[SW1-Eth-Trunk1]bpdu enable
[SW1-Eth-Trunk1]mode lacp-static
[SW1-Eth-Trunk1]int e0/0/10
[SW1-Ethernet0/0/10]eth-trunk 1
[SW1-Ethernet0/0/10]int e0/0/11
[SW1-Ethernet0/0/11]eth-trunk 1
[SW1-Ethernet0/0/12]int e0/0/12
[SW1-Ethernet0/0/12]eth-trunk 1
[SW1]dis eth-trunk 1
Least Active-linknumber: 1  Max Active-linknumber: 8
Ethernet0/0/10         Unselect 100M     32768   11     289     10100010  1
Ethernet0/0/11         Unselect 100M     32768   12     289     10100010  1
Ethernet0/0/12         Unselect 100M     32768   13     289     10100010  1
配置最大跑的链接数
[SW1]int Eth-Trunk 1 [SW1-Eth-Trunk1]max active-linknumber 2 [SW1-Eth-Trunk1]dis eth-trunk 1 Least Active-linknumber: 1 Max Active-linknumber: 2 ActorPortName Status PortType PortPri PortNo PortKey PortState Weight Ethernet0/0/10 Unselect 100M 32768 11 289 10100010 1 Ethernet0/0/11 Unselect 100M 32768 12 289 10100010 1 Ethernet0/0/12 Unselect 100M 32768 13 289 10100010 1 - 配置LSW2 ,不需要配置优先级和最大链路数
[Huawei]sysname SW2
[SW2]int Eth-Trunk 1
[SW2-Eth-Trunk1]bpdu enable
[SW2-Eth-Trunk1]mode lacp-static
[SW2-Eth-Trunk1]q
[SW2]int e0/0/10
[SW2-Ethernet0/0/10]eth-trunk 1
[SW2]int e0/0/11
[SW2-Ethernet0/0/11]eth-trunk 1
[SW2-Ethernet0/0/11]q
[SW2]int e0/0/12
[SW2-Ethernet0/0/12]eth-trunk 1
[SW2-Ethernet0/0/12]q
[SW2]dis eth-trunk 1
Operate status: up          Number Of Up Port In Trunk: 2
Ethernet0/0/10         Selected 100M     32768   11     289     10111100  1
Ethernet0/0/11         Selected 100M     32768   12     289     10111100  1
Ethernet0/0/12         Unselect 100M     32768   13     289     10110000  1
3.配置LSW1, LSW2的网关IP
配置SW2[SW2]int vlanif 1 [SW2-Vlanif1]ip add 192.168.10.3 24 [SW2-Vlanif1]dis ip int brief Interface IP Address/Mask Physical Protocol MEth0/0/1 unassigned down down NULL0 unassigned up up(s) Vlanif1 192.168.10.3/24 up up配置SW1
[SW1]int vlanif 1
[SW1-Vlanif1]ip add 192.168.10.2 24
[SW1-Vlanif1]dis ip int brief
Interface                         IP Address/Mask      Physical   Protocol
MEth0/0/1                         unassigned           down       down
NULL0                             unassigned           up         up(s)
Vlanif1                           192.168.10.2/24      up         up
4.配置LSW1的Eth- Trunk2
[SW1]int Eth-Trunk 2
[SW1-Eth-Trunk2]trunkport GigabitEthernet 0/0/1 to 0/0/2
[SW1-Eth-Trunk2]dis eth-trunk 2
PortName                      Status      Weight
GigabitEthernet0/0/1          Up          1
GigabitEthernet0/0/2          Up          1
5.配置R1
[Huawei]sysname R1
[R1]int Eth-Trunk 2
[R1-Eth-Trunk2]trunkport GigabitEthernet 0/0/0 to 0/0/1
[R1-Eth-Trunk2]ip add 192.168.10.1 24
[R1-Eth-Trunk2]display ip int brief
Interface                         IP Address/Mask      Physical   Protocol
Eth-Trunk2                        192.168.10.1/24      up         up
[R1-Eth-Trunk2]int Eth-Trunk 1
[R1-Eth-Trunk1]trunkport GigabitEthernet 0/0/2 to 0/0/3
[R1-Eth-Trunk1]ip add 12.0.0.1 30
[R1-Eth-Trunk1]display ip int brief
Interface                         IP Address/Mask      Physical   Protocol
Eth-Trunk1                        12.0.0.1/30         up         up
Eth-Trunk2                        192.168.10.1/24      up         up
6.配置R2
[R2]interface Eth-Trunk 5
[R2-Eth-Trunk5]trunkport g 0/0/2 to 0/0/3
[R2-Eth-Trunk5]ip add 12.0.0.2 30
[R2-Eth-Trunk5]dis ip int brief
Interface                         IP Address/Mask      Physical   Protocol
Eth-Trunk5                        12.0.0.2/30          up         up
R2需要配置静态路由
[R2]ip route-static 192.168.10.0 24 12.0.0.1
[R2]display ip routing-table
   12.0.0.0/30  Direct  0    0           D   12.0.0.2        Eth-Trunk5
   12.0.0.2/32  Direct  0    0           D   127.0.0.1       Eth-Trunk5
  127.0.0.0/8   Direct  0    0           D   127.0.0.1       InLoopBack0
  127.0.0.1/32  Direct  0    0           D   127.0.0.1       InLoopBack0
192.168.10.0/24  Static  60   0          RD   12.0.0.1        Eth-Trunk5
7.PC测试网络
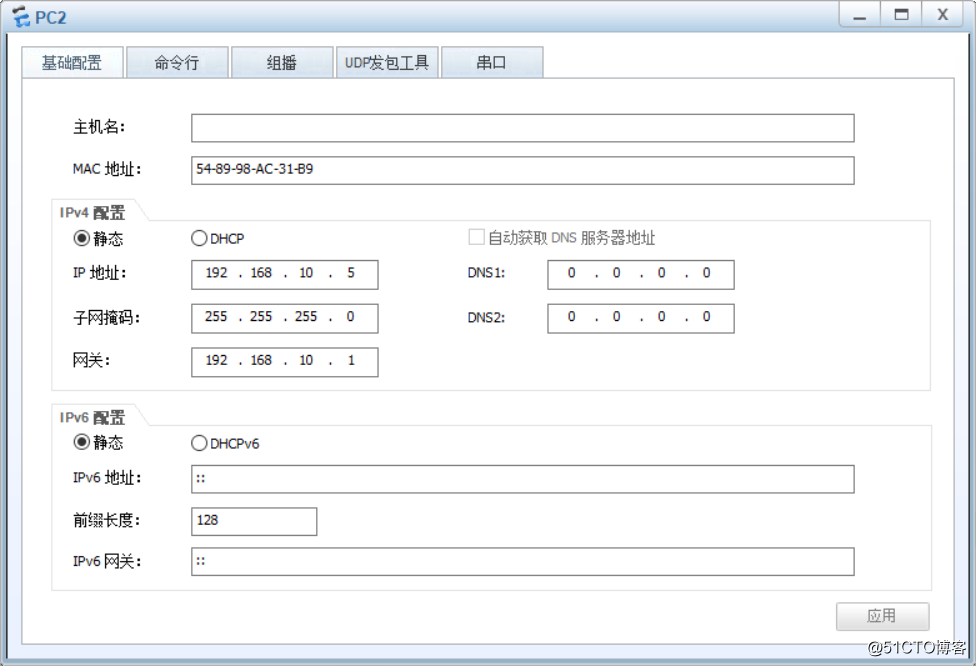
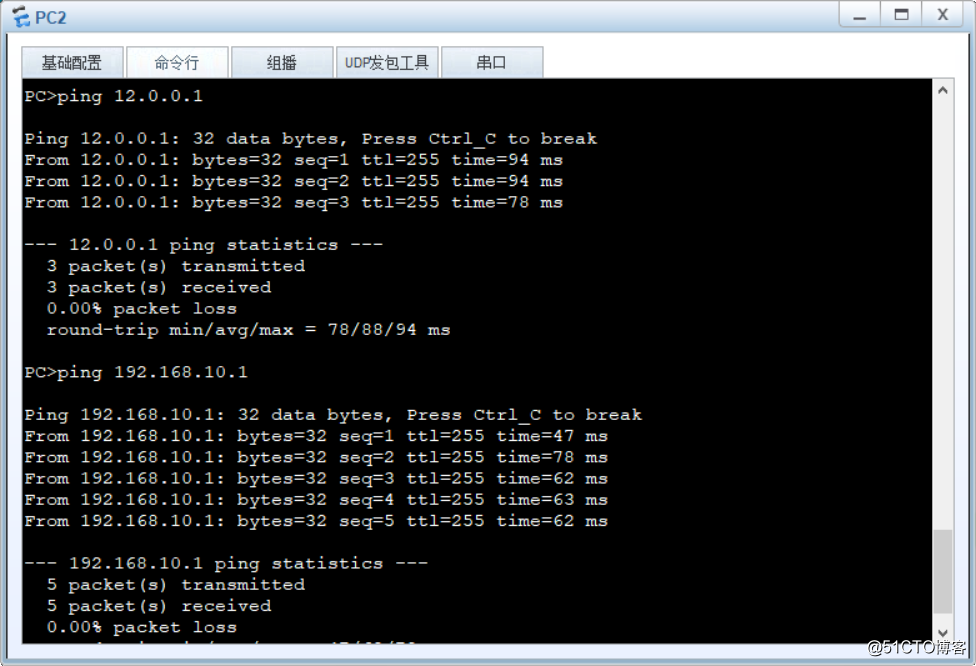
以上。