文章目录
一、图书列表页面开发 + 列表 API 对接
新建src\pages\list\list.vue:
<template>
  <div>
    123
  </div>
</template>

<script>

export default {
  components: {},
  data() {
    return {
    }
  },
  mounted() {
  },
  methods: {
  }
}
</script>

<style lang="scss" scoped>
</style>
新建src\pages\list\main.js:
import Vue from 'vue'
import App from './list'

const app = new Vue(App)
app.$mount()
修改src\components\search\SearchList.vue的showList方法来跳转到图书列表页:
    showList(text, key) {
      console.log(text, key)
      this.$router.push({
        path: '/pages/list/main',
        query: {
          text, key, title: text
        }
      })
    },
在src\api\index.js中新建一个接口函数searchList,用来获取图书列表:
export function searchList(params) {
  return get(`${API_URL}/book/shelf/search-list`, params)
}
修改src\pages\list\list.vue:
<template>
  <div>
    <SearchTable :data="data"/>
  </div>
</template>

<script>
import SearchTable from '../../components/search/SearchTable'
import {searchList} from '../../api'

export default {
  components: {SearchTable},
  data() {
    return {
      data: []
    }
  },
  mounted() {
    this.getSearchList()
  },
  methods: {
    getSearchList() {
      const { key, text } = this.$route.query
      const params = {}
      if (key && text) {
        params[key] = text
      }
      searchList(params).then(res => {
        this.data = res.data.data
      })
    }
  }
}
</script>

<style lang="scss" scoped>
</style>
预览:
搜索页点击(出版社/作者/分类)标签触发

二、图书列表标题动态切换+图书详情页跳转
在src\api\wechat.js中新建一个接口函数setNavigationBarTitle,用来动态设置标题:
export function setNavigationBarTitle(title) {
  mpvue.setNavigationBarTitle({ title })
}
接下来在mounted中调用setNavigationBarTitle:
  mounted() {
    this.getSearchList()
    const { title } = this.$route.query
    setNavigationBarTitle(title)
  },
由于SearchTable点击是一定会跳转到图书详情页的,因此将跳转直接加到SearchTable中,其他事件内容依旧通过$emit交给调用者处理:
src\components\search\SearchTable.vue
    onClick(book) {
      this.$router.push({
        path: '/pages/detail/main',
        query: {
          fileName: book.fileName
        }
      })
      this.$emit('onClick', book)
    }
删掉src\components\search\SearchList.vue中关于onBookClick的内容和调用
预览:

三、图书列表触底自动刷新功能开发
data中新增page: 1
修改getSearchList方法:
    getSearchList() {
      const { key, text } = this.$route.query
      const params = {}
      if (key && text) {
        params[key] = text
      }
      params.page = this.page
      searchList(params).then(res => {
        const { data } = res.data
        if (data.length > 0) {
          this.data.push(...data)
        } else {
          showToast('没有更多数据了')
        }
      })
    }
新增周期函数:
  onReachBottom() {
    this.page++
    this.getSearchList()
  },
在mounted中新增一句:this.page = 1防止打开新list页面时旧list页面未销毁时导致的page未初始化问题
这样就实现了触底刷新
四、分类列表页面开发 + 分类 API 对接
新建src\pages\categoryList\main.json:
{
  "navigationBarTitleText": "分类列表"
}
新建src\pages\categoryList\main.js:
import Vue from 'vue'
import App from './categoryList'

const app = new Vue(App)
app.$mount()
新建src\pages\categoryList\categoryList.vue:
<template>
  <div>
  </div>
</template>

<script>
export default {
}
</script>

<style lang="scss" scoped>
</style>
在首页中新加跳转到categoryList页面,即为onCategoryMoreClick完善内容:
    onCategoryMoreClick() {
      this.$router.push({
        path: '/pages/categoryList/main'
      })
    },
在src\api\index.js中新建一个接口函数categoryList,用来拿到所有分类列表:
export function categoryList() {
  return get(`${API_URL}/book/category/list/v2`)
}
完成分类列表页面src\pages\categoryList\categoryList.vue:
<template>
  <div>
    <HomeBook
      title="图书分类"
      :row="category.length / 2"
      :col="2"
      :data="category"
      mode="category"
      :show-btn="false"
      :show-title="false"
    />
  </div>
</template>

<script>
import HomeBook from '../../components/home/HomeBook'
import {categoryList} from '../../api'
export default {
  components: { HomeBook },
  data() {
    return {
      category: []
    }
  },
  mounted() {
    categoryList().then(res => {
      this.category = res.data.data
    })
  }
}
</script>

<style lang="scss" scoped>
</style>
预览

五、分类列表跳转图书列表功能开发
修改src\pages\index\index.vue中图书分类HomeBook的事件监听属性onBookClick为:@onBookClick="onCategoryClick"
新增onCategoryClick方法:
    onCategoryClick(category) {
      this.$router.push({
        path: '/pages/list/main',
        query: {
          key: 'categoryId',
          text: category.category,
          title: category.categoryText
        }
      })
    }
同样也为src\pages\categoryList\categoryList.vue中的HomeBook新增@onBookClick="onCategoryClick":
    onCategoryClick(category) {
      this.$router.push({
        path: '/pages/list/main',
        query: {
          key: 'categoryId',
          text: category.category,
          title: category.categoryText
        }
      })
    }
六、阅读器页面开发
1.学习重点
- webview 组件的使用(查看官方文档)
- 阅读器模块的集成方法
2.阅读器组件
| 组件名称 | 属性 | 参数 | 用途 | 默认值 |
|---|---|---|---|---|
| read | data | fileName | 图书的唯一标识 | - |
| opf | 图书opf文件地址 | - | ||
| navigation | 图书目录地址 | - |
3.动手操作
新建src\pages\read\main.json:
{
  "navigationBarTitleText": "阅读器"
}
新建src\pages\read\main.js:
import Vue from 'vue'
import App from './read'

const app = new Vue(App)
app.$mount()
新建src\pages\read\read.vue:
<template>
  <web-view :src="url"></web-view>
</template>

<script>
export default {
  data() {
    return {
      url: ''
    }
  },
  mounted() {
    const { query } = this.$route
    let _url = 'https://www.youbaobao.xyz/book/#/ebook'
    if (query.fileName) {
      _url = `${_url}/${query.fileName}`
      if (query.opf) {
        _url = `${_url}?opf=${query.opf}`
      }
      if (query.navigation && query.opf) {
        _url = `${_url}&navigation=${query.navigation}`
      } else if (query.navigation) {
        _url = `${_url}?navigation=${query.navigation}`
      }
      this.url = _url
    }
  }
}
</script>

<style lang="scss" scoped>
</style>
完善src\pages\detail\detail.vue页面的readBook方法:
    readBook(href) {
      const query = {
        fileName: this.book.fileName,
        opf: this.book.opf
      }
      if (href) {
        // 找到标记位置
        const index = href.toString().indexOf('/')
        if (index >= 0) {
          // 标记存在则做截断(从标记的下一个位置开始读取)
          query.navigation = href.slice(index + 1)
        } else {
          query.navigation = href
        }
      }
      if (this.book && this.book.fileName) {
        this.$router.push({
          path: '/pages/read/main',
          query
        })
      }
    },
预览:

这样就可以阅读图书了
七、书架页面开发
1.学习重点
- API对接:
- 加入时间API
- 书架列表API
2.书架视觉稿
http://www.youbaobao.xyz/mpvue-design/preview/#artboard6
3.用户信息面板
| 组件名称 | 属性 | 参数 | 用途 | 默认值 |
|---|---|---|---|---|
| ShelfUserInfo | props | num | 书架图书数量 | 0 |
| readDay | 加入天数 | 0 | ||
| userInfo | 用户信息 | {} |
4.书架列表组件
| 组件名称 | 属性 | 参数 | 用途 | 默认值 |
|---|---|---|---|---|
| ShelfList | props | shelfList | 书架列表 | [] |
| methods | gotoHome | 访问首页 | - | |
| gotoBookDetail | 访问图书详情 | - |
5.动手操作
新建src\pages\shelf\main.json:
{
  "navigationBarTitleText": "书架"
}
新建src\pages\shelf\main.js:
import Vue from 'vue'
import App from './shelf'

const app = new Vue(App)
app.$mount()
新建src\pages\shelf\shelf.vue:
<template>
  <div></div>
</template>

<script>
export default {
  data() {
    return {
    }
  },
  mounted() {
    }
  }
}
</script>

<style lang="scss" scoped>
</style>
修改src\components\home\HomeCard.vue的gotoShelf方法为:
    gotoShelf() {
      this.$router.push('/pages/shelf/main')
    },
八、书架用户面板组件开发
新建组件:src\components\shelf\ShelfUserInfo.vue:
<template>
  <div class="user-info-wrapper">
    <div class="user-info">
      <div class="user-nick-name">{{userInfo.nickName}}</div>
      <div class="user-read-time">您已经加入小慕读书{{readDay}}天</div>
      <div class="user-avatar-wrapper">
        <img class="user-avatar" :src="userInfo.avatarUrl" mode="widthFix">
      </div>
    </div>
    <div class="user-extra">
      <div class="user-extra-text">您的书架中共有 {{num}} 本好书</div>
    </div>
  </div>
</template>

<script>
  export default {
    props: {
      num: Number,
      readDay: Number,
      userInfo: Object
    }
  }
</script>

<style lang="scss" scoped>
  .user-info-wrapper {
    margin: 15px 25px;
    background: #F8F9FB;
    border-radius: 12px;
    padding: 15px 20px;
    border: 1px solid #E0E1E2;

    .user-info {
      position: relative;
      height: 60px;
      border-bottom: 1px solid #E9E9E9;

      .user-nick-name {
        font-size: 17px;
        font-weight: 500;
        color: #333;
      }

      .user-read-time {
        font-size: 12px;
        color: #868686;
      }

      .user-avatar-wrapper {
        position: absolute;
        right: 0;
        top: 0;

        .user-avatar {
          width: 40px;
          border-radius: 50%;
        }
      }
    }

    .user-extra {
      margin-top: 15px;

      .user-extra-text {
        font-size: 12px;
        color: #666;
        font-weight: 500;
      }
    }
  }
</style>
在src\api\index.js中新增接口调用,用来获取用户注册天数:
export function userDay(params) {
  return get(`${API_URL}/user/day`, params)
}
修改src\pages\shelf\shelf.vue为:
<template>
  <div>
    <ShelfUserInfo
      :user-info="userInfo"
      :read-day="readDay"
      :num="shelfList.length"
    />
  </div>
</template>

<script>
import ShelfUserInfo from '../../components/shelf/ShelfUserInfo'
import {getStorageSync} from '../../api/wechat'
import {bookShelf, userDay} from '../../api'
export default {
  components: {ShelfUserInfo},
  data() {
    return {
      userInfo: {},
      readDay: 0,
      shelfList: []
    }
  },
  mounted() {
    this.userInfo = getStorageSync('userInfo')
    const openId = getStorageSync('openId')
    userDay({ openId }).then(res => {
      this.readDay = res.data.data.day
    })
    bookShelf({ openId }).then(res => {
      this.shelfList = res.data.data
    })
  }
}
</script>

<style lang="scss" scoped>
</style>
这里已经修改bookIsInShelf接口名称为bookShelf
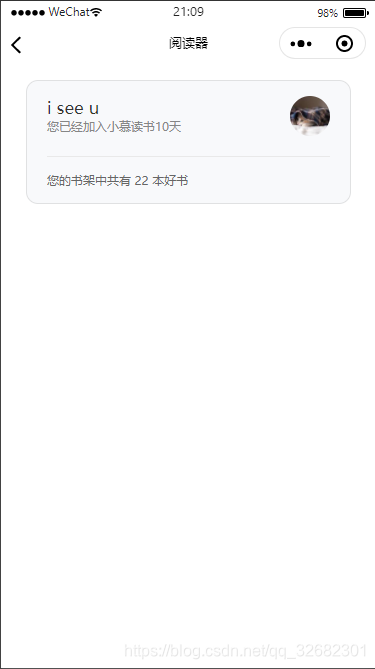
预览:
九、书架列表组件开发
新建src\components\shelf\ ShelfList.vue:
<template>
  <div class="shelf-list-wrapper">
    <div class="shelf-list-inner">
      <div
        class="shelf-book"
        v-for="book in shelfList"
        :key="book.fileName"
      >
        <div
          class="shelf-book-cover"
          v-if="book && book.cover"
          @click="() => gotoBookDetail(book)"
        >
          <ImageView :src="book.cover"></ImageView>
        </div>
        <div class="shelf-book-title" v-if="book && book.title">{{book.title}}</div>
        <div class="shelf-book-add" v-if="!book.title" @click="gotoHome">
          <div class="shelf-book-add-wrapper">
            <div class="shelf-book-add-x"></div>
            <div class="shelf-book-add-y"></div>
          </div>
        </div>
      </div>
    </div>
  </div>
</template>

<script>
  import ImageView from '../base/ImageView'
  export default {
    components: { ImageView },
    props: {
      shelfList: Array
    },
    methods: {
      gotoHome() {
        this.$router.push('/pages/index/main')
      },
      gotoBookDetail(book) {
        this.$router.push({ path: '/pages/detail/main', query: { fileName: book.fileName } })
      }
    }
  }
</script>

<style lang="scss" scoped>
  .shelf-list-wrapper {
    padding: 0 12.5px 20px 12.5px;

    .shelf-list-inner {
      display: flex;
      flex-flow: row wrap;

      .shelf-book {
        flex: 0 0 33.33%;
        width: 33.33%;
        padding: 20px 12.5px 0 12.5px;
        box-sizing: border-box;

        .shelf-book-cover {
          width: 100%;
          height: 130px;
        }

        .shelf-book-title {
          width: 100%;
          font-size: 12px;
          color: #333;
          overflow: hidden;
          text-overflow: clip;
          line-height: 14px;
          max-height: 28px;
          margin-top: 10px;
        }

        .shelf-book-add {
          width: 100%;
          height: 130px;
          border: 1px solid #CBCBCB;
          box-sizing: border-box;
          display: flex;
          align-items: center;
          justify-content: center;

          .shelf-book-add-wrapper {
            position: relative;
            width: 30px;
            height: 30px;

            .shelf-book-add-x {
              position: absolute;
              top: 50%;
              width: 30px;
              height: 2px;
              margin-top: -1px;
              background: #CACACA;
            }

            .shelf-book-add-y {
              position: absolute;
              left: 50%;
              width: 2px;
              height: 30px;
              background: #CACACA;
            }
          }
        }
      }
    }
  }
</style>
直接在src\pages\shelf\shelf.vue中调用组件:
<ShelfList :shelfList="shelfList" />
修改mounted为onShow并给shelfList push一个空对象:
  onShow() {
    this.userInfo = getStorageSync('userInfo')
    const openId = getStorageSync('openId')
    userDay({ openId }).then(res => {
      this.readDay = res.data.data.day
    })
    bookShelf({ openId }).then(res => {
      this.shelfList = res.data.data
      this.shelfList.push({})
    })
  }
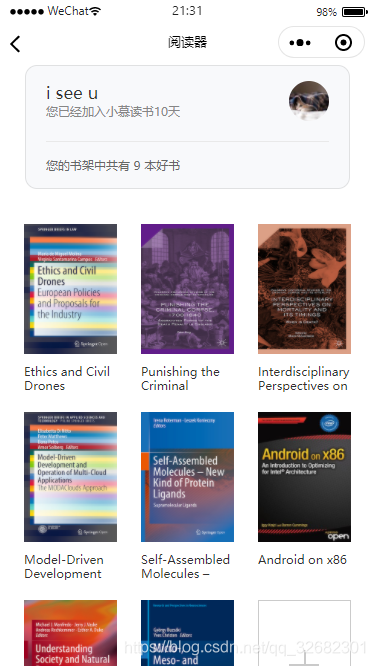
预览:
mounted在页面加载时只调用一次,而onShow是小程序页面的生命周期函数,在每次页面获得焦点时都会调用,包括首次加载和再次返回
此处有大坑:

