前言
NFS是一种基于TCP/IP传输的网络文件系统协议,最初由SUN公司开发。通过使用NFS协议,客户机可以像访问本地目录一样访问服务器的共享资源,对于大多数负载均衡集群来说,使用NFS协议来共享数据存储是比较常见的做法,NFS也是NAS存储设备必然支持的一种协议。
NFS服务的实现依赖于RPC机制已完成远程到本地的映射过程,在Centos 7系统中。需要安装nfs-utils,rpcbind软件包来提供NFS共享服务,前者用于 NFS共享发布和访问,后者用于RPC支持。
使用NFS发布共享资源de优点
- 节省本机的磁盘空间,可以把经常使用的数据集中存放在一台服务器上,并使用NFS发布,使局域网没所有主机都能访问
- 节约硬件资源
- 用户主目录设定
再来说说NFS的缺点
- 局限性:server宕机,所有节点都不能访问使用
- 性能有限:高并发时,访问速度变慢
- 安全性低:客户端数据都是明文传送,客户端无用户认证
- 管理繁琐:所有客户端都挂载在一台serve端,管理维护较繁琐
安装nfs-utils和rpcbind
[root@nfs ~]# yum -y install nfs-utils rpcbind
[root@nfs ~]# systemctl enable nfs rpcbind
Created symlink from /etc/systemd/system/multi-user.target.wants/nfs-server.service to /usr/lib/systemd/system/nfs-server.service.
Created symlink from /etc/systemd/system/multi-user.target.wants/rpcbind.service to /usr/lib/systemd/system/rpcbind.service.
设置共享目录
NFS的配置文件是/etc/exports,文件内容默认为空(无任何共享),在exports里设置共享资源时,格式为:目录位置 客户机地址(权限选项)
[root@nfs ~]# mkdir /nfs
[root@nfs ~]# cat /etc/exports
/nfs 192.168.1.0/24(rw,sync,no_root_squash)
其中,客户机地址可以是主机名,IP地址,网段地址,允许使用*,?通配符
权限选项中的rw表示读写,ro为只读,sync表示同步写入,no_root_squash表示当客户机以root身份访问时赋予本地root权限
启动NFS服务程序
[root@nfs ~]# systemctl start rpcbind
[root@nfs ~]# systemctl start nfs
[root@nfs ~]# showmount -e             #查看本机发布的共享目录
Export list for nfs:
/nfs 192.168.1.0/24
[root@nfs ~]#
在客户机里访问NFS共享资源
NFS协议目标是一种网络文件系统,因此对NFS共享的访问也使用mount命令来进行挂载,对应的文件系统也是nfs,客户机若要正常访问nfs共享资源,也要启动rpcbind。一般Centos图形化界面都是默认安装好的rpcbind,其他情况若没有自己下载就好,
例:
[root@web ~]# yum -y install nfs-utils rpcbind
[root@web ~]# systemctl enable rpcbind nfs
Created symlink from /etc/systemd/system/multi-user.target.wants/rpcbind.service to /usr/lib/systemd/system/rpcbind.service.
Created symlink from /etc/systemd/system/multi-user.target.wants/nfs-server.service to /usr/lib/systemd/system/nfs-server.service.
[root@web ~]#
[root@web ~]# systemctl start rpcbind nfs
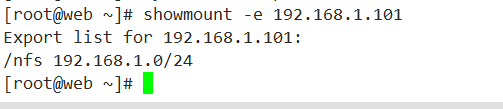
使用showmount -e 服务器地址查看共享目录
手动挂载NFS共享目录
以root用户身份执行mount操作,将NFS共享目录挂载到本地网站根目录/var/www/html下
[root@web ~]# mount 192.168.1.101:/nfs /var/www/html/
[root@web ~]# tail -l /etc/mtab   #确认挂载结果
mqueue /dev/mqueue mqueue rw,seclabel,relatime 0 0
hugetlbfs /dev/hugepages hugetlbfs rw,seclabel,relatime 0 0
debugfs /sys/kernel/debug debugfs rw,relatime 0 0
sunrpc /var/lib/nfs/rpc_pipefs rpc_pipefs rw,relatime 0 0
nfsd /proc/fs/nfsd nfsd rw,relatime 0 0
/dev/sda1 /boot xfs rw,seclabel,relatime,attr2,inode64,noquota 0 0
tmpfs /run/user/0 tmpfs rw,seclabel,nosuid,nodev,relatime,size=99996k,mode=700 0 0
gvfsd-fuse /run/user/0/gvfs fuse.gvfsd-fuse rw,nosuid,nodev,relatime,user_id=0,group_id=0 0 0
fusectl /sys/fs/fuse/connections fusectl rw,relatime 0 0
192.168.1.101:/nfs /var/www/html nfs4 rw,relatime,vers=4.1,rsize=131072,wsize=131072,namlen=255,hard,proto=tcp,port=0,timeo=600,retrans=2,sec=sys,clientaddr=192.168.1.102,local_lock=none,addr=192.168.1.101 0 0
[root@web ~]#
完成挂载后,访问客户机的/var/www/html文件夹,实际上相当于访问NFS的服务器的/nfs。
例如:
[root@web ~]# echo 'Hello Word!' > /var/www/html/index.html
在nfs服务端检查,已经同步了过来
[root@nfs ~]# cd /nfs/
[root@nfs nfs]# ls
index.html
[root@nfs nfs]# cat index.html
Hello Word!
[root@nfs nfs]#
自动挂载,编辑/etc/fstab文件
添加这么一行:
192.168.1.101:/nfs /var/www/html nfs defaults,_netdev 0 0
_netdev参数的意思是设备需要网络,之后就会开机自动挂载了
windows端挂载使用nfs
第一步:开启NFS功能
在控制面板——程序——windows功能 添加NFS功能

第二步:输入服务器地址和共享目录访问
映射网络驱动器——按照示例输入正确的地址——登录

然后就会连接到,如下图

我们在linux客户端建立的index.html文档,也同步到了这里

