一、NFS远程共享存储
文件系统级别共享(是NAS存储) --------- 已经做好了格式化,可以直接用。
因为NFS有很多功能,不同的功能需要使用不同的端口。因此NFS无法固定端口。因此NFS无法固定端口。而RPC会记录NFS端口的信息,这样就能够通过RPC实现服务端和客户端的RPC来沟通端口信息。
练习
环境准备:
服务端:Server1 IP:192.168.56.99
客户端:web1 IP:192.168.56.110
修改主机名:
服务端:hostnamectl set-hostname server1
客户端:hostnamectl set-hostname web1
同时关闭服务端客户端的防火墙和selinux内核防火墙:
[root@server1 ~]# systemctl stop firewalld && systemctl disable firewalld && setenforce 0
[root@web1 ~]# systemctl stop firewalld && systemctl disable firewalld && setenforce 0
NFS-server操作
[root@server1 ~]# yum -y install rpcbind  #安装rpc协议的包
[root@server1 ~]# yum -y install nfs-utils  #安装nfs服务,提供文件系统
[root@server1 ~]# systemctl start nfs && systemctl start rpcbind  #开启nfs服务和rpc协议
[root@server1 ~]# mkdir /nfs   #在根下创建一个名为nfs的目录作为共享存储目录
[root@server1 ~]# echo 'holle NFS' >> /nfs/text   #在目录nfc下创建text文件并追加内容
[root@server1 ~]# vim /etc/exports        #编辑共享文件
/nfs 192.168.56.0(rw,no_root_squash,sync)
【参数值内容说明】

rw ro 该目录分享的权限是可擦写 (read-write) 或只读 (read-only)
sync async sync 代表数据会同步写入到内存与硬盘中,async 则代表数据会先暂存于内存当中,而非直接写入硬盘!
no_root_squash root_squash 客户端使用 NFS 文件系统的账号若为 root 时,系统该如何判断这个账号的身份?预设的情况下,客户端 root 的身份会由 root_squash 的设定压缩成 nfsnobody, 如此对服务器的系统会较有保障。但如果你想要开放客户端使用 root 身份来操作服务器的文件系统,那么这里就得要开 no_root_squash 才行!
all_squash 不论登入 NFS 的使用者身份为何, 他的身份都会被压缩成为匿名用户,通常也就是 nobody(nfsnobody) 啦!
anonuid anongid anon 意指 anonymous (匿名者) 前面关于 *_squash 提到的匿名用户的 UID 设定值,通常为 nobody(nfsnobody),但是你可以自行设定这个 UID 的值!当然,这个 UID 必需要存在于你的 /etc/passwd 当中! anonuid 指的是 UID 而 anongid 则是群组的 GID 啰。
[root@server1 ~]# systemctl restart nfs-server   #重启nfc服务
[root@server1 ~]# systemctl enable nfs-server   #制作开机启动
[root@server1 ~]#  exportfs -v                  #确认 NFS 服务器启动
客户端web1操作:
[root@web1 ~]# yum -y install rpcbind  #安装rpc协议的包
[root@web1 ~]# yum -y install nfs-utils  #安装nfs服务,提供文件系统
[root@web1 ~]# systemctl start nfs && systemctl start rpcbind  #开启nfs服务和rpc协议
[root@web1 ~]# mkdir /gyl      #创建挂载点
[root@web-1 ~]# mount -t nfs 192.168.56.110:/nfs /gyl/   #挂载
[root@web-1 ~]# df -Th                                  # 查看挂载是否成功
[root@web-1 ~]# ls /gyl/
text
[root@web-1 ~]# umount /qf  #取消挂载
开[机自动挂载:
[root@web-1 ~]# vim /etc/fstab
192.168.56.110:/nfs     /gyl                    nfs     defaults        0 0
[root@web-1 ~]# mount -a
二、FTP文件传输服务
文件传输协议(File Transfer Protocol,FTP),基于该协议FTP客户端与服务端可以实现共享文件、上传文件、下载文件。 FTP 基于TCP协议生成一个虚拟的连接,用户可以通过客户端向FTP服务器端上传、下载、删除文件,FTP服务器端可以同时提供给多人共享使用。
FTP服务是Client/Server(简称C/S)模式,基于FTP协议实现FTP文件对外共享及传输的软件称之为FTP服务器源端,客户端程序基于FTP协议,则称之为FTP客户端,FTP客户端可以向FTP服务器上传、下载文件。
FTP Server
作用:提供文件共享服务,实现上传下载
端口:
21号,建立tcp连接 默认端口
20号:传输数据
ftp主动模式:
客户端开启一个端口N(>1023)向服务端的21端口,建立连接,同时开启一个N+1,告诉服务端,我监听的是N+1端口,服务端接到请求之后,用自己的20端口连接到客户端的N+1端口,进行传输
21端口建立连接
20端口传输数据
ftp被动模式:
客户端同时开启两个端口(1024,1025),一个端口(1024)跟服务端的21端口建立连接,并请求,大哥,我连上了,你再开一个端口呗。服务端接到请求之后,随机会开启一个端口(1027)并告诉客户端我开启的是1027端口,客户端用另一个端口(1025)与服务端的(1027)端口进行连接,传输数据
vsftp服务简介:
非常安全的FTP服务进程(Very Secure FTP daemon,Vsftpd),Vsftpd在Unix/Linux发行版中最主流的FTP服务器程序,优点小巧轻快,安全易用、稳定高效、满足企业跨部门、多用户的使用(1000用户)等。
开始vsftpd配置
环境准备:
服务端:Server1 IP:192.168.56.99
客户端:web1 IP:192.168.56.110
修改主机名:
服务端:hostnamectl set-hostname server1
客户端:hostnamectl set-hostname web1
同时关闭服务端客户端的防火墙和selinux内核防火墙:
[root@server1 ~]# systemctl stop firewalld && systemctl disable firewalld && setenforce 0
[root@web1 ~]# systemctl stop firewalld && systemctl disable firewalld && setenforce 0
服务端配置:
[root@server-1 ~]# yum install -y vsftpd         #下载安装vsftp服务
[root@server-1 ~]# systemctl start vsftpd        #开启vsftp服务
[root@server-1 ~]# systemctl enable vsftpd     #设置开机自启动
[root@server-1 ~]# touch /var/ftp/pub/text.txt     #创建文件到共享目录
[root@server-1 ~]# cd /var/ftp/                             #切换到ftp目录下
[root@server-1 ftp]# ls
[root@server-1 ftp]# chown ftp.ftp pub/ -R            #修改ftp目录的属主与属组
[root@server-1 ftp]# vim /etc/vsftpd/vsftpd.conf          --修改配置文件找到29行将下面的注释取消
 anon_other_write_enable=YES
 anon_umask=000                                      #匿名用户上传下载目录权限掩码
[root@server-1 ftp]# systemctl restart vsftpd.service       #重启vsftp服务
[root@server-1 ftp]# systemctl status vsftpd.service        #查看vsftp服务运行状态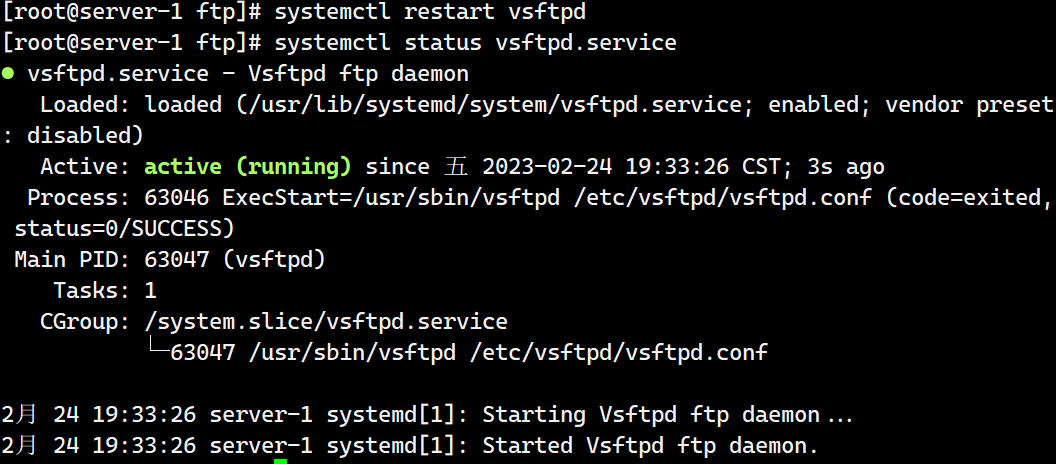
客户端配置
[root@web-1 ~]# yum -y install lftp          #安装ftp客户端
[root@web-1 ~]# lftp 192.168.56.110         #登录ftp
lftp 192.168.56.110:~> ls
drwxr-xr-x    2 14       50             22 Feb 24 11:24 pub
lftp 192.168.56.110:/> cd /pub/
lftp 192.168.56.110:/pub> ls
-rw-r--r--    1 14       50              0 Feb 24 11:24 text.txt
lftp 192.168.56.110:/pub> get text.txt        # 下载文件
lftp 192.168.56.110:/pub> exit                    # 退出ftp
[root@web-1 ~]# ls
anaconda-ks.cfg text.txt initial-setup-ks.cfg 
[root@web-1 ~]# lftp 192.168.56.110
lftp 192.168.56.110:/> mkdir /pub/gao            #创建目录
lftp 192.168.56.110:/> exit
[root@web-1 ~]# touch liang.txt                     #创建测试目录
[root@web-1 ~]# mkdir /text/                         #创建测试文件
[root@web-1 ~]# touch /text/liang-1              #在测试目录下创建测试文件
[root@web-1 ~]# lftp 192.168.56.110
lftp 192.168.56.110:~> cd /pub/
lftp 192.168.56.110:/pub> ls
drwxrwxrwx    2 14       50              6 Feb 24 11:39 gao
-rw-r--r--    1 14       50              0 Feb 24 11:24 text.txt
lftp 192.168.56.110:/pub> put /root/liang.txt       #上传文件
lftp 192.168.56.110:/pub> ls
drwxrwxrwx    2 14       50              6 Feb 24 11:39 gao
-rw-rw-rw-    1 14       50              0 Feb 24 11:45 liang.txt
-rw-r--r--    1 14       50              0 Feb 24 11:24 text.txt
lftp 192.168.56.110:/pub> mirror -R /text/          #上传目录以及目录中的子文件(mirror 下载目录)
Total: 1 directory, 1 file, 0 symlinks
New: 1 file, 0 symlinks
lftp 192.168.56.110:/pub> ls
drwxrwxrwx    2 14       50              6 Feb 24 11:39 gao
-rw-rw-rw-    1 14       50              0 Feb 24 11:45 liang.txt
drwxrwxrwx    2 14       50             21 Feb 24 11:46 text
-rw-r--r--    1 14       50              0 Feb 24 11:24 text.txt
ftp配置本地用户登录
创建测试用户(服务端操作)
创建 zhangsan 密码都设置为 “root”
[root@server-1 ~]# useradd zhangsan           # 创建zhangsan用户
[root@server-1 ~]# echo 'root' | passwd --stdin zhangsan    # 设置密码
更改用户 zhangsan 的密码 。
passwd:所有的身份验证令牌已经成功更新。
[root@server-1 ~]# vim /etc/vsftpd/vsftpd.conf  # 添加注释并修改
 anonymous_enable=NO                       #将允许匿名登录关闭
新添加
local_root=/home/zhangsan     # 设置本地用户的FTP根目录,一般为用户的家目录(可有可无)
local_max_rate=0              # 限制最大传输速率(字节/秒)0为无限制(可有可无)
[root@server-1 ~]# systemctl restart vsftpd        # 重启服务
客户端操作
[root@web-1 ~]# lftp 192.168.56.110 -u zhangsan           # 使用zhangsan登录ftp
口令:
lftp [email protected]:~> ls
lftp [email protected]:~> mkdir gyl                  # 创建gyl目录
mkdir 成功, 建立 `gyl'
lftp [email protected]:~> ls
drwxr-xr-x    2 1000     1000            6 Aug 02 20:55 gyl
lftp [email protected]:~> put /root/test.txt      # 上传文件text.txt
lftp [email protected]:~> ls
drwxr-xr-x    2 1001     1001            6 Feb 27 02:06 gyl
-rw-r--r--    1 1001     1001            7 Feb 27 01:55 text.txt
服务器端查看
[root@server-1 ~]# cd /home/zhangsan/
[root@server-1 zhangsan]# ls
gyl  text.txt
[root@server-1 zhangsan]# ll
总用量 4
drwxr-xr-x. 2 zhangsan zhangsan 6 2月  27 10:06 gyl
-rw-r--r--. 1 zhangsan zhangsan 7 2月  27 09:55 text.txt