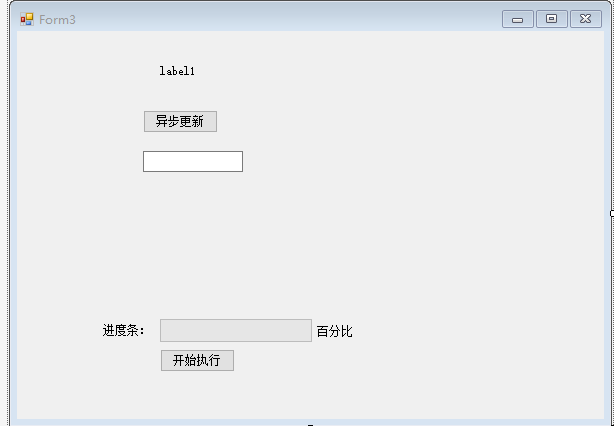
首选拖几个控件,如图:
直接上代码:


 1 public partial class Form3 : Form
 2     {
 3         public Form3()
 4         {
 5             InitializeComponent();
 6         }
 7
 8
 9         //方法一开始
10         private async void button1_Click(object sender, EventArgs e)
11         {
12             var t = Task.Run(() =>
13             {
14                 Thread.Sleep(5000);
15                 return "Hello I am TimeConsumingMethod";
16             });
17             label1.Text = await t;
18         }
19
20
21         private void btnWrite_Click(object sender, EventArgs e)
22         {
23             var taskCount = 10000; //任务量为10000
24             pgbWrite.Maximum = taskCount;
25             pgbWrite.Value = 0;
26
27             var dataWrite = new DataWrite(); //实例化一个写入数据的类
28             dataWrite.UpdateUIDelegate += UpdateUiStatus; //绑定更新任务状态的委托
29             dataWrite.TaskCallBack += Accomplish; //绑定完成任务要调用的委托
30
31             var thread = new Thread(dataWrite.Write) {IsBackground = true};
32             thread.Start(taskCount);
33         }
34
35         //更新UI
36         private void UpdateUiStatus(int step)
37         {
38             if (InvokeRequired)
39             {
40                 Invoke(new AsycUpdateUi(delegate(int s)
41                 {
42                     pgbWrite.Value += s;
43                     lblWriteStatus.Text = $"{pgbWrite.Value}/{pgbWrite.Maximum}";
44                 }), step);
45             }
46             else
47             {
48                 pgbWrite.Value += step;
49                 lblWriteStatus.Text = $"{pgbWrite.Value}/{pgbWrite.Maximum}";
50             }
51         }
52
53         //完成任务时需要调用
54         private void Accomplish()
55         {
56             //还可以进行其他的一些完任务完成之后的逻辑处理
57             MessageBox.Show(@"任务完成");
58         }
59         //方法一结束
60
61         //方法三
62         private delegate void AsycUpdateUi(int step);
63
64
65         ////方法二开始
66         //private void button1_Click(object sender, EventArgs e)
67         //{
68         //    var ResultTask = Task.Run(() => {
69         //        Console.WriteLine("Helo I am TimeConsumingMethod. My Thread ID is :" + Thread.CurrentThread.ManagedThreadId);
70         //        Thread.Sleep(5000);
71         //        Console.WriteLine("Helo I am TimeConsumingMethod after Sleep(5000). My Thread ID is :" + Thread.CurrentThread.ManagedThreadId);
72         //        return "Hello I am TimeConsumingMethod";
73         //    });
74
75         //    ResultTask.ContinueWith(OnDoSomthingIsComplete);
76
77         //}
78
79         //private void OnDoSomthingIsComplete(Task<string> t)
80         //{
81         //    Action action = () => {
82         //        label1.Text = t.Result;
83         //    };
84         //    label1.Invoke(action);
85         //    Console.WriteLine("Continue Thread ID :" + Thread.CurrentThread.ManagedThreadId);
86         //}
87         ////方法二结束
88     }
页面设计器代码:
  1  partial class Form3
  2     {
  3         /// <summary>
  4         /// Required designer variable.
  5         /// </summary>
  6         private System.ComponentModel.IContainer components = null;
  7
  8         /// <summary>
  9         /// Clean up any resources being used.
 10         /// </summary>
 11         /// <param name="disposing">true if managed resources should be disposed; otherwise, false.</param>
 12         protected override void Dispose(bool disposing)
 13         {
 14             if (disposing && (components != null))
 15             {
 16                 components.Dispose();
 17             }
 18             base.Dispose(disposing);
 19         }
 20
 21         #region Windows Form Designer generated code
 22
 23         /// <summary>
 24         /// Required method for Designer support - do not modify
 25         /// the contents of this method with the code editor.
 26         /// </summary>
 27         private void InitializeComponent()
 28         {
 29             this.button1 = new System.Windows.Forms.Button();
 30             this.label1 = new System.Windows.Forms.Label();
 31             this.textBox1 = new System.Windows.Forms.TextBox();
 32             this.pgbWrite = new System.Windows.Forms.ProgressBar();
 33             this.label2 = new System.Windows.Forms.Label();
 34             this.lblWriteStatus = new System.Windows.Forms.Label();
 35             this.btnWrite = new System.Windows.Forms.Button();
 36             this.SuspendLayout();
 37             //
 38             // button1
 39             //
 40             this.button1.Location = new System.Drawing.Point(126, 79);
 41             this.button1.Name = "button1";
 42             this.button1.Size = new System.Drawing.Size(75, 23);
 43             this.button1.TabIndex = 0;
 44             this.button1.Text = "异步更新";
 45             this.button1.UseVisualStyleBackColor = true;
 46             this.button1.Click += new System.EventHandler(this.button1_Click);
 47             //
 48             // label1
 49             //
 50             this.label1.AutoSize = true;
 51             this.label1.Location = new System.Drawing.Point(141, 34);
 52             this.label1.Name = "label1";
 53             this.label1.Size = new System.Drawing.Size(41, 12);
 54             this.label1.TabIndex = 1;
 55             this.label1.Text = "label1";
 56             //
 57             // textBox1
 58             //
 59             this.textBox1.Location = new System.Drawing.Point(126, 120);
 60             this.textBox1.Name = "textBox1";
 61             this.textBox1.Size = new System.Drawing.Size(100, 21);
 62             this.textBox1.TabIndex = 2;
 63             //
 64             // pgbWrite
 65             //
 66             this.pgbWrite.Location = new System.Drawing.Point(143, 288);
 67             this.pgbWrite.Name = "pgbWrite";
 68             this.pgbWrite.Size = new System.Drawing.Size(152, 23);
 69             this.pgbWrite.TabIndex = 3;
 70             //
 71             // label2
 72             //
 73             this.label2.AutoSize = true;
 74             this.label2.Location = new System.Drawing.Point(84, 293);
 75             this.label2.Name = "label2";
 76             this.label2.Size = new System.Drawing.Size(53, 12);
 77             this.label2.TabIndex = 4;
 78             this.label2.Text = "进度条:";
 79             //
 80             // lblWriteStatus
 81             //
 82             this.lblWriteStatus.AutoSize = true;
 83             this.lblWriteStatus.Location = new System.Drawing.Point(298, 294);
 84             this.lblWriteStatus.Name = "lblWriteStatus";
 85             this.lblWriteStatus.Size = new System.Drawing.Size(41, 12);
 86             this.lblWriteStatus.TabIndex = 5;
 87             this.lblWriteStatus.Text = "百分比";
 88             //
 89             // btnWrite
 90             //
 91             this.btnWrite.Location = new System.Drawing.Point(143, 318);
 92             this.btnWrite.Name = "btnWrite";
 93             this.btnWrite.Size = new System.Drawing.Size(75, 23);
 94             this.btnWrite.TabIndex = 6;
 95             this.btnWrite.Text = "开始执行";
 96             this.btnWrite.UseVisualStyleBackColor = true;
 97             this.btnWrite.Click += new System.EventHandler(this.btnWrite_Click);
 98             //
 99             // Form3
100             //
101             this.AutoScaleDimensions = new System.Drawing.SizeF(6F, 12F);
102             this.AutoScaleMode = System.Windows.Forms.AutoScaleMode.Font;
103             this.ClientSize = new System.Drawing.Size(587, 388);
104             this.Controls.Add(this.btnWrite);
105             this.Controls.Add(this.lblWriteStatus);
106             this.Controls.Add(this.label2);
107             this.Controls.Add(this.pgbWrite);
108             this.Controls.Add(this.textBox1);
109             this.Controls.Add(this.label1);
110             this.Controls.Add(this.button1);
111             this.Name = "Form3";
112             this.Text = "Form3";
113             this.ResumeLayout(false);
114             this.PerformLayout();
115
116         }
117
118         #endregion
119
120         private System.Windows.Forms.Button button1;
121         private System.Windows.Forms.Label label1;
122         private System.Windows.Forms.TextBox textBox1;
123         private System.Windows.Forms.ProgressBar pgbWrite;
124         private System.Windows.Forms.Label label2;
125         private System.Windows.Forms.Label lblWriteStatus;
126         private System.Windows.Forms.Button btnWrite;
127     }
其它类:
public class DataWrite
    {
        public delegate void UpdateUI(int step);//声明一个更新主线程的委托
        public UpdateUI UpdateUIDelegate;

        public delegate void AccomplishTask();//声明一个在完成任务时通知主线程的委托
        public AccomplishTask TaskCallBack;

        public void Write(object lineCount)
        {
            StreamWriter writeIo = new StreamWriter("text.txt", false, Encoding.GetEncoding("gb2312"));
            string head = "编号,省,市";
            writeIo.Write(head);
            for (int i = 0; i < (int)lineCount; i++)
            {
                writeIo.WriteLine(i.ToString() + ",北京,顺义");
                //写入一条数据,调用更新主线程ui状态的委托
                UpdateUIDelegate(1);
            }
            //任务完成时通知主线程作出相应的处理
            TaskCallBack();
            writeIo.Close();
        }
    }
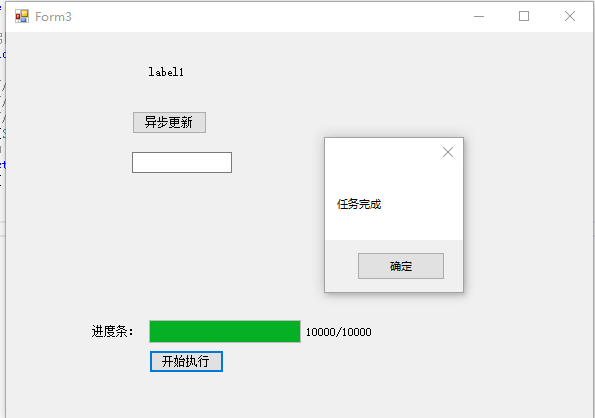
效果图:
其它方式还有:
- 通过BackgroundWorker取代Thread执行异步操作
//共分三步

        //第一步:定义BackgroundWorker对象,并注册事件(执行线程主体、执行UI更新事件)
        private BackgroundWorker backgroundWorker1 =null;
        public Form1()
        {
            InitializeComponent();


            backgroundWorker1 = new System.ComponentModel.BackgroundWorker();
            //设置报告进度更新
            backgroundWorker1.WorkerReportsProgress = true;
            //注册线程主体方法
            backgroundWorker1.DoWork += new DoWorkEventHandler(backgroundWorker1_DoWork);
            //注册更新UI方法
            backgroundWorker1.ProgressChanged += new ProgressChangedEventHandler(backgroundWorker1_ProgressChanged);
            //backgroundWorker1.RunWorkerCompleted += new System.ComponentModel.RunWorkerCompletedEventHandler(this.backgroundWorker1_RunWorkerCompleted);
        }

        //第二步:定义执行线程主体事件
        //线程主体方法
        public void backgroundWorker1_DoWork(object sender, DoWorkEventArgs e)
        {
            //...执行线程任务

            //在线程中更新UI(通过ReportProgress方法)
            backgroundWorker1.ReportProgress(50, "This text was set safely by BackgroundWorker.");

            //...执行线程其他任务
        }
        //第三步:定义执行UI更新事件
        //UI更新方法
        public void backgroundWorker1_ProgressChanged(object sender, ProgressChangedEventArgs e)
        {
            this.textBox1.Text = e.UserState.ToString();
        }
        //之后,启动线程
        //启动backgroundWorker
        private void setTextBackgroundWorkerBtn_Click(object sender, EventArgs e)
        {
            this.backgroundWorker1.RunWorkerAsync();
        }
/*
说明:C# Winform中执行异步任务时,BackgroundWorker是个不错的选择。它是EAP(Event based Asynchronous Pattern)思想的产物,DoWork用来执行异步任务,在任务执行过程中/执行完成后,我们可以通过ProgressChanged,ProgressCompleteded事件进行线程安全的UI更新。

需要注意的是://设置报告进度更新
            backgroundWorker1.WorkerReportsProgress = true;
默认情况下BackgroundWorker是不报告进度的,需要显示设置报告进度属性。
*/
- UI线程的SynchronizationContext的Post/Send方法更新
 1 //共分三步
 2         //第一步:获取UI线程同步上下文(在窗体构造函数或FormLoad事件中)
 3         /// <summary>
 4         /// UI线程的同步上下文
 5         /// </summary>
 6         SynchronizationContext m_SyncContext = null;
 7         public Form1()
 8         {
 9             InitializeComponent();
10             //获取UI线程同步上下文
11             m_SyncContext = SynchronizationContext.Current;
12             //Control.CheckForIllegalCrossThreadCalls = false;
13         }
14         //第二步:定义线程的主体方法
15         /// <summary>
16         /// 线程的主体方法
17         /// </summary>
18         private void ThreadProcSafePost()
19         {
20             //...执行线程任务
21
22             //在线程中更新UI(通过UI线程同步上下文m_SyncContext)
23             m_SyncContext.Post(SetTextSafePost, "This text was set safely by SynchronizationContext-Post.");
24
25             //...执行线程其他任务
26         }
27         //第三步:定义更新UI控件的方法
28         /// <summary>
29         /// 更新文本框内容的方法
30         /// </summary>
31         /// <param name="text"></param>
32         private void SetTextSafePost(object text)
33         {
34             this.textBox1.Text = text.ToString();
35         }
36         //之后,启动线程
37         /// <summary>
38         /// 启动线程按钮事件
39         /// </summary>
40         /// <param name="sender"></param>
41         /// <param name="e"></param>
42         private void setSafePostBtn_Click(object sender, EventArgs e)
43         {
44             this.demoThread = new Thread(new ThreadStart(this.ThreadProcSafePost));
45             this.demoThread.Start();
46         }
47 /*
48 说明:三处加粗部分是关键。该方法的主要原理是:在线程执行过程中,需要更新到UI控件上的数据不再直接更新,而是通过UI线程上下文的Post/Send方法,将数据以异步/同步消息的形式发送到UI线程的消息队列;UI线程收到该消息后,根据消息是异步消息还是同步消息来决定通过异步/同步的方式调用SetTextSafePost方法直接更新自己的控件了。
49
50 在本质上,向UI线程发送的消息并是不简单数据,而是一条委托调用命令。
51
52 //在线程中更新UI(通过UI线程同步上下文m_SyncContext)
53 m_SyncContext.Post(SetTextSafePost, "This text was set safely by SynchronizationContext-Post.");
54 可以这样解读这行代码:向UI线程的同步上下文(m_SyncContext)中提交一个异步消息(UI线程,你收到消息后以异步的方式执行委托,调用方法SetTextSafePost,参数是“this text was ....”).
55 */
部分内容参考自:C# Winform 跨线程更新UI控件常用方法汇总