今天终于完成了SSM框架的整合,高兴地我立马就来写这个整合的过程,好了话不多说下面开始。

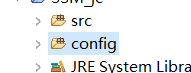
这是我的项目结构图

1.导包
 这些包都是最基础的jar包了,小编在这就不分类了。
2.配置文件
首先我们先创建一个Source Folder
(1)我们先来写springmvc的配置文件(因为这个简单!)
	<?xml version="1.0" encoding="UTF-8"?>
<beans xmlns="http://www.springframework.org/schema/beans"
	xmlns:xsi="http://www.w3.org/2001/XMLSchema-instance"
	xmlns:context="http://www.springframework.org/schema/context"
	xsi:schemaLocation="http://www.springframework.org/schema/beans http://www.springframework.org/schema/beans/spring-beans.xsd
		http://www.springframework.org/schema/context http://www.springframework.org/schema/context/spring-context-4.0.xsd">

	<!--controller的包扫描-->
	<context:component-scan base-package="edu.sdp.controller"></context:component-scan>
	<!-- 配置视图解析器 -->
	<bean class="org.springframework.web.servlet.view.InternalResourceViewResolver">
		<property name="prefix" value="/WEB-INF/pages/"></property>
		<property name="suffix" value=".jsp"></property>
	</bean>

</beans>
配置完springmvc后再WEB-INF下要新建一个pages的文件夹,然后在文件夹下创建一个customer.jsp的文件
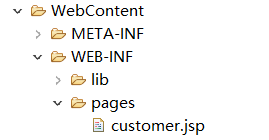
在jsp文件内写入
<%@ page language="java" contentType="text/html; charset=UTF-8"
    pageEncoding="UTF-8"%>
<!DOCTYPE html PUBLIC "-//W3C//DTD HTML 4.01 Transitional//EN" "http://www.w3.org/TR/html4/loose.dtd">
<html>
<head>
<meta http-equiv="Content-Type" content="text/html; charset=UTF-8">
<title>Insert title here</title>
</head>
<body>
	<table border="1">
		<tr>
			<td>编号</td>
			<td>名称</td>
			<td>职业</td>
			<td>电话</td>
		</tr>
		<tr>
			<td>${customer.id }</td>
			<td>${customer.username }</td>
			<td>${customer.jobs }</td>
			<td>${customer.phone }</td>
		</tr>
	</table>
</body>
</html>
这是用来接收从后台传输的数据,然后用EL表达式进行输出。
弄完这些之后,用一个File写一个数据库的用户名及密码等

在这里一定注意?之后的代码,那是防止乱码的
(2)spring配置文件
<?xml version="1.0" encoding="UTF-8"?>
<beans xmlns="http://www.springframework.org/schema/beans"
	xmlns:xsi="http://www.w3.org/2001/XMLSchema-instance"
	xmlns:context="http://www.springframework.org/schema/context"
	xmlns:tx="http://www.springframework.org/schema/tx"
	xsi:schemaLocation="http://www.springframework.org/schema/beans http://www.springframework.org/schema/beans/spring-beans.xsd
		http://www.springframework.org/schema/context http://www.springframework.org/schema/context/spring-context-4.0.xsd
		http://www.springframework.org/schema/tx http://www.springframework.org/schema/tx/spring-tx-4.0.xsd">
	<!-- 导入外部文件 -->
	<context:property-placeholder location="classpath:db.properties"/>

	<!-- 配置数据源 -->
	<bean id="ds" class="org.apache.commons.dbcp.BasicDataSource">
		<!-- 数据库驱动-->
		<property name="driverClassName" value="${jdbc.driver}"></property>
		<property name="url" value="${jdbc.url}"></property>
		<property name="username" value="${jdbc.username}"></property>
		<property name="password" value="${jdbc.password}"></property>
		<property name="maxIdle" value="${jdbc.maxIdle}"></property>
		<property name="initialSize" value="${jdbc.initalSize}"></property>
	</bean>
	<!-- 事务管理器-依赖于数据源 -->
	<bean id="tm" class="org.springframework.jdbc.datasource.DataSourceTransactionManager">
		<property name="dataSource" ref="ds"></property>
	</bean>
	<!-- 开启事务注解  默认为transactionManager因为我们上边命名为tm所以这里我们写tm -->
	<tx:annotation-driven  transaction-manager="tm"/>
	<!-- 配置工厂 -->
	<bean id="SqlSessionFactory" class="org.mybatis.spring.SqlSessionFactoryBean">
		<property name="dataSource" ref="ds"></property>
		<!-- mybatis配置文件 也可以不配置 -->
		<property name="configLocation" value="classpath:mybatis-config.xml"></property>
		<!-- mapper位置 -->
		<property name="mapperLocations" value="classpath:edu.sdp.dao.*.xml" />
	</bean>
	<!-- 配置扫描器 扫描mapper-->
	<bean class="org.mybatis.spring.mapper.MapperScannerConfigurer">
		<property name="basePackage" value="edu.sdp.dao"></property>
	</bean>
	<!-- 扫描service -->
	<context:component-scan base-package="edu.sdp.service"></context:component-scan>

</beans>```

(3)mybatis配置文件(可以不写,不熟悉的小白还是写上比较好)

```java
<?xml version="1.0" encoding="UTF-8" ?>
<!DOCTYPE configuration
  PUBLIC "-//mybatis.org//DTD Config 3.0//EN"
  "http://mybatis.org/dtd/mybatis-3-config.dtd">
<configuration>
	<typeAliases>
		<package name="edu.sdp.po"/>
	</typeAliases>
</configuration>
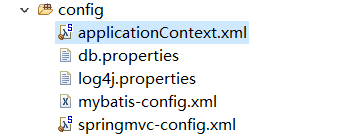
最后上我们配置文件的总图,当然不要忘了log4g
3.开始我们的类编写了。
(1)po层(好像很多人叫bean层,各种各样吧小编也不清楚这是个啥层)
package edu.sdp.po;

public class Customer {
	private Integer id;
	private String username;
	private String jobs;
	private String phone;
	public Integer getId() {
		return id;
	}
	public void setId(Integer id) {
		this.id = id;
	}
	public String getUsername() {
		return username;
	}
	public void setUsername(String username) {
		this.username = username;
	}
	public String getJobs() {
		return jobs;
	}
	public void setJobs(String jobs) {
		this.jobs = jobs;
	}
	public String getPhone() {
		return phone;
	}
	public void setPhone(String phone) {
		this.phone = phone;
	}

}
(2)controller层
package edu.sdp.controller;

import org.springframework.beans.factory.annotation.Autowired;
import org.springframework.stereotype.Controller;
import org.springframework.ui.Model;
import org.springframework.web.bind.annotation.RequestMapping;
import org.springframework.web.bind.annotation.RequestParam;

import edu.sdp.po.Customer;
import edu.sdp.service.CustomerService;

@Controller
public class CustomerController {
	@Autowired
	private CustomerService customerService;

	//拦截请求
	@RequestMapping("/customer")    //@RequestParam给参数默认值
	public String findCustomerById(@RequestParam(value="id",defaultValue="1")Integer id,Model model) {
		System.out.println(6666);
		Customer findCustomerById = customerService.findCustomerById(id);
		model.addAttribute("customer", findCustomerById);
		System.out.println(6666);
		return "customer";
	}
}
(3)service层
首先来一个接口
package edu.sdp.service;

import edu.sdp.po.Customer;

public interface CustomerService {
	public Customer findCustomerById(Integer id);
}
然后给接口写上实现类
package edu.sdp.service.impl;

import org.springframework.beans.factory.annotation.Autowired;
import org.springframework.stereotype.Service;
import org.springframework.transaction.annotation.Transactional;

import edu.sdp.dao.CustomerDao;
import edu.sdp.po.Customer;
import edu.sdp.service.CustomerService;

@Service
@Transactional
public class CustomerServiceimpl implements CustomerService {
	@Autowired
	private CustomerDao customerDao;

	@Override
	public Customer findCustomerById(Integer id) {
		return this.customerDao.findCustomerById(id);
	}
}
(4)dao层(也就是查数据了)
第一步还是写一个接口
package edu.sdp.dao;

import edu.sdp.po.Customer;

public interface CustomerDao {
	public Customer findCustomerById(Integer id);
}
然后给接口搞上sql查询语句
<?xml version="1.0" encoding="UTF-8" ?>
<!DOCTYPE mapper
  PUBLIC "-//mybatis.org//DTD Mapper 3.0//EN"
  "http://mybatis.org/dtd/mybatis-3-mapper.dtd">
<mapper namespace="edu.sdp.dao.CustomerDao">
  <select id="findCustomerById" parameterType="Integer" resultType="Customer">
    select * from t_customer where id = #{id}
  </select>
</mapper>
4.数据库
CREATE TABLE t_customer
(
id INTEGER NOT NULL PRIMARY KEY auto_increment,    #auto_increment自增!!!
username VARCHAR(50) NOT NULL,
jobs VARCHAR(20) NOT NULL,
phone VARCHAR(100) NOT NULL
);

INSERT INTO t_customer
(username,jobs,phone)
VALUE
('shine','IT程序猿','521521');
表是这样的:
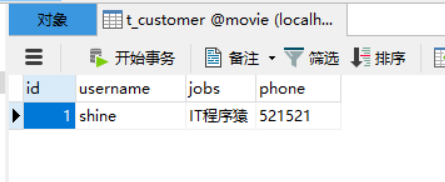
数据库写完之后就是我们的最后阶段了(测试测试)


最后在WebContent下下一个index.jsp
<%@ page language="java" contentType="text/html; charset=UTF-8"
    pageEncoding="UTF-8"%>
<!DOCTYPE html PUBLIC "-//W3C//DTD HTML 4.01 Transitional//EN" "http://www.w3.org/TR/html4/loose.dtd">
<html>
<head>
<meta http-equiv="Content-Type" content="text/html; charset=UTF-8">
<title>Insert title here</title>
</head>
<body>
<a href="customer">点我</a>
</body>
</html>
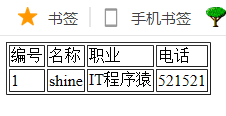
程序运行结果:
如果你也搭建完成的话就给博主点个赞吧!

