最简单的SSM框架整合_java web项目普通版
1. 前言
笔者在做javaweb项目时,用SSM+maven+easyui/bootstarp,接着上一个博文,我们梳理了SSM框架下的每层的作用和联系。详情点击。而在这篇博文中,记录的是SSM框架整合之java web普通版,为什么说是普通版呢?因为现在有jar依赖管理工具maven,很多人开始建maven工程,但是万丈高楼平地起,笔者就先写一个java web 普通版本,下一篇博文再写一个maven版的。
在这里记录一下,希望有疑惑的人能找到答案。
2. 正文
一、项目总览
项目名称:ssm
数据库:ssm_zh,
访问地址:http://localhost:8080/ssm/
项目位置:F:\Web项目_实战+模板\已完成项目\SSM整合最后一次学习\ssm
Jar包备份:链接: https://pan.baidu.com/s/1snmL8aL 密码: j71r
源码地址:GitHub
运行环境:eclipse+mysql+ssm+tomcat
二、整合教程
- 新建ssm_zh数据库,创建category_表:
在mysql数据库当中新建ssm_zh数据库,创建category_表,建表语句:
CREATE TABLE category_ (
  id int(11) NOT NULL AUTO_INCREMENT,
  name varchar(30) ,
  PRIMARY KEY (id)
) DEFAULT CHARSET=UTF8;
如图:

2.准备数据,添加数据库数据
(可以手动加入,也可以使用下面的sql语句)
就是为了便于项目测试,直接先在建好的数据库表里加一些数据:
use ssm;
insert into category_ values(null,"柒晓白");
insert into category_ values(null,"SSM_javaweb版");
insert into category_ values(null,"整合示例");
insert into category_ values(null,"最后一次");
insert into category_ values(null,"学习ssm");
insert into category_ values(null,"new Category");
insert into category_ values(null,"新类别");
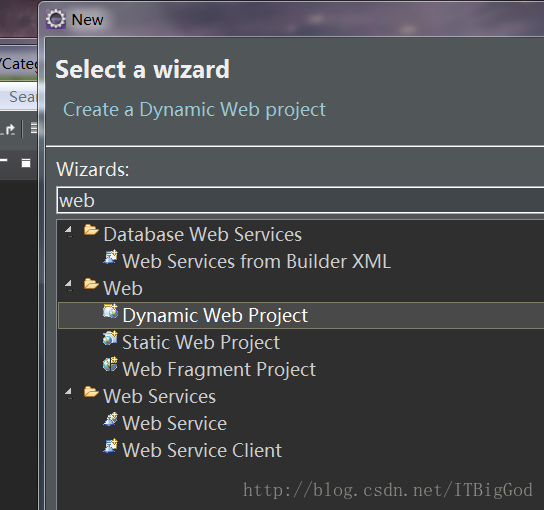
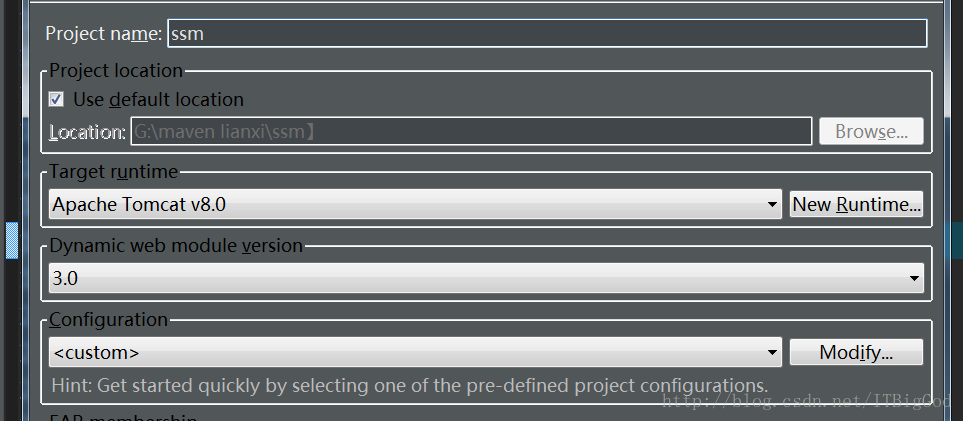
3.新建java web项目
在eclipse中新建项目ssm,使用dynamic web project的方式。
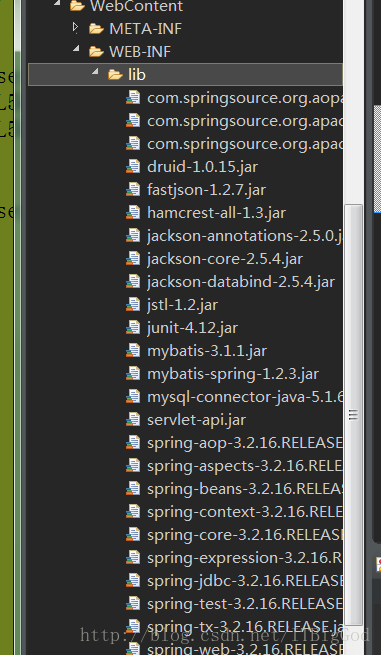
4.导入需要的jar包
注意:因为这是先做的普通的web工程,所以项目需要的jar包需要自己下载。
然后复制到 ssm/WebContent/WEB-INF/lib目录下;(没有lib就新建一个)
说明一下:整合为了更加的形象具体,因为xml配置中,常常是需要用到很多name,是跟业务代码下的java文件关联的,而这些name又跟个人的命名习惯不同而不同,所以不先配置.xml文件,先写业务代码,然后再根据建立的包名来配置xml。
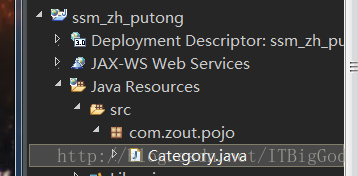
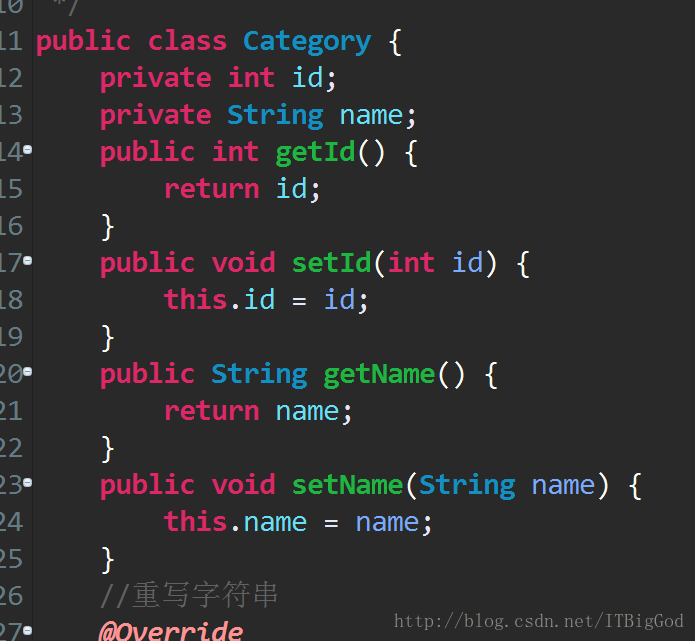
5.写实体类Category.java(实体类)
在创建的ssm项目里面,新建pojo包,新建Category类:
写数据表里面对应的字段属性,
生成set、get方法,和重写实体类tosting方法。
使用eclipse自动生成方法来做,不会百度;
具体代码:
package com.zout.pojo;
/**
 *@class_name:Category
 *@param: Category的实体类
 *@return:
 *@author:Zoutao
 *@createtime:2018年2月8日
 */
public class Category {
    private int id;
    private String name;
    public int getId() {
        return id;
    }
    public void setId(int id) {
        this.id = id;
    }
    public String getName() {
        return name;
    }
    public void setName(String name) {
        this.name = name;
    }
    //重写字符串
    @Override
    public String toString() {
        return "Category [id=" + id + ", name=" + name + "]";
    }
}
6.写接口CategoryMapper(Dao层)
按照现在的方式来说,可以通过MyBatis-Generator逆向工程来自动生成实体类、mapper.xml和dao层,但是这里我们使用手写。
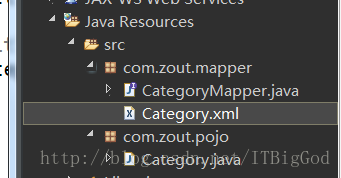
新建mapper包,新建CategoryMapper接口类:
package com.zout.mapper;
import java.util.List;
import com.zout.pojo.Category;

/**
 *@class_name:CategoryMapper
 *@param: mapper接口实现数据库操作
 *@return:
 *@author:Zoutao
 *@createtime:2018年2月8日
 */
public interface CategoryMapper {
    //增-对应mapper.xml文件的parameterType名
    public int add(Category category);
    //删-对应mapper.xml文件的parameterType名
    public void delete(int id);
    //查-对应mapper.xml文件的parameterType名
    public Category get(int id);
    //更新-对应mapper.xml文件的parameterType名
    public void update(Category category);
    //查询全部
    public List<Category>list();
    public int count();
}
7.写Category.xml(mapper配置):
写的就是mapper接口中写的数据操作方法的具体sql语法。
Category.xml需要和CategoryMapper放在同一个包下面,并且namespace必须写CategoryMapper的完整类名;
<?xml version="1.0" encoding="UTF-8"?>
<!DOCTYPE mapper
    PUBLIC "-//mybatis.org//DTD Mapper 3.0//EN"
    "http://mybatis.org/dtd/mybatis-3-mapper.dtd">
    <!-- 参考官方文档教程复制即可 -->
        <mapper namespace="com.zout.mapper.CategoryMapper">
        <insert id="add" parameterType="Category" >
            insert into category_ ( name ) values (#{name})
        </insert>

        <delete id="delete" parameterType="Category" >
            delete from category_ where id= #{id}
        </delete>

        <select id="get" parameterType="_int" resultType="Category">
            select * from   category_  where id= #{id}
        </select>

        <update id="update" parameterType="Category" >
            update category_ set name=#{name} where id=#{id}
        </update>
        <select id="list" resultType="Category">
            select * from   category_
        </select>
    </mapper>
8.写接口CategoryService:(Service层)
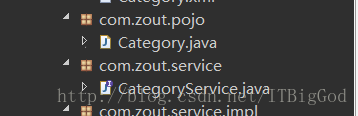
新建Service包,新建CategoryService接口类:
package com.zout.service;

import java.util.List;
import com.zout.pojo.Category;

public interface CategoryService {

    List<Category> list();
}- 写接口实现类CategoryServiceImpl:(impl)
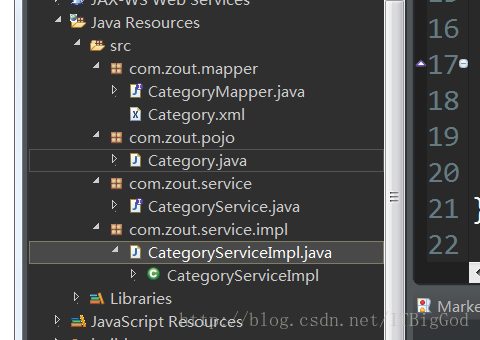
在新建Service包下再建一个impl包,然后新建CategoryServiceImpl实现类:
CategoryServiceImpl被注解@Service标示为一个Service
并且装配了categoryMapper
package com.zout.service.impl;

import java.util.List;

import org.springframework.beans.factory.annotation.Autowired;
import org.springframework.stereotype.Service;

import com.zout.mapper.CategoryMapper;
import com.zout.pojo.Category;
import com.zout.service.CategoryService;

@Service
public class CategoryServiceImpl  implements CategoryService{
    @Autowired
    CategoryMapper categoryMapper;


    public List<Category> list(){
        return categoryMapper.list();
    };
}
10.写控制层CategoryController:(Controller层)
在新建Controller包,然后新建CategoryController类:
CategoryController被@Controller标示为了控制器
自动装配了categoryService,通过@RequestMapping映射访问路径/listCategory路径到方法listCategory()。
在listCategory()方法中,通过categoryService获取后,然后存放在”cs”这个key上。
package com.zout.controller;

import java.util.List;
import org.springframework.beans.factory.annotation.Autowired;
import org.springframework.stereotype.Controller;
import org.springframework.web.bind.annotation.RequestMapping;
import org.springframework.web.servlet.ModelAndView;
import com.zout.pojo.Category;
import com.zout.service.CategoryService;

// 告诉spring mvc这是一个控制器类
@Controller
@RequestMapping("")
public class CategoryController {
    @Autowired
    CategoryService categoryService;

    @RequestMapping("listCategory")
    public ModelAndView listCategory(){
        ModelAndView mav = new ModelAndView();
        List<Category> cs= categoryService.list();

        // 放入转发参数
        mav.addObject("cs", cs);
        // 放入jsp路径
        mav.setViewName("listCategory");
        return mav;
    }
}
11.配置web.xml文件:
在WEB-INF目录下新增加web.xml,这个web.xml有两个作用:
1. 通过ContextLoaderListener在web app启动的时候,获取contextConfigLocation配置文件的文件名applicationContext.xml,并进行Spring相关初始化工作,
有任何访问,都被DispatcherServlet所拦截,这就是Spring MVC那套工作机制了。
代码:
<?xml version="1.0" encoding="UTF-8"?>
<web-app xmlns:xsi="http://www.w3.org/2001/XMLSchema-instance"
         xmlns="http://java.sun.com/xml/ns/javaee"
         xmlns:web="http://java.sun.com/xml/ns/javaee"
         xsi:schemaLocation="http://java.sun.com/xml/ns/javaee http://java.sun.com/xml/ns/javaee/web-app_2_5.xsd" version="2.5">

<display-name>ssm</display-name>
<!-- 默认首页 -->
  <welcome-file-list>
    <welcome-file>index.html</welcome-file>
    <welcome-file>index.htm</welcome-file>
    <welcome-file>index.jsp</welcome-file>
  </welcome-file-list>

    <!-- spring的配置文件-->
    <context-param>
        <param-name>contextConfigLocation</param-name>
        <param-value>classpath:applicationContext.xml</param-value>
    </context-param>
    <listener>
        <listener-class>org.springframework.web.context.ContextLoaderListener</listener-class>
    </listener>

    <!-- spring mvc核心:分发servlet -->
    <servlet>
        <servlet-name>mvc-dispatcher</servlet-name>
        <servlet-class>org.springframework.web.servlet.DispatcherServlet</servlet-class>
        <!-- spring mvc的配置文件 -->
        <init-param>
            <param-name>contextConfigLocation</param-name>
            <param-value>classpath:springMVC.xml</param-value>
        </init-param>
        <load-on-startup>1</load-on-startup>
    </servlet>
    <servlet-mapping>
        <servlet-name>mvc-dispatcher</servlet-name>
        <url-pattern>/</url-pattern>
    </servlet-mapping>
</web-app>
12.配置applicationContext.xml
在src目录下新建applicationContext.xml文件,这是Spring+mybatis的配置文件,实际上将mybatis-config.xml和spring-mybatis.xml一起包含。其作用
1. 通过注解,将Service的生命周期纳入Spring的管理
2. 配置数据源
3. 扫描存放SQL语句的Category.xml
4. 扫描Mapper,并将其生命周期纳入Spring的管理
……根据项目需求不同,增加配置即可。
<?xml version="1.0" encoding="UTF-8"?>
<beans xmlns="http://www.springframework.org/schema/beans"
    xmlns:xsi="http://www.w3.org/2001/XMLSchema-instance" xmlns:aop="http://www.springframework.org/schema/aop"
    xmlns:tx="http://www.springframework.org/schema/tx" xmlns:jdbc="http://www.springframework.org/schema/jdbc"
    xmlns:context="http://www.springframework.org/schema/context"
    xmlns:mvc="http://www.springframework.org/schema/mvc"
    xsi:schemaLocation="
     http://www.springframework.org/schema/context http://www.springframework.org/schema/context/spring-context-3.0.xsd
     http://www.springframework.org/schema/beans http://www.springframework.org/schema/beans/spring-beans-3.0.xsd
     http://www.springframework.org/schema/jdbc http://www.springframework.org/schema/jdbc/spring-jdbc-3.0.xsd
     http://www.springframework.org/schema/tx http://www.springframework.org/schema/tx/spring-tx-3.0.xsd
     http://www.springframework.org/schema/aop http://www.springframework.org/schema/aop/spring-aop-3.0.xsd
     http://www.springframework.org/schema/mvc http://www.springframework.org/schema/mvc/spring-mvc.xsd">

    <!-- 自动扫描(自动注入) -->
   <context:annotation-config />
    <context:component-scan base-package="com.zout.service" />

    <!-- 配置数据源 -->
    <!--实际上这里可以单独写jdbc.properties,然后引入属性文件也可以。 -->
    <!-- 我这里是直接写进了xml当中。省略了jdbc.properties -->
    <bean id="dataSource" class="org.springframework.jdbc.datasource.DriverManagerDataSource">
      <property name="driverClassName">
          <value>com.mysql.jdbc.Driver</value>
      </property>
      <property name="url">
          <value>jdbc:mysql://localhost:3306/ssm_zh?characterEncoding=UTF-8</value>
      </property>
      <property name="username">
          <value>root</value>
      </property>
      <property name="password">
          <value>root</value>
      </property>
    </bean>

    <!-- myBatis文件 -->
    <bean id="sqlSession" class="org.mybatis.spring.SqlSessionFactoryBean">
    <!-- 自动扫描实体类目录, 省掉Configuration.xml里的手工配置 -->
        <property name="typeAliasesPackage" value="com.zout.pojo" />
        <property name="dataSource" ref="dataSource"/>
        <property name="mapperLocations" value="classpath:com/zout/mapper/*.xml"/>
    </bean>

    <bean class="org.mybatis.spring.mapper.MapperScannerConfigurer">
        <property name="basePackage" value="com.zout.mapper"/>
    </bean>
    <!-- 配置事务管理器 -->
    <!-- 配置事物的注解方式注入 ,这些是开发时需要就加-->

</beans>
13.配置springMVC.xml文件:
在src目录下新建springMVC.xml,这是spring MVC的配置文件,其作用
1. 扫描Controller,并将其生命周期纳入Spring管理
2. 注解驱动,以使得访问路径与方法的匹配可以通过注解配置
3. 静态页面,如html,css,js,images可以访问
4. 视图定位到/WEB/INF/jsp 这个目录下
<?xml version="1.0" encoding="UTF-8"?>
<beans xmlns="http://www.springframework.org/schema/beans"
    xmlns:xsi="http://www.w3.org/2001/XMLSchema-instance" xmlns:aop="http://www.springframework.org/schema/aop"
    xmlns:tx="http://www.springframework.org/schema/tx" xmlns:jdbc="http://www.springframework.org/schema/jdbc"
    xmlns:context="http://www.springframework.org/schema/context"
    xmlns:mvc="http://www.springframework.org/schema/mvc"
    xsi:schemaLocation="http://www.springframework.org/schema/jdbc http://www.springframework.org/schema/jdbc/spring-jdbc-3.0.xsd
        http://www.springframework.org/schema/aop http://www.springframework.org/schema/aop/spring-aop-3.0.xsd
        http://www.springframework.org/schema/beans http://www.springframework.org/schema/beans/spring-beans-3.0.xsd
        http://www.springframework.org/schema/context http://www.springframework.org/schema/context/spring-context-3.0.xsd
        http://www.springframework.org/schema/tx http://www.springframework.org/schema/tx/spring-tx-3.0.xsd
        http://www.springframework.org/schema/mvc http://www.springframework.org/schema/mvc/spring-mvc-3.2.xsd">

    <context:annotation-config/>
<!-- 使用annotation自动注册bean,并保证@Required,@Autowired的属性被注入 -->
    <context:component-scan base-package="com.zout.controller">
          <context:include-filter type="annotation"
          expression="org.springframework.stereotype.Controller"/>
    </context:component-scan>

    <mvc:annotation-driven />

    <mvc:default-servlet-handler />

<!-- 对模型视图名称的解析,即在模型视图名称添加前后缀 -->
    <bean
        class="org.springframework.web.servlet.view.InternalResourceViewResolver">
        <property name="viewClass"
            value="org.springframework.web.servlet.view.JstlView" />
        <property name="prefix" value="/WEB-INF/jsp/" />
        <property name="suffix" value=".jsp" />
         <!--可为空,方便实现自已的依据扩展名来选择视图解释类的逻辑 -->
    </bean>
    <!-- 支持JSON数据格式等其他配置,根据项目不同自行配即可 -->
</beans>
14.写前端jsp文件
在webcontent文件夹下:
新建index.jsp:
<%@ page language="java" contentType="text/html; charset=UTF-8"
pageEncoding="UTF-8"%>
<%
String appPath = request.getContextPath();
%>
<!DOCTYPE html PUBLIC "-//W3C//DTD HTML 4.01 Transitional//EN" "http://www.w3.org/TR/html4/loose.dtd">
<html>
<head>
<meta http-equiv="Content-Type" content="text/html; charset=UTF-8">
<title>SSM_整合javaweb版_qxb</title>
<style type="text/css">
body {text-align:center}
h2 {color:red}
</style>
</head>
<body>
<h2>SSM_整合之普通javaweb版--整合示例</h2>
简单的查询数据库功能
<br /> 日期:2018-02-07
<br /> 作者:Zoutao
<br /> 博客:
<a href="http://blog.csdn.net/ITBigGod" target="_blank">柒晓白</a>
<br />
<br />
<br />
<br /> 数据库数据查看:
<a href="<%=appPath%>/listCategory">点击前往</a>
</body>
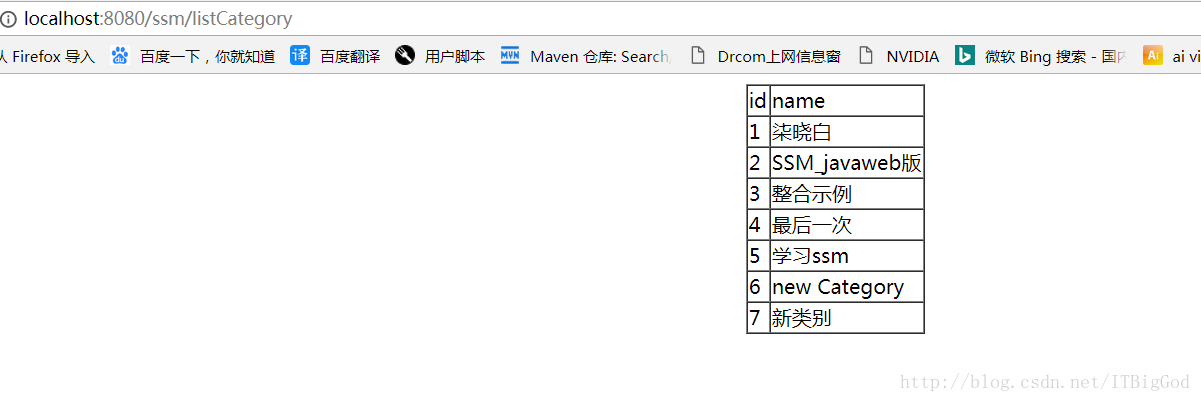
</html>然后在建立一个数据库效果展示页面,listCategory.jsp:
在WEB-INF下创建jsp文件夹,并创建文件listCategory.jsp。
在这个jsp文件中,通过forEach标签,遍历CategoryController传递过来的集合数据。
listCategory.jsp:
<%@ page language="java" contentType="text/html; charset=UTF-8"
    pageEncoding="UTF-8" import="java.util.*"%>

<%@ taglib uri="http://java.sun.com/jsp/jstl/core" prefix="c"%>
<!DOCTYPE html PUBLIC "-//W3C//DTD HTML 4.01 Transitional//EN" "http://www.w3.org/TR/html4/loose.dtd">
<html>
<meta http-equiv="Content-Type" content="text/html; charset=UTF-8">
<title>数据详情页</title>
<body>
<table align='center' border='1' cellspacing='0'>
    <tr>
        <td>id</td>
        <td>name</td>
    </tr>
    <c:forEach items="${cs}" var="c" varStatus="st">
        <tr>
            <td>${c.id}</td>
            <td>${c.name}</td>

        </tr>
    </c:forEach>
</table>
</body>
</html>
15.部署运行项目
部署到tomcat中,选中项目,右键服务器运行,然后浏览器输入测试地址:
http://127.0.0.1:8080/ssm/
即可访问默认的index.jsp首页。

补充总结:
1.从index.jsp访问到WEB-INF下的jsp页面:
web.xml下设置默认首页:
<!-- 默认首页 -->
  <welcome-file-list>
    <welcome-file>index.html</welcome-file>
    <welcome-file>index.htm</welcome-file>
    <welcome-file>index.jsp</welcome-file>
  </welcome-file-list>
2.index.jsp页面中获取路径。
<%
    String appPath = request.getContextPath();
%>
3.index.jsp页面中设置添加跳转url:(路径根据项目url来设置)
<a href="<%=appPath%>/xxxxx/listCategory">点击前往</a>这样就能从index页面跳转,访问到web-inf下的jsp页面。
以上就是SSM框架整合_java web项目普通版的内容。如果想要看maven版本,请看下一篇博文。
You got a dream, you gotta protect it.
如果你有梦想的话,就要去捍卫它 。 ——《当幸福来敲门》