[root@localhost conf.d]# nginx -v
nginx version: nginx/1.16.1
[root@localhost conf.d]# hostnamectl
Static hostname: localhost.localdomain
Icon name: computer-vm
Chassis: vm
Machine ID: 8502af7175ae42b3bf840df5de6a746c
Boot ID: 7976a1d88f9a459c83fd42550d66606f
Virtualization: vmware
Operating System: CentOS Linux 7 (Core)
CPE OS Name: cpe:/o:centos:centos:7
Kernel: Linux 3.10.0-957.el7.x86_64
Architecture: x86-64
1.yum -y install httpd-tools # 安装 htpasswd 工具
[root@localhost conf.d]# cd /etc/nginx/conf.d/
2.htpasswd -c pass.db ybj # 创建passwordfile并添加认证用户 ybj
会在/etc/nginx/conf.d/passwd.db文件中生成用户名和加密的密码:
ybj:
Xq0d6gYO$g4Txsf.xkJjEsyTw8pJ22.
在原先的passwordfile基础上在新增账号
htpasswd pass.db jby
passwordfile上删除指定账号
htpasswd -D pass.db ybj
3.nginx增加auth_basic和auth_basic_user_file两项配置:
[root@localhost conf.d]# vi /etc/nginx/conf.d/default.conf
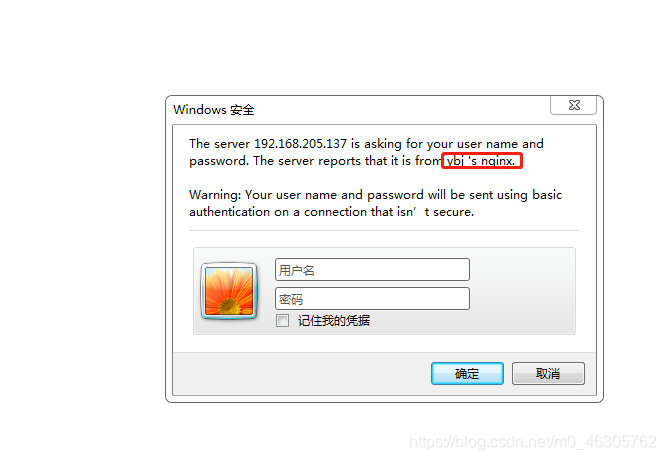
#auth_basic代表登陆提示信息
#auth_basic_user_file代表调用的passwordfile
server {
    listen       80;
    server_name  localhost;

    #charset koi8-r;
    #access_log  /var/log/nginx/host.access.log  main;

    auth_basic "ybj 's nginx";
    auth_basic_user_file        /etc/nginx/conf.d/pass.db;

    location / {
        root   /usr/share/nginx/html;
        index  index.html index.htm;
    }

    #error_page  404              /404.html;

    # redirect server error pages to the static page /50x.html
    #
    error_page   500 502 503 504  /50x.html;
    location = /50x.html {
        root   /usr/share/nginx/html;
    }

    # proxy the PHP scripts to Apache listening on 127.0.0.1:80
“/etc/nginx/conf.d/default.conf” 48L, 1177C
4 重启nginx服务
systemctl restart nginx

