零、系列
欢迎来嫖从零开始SpringCloud Alibaba电商系列:
- 从零开始SpringCloud Alibaba电商系统(一)——Alibaba与Nacos服务注册与发现
- 从零开始SpringCloud Alibaba电商系统(二)——Nacos配置中心
- 从零开始SpringCloud Alibaba电商系统(三)——Sentinel流量防卫兵介绍、流量控制demo
- 从零开始SpringCloud Alibaba电商系统(四)——Sentinel的fallback和blockHandler
- 从零开始SpringCloud Alibaba电商系统(五)——Feign Demo,Sentinel+Feign实现多节点间熔断/服务降级
- 从零开始SpringCloud Alibaba电商系统(六)——Sentinel规则持久化到Nacos配置中心
一、Spring Security是什么?
Spring Security is a powerful and highly customizable authentication and access-control framework. ————spring官网
显然而易见,它是一个可以帮我们实现登录认证、角色(资源)权限控制的框架,此外,它还提供了一些诸如CSRF攻击拦截的功能,有兴趣的同学可以查一下。
有的同学可能疑惑,权限认证这种东西我写个select+ifelse不就完了吗?用它干啥?
嗯,看完,然后,真香……
二、登录认证
登录认证的演示将会做大概如下几个步骤:
- 配置spring security相关内容。
- 简单叙述用户角色权限。
- 代码配置。
- 代码用户逻辑编写。
- 我们继续在之前的demo基础上开发(新建一个springboot项目也可以,无甚区别)。
<dependency>
        <groupId>org.springframework.boot</groupId>
        <artifactId>spring-boot-starter-security</artifactId>
</dependency>
- 增加一个WebSecurityConfigurerAdapter的继承类,我们可以通过这个类配置
如何验证用户,对那些路径进行验证,对请求加入哪些拦截器校验等。
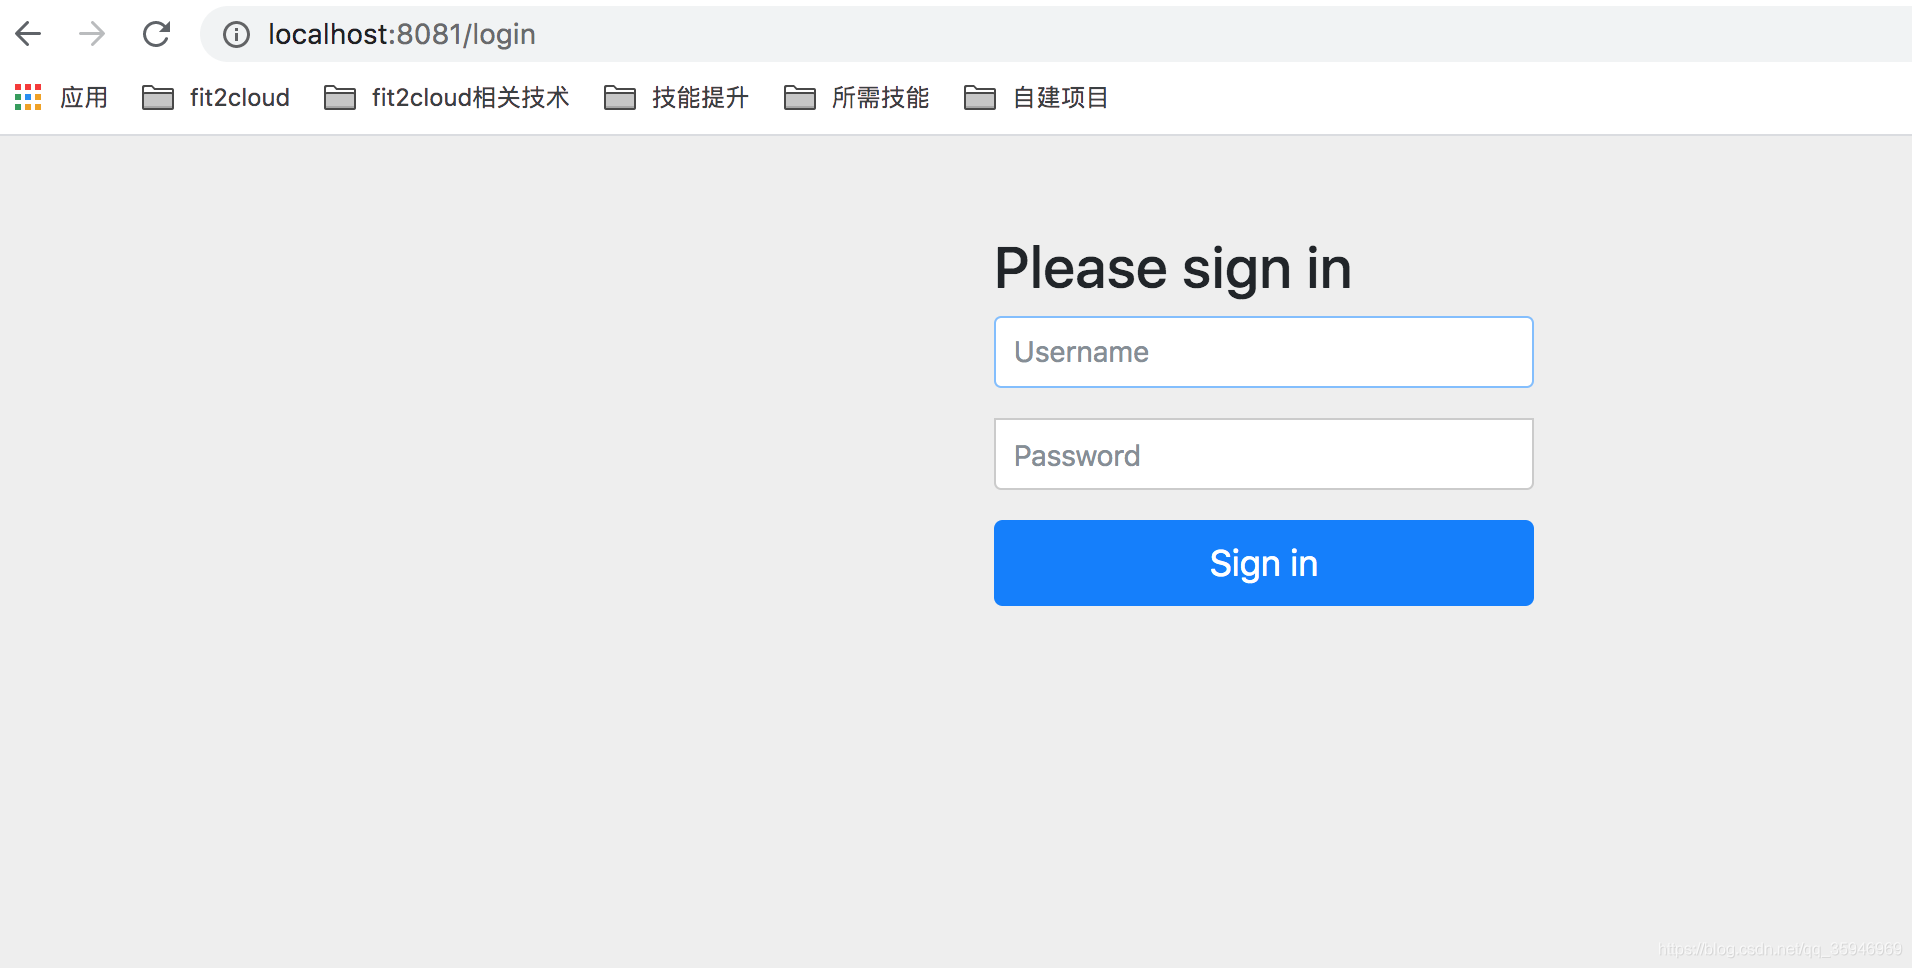
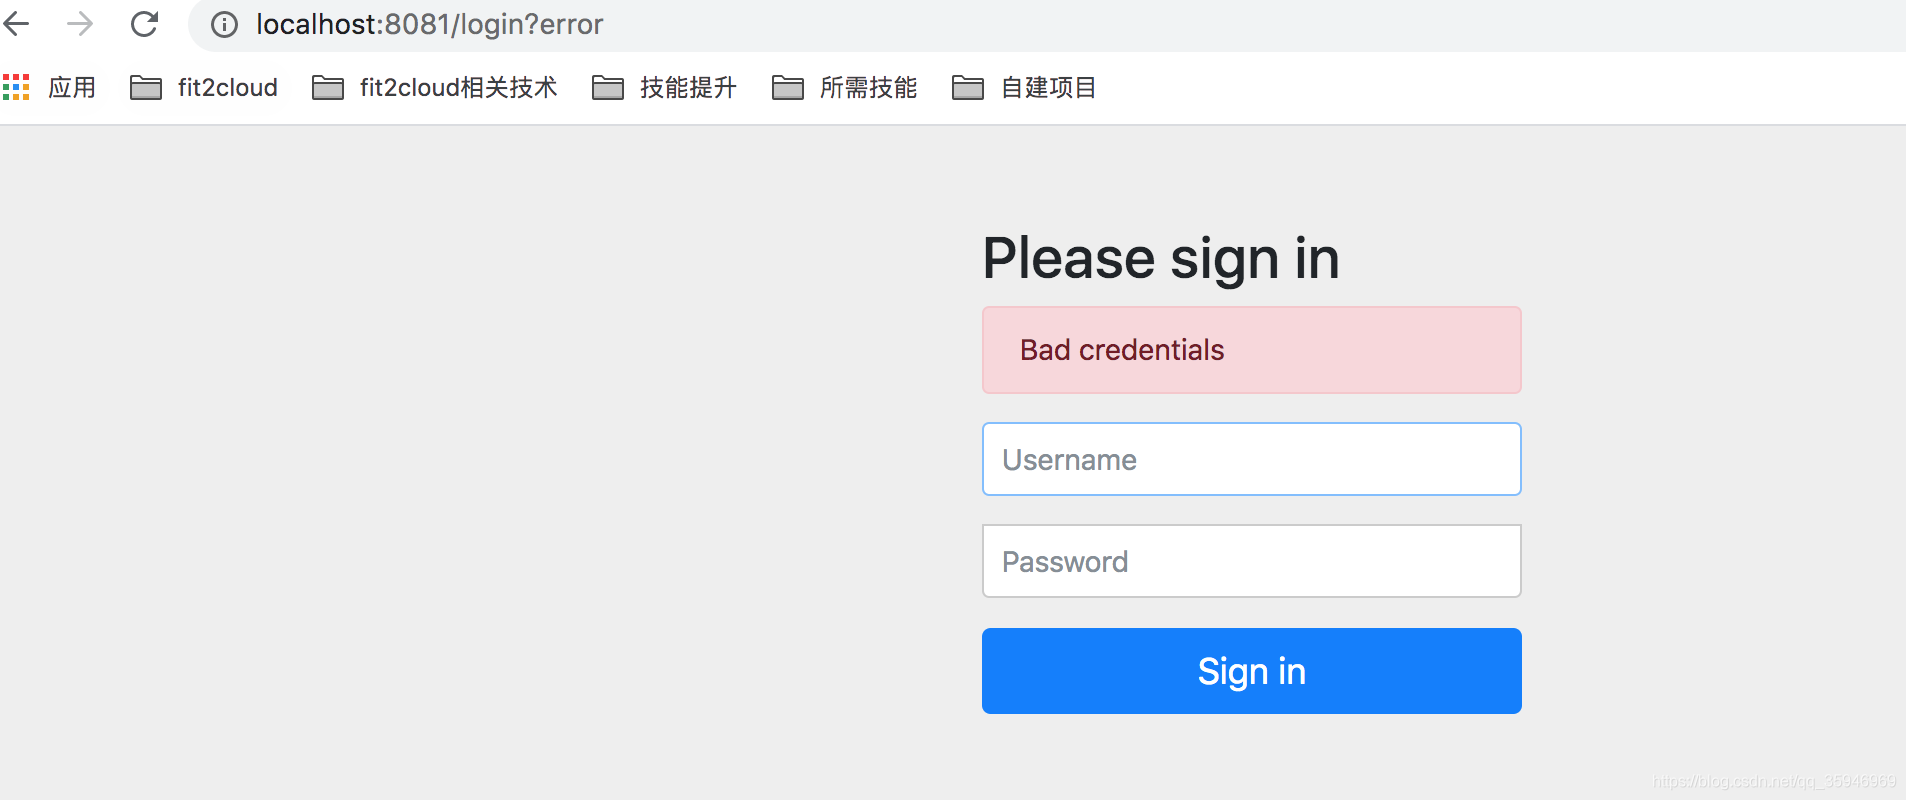
实际上,当我们没有任何配置的时候,Spring Security会帮我们自动拦截所有请求并跳转一个由该框架提供的默认登录界面,如下图:
package com.lele.mall.config;/*
 * com.lele.mall.config
 * @author: lele
 * @date: 2020-04-18
 */

import org.springframework.beans.factory.annotation.Configurable;
import org.springframework.security.config.annotation.authentication.builders.AuthenticationManagerBuilder;
import org.springframework.security.config.annotation.web.builders.HttpSecurity;
import org.springframework.security.config.annotation.web.configuration.EnableWebSecurity;
import org.springframework.security.config.annotation.web.configuration.WebSecurityConfigurerAdapter;

@Configurable
@EnableWebSecurity
public class SimpleSecurityConfig extends WebSecurityConfigurerAdapter {


}
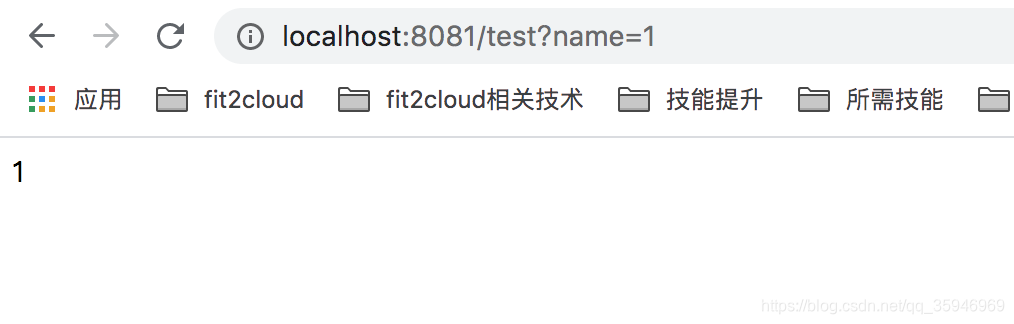
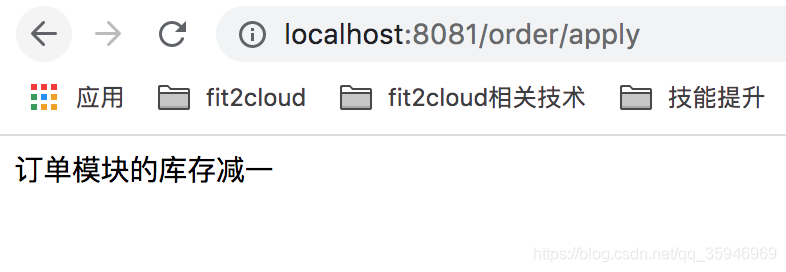
3. WebSecurityConfigurerAdapter提供了几种配置。这里我配置一些简单的规则:除了/test之外所有url进行认证,可认证用户名密码只有(admin,admin)。
重写configure(HttpSecurity http)可以配置`对那些路径进行验证`。
重写 configure(AuthenticationManagerBuilder auth)可以配置`如何验证用户`。
然后尝试访问localhost:8081/order/apply,结果直接跳转到登录页面:
4. 配置我们的用户,我在这里写了死数据,正常项目我们一般配合数据库来做。
值得一提,这里需要我们自己实现一个UserDetailsService的实现类并重载它的loadUserByUsername方法。它的作用显而易见:给它一个username,它返回一个完整的User对象。
修改后的SimpleSecurityConfig如下:
package com.lele.mall.config;/*
 * com.lele.mall.config
 * @author: lele
 * @date: 2020-04-18
 */

import com.lele.mall.MyUserDetailsService;
import org.springframework.beans.factory.annotation.Autowired;
import org.springframework.beans.factory.annotation.Configurable;
import org.springframework.context.annotation.Bean;
import org.springframework.security.config.annotation.authentication.builders.AuthenticationManagerBuilder;
import org.springframework.security.config.annotation.web.builders.HttpSecurity;
import org.springframework.security.config.annotation.web.configuration.EnableWebSecurity;
import org.springframework.security.config.annotation.web.configuration.WebSecurityConfigurerAdapter;
import org.springframework.security.core.userdetails.UserDetailsService;
import org.springframework.security.crypto.bcrypt.BCryptPasswordEncoder;
import org.springframework.security.crypto.password.NoOpPasswordEncoder;
import org.springframework.security.crypto.password.PasswordEncoder;

@Configurable
@EnableWebSecurity
public class SimpleSecurityConfig extends WebSecurityConfigurerAdapter {

    // 引入自定义userDetails
    @Autowired
    MyUserDetailsService myUserDetailsService;

    @Bean
    public PasswordEncoder passwordEncoder(){
        //return new BCryptPasswordEncoder();
        return NoOpPasswordEncoder.getInstance(); // 不对密码进行加密
    }

    /**
     * 通过http对象配置具体的认证规则、路由权限规则
     *  这里用http对象代替xm配置,注意这里每个and()之间的配置都相当于原来xml中一个标签包含的配置。
     * @param http
     * @throws Exception
     */
        @Override
        protected void configure(HttpSecurity http) throws Exception {
            http
                .formLogin()// 使用默认的表单登录
                    .permitAll()
                    .and()
                .authorizeRequests()
                    .antMatchers("/test")
                    .permitAll()
                    .anyRequest() // 捕获所有路径
                    .authenticated();
        }

    /**
     * 用户认证规则,即用户传递何种信息才可以登录
     *  myUserDetailsService.loadUserByUsername 通过传入username,返回我们的user数据,
     *  passwordEncoder 会对user数据中的password进行BCrypt算法加密。
     * @param auth
     * @throws Exception
     */
        @Override
        protected void configure(AuthenticationManagerBuilder auth) throws Exception {
            auth.userDetailsService(myUserDetailsService);
            //.passwordEncoder(passwordEncoder());
        }

}
新增MyUserDetail如下:
package com.lele.mall;/*
 * com.lele.mall
 * @author: lele
 * @date: 2020-04-19
 */

import org.springframework.security.core.GrantedAuthority;
import org.springframework.security.core.authority.SimpleGrantedAuthority;
import org.springframework.security.core.userdetails.User;
import org.springframework.security.core.userdetails.UserDetails;
import org.springframework.security.core.userdetails.UserDetailsService;
import org.springframework.security.core.userdetails.UsernameNotFoundException;
import org.springframework.stereotype.Service;

import java.util.ArrayList;
import java.util.List;


@Service
public class MyUserDetailsService implements UserDetailsService {

    /**
     * 这里应该实现自定义认证逻辑:通过username查库找到user
     * @param s
     * @return 返回一个Srping Security规定的UserDetails,包含密码和用户权限
     * @throws UsernameNotFoundException
     */
    @Override
    public UserDetails loadUserByUsername(String s) throws UsernameNotFoundException {
        if( !s.equals("admin") )
            throw new UsernameNotFoundException(s + "用户名不存在");

        // 资源权限,之后可以通过这里赋予的权限控制接口访问。
        List<GrantedAuthority> roles = new ArrayList<GrantedAuthority>();
        roles.add(new SimpleGrantedAuthority( "ROLE_ADMIN"));
        return new User(s,"admin",roles);
    }
}
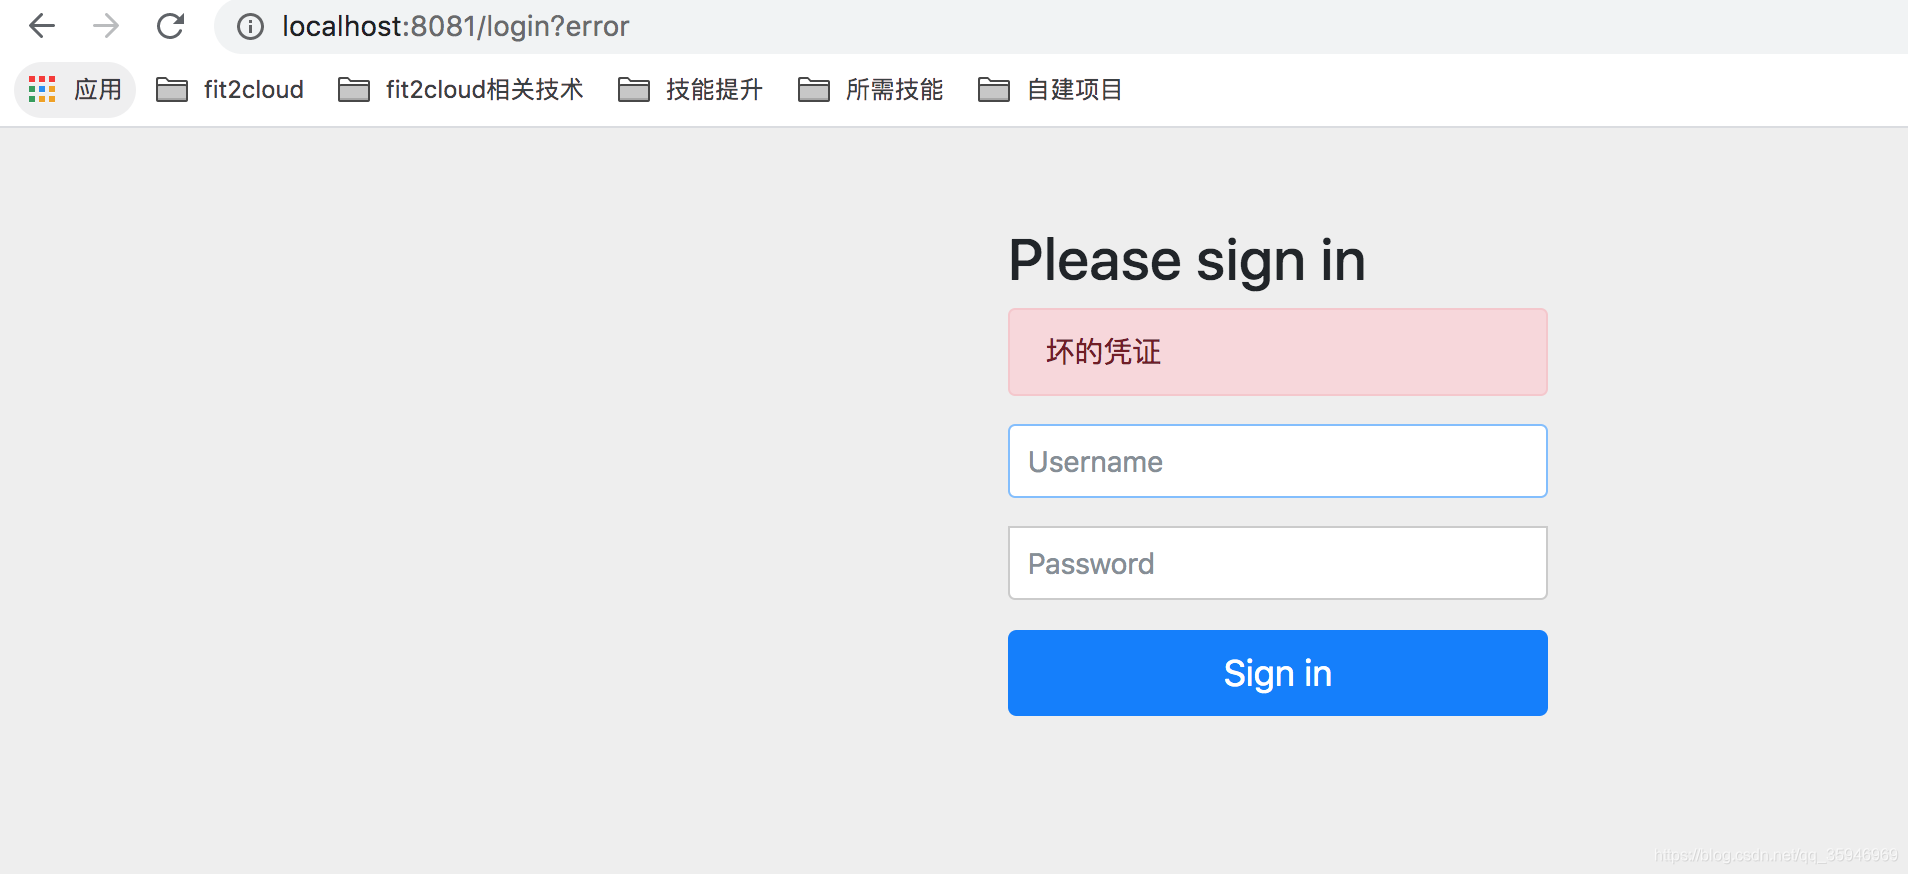
- 测试访问,第一次使用
admin,pass访问,失败。第二次使用admin,admin访问,成功!可以正常访问接口。
以上我们介绍了一个spring security最简单的一个例子,之后在我们即将构建的电商系统中,还会介绍如何配置一个自己的登录页面、如何对密码加密解密以及CSRF攻击拦截等功能。
三、访问权限控制
之前我们介绍了登录认证的基本用法,接下来我们将介绍,基于用户、角色权限,如何实现对接口的访问控制。
- 开启权限认证,在Application头顶上配置@EnableGlobalMethodSecurity注解prePostEnabled为true,此开关不开,后面的访问控制尽皆无效。
@SpringBootApplication
@EnableGlobalMethodSecurity(prePostEnabled = true)
public class MallApplication {

    public static void main(String[] args) {
        ConfigurableApplicationContext applicationContext = SpringApplication.run(MallApplication.class, args);
    }
}
-
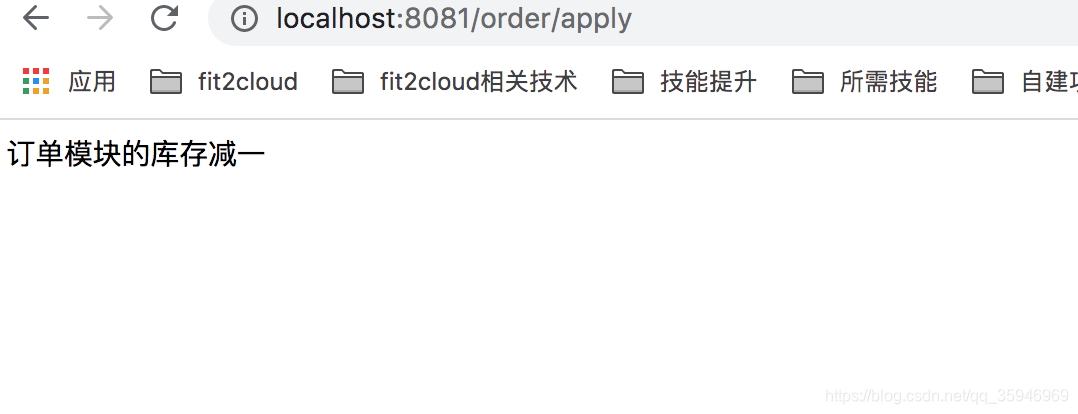
在order/apply方法脑袋上配置注解@PreAuthorize(“hasRole(‘ROLE_ADMIN’)”),代表拥有‘ROLE_ADMIN’角色才能请求该方法,ROLE_ADMIN角色我们已经在之前的UserDetails中赋予了admin用户。
注意:这里的角色系统中也需要我们自行设计,这里只是用默认的方便展示。 -
登录admin,并访问 /order/apply,访问成功!想看失败结果的同学可以将UserDetails中赋予角色的代码去掉,会发现此时访问会出现403错误。
四、demo地址
https://github.com/flyChineseBoy/lel-mall/tree/master/mall07
下一节,我们继续来看Spring Security,它在分布式场景下,是如何保证各个子系统间登录信息互通的。
