SpringBoot2.X实现Redis缓存
SpringBoot 怎么整合 redis?请见 https://blog.csdn.net/weixin_43424932/article/details/104098409。
主要的包,一个是缓存,一个是redis:
<dependency>
    <groupId>org.springframework.boot</groupId>
    <artifactId>spring-boot-starter-cache</artifactId>
</dependency>

<dependency>
    <groupId>org.springframework.boot</groupId>
    <artifactId>spring-boot-starter-data-redis</artifactId>
</dependency>
开启缓存:
package com.springboot;

import org.springframework.boot.SpringApplication;
import org.springframework.boot.autoconfigure.SpringBootApplication;
import org.springframework.cache.annotation.EnableCaching;

@SpringBootApplication
@EnableCaching
public class DemoApplication {

    public static void main(String[] args) {
        SpringApplication.run(DemoApplication.class, args);
    }
}
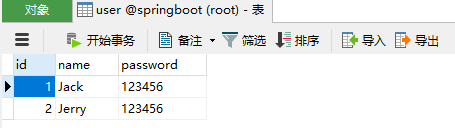
新建一张user表用于测试:
新建一个user的bean用来映射user表的字段,并继承Serializable可序列化。
package com.springboot.bean;

import java.io.Serializable;

public class User implements Serializable{

    private  Integer id;

    private  String name;
    private  String password;

    public Integer getId() {
        return id;
    }

    public void setId(Integer id) {
        this.id = id;
    }

    public String getName() {
        return name;
    }

    public void setName(String name) {
        this.name = name;
    }

    public String getPassword() {
        return password;
    }

    public void setPassword(String password) {
        this.password = password;
    }
}
写一个接口来测试一下,为了简单我就随便写了。
package com.springboot.controller;

import com.springboot.bean.User;
import org.springframework.beans.factory.annotation.Autowired;
import org.springframework.cache.annotation.Cacheable;
import org.springframework.jdbc.core.BeanPropertyRowMapper;
import org.springframework.jdbc.core.JdbcTemplate;
import org.springframework.jdbc.core.RowMapper;
import org.springframework.web.bind.annotation.GetMapping;
import org.springframework.web.bind.annotation.RestController;

@RestController
public class RedisController {

    @Autowired
    JdbcTemplate jdbcTemplate;

    @GetMapping(value="/getUserById")
    @Cacheable(cacheNames = "user",key = "#id")
    public User getUserById(Integer id){
        System.err.println("用户"+id+"开始查询。。。");
        RowMapper<User> mapper = BeanPropertyRowMapper.newInstance(User.class);
        User user =jdbcTemplate.queryForObject("select * from user where id = ?",new Object[] {id} ,mapper);
        return user;
    }
}
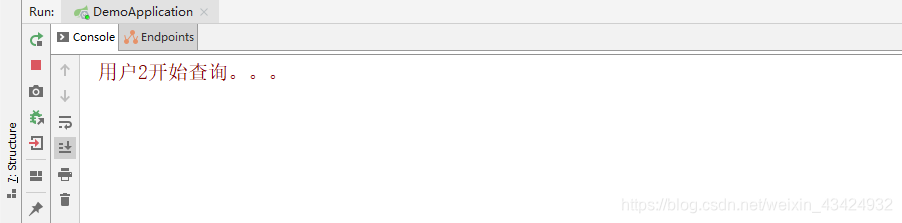
运行项目,请求getUserById接口。

连续请求多次,发现只有第一次请求访问了数据库,说明缓存生效了。
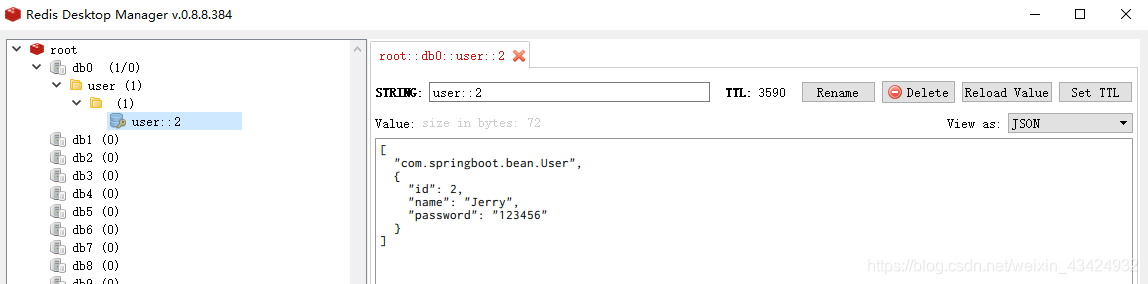
使用RedisDesktopManager工具查看,发现SpringBoot的缓存自动存到了redis中,这都是SpringBoot自动配置的结果。

但是仔细一看redis中存的却并不是我们理想中的json字符串。这就和序列化有关了。
接下来自定义cacheManager,新建RedisConfig 配置类,可在其中配置缓存过期时间、序列化方式等:
package com.springboot.config;

import com.fasterxml.jackson.annotation.JsonAutoDetect;
import com.fasterxml.jackson.annotation.PropertyAccessor;
import com.fasterxml.jackson.databind.ObjectMapper;
import org.springframework.cache.CacheManager;
import org.springframework.context.annotation.Bean;
import org.springframework.context.annotation.Configuration;
import org.springframework.data.redis.cache.RedisCacheConfiguration;
import org.springframework.data.redis.cache.RedisCacheManager;
import org.springframework.data.redis.connection.RedisConnectionFactory;
import org.springframework.data.redis.serializer.Jackson2JsonRedisSerializer;
import org.springframework.data.redis.serializer.RedisSerializationContext;
import org.springframework.data.redis.serializer.RedisSerializer;
import org.springframework.data.redis.serializer.StringRedisSerializer;

import java.time.Duration;


@Configuration
public class RedisConfig {

    @Bean
    public CacheManager cacheManager(RedisConnectionFactory factory) {
        RedisSerializer<String> redisSerializer = new StringRedisSerializer();
        Jackson2JsonRedisSerializer jackson2JsonRedisSerializer = new Jackson2JsonRedisSerializer(Object.class);

        //解决查询缓存转换异常的问题
        ObjectMapper om = new ObjectMapper();
        om.setVisibility(PropertyAccessor.ALL, JsonAutoDetect.Visibility.ANY);
        om.enableDefaultTyping(ObjectMapper.DefaultTyping.NON_FINAL);
        jackson2JsonRedisSerializer.setObjectMapper(om);

        // 配置序列化(解决乱码的问题)
        RedisCacheConfiguration config = RedisCacheConfiguration.defaultCacheConfig()
                .entryTtl(Duration.ofHours(1))
                .serializeKeysWith(RedisSerializationContext.SerializationPair.fromSerializer(redisSerializer))
                .serializeValuesWith(RedisSerializationContext.SerializationPair.fromSerializer(jackson2JsonRedisSerializer))
                .disableCachingNullValues();

        RedisCacheManager cacheManager = RedisCacheManager.builder(factory)
                .cacheDefaults(config)
                .build();
        return cacheManager;
    }
}
重新运行项目,请求getUserById接口。使用RedisDesktopManager工具查看,自定义cacheManager已经生效。
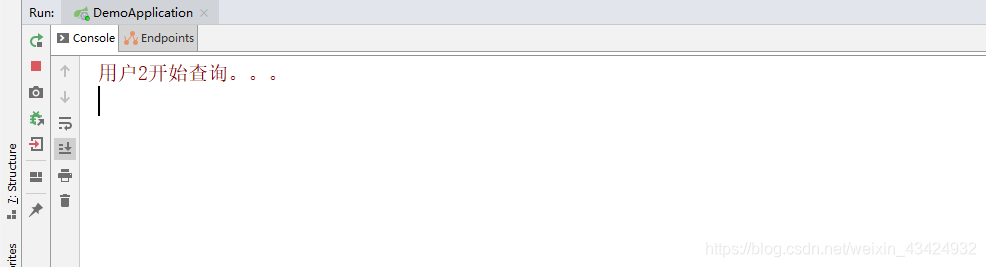
连续请求多次看看:
没有问题,SpringBoot2.X实现 redis 缓存完成。
SpringBoot 缓存的更多使用请见 https://blog.csdn.net/weixin_43424932/article/details/104239943。
