Android P版本的发布,引入了刘海屏的概念,像华为nova 3e,vivo X21等手机厂商也纷纷推出自己的刘海屏手机,我们先预览下HUAWEI nova 3e的机照
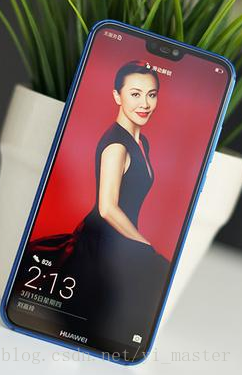
从这张图中我们可以看出,所谓的刘海屏实际上是安装在状态栏的一块玻璃屏幕,刘海屏的高度等于状态栏的高度
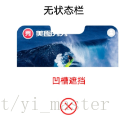
如果我们的的app没有适配android p的刘海屏,那么在显示的时候变会出现问题,
1)如没有状态栏,全屏显示的App,那么在Android P版本中显示如下
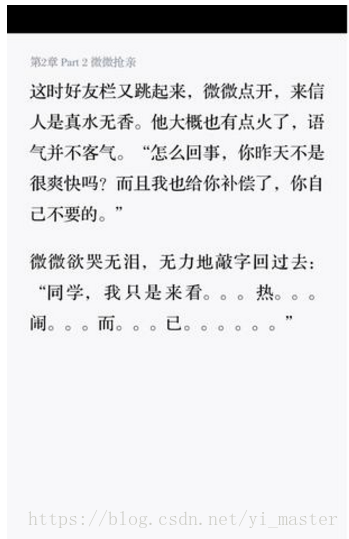
2)如果有状态栏,全屏显示的App,那么在Android P版本中显示如下,你会发现UI出现了黑边,页码也看不清了
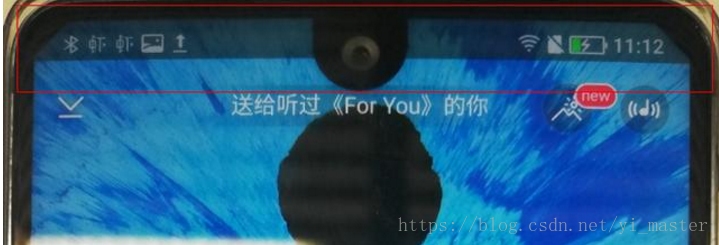
以上都是基于标准的刘海屏设计出现的情况,还有一些厂商自定义了刘海屏,即刘海屏的高度大于了状态栏,那么就会产生类似的问题,如下
1)状态栏背景高度写死的问题
因此如果你想让你的App在Android P版本中完美运行,你应该知道怎么去适配他
默认的Android P的模拟器是关闭刘海屏的,首先看下如何开启Android P的模拟器中的刘海屏,
1)启用开发者选项和调试
-> 打开 Settings 应用。
-> 选择 System。
-> 滚动到底部,然后选择 About phone。
-> 滚动到底部,点按 Build number 7 次。
-> 返回上一屏幕,在底部附近可找到 Developer options
2)在 Developer options 屏幕中,向下滚动至 Drawing 部分并选择 Simulate a display with a cutout
3)选择屏幕缺口的大小
如图所示,Google提供了四种刘海屏选择方案
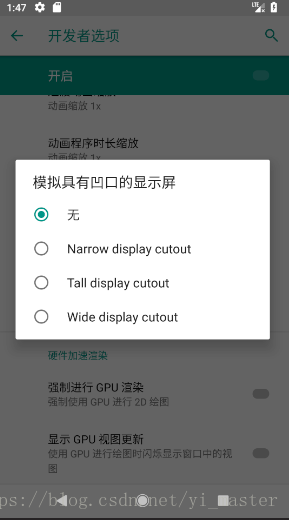
对应上面4中选择
第一种,很显然没有刘海屏
第二种到第四种,只不过是刘海屏宽度不一样罢了,我这里选择的是Tall display cutout模式,如下图所示
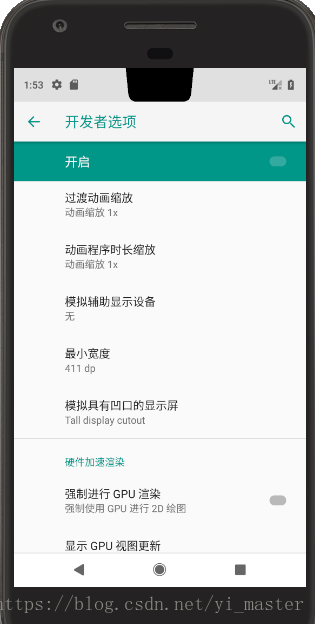
这里需要注意一个问题:使用Android P模拟器的时候,这里的模拟凹口屏的四个选项其实实质只改变了刘海屏的位置和宽度,高度(系统刘海屏不会超过状态栏),但是在真机中,这四个选项有可能对应不同的操作,请参阅如下链接
四种刘海屏的真机样式
既然看到了google搞的刘海屏,那google针对刘海屏有什么自适配策略?,google总不能说一个老的app上来就直接在刘海屏上显示错乱吧?
先上一段代码
public class AndroidPDemoActivity extends Activity{
private TextView mTv;
@Override
protected void onCreate(Bundle savedInstanceState) {
super.onCreate(savedInstanceState);
requestWindowFeature(Window.FEATURE_NO_TITLE);
getWindow().setFlags(WindowManager.LayoutParams.FLAG_FULLSCREEN,WindowManager.LayoutParams.FLAG_FULLSCREEN);
setContentView(R.layout.activity_android_p_demo_layout);
mTv = (TextView)this.findViewById(R.id.android_p_demo_tv);
}
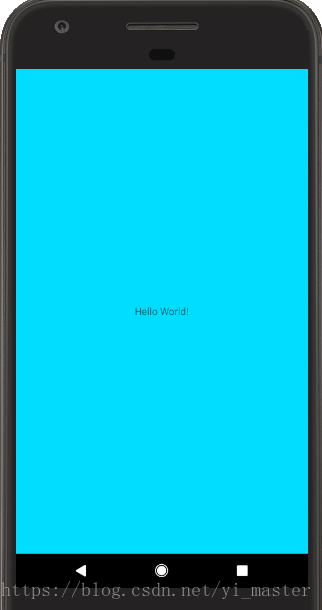
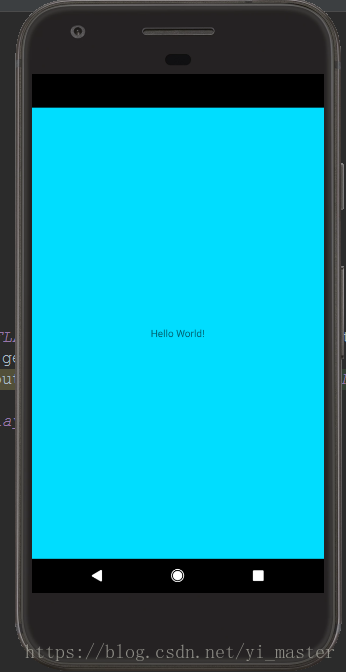
}这段代码很简单,就是给Activity设置为无title,全屏显示,这段代码在无刘海屏显示效果如下
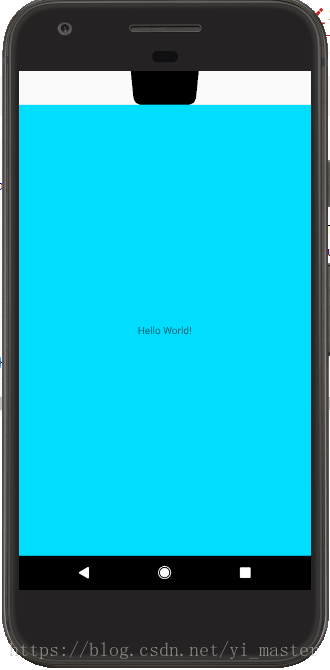
但是如果切换到刘海屏,则显示就出现了异常,如下图
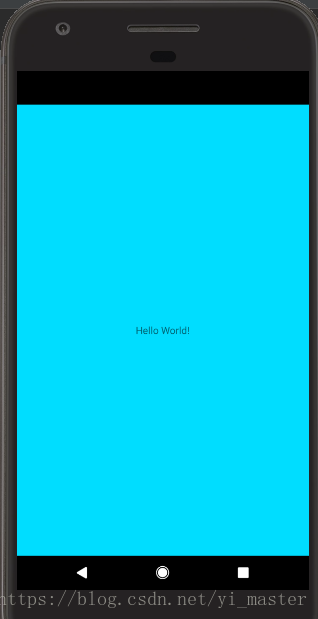
可以发现原先正常的App出现了黑边
所以Google默认的适配刘海屏策略是这样的
1) 如果应用未适配刘海屏,需要系统对全屏显示的应用界面做特殊移动处理(竖屏下移处理,横屏右移处),因此此处出现了黑边的现象;如果应用页面布局不能做到自适应,就会出现布局问题;如果应用布局能够做到自适应,也会有黑边无法全屏显示的体验问题
2)如果有状态栏的App,则不受刘海屏的影响(有状态肯定不是全屏,那么就不会有下移的风险)
知晓了google是如何适配刘海屏的策略,那么我们看下在Android P版本中,如何去适配这个刘海屏;
在Android P版本中,通过DisplayCutout 类,可以确定非功能区域(刘海屏)的位置和形状
第一种方案:使用layoutInDisplayCutoutMode来进行适配,他的作用是在有刘海屏的时候,如何布局窗口,默认为LAYOUT_IN_DISPLAY_CUTOUT_MODE_DEFAULT,他有以下几种模式
LAYOUT_IN_DISPLAY_CUTOUT_MODE_DEFAULT:默认情况下,全屏窗口不会使用到刘海区域,非全屏窗口可正常使用刘海区域
LAYOUT_IN_DISPLAY_CUTOUT_MODE_NEVER:窗口不允许和刘海屏重叠
LAYOUT_IN_DISPLAY_CUTOUT_MODE_SHORT_EDGES:the window is always allowed to extend into the DisplayCutout areas on the short edges of the screen
我们通过代码看下效果:LAYOUT_IN_DISPLAY_CUTOUT_MODE_DEFAULT
public class AndroidPDemoActivity extends Activity{

    protected void onCreate(Bundle savedInstanceState) {
        super.onCreate(savedInstanceState);
        requestWindowFeature(Window.FEATURE_NO_TITLE);
        getWindow().setFlags(WindowManager.LayoutParams.FLAG_FULLSCREEN,WindowManager.LayoutParams.FLAG_FULLSCREEN);
        WindowManager.LayoutParams lp = this.getWindow().getAttributes();
        lp.layoutInDisplayCutoutMode = WindowManager.LayoutParams.LAYOUT_IN_DISPLAY_CUTOUT_MODE_DEFAULT;
        this.getWindow().setAttributes(lp);
        setContentView(R.layout.activity_android_p_demo_layout);
    }
}
从图中可以看出,这个并不是完美的适配方案
在来看第二种样式:LAYOUT_IN_DISPLAY_CUTOUT_MODE_NEVER
public class AndroidPDemoActivity extends Activity{

    protected void onCreate(Bundle savedInstanceState) {
        super.onCreate(savedInstanceState);
        requestWindowFeature(Window.FEATURE_NO_TITLE);
        getWindow().setFlags(WindowManager.LayoutParams.FLAG_FULLSCREEN,WindowManager.LayoutParams.FLAG_FULLSCREEN);
        WindowManager.LayoutParams lp = this.getWindow().getAttributes();
        lp.layoutInDisplayCutoutMode = WindowManager.LayoutParams.LAYOUT_IN_DISPLAY_CUTOUT_MODE_NEVER;
        this.getWindow().setAttributes(lp);
        setContentView(R.layout.activity_android_p_demo_layout);
    }
}
可以看出显示效果和DEFAULT是一致的,LAYOUT_IN_DISPLAY_CUTOUT_MODE_NEVER是不允许使用刘海屏区域,而LAYOUT_IN_DISPLAY_CUTOUT_MODE_DEFAULT全屏窗口不允许使用刘海屏区域
在来看LAYOUT_IN_DISPLAY_CUTOUT_MODE_SHORT_EDGES
public class AndroidPDemoActivity extends Activity{

    protected void onCreate(Bundle savedInstanceState) {
        super.onCreate(savedInstanceState);
        requestWindowFeature(Window.FEATURE_NO_TITLE);
        getWindow().setFlags(WindowManager.LayoutParams.FLAG_FULLSCREEN,WindowManager.LayoutParams.FLAG_FULLSCREEN);
        WindowManager.LayoutParams lp = this.getWindow().getAttributes();
        lp.layoutInDisplayCutoutMode = WindowManager.LayoutParams.LAYOUT_IN_DISPLAY_CUTOUT_MODE_SHORT_EDGES;
        this.getWindow().setAttributes(lp);
        setContentView(R.layout.activity_android_p_demo_layout);
    }
}
可以看出LAYOUT_IN_DISPLAY_CUTOUT_MODE_SHORT_EDGES已经允许全屏app使用刘海屏了,只不过状态栏那边是白色。
那我们要如何修复这个问题?采用沉浸式布局即可,即设置DecorView为SYSTEM_UI_FLAG_FULLSCREEN模式。
那何为沉浸式布局?这是Android 4.4 (API Level 19)引入一个新的概念,即真正的全屏模式:SystemUI(StatusBar和NavigationBar)也都被隐藏
直接上代码
//主activity类
package com.hwj.android.learning;

import android.app.Activity;
import android.os.Bundle;

public class AndroidPDemoActivity extends Activity{

    protected void onCreate(Bundle savedInstanceState) {
        super.onCreate(savedInstanceState);
        DisplayCutoutDemo displayCutoutDemo = new DisplayCutoutDemo(this);
        displayCutoutDemo.openFullScreenModel();
        setContentView(R.layout.activity_android_p_demo_layout);
    }
}
package com.hwj.android.learning;
import android.app.Activity;
import android.view.View;
import android.view.Window;
import android.view.WindowManager;
/**
* 功能描述: 刘海屏控制
*/
public class DisplayCutoutDemo {
private Activity mAc;
public DisplayCutoutDemo(Activity ac) {
mAc = ac;
}
//在使用LAYOUT_IN_DISPLAY_CUTOUT_MODE_SHORT_EDGES的时候,状态栏会显示为白色,这和主内容区域颜色冲突,
//所以我们要开启沉浸式布局模式,即真正的全屏模式,以实现状态和主体内容背景一致
public void openFullScreenModel(){
mAc.requestWindowFeature(Window.FEATURE_NO_TITLE);
WindowManager.LayoutParams lp = mAc.getWindow().getAttributes();
lp.layoutInDisplayCutoutMode = WindowManager.LayoutParams.LAYOUT_IN_DISPLAY_CUTOUT_MODE_SHORT_EDGES;
mAc.getWindow().setAttributes(lp);
View decorView = mAc.getWindow().getDecorView();
int systemUiVisibility = decorView.getSystemUiVisibility();
int flags = View.SYSTEM_UI_FLAG_LAYOUT_FULLSCREEN
| View.SYSTEM_UI_FLAG_HIDE_NAVIGATION
| View.SYSTEM_UI_FLAG_FULLSCREEN;
systemUiVisibility |= flags;
mAc.getWindow().getDecorView().setSystemUiVisibility(systemUiVisibility);
}
}
显示效果如下
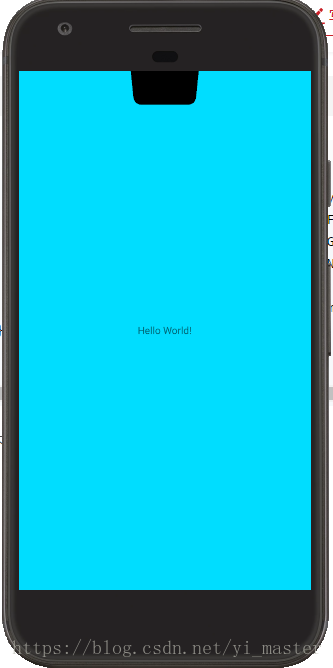
可以看出我们已经可以较完美的适配刘海屏了
那我们布局的时候,你总不能在刘海屏区域内部放控件吧,所以这个时候我们就要计算状态栏高度了,在布局时候,要刻意避开这个区域
    //获取状态栏高度
    public int getStatusBarHeight(Context context) {
        int result = 0;
        int resourceId = context.getResources().getIdentifier("status_bar_height","dimen", "android");
        if (resourceId > 0) {
            result = context.getResources().getDimensionPixelSize(resourceId);
        }
        Log.d("hwj","**getStatusBarHeight**" + result);
        return result;
    }
通过上述代码,我们就可以计算出状态栏高度,在我的模拟器中,这个高度是126,单位PX
因此为了更完美的布局我们的App,则布局文件应该做如下调整
<?xml version="1.0" encoding="utf-8"?>
<LinearLayout
    xmlns:android="http://schemas.android.com/apk/res/android"
    xmlns:app="http://schemas.android.com/apk/res-auto"
    xmlns:tools="http://schemas.android.com/tools"
    android:layout_width="match_parent"
    android:layout_height="match_parent"
    android:orientation="vertical"
    android:background="@android:color/holo_blue_bright"
    tools:context="com.hwj.android.learning.AndroidPDemoActivity">

    <!--这里layout_marginTop="126px"是因为我提前用DisplayCutoutDemo.java中的getStatusBarHeight方法
    提前获得状态栏高度为126,单位为PX
    因此在设置的时候,直接设置距离上面126px了
    这样就能完美的避开刘海屏区域-->
    <Button
        android:layout_width="wrap_content"
        android:layout_height="wrap_content"
        android:layout_marginTop="126px"/>

    <TextView
        android:id="@+id/android_p_demo_tv"
        android:layout_width="wrap_content"
        android:layout_height="wrap_content"
        android:text="Hello World!"/>

</LinearLayout>
效果显示如下

现在是不是UI已经有了更多的优化了?呵呵
那有的人非要在刘海屏那块填充控件咋整?
那我们就得借助DisplayCutout类了,其基本思路如下
1):通过DisplayCutout类提供的API去获取刘海屏的坐标位置
2):在布局的时候,因为已知刘海屏的坐标,因此控件可以很方便的避开这个位置
直接上代码
//主activity
package com.hwj.android.learning;

import android.app.Activity;
import android.os.Bundle;

public class AndroidPDemoActivity extends Activity{

    protected void onCreate(Bundle savedInstanceState) {
        super.onCreate(savedInstanceState);
        DisplayCutoutDemo displayCutoutDemo = new DisplayCutoutDemo(this);
        displayCutoutDemo.openFullScreenModel();
        setContentView(R.layout.activity_android_p_demo_layout);
        displayCutoutDemo.controlView();
    }
}
package com.hwj.android.learning;
import android.annotation.TargetApi;
import android.app.Activity;
import android.content.Context;
import android.os.Build;
import android.util.Log;
import android.view.DisplayCutout;
import android.view.View;
import android.view.Window;
import android.view.WindowInsets;
import android.view.WindowManager;
/**
* 功能描述: 刘海屏控制
*/
public class DisplayCutoutDemo {
private Activity mAc;
public DisplayCutoutDemo(Activity ac) {
mAc = ac;
}
//在使用LAYOUT_IN_DISPLAY_CUTOUT_MODE_SHORT_EDGES的时候,状态栏会显示为白色,这和主内容区域颜色冲突,
//所以我们要开启沉浸式布局模式,即真正的全屏模式,以实现状态和主体内容背景一致
public void openFullScreenModel(){
mAc.requestWindowFeature(Window.FEATURE_NO_TITLE);
WindowManager.LayoutParams lp = mAc.getWindow().getAttributes();
lp.layoutInDisplayCutoutMode = WindowManager.LayoutParams.LAYOUT_IN_DISPLAY_CUTOUT_MODE_SHORT_EDGES;
mAc.getWindow().setAttributes(lp);
View decorView = mAc.getWindow().getDecorView();
int systemUiVisibility = decorView.getSystemUiVisibility();
int flags = View.SYSTEM_UI_FLAG_LAYOUT_FULLSCREEN
| View.SYSTEM_UI_FLAG_HIDE_NAVIGATION
| View.SYSTEM_UI_FLAG_FULLSCREEN;
systemUiVisibility |= flags;
mAc.getWindow().getDecorView().setSystemUiVisibility(systemUiVisibility);
}
//获取状态栏高度
public int getStatusBarHeight(Context context) {
int result = 0;
int resourceId = context.getResources().getIdentifier("status_bar_height","dimen", "android");
if (resourceId > 0) {
result = context.getResources().getDimensionPixelSize(resourceId);
}
Log.d("hwj","**getStatusBarHeight**" + result);
return result;
}
public void controlView(){
View decorView = mAc.getWindow().getDecorView();
if(decorView != null){
Log.d("hwj", "**controlView**" + android.os.Build.VERSION.SDK_INT);
Log.d("hwj", "**controlView**" + android.os.Build.VERSION_CODES.P);
WindowInsets windowInsets = decorView.getRootWindowInsets();
if(windowInsets != null){
if (android.os.Build.VERSION.SDK_INT >= android.os.Build.VERSION_CODES.P) {
DisplayCutout displayCutout = windowInsets.getDisplayCutout();
//getBoundingRects返回List<Rect>,没一个list表示一个不可显示的区域,即刘海屏,可以遍历这个list中的Rect,
//即可以获得每一个刘海屏的坐标位置,当然你也可以用类似getSafeInsetBottom的api
Log.d("hwj", "**controlView**" + displayCutout.getBoundingRects());
Log.d("hwj", "**controlView**" + displayCutout.getSafeInsetBottom());
Log.d("hwj", "**controlView**" + displayCutout.getSafeInsetLeft());
Log.d("hwj", "**controlView**" + displayCutout.getSafeInsetRight());
Log.d("hwj", "**controlView**" + displayCutout.getSafeInsetTop());
}
}
}
}
}
<!--布局文件-->
<?xml version="1.0" encoding="utf-8"?>
<LinearLayout
    xmlns:android="http://schemas.android.com/apk/res/android"
    xmlns:app="http://schemas.android.com/apk/res-auto"
    xmlns:tools="http://schemas.android.com/tools"
    android:layout_width="match_parent"
    android:layout_height="match_parent"
    android:orientation="vertical"
    android:background="@android:color/holo_blue_bright"
    tools:context="com.hwj.android.learning.AndroidPDemoActivity">

    <!--假设我们已经通过DisplayCutoutDemo.java的controlView方法提前
     获得了刘海屏的坐标,则这里坐边距就可以设置了-->
    <!--在你实际使用android p模拟器的时候,你会发现android.os.Build.VERSION_CODES.P的值居然等于10000
     顾你是无法通过模拟器去实际使用DisplayCutoutDemo类的-->
    <Button
        android:layout_width="wrap_content"
        android:layout_height="wrap_content"
        android:layout_marginLeft="800px"/>

    <TextView
        android:id="@+id/android_p_demo_tv"
        android:layout_width="wrap_content"
        android:layout_height="wrap_content"
        android:text="Hello World!"/>

</LinearLayout>
显示效果如下
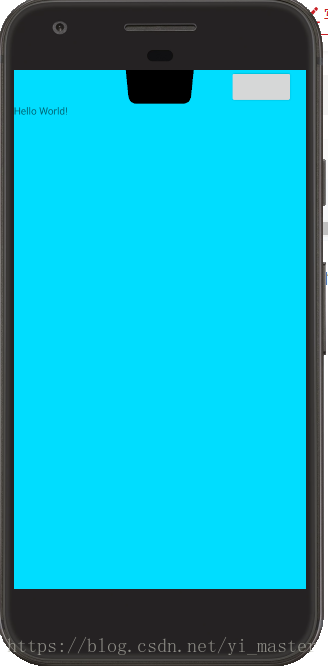
这里有一个需要关注的问题,在使用Android P模拟器的时,android.os.Build.VERSION_CODES.P的值居然等于10000,这说明在实际使用过程中你是无法通过模拟器去实际使用DisplayCutoutDemo类的,也就是无法去获取刘海屏的具体坐标
究其原因,我猜测是Android P版本还未正式发布,这只是一个debug版本,待正式发布,这个bug应该就会修复掉了。
但是只要我们掌握了适配原理,那就不用担心了
但是我们应该遵循的一个原则就是:不要在刘海屏那一栏显示内容,那一块我们称为非安全区域,尽量在安全区域去绘制UI
综述刘海屏的适配:
1)设置LAYOUT_IN_DISPLAY_CUTOUT_MODE_SHORT_EDGES模式
2)设置沉浸式布局模式
3)计算状态栏高度,进行布局;如果有特殊UI要求,则可以使用DisplayCutoutDemo类去获取刘海屏的坐标,完成UI
下面的链接是华为和VIVO的自己的适配刘海屏方案
华为适配刘海屏
VIVO适配刘海屏
虽然各大厂商均有自己额适配方案和API,但是只要你遵循Google的适配刘海屏方案,即我博文上述的方法,各厂商的手机显示也是不会有问题的,如华为P版本会同时兼容谷歌和华为的方案,在android p版本发布之前,我们还是得遵循华为或者VIVO的适配方案去适配刘海屏;