前言
学习自定义view,想找点东西耍一下,刚好看到抖音的点赞效果不错,尝试一下。
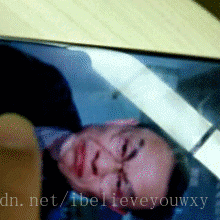
抖音效果:
话不多说,先上代码:
public class Love extends RelativeLayout {
    private Context mContext;
    float[] num = {-30, -20, 0, 20, 30};//随机心形图片角度

    public Love(Context context) {
        super(context);
        initView(context);
    }

    public Love(Context context, @Nullable AttributeSet attrs) {
        super(context, attrs);
        initView(context);
    }

    public Love(Context context, @Nullable AttributeSet attrs, int defStyleAttr) {
        super(context, attrs, defStyleAttr);
        initView(context);
    }

    private void initView(Context context) {
        mContext = context;
    }

    @Override
    protected void dispatchDraw(Canvas canvas) {
        super.dispatchDraw(canvas);
        ImageView imageView = new ImageView(mContext);
        LayoutParams params = new LayoutParams(100, 100);
        params.leftMargin = getWidth() - 200;
        params.topMargin = getHeight() / 2 - 300;
        imageView.setImageDrawable(getResources().getDrawable(R.drawable.heart_red));
        imageView.setLayoutParams(params);
        addView(imageView);

        imageView.setOnClickListener(new OnClickListener() {
            @Override
            public void onClick(View v) {
                Toast.makeText(mContext, "这里是点击爱心的动画,待展示", Toast.LENGTH_SHORT).show();
            }
        });
    }

    @Override
    public boolean onTouchEvent(MotionEvent event) {

        final ImageView imageView = new ImageView(mContext);
        LayoutParams params = new LayoutParams(300, 300);
        params.leftMargin = (int) event.getX() - 150;
        params.topMargin = (int) event.getY() - 300;
        imageView.setImageDrawable(getResources().getDrawable(R.drawable.heart_red));
        imageView.setLayoutParams(params);
        addView(imageView);

        AnimatorSet animatorSet = new AnimatorSet();
        animatorSet.play(scale(imageView, "scaleX", 2f, 0.9f, 100, 0))
                .with(scale(imageView, "scaleY", 2f, 0.9f, 100, 0))
                .with(rotation(imageView, 0, 0, num[new Random().nextInt(4)]))
                .with(alpha(imageView, 0, 1, 100, 0))
                .with(scale(imageView, "scaleX", 0.9f, 1, 50, 150))
                .with(scale(imageView, "scaleY", 0.9f, 1, 50, 150))
                .with(translationY(imageView, 0, -600, 800, 400))
                .with(alpha(imageView, 1, 0, 300, 400))
                .with(scale(imageView, "scaleX", 1, 3f, 700, 400))
                .with(scale(imageView, "scaleY", 1, 3f, 700, 400));

        animatorSet.start();
        animatorSet.addListener(new AnimatorListenerAdapter() {
            @Override
            public void onAnimationEnd(Animator animation) {
                super.onAnimationEnd(animation);
                removeViewInLayout(imageView);
            }
        });
        return super.onTouchEvent(event);
    }

    public static ObjectAnimator scale(View view, String propertyName, float from, float to, long time, long delayTime) {
        ObjectAnimator translation = ObjectAnimator.ofFloat(view
                , propertyName
                , from, to);
        translation.setInterpolator(new LinearInterpolator());
        translation.setStartDelay(delayTime);
        translation.setDuration(time);
        return translation;
    }

    public static ObjectAnimator translationX(View view, float from, float to, long time, long delayTime) {
        ObjectAnimator translation = ObjectAnimator.ofFloat(view
                , "translationX"
                , from, to);
        translation.setInterpolator(new LinearInterpolator());
        translation.setStartDelay(delayTime);
        translation.setDuration(time);
        return translation;
    }

    public static ObjectAnimator translationY(View view, float from, float to, long time, long delayTime) {
        ObjectAnimator translation = ObjectAnimator.ofFloat(view
                , "translationY"
                , from, to);
        translation.setInterpolator(new LinearInterpolator());
        translation.setStartDelay(delayTime);
        translation.setDuration(time);
        return translation;
    }

    public static ObjectAnimator alpha(View view, float from, float to, long time, long delayTime) {
        ObjectAnimator translation = ObjectAnimator.ofFloat(view
                , "alpha"
                , from, to);
        translation.setInterpolator(new LinearInterpolator());
        translation.setStartDelay(delayTime);
        translation.setDuration(time);
        return translation;
    }

    public static ObjectAnimator rotation(View view, long time, long delayTime, float... values) {
        ObjectAnimator rotation = ObjectAnimator.ofFloat(view, "rotation", values);
        rotation.setDuration(time);
        rotation.setStartDelay(delayTime);
        rotation.setInterpolator(new TimeInterpolator() {
            @Override
            public float getInterpolation(float input) {
                return input;
            }
        });
        return rotation;
    }
    }
实现思路
在点击时触发将心形的图片add到整个view中,然后在执行动画。主要的处理逻辑都在onTouchEvent()事件中,下面我们来详细讲解一下思路和代码:
 @Override
    public boolean onTouchEvent(MotionEvent event) {

        final ImageView imageView = new ImageView(mContext);
        LayoutParams params = new LayoutParams(300, 300);
        params.leftMargin = (int) event.getX() - 150;
        params.topMargin = (int) event.getY() - 300;
        imageView.setImageDrawable(getResources().getDrawable(R.drawable.heart_red));
        imageView.setLayoutParams(params);
        addView(imageView);

        AnimatorSet animatorSet = new AnimatorSet();
        animatorSet.play(scale(imageView, "scaleX", 2f, 0.9f, 100, 0))
                .with(scale(imageView, "scaleY", 2f, 0.9f, 100, 0))
                .with(rotation(imageView, 0, 0, num[new Random().nextInt(4)]))
                .with(alpha(imageView, 0, 1, 100, 0))
                .with(scale(imageView, "scaleX", 0.9f, 1, 50, 150))
                .with(scale(imageView, "scaleY", 0.9f, 1, 50, 150))
                .with(translationY(imageView, 0, -600, 800, 400))
                .with(alpha(imageView, 1, 0, 300, 400))
                .with(scale(imageView, "scaleX", 1, 3f, 700, 400))
                .with(scale(imageView, "scaleY", 1, 3f, 700, 400));

        animatorSet.start();
        animatorSet.addListener(new AnimatorListenerAdapter() {
            @Override
            public void onAnimationEnd(Animator animation) {
                super.onAnimationEnd(animation);
                removeViewInLayout(imageView);
            }
        });
        return super.onTouchEvent(event);
}- 首先,我们需要在触摸事件中做监听,当有触摸时,创建一个展示心形图片的ImageView。
final ImageView imageView = new ImageView(mContext);
imageView.setImageDrawable(getResources().getDrawable(R.drawable.heart_red));//设置红色心形图片- 设置图片展示的位置,是需要在手指触摸的位置上方,即触摸点是心形的下方角的位置。所以我们需要将ImageView设置到手指的位置
 LayoutParams params = new LayoutParams(300, 300);
 params.leftMargin = (int) event.getX() - 150;
 params.topMargin = (int) event.getY() - 300;
imageView.setLayoutParams(params);- 给imageView add到父view中。
addView(imageView);- 设置imageView动画
 AnimatorSet animatorSet = new AnimatorSet();
 animatorSet.play(scale(imageView, "scaleX", 2f, 0.9f, 100, 0))//缩放动画,X轴2倍缩小至0.9倍
                .with(scale(imageView, "scaleY", 2f, 0.9f, 100, 0))//缩放动画,Y轴2倍缩小至0.9倍
                .with(rotation(imageView, 0, 0, num[new Random().nextInt(4)]))//旋转动画,随机旋转角度num={-30.-20,0,20,30}
                .with(alpha(imageView, 0, 1, 100, 0))//渐变透明度动画,透明度从0-1.
                .with(scale(imageView, "scaleX", 0.9f, 1, 50, 150))//缩放动画,X轴0.9倍缩小至1倍
                .with(scale(imageView, "scaleY", 0.9f, 1, 50, 150))//缩放动画,Y轴0.9倍缩小至1倍
                .with(translationY(imageView, 0, -600, 800, 400))//平移动画,Y轴从0向上移动600单位
                .with(alpha(imageView, 1, 0, 300, 400))//透明度动画,从1-0
                .with(scale(imageView, "scaleX", 1, 3f, 700, 400))//缩放动画,X轴1倍放大至3倍
                .with(scale(imageView, "scaleY", 1, 3f, 700, 400));//缩放动画,Y轴1倍放大至3倍
animatorSet.start();- 当然,我们不可能无限制的增加view,在view消失之后,需要手动的移除改ImageView。
animatorSet.addListener(new AnimatorListenerAdapter() {
@Override
public void onAnimationEnd(Animator animation) {
super.onAnimationEnd(animation);
removeViewInLayout(imageView);
}
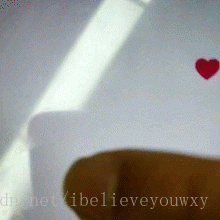
});效果如下:
有问题和想法,欢迎私信或者评论留言,一起学习,一起进步