简介
这种方案,使用一个VIP地址,前端使用2台机器,一台做主,一台做备,但同时只有一台机器工作,另一台备机在主机器不出现故障的时候,永远处于浪费状态,对于服务器不多的网站,该方案并不经济实惠。
一、网络拓扑
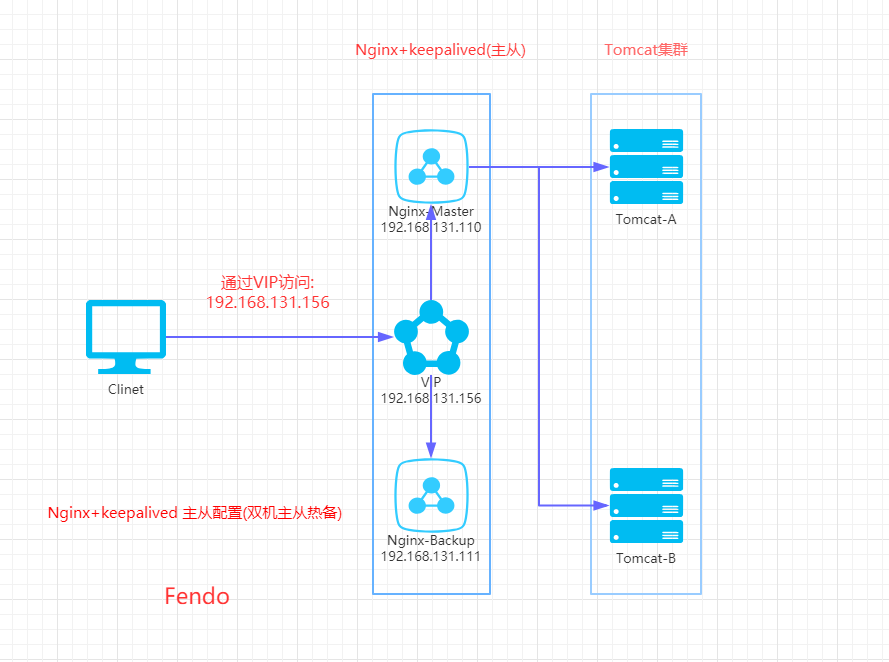
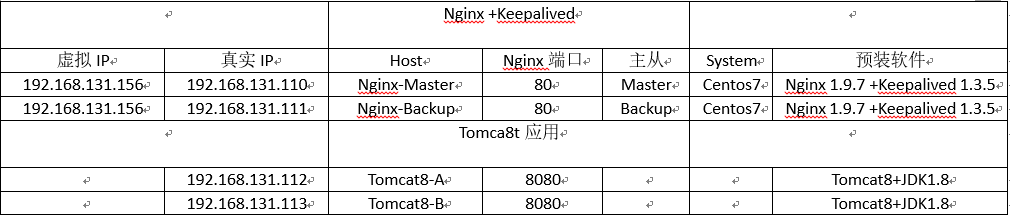
四台虚拟机如下所示:
为什么使用keepalived呢?
使用keepalived就用来做高可用的,提供虚拟VIP
二、软件安装
Nginx-Master和Nginx-Slave两台服务器上的安装操作完全一样
1、更新系统[root@Nginx-Master ~]# yum -y update2、安装依赖软件
[root@Nginx-Master ~]# yum install -y libnl*
[root@Nginx-Master ~]# yum -y install openssl openssl-devel kernel-devel        #可分别安装
[root@Nginx-Master ~]# yum -y install gcc gcc-c++ autoconf automake make  #可分别安装
[root@Nginx-Master ~]# yum install -y libnfnetlink-devel zlib zlib-devel gcc gcc-c++ openssl openssl-devel openssh
说明:
pcre: 用来作地址重写的功能。zlib:nginx 的gzip模块,传输数据打包,省流量(但消耗资源)。
openssl:提供ssl加密协议
安装 mailx 包,用于发送邮件
[root@Nginx-Master ~]# yum -y install mailx
[root@Nginx-Master ~]# mailx -V
12.5 7/5/10
[root@Nginx-Master ~]# vim /etc/nail.rc
set [email protected](邮箱地址)
set smtp=smtp.163.com(smtp服务器)
set [email protected](用户名)
set smtp-auth-password=xxxxxxxx(邮箱密码)
set smtp-auth=login
测试
[root@Nginx-Master ~]echo 123 | mailx -v -s "test" [email protected]
[root@Nginx-Master ~]echo "hello world" | mail -s 'test666' [email protected]
或者
[root@Nginx-Master ~]mailx -v -s "test" [email protected]<test.txt
3、安装keepalived和nginx
3.1.1、下载
[root@Nginx-Master ~]# cd /usr/local/src/
[root@Nginx-Master src]# wget http://nginx.org/download/nginx-1.9.7.tar.gz
[root@Nginx-Master src]# wget wget http://www.keepalived.org/software/keepalived-1.3.5.tar.gz
3.1.2、解压
[root@Nginx-Master src]# tar -zvxf nginx-1.9.7.tar.gz
[root@Nginx-Master src]# cd nginx-1.9.7
3.1.3、建立Nginx用户
[root@Nginx-Master nginx-1.9.7]# groupadd -g 1001 nginx
[root@Nginx-Master nginx-1.9.7]# useradd -u 900 nginx -g nginx -s /sbin/nologin
[root@Nginx-Master nginx-1.9.7]# tail -1 /etc/passwd
nginx:x:900:1001::/home/nginx:/sbin/nologin
3.1.4、安装Nginx
[root@Nginx-Master nginx-1.9.7]#./configure --prefix=/usr/local/nginx --with-http_dav_module --with-http_stub_status_module --with-http_addition_module --with-http_sub_module --with-http_flv_module --with-http_mp4_module --with-http_ssl_module --with-http_gzip_static_module --user=nginx --group=nginx && make && make install
[root@Nginx-Master nginx-1.9.7]# ln -s /usr/local/nginx/sbin/* /usr/local/sbin/
3.1.5、安装keepalived
[root@Nginx-Master src]# tar -zvxf keepalived-1.3.5.tar.gz
[root@Nginx-Master src]# cd keepalived-1.3.5
[root@Nginx-Master keepalived-1.3.5]# ./configure
Keepalived configuration
------------------------
Keepalived version       : 1.3.5
Compiler                 : gcc
Preprocessor flags       :  -I/usr/include/libnl3
Compiler flags           : -Wall -Wunused -Wstrict-prototypes -Wextra -g -O2
Linker flags             :
Extra Lib                : -lcrypto -lssl -lnl-genl-3 -lnl-3
Use IPVS Framework       : Yes
IPVS use libnl           : Yes
IPVS syncd attributes    : No
IPVS 64 bit stats        : No
fwmark socket support    : Yes
Use VRRP Framework       : Yes
Use VRRP VMAC            : Yes
Use VRRP authentication  : Yes
With ip rules/routes     : Yes
SNMP vrrp support        : No
SNMP checker support     : No
SNMP RFCv2 support       : No
SNMP RFCv3 support       : No
DBUS support             : No
SHA1 support             : No
Use Debug flags          : No
Stacktrace support       : No
Memory alloc check       : No
libnl version            : 3
Use IPv4 devconf         : No
Use libiptc              : No
Use libipset             : No
init type                : systemd
Build genhash            : Yes
Build documentation      : No
[root@Nginx-Master keepalived-1.3.5]# make && make install
[root@Nginx-Master keepalived-1.3.5]# cp /usr/local/src/keepalived-1.3.5/keepalived/etc/init.d/keepalived /etc/init.d/keepalived
[root@Nginx-Master keepalived-1.3.5]# ll /etc/init.d/ | grep keepalived
-rwxr-xr-x  1 root root  1308 5月  28 16:01 keepalived
[root@Nginx-Master keepalived-1.3.5]# cp /usr/local/keepalived/etc/sysconfig/keepalived /etc/sysconfig/
[root@Nginx-Master keepalived-1.3.5]# mkdir /etc/keepalived
[root@Nginx-Master keepalived-1.3.5]# cp /usr/local/keepalived/etc/keepalived/keepalived.conf /etc/keepalived/
[root@Nginx-Master keepalived-1.3.5]# cp /usr/local/keepalived/sbin/keepalived /usr/sbin/
将nginx和keepalive服务加入开机启动服务
[root@Nginx-Master keepalived-1.3.5]# echo "/usr/local/nginx/sbin/nginx" >> /etc/rc.local
[root@Nginx-Master keepalived-1.3.5]# echo "/etc/init.d/keepalived start" >> /etc/rc.local
三、配置机器
3.1、先关闭SElinux(master和slave两台负载均衡机都要做)
[root@Nginx-Master ~]# vim /etc/sysconfig/selinux
#SELINUX=enforcing                      #注释掉
#SELINUXTYPE=targeted                   #注释掉
SELINUX=disabled                        #增加
[root@Nginx-Master ~]# setenforce 0     #使配置立即生效
setenforce: SELinux is disabled
3.2、关闭防火墙
systemctl stop firewalld.service    #停止firewall
systemctl disable firewalld.service #禁止firewall开机启动
3.3、配置nginx
修改Nginx-Master的配置文件:
[root@Nginx-Master src]# vim /usr/local/nginx/conf/nginx.conf**********************************************Nginx-Master配置文件*************************************
首先创建目录
[root@Nginx-Master ~]# mkdir /usr/local/webapps
修改nginx配置文件
[root@Nginx-Master ~]# vim /usr/local/nginx/conf/nginx.conf
user nobody;

worker_processes 2;

events{
		worker_connections 1024;
}

http{
		#设置默认类型为二进制流
		default_type    application/octet-stream;

		server_names_hash_bucket_size   128;
		#指定来自client请求头的headerbuffer大小。设置为32KB
		client_header_buffer_size   32k;
		#指定client请求中较大的消息头的缓存最大数量和大小,这里是4个32KB
		large_client_header_buffers 4 32k;
		#上传文件大小
		client_max_body_size 356m;
		#nginx的HttpLog模块指定,指定nginx日志的输出格式,输出格式为access
		log_format access '$remote_addr - $remote_user [$time_local] "$request" '
				'$status $body_bytes_sent "$http_referer" '
				'"$http_user_agent" "$http_x_forwarded_for"';
		#access日志存在未知
		access_log  /usr/local/nginx/logs/access.log    access;
		#开启高效模式文件传输模式,将tcp_nopush和tcp_nodelay两个指另设置为on,用于防止网络堵塞。

		sendfile    on;
		tcp_nopush  on;
		tcp_nodelay on;
		#设置client连接保持活动的超时时间
		keepalive_timeout   65;
		server_tokens   off;
		#client请求主体读取缓存
		client_body_buffer_size 512k;
		proxy_connect_timeout   5;
		proxy_send_timeout      60;
		proxy_read_timeout      5;
		proxy_buffer_size       16k;
		proxy_buffers           4 64k;
		proxy_busy_buffers_size 128k;
		proxy_temp_file_write_size 128k;

		#fastcgi_connect_timeout 300;
		#fastcgi_send_timeout   300;
		#fastcgi_read_timeout   300;
		#fastcgi_buffer_timeout 300;
		#fastcgi_buffers 4 64k;
		#fastcgi_busy_buffers_size 128k;
		#fastcgi_temp_file_write_size 128k;

		#开启gzip
		gzip    on;
		#同意压缩的最小字节数
		gzip_min_length 1k;
		#4个单位为16k的内存作为压缩结果流缓存
		gzip_buffers 4 16k;
		#设置识别HTTP协议版本号,默认是1.1
		gzip_http_version 1.1;
		#gzip压缩比,可在1~9中设置,1压缩比最小,速度最快。9压缩比最大。速度最慢,消耗CPU
		gzip_comp_level 2;
		#压缩的类型
		gzip_types text/plain application/x-javascript text/css application/xml;
		#让前端的缓存server混村经过的gzip压缩的页面
		gzip_vary   on;

		#Tomcat集群
		upstream mycluster{
				 server 192.168.182.112:8080 weight=1;
				 server 192.168.182.113:8080 weight=1;
		}

		server{
				listen 80;
				server_name 192.168.131.110;
				charset    utf-8; #设置编码为utf-8
				#root   html;

				location / {
				    root   html;
				    index  index.html index.htm;
				}

				#location ~ .*\.(jsp|do|action)$
				#location / {
				#			proxy_next_upstream http_502 http_504 error timeout invalid_header;
				#			proxy_pass http://mycluster;
				#			# 真实的clientIP
				#			proxy_set_header   X-Real-IP        $remote_addr;
				#			# 请求头中Host信息
				#			proxy_set_header   Host             $host;
				#			# 代理路由信息。此处取IP有安全隐患
				#			proxy_set_header   X-Forwarded-For  $proxy_add_x_forwarded_for;
				#			# 真实的用户訪问协议
				#			proxy_set_header   X-Forwarded-Proto $scheme;
				#}
				#静态文件交给nginx处理
				#location ~ .*\.(htm|html|gif|jpg|jpeg|png|bmp|swf|ioc|rar|zip|txt|flv|mid|doc|ppt|pdf|xls|mp3|wma)$
				#{
				#		root /usr/local/webapps;
				#		expires 30d;
				#}
				#静态文件交给nginx处理
				#location ~ .*\.(js|css)? $
				#{
				#		root /usr/local/webapps;
				#		expires 1h;
				#}
				error_page   500 502 503 504  /50x.html;

				location = /50x.html {
					root   html;
				}

		}
}
**************************************************************Nginx-Slave配置文件**************************************
[root@Nginx-Slave ~]# mkdir /usr/local/webapps
[root@Nginx-Slave ~]# vim /usr/local/nginx/conf/nginx.conf
user nobody;

worker_processes 2;

events{
		worker_connections 1024;
}

http{
		#设置默认类型为二进制流
		default_type    application/octet-stream;
		server_names_hash_bucket_size   128;
		#指定来自client请求头的headerbuffer大小,设置为32KB
		client_header_buffer_size   32k;
		#指定client请求中较大的消息头的缓存最大数量和大小,这里是4个32KB
		large_client_header_buffers 4 32k;
		#上传文件大小
		client_max_body_size 356m;
		#nginx的HttpLog模块指定。指定nginx日志的输出格式,输出格式为access
		log_format access '$remote_addr - $remote_user [$time_local] "$request" '
				'$status $body_bytes_sent "$http_referer" '
				'"$http_user_agent" "$http_x_forwarded_for"';
		#access日志存在未知
		access_log  /usr/local/nginx/logs/access.log    access;
		#开启高效模式文件传输模式。将tcp_nopush和tcp_nodelay两个指另设置为on。用于防止网络堵塞。
		sendfile    on;
		tcp_nopush  on;
		tcp_nodelay on;
		#设置client连接保持活动的超时时间
		keepalive_timeout   65;
		server_tokens   off;
		#client请求主体读取缓存
		client_body_buffer_size 512k;
		proxy_connect_timeout   5;
		proxy_send_timeout      60;
		proxy_read_timeout      5;
		proxy_buffer_size       16k;
		proxy_buffers           4 64k;
		proxy_busy_buffers_size 128k;
		proxy_temp_file_write_size 128k;

		#fastcgi_connect_timeout 300;
		#fastcgi_send_timeout   300;
		#fastcgi_read_timeout   300;
		#fastcgi_buffer_timeout 300;
		#fastcgi_buffers 4 64k;
		#fastcgi_busy_buffers_size 128k;
		#fastcgi_temp_file_write_size 128k;

		#开启gzip
		gzip    on;
		#同意压缩的最小字节数
		gzip_min_length 1k;
		#4个单位为16k的内存作为压缩结果流缓存
		gzip_buffers 4 16k;
		#设置识别HTTP协议版本号。默认是1.1
		gzip_http_version 1.1;
		#gzip压缩比,可在1~9中设置。1压缩比最小。速度最快。9压缩比最大,速度最慢,消耗CPU
		gzip_comp_level 2;
		#压缩的类型
		gzip_types text/plain application/x-javascript text/css application/xml;
		#让前端的缓存server混村经过的gzip压缩的页面
		gzip_vary   on;

		upstream mycluster{
			 server 192.168.182.112:8080 weight=1;
			 server 192.168.182.113:8080 weight=1;
		 }

		server{
				listen 80;
				server_name 192.168.131.111;
				charset    utf-8; #设置编码为utf-8
				#root   html;

		location / {
		    root   html;
		    index  index.html index.htm;
		}

		#location ~ .*\.(jsp|do|action)$
		#location / {
		#		proxy_next_upstream http_502 http_504 error timeout invalid_header;
		#		proxy_pass http://mycluster;
		#		# 真实的clientIP
		#		proxy_set_header   X-Real-IP        $remote_addr;
		#		# 请求头中Host信息
		#		proxy_set_header   Host             $host;
		#		# 代理路由信息,此处取IP有安全隐患
		#		proxy_set_header   X-Forwarded-For  $proxy_add_x_forwarded_for;
		#		# 真实的用户訪问协议
		#		proxy_set_header   X-Forwarded-Proto $scheme;
		#}
		#静态文件交给nginx处理
		#location ~ .*\.(htm|html|gif|jpg|jpeg|png|bmp|swf|ioc|rar|zip|txt|flv|mid|doc|ppt|pdf|xls|mp3|wma)$
		#{
		#		root /usr/local/webapps;
		#		expires 30d;
		#}
		#静态文件交给nginx处理
		#location ~ .*\.(js|css)$
		#{
		#		root /usr/local/webapps;
		#		expires 1h;
		#}
		error_page   500 502 503 504  /50x.html;

		location = /50x.html {
			root   html;
		}

		}
}
修改之后使用命令检查下是否有错误:
[root@Nginx-Master local]# nginx -t
nginx: the configuration file /usr/local/nginx/conf/nginx.conf syntax is ok
nginx: configuration file /usr/local/nginx/conf/nginx.conf test is successful
修改nginx的首页
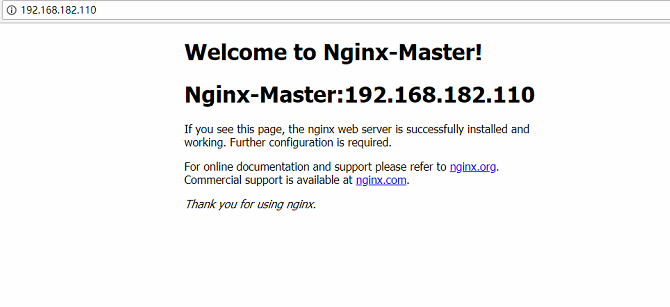
[root@Nginx-Master ~]# vim /usr/local/nginx/html/index.html
<!DOCTYPE html>
<html>
 <head>
  <title>Welcome to Nginx-Master!</title>
  <style>
	body {
		width: 35em;
		margin: 0 auto;
		font-family: Tahoma, Verdana, Arial, sans-serif;
	 }
 </style>
 </head>
 <body>
  <h1>Welcome to Nginx-Master!</h1>
  <h1><b>Nginx-Master:192.168.182.110</b></h1>
  <p>If you see this page, the nginx web server is successfully installed and working. Further configuration is required.</p>
  <p>For online documentation and support please refer to <a href="http://nginx.org/">nginx.org</a>.<br /> Commercial support is available at <a href="http://nginx.com/">nginx.com</a>.</p>
  <p><em>Thank you for using nginx.</em></p>
 </body>
</html>
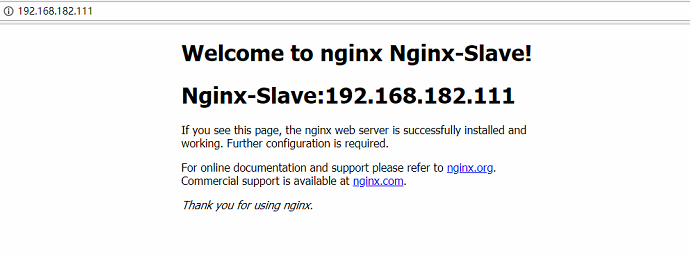
[root@Nginx-Slave ~]# vim /usr/local/nginx/html/index.html
<!DOCTYPE html>
<html>
 <head>
  <title>Welcome to Nginx-Slave!</title>
  <style>
	body {
		width: 35em;
		margin: 0 auto;
		font-family: Tahoma, Verdana, Arial, sans-serif;
	 }
 </style>
 </head>
 <body>
  <h1>Welcome to nginx Nginx-Slave!</h1>
  <h1><b>Nginx-Slave:192.168.182.111</b></h1>
  <p>If you see this page, the nginx web server is successfully installed and working. Further configuration is required.</p>
  <p>For online documentation and support please refer to <a href="http://nginx.org/">nginx.org</a>.<br /> Commercial support is available at <a href="http://nginx.com/">nginx.com</a>.</p>
  <p><em>Thank you for using nginx.</em></p>
 </body>
</html>
分别访问两个Nginx,http://192.168.182.110,http://192.168.182.111


3.4、keepalived配置
3.4.1、创建keepalived的pid目录
[root@Nginx-Master ~]# mkdir -p /usr/local/keepalived/var/run/
[root@Nginx-Master ~]# vi /usr/local/keepalived/var/run/keepalived.pid
3.4.2、修改Nginx-Master负载机上的keepalived配置
[root@Nginx-Master ~]# cp /etc/keepalived/keepalived.conf /etc/keepalived/keepalived.conf.bak
[root@Nginx-Master ~]# vim /etc/keepalived/keepalived.conf
! Configuration File for keepalived

############################ 全局配置 #############################

global_defs {

    # 定义管理员邮件地址,表示keepalived在发生诸如切换操作时需要发送email通知,以及email发送给哪些邮件地址,可以有多个,每行一个
	notification_email {
        #设置报警邮件地址,可以设置多个,每行一个。 需开启本机的sendmail服务
		[email protected]
	}
    #keepalived在发生诸如切换操作时需要发送email通知地址,表示发送通知的邮件源地址是谁
	notification_email_from [email protected]

	#指定发送email的smtp服务器
	smtp_server 127.0.0.1

	#设置连接smtp server的超时时间
	smtp_connect_timeout 30

	#运行keepalived的机器的一个标识,通常可设为hostname。故障发生时,发邮件时显示在邮件主题中的信息。
	router_id swarm01
}


############################ VRRPD配置 #############################

# 定义chk_http_port脚本,脚本执行间隔10秒,权重-5,检测nginx服务是否在运行。有很多方式,比如进程,用脚本检测等等
vrrp_script chk_http_port {

    #这里通过脚本监测
    script "/opt/chk_nginx.sh"

	#脚本执行间隔,每2s检测一次
    interval 2

    #脚本结果导致的优先级变更,检测失败(脚本返回非0)则优先级 -5
    weight -5

    #检测连续2次失败才算确定是真失败。会用weight减少优先级(1-255之间)
    fall 2

    #检测1次成功就算成功。但不修改优先级
    rise 1
}

#定义vrrp实例,VI_1 为虚拟路由的标示符,自己定义名称,keepalived在同一virtual_router_id中priority(0-255)最大的会成为master,也就是接管VIP,当priority最大的主机发生故障后次priority将会接管
vrrp_instance VI_1 {

    #指定keepalived的角色,MASTER表示此主机是主服务器,BACKUP表示此主机是备用服务器。注意这里的state指定instance(Initial)的初始状态,就是说在配置好后,这台服务器的初始状态就是这里指定的,
	#但这里指定的不算,还是得要通过竞选通过优先级来确定。如果这里设置为MASTER,但如若他的优先级不及另外一台,那么这台在发送通告时,会发送自己的优先级,另外一台发现优先级不如自己的高,
	#那么他会就回抢占为MASTER
    state MASTER

	#指定HA监测网络的接口。与本机 IP 地址所在的网络接口相同,可通过ip addr 查看
    interface ens33

    # 发送多播数据包时的源IP地址,这里注意了,这里实际上就是在哪个地址上发送VRRP通告,这个非常重要,
	#一定要选择稳定的网卡端口来发送,这里相当于heartbeat的心跳端口,如果没有设置那么就用默认的绑定的网卡的IP,也就是interface指定的IP地址
    mcast_src_ip 192.168.182.110

	#虚拟路由标识,这个标识是一个数字,同一个vrrp实例使用唯一的标识。即同一vrrp_instance下,MASTER和BACKUP必须是一致的
    virtual_router_id 51

    #定义优先级,数字越大,优先级越高,在同一个vrrp_instance下,MASTER的优先级必须大于BACKUP的优先级
    priority 101

    #设定MASTER与BACKUP负载均衡器之间同步检查的时间间隔,单位是秒
    advert_int 1

    #设置验证类型和密码。主从必须一样
    authentication {

	    #设置vrrp验证类型,主要有PASS和AH两种
        auth_type PASS

		#设置vrrp验证密码,在同一个vrrp_instance下,MASTER与BACKUP必须使用相同的密码才能正常通信
        auth_pass 1111
    }

	#VRRP HA 虚拟地址 如果有多个VIP,继续换行填写
	#设置VIP,它随着state变化而增加删除,当state为master的时候就添加,当state为backup的时候则删除,由优先级决定
    virtual_ipaddress {
        192.168.182.156
    }

	#执行nginx检测脚本。注意这个设置不能紧挨着写在vrrp_script配置块的后面(实验中碰过的坑),否则nginx监控失效!!
	track_script {

       #引用VRRP脚本,即在 vrrp_script 部分指定的名字。定期运行它们来改变优先级,并最终引发主备切换。
	   chk_http_port
	}
}
3.4.3、修改Nginx-Slave负载机上的keepalived配置
[root@Nginx-Slave ~]# cp /etc/keepalived/keepalived.conf /etc/keepalived/keepalived.conf.bak
[root@Nginx-Slave ~]# vim /etc/keepalived/keepalived.conf
! Configuration File for keepalived

global_defs {
	notification_email {
		[email protected]
	}

	notification_email_from [email protected]
	smtp_server 127.0.0.1
	smtp_connect_timeout 30
	router_id swaram02
}

vrrp_script chk_http_port {
	script "/opt/chk_nginx.sh"
	interval 2
	weight -5
	fall 2
	rise 1
}

vrrp_instance VI_1 {
	state BACKUP
	interface ens33
	mcast_src_ip 192.168.182.111
	virtual_router_id 51
	priority 99
	advert_int 1
	authentication {
		auth_type PASS
		auth_pass 1111
	}
	virtual_ipaddress {
		192.168.182.156
	}

	track_script {
	   chk_http_port
	}

}
四、测试keepalived主从
4.1、让keepalived监控NginX的状态:
1)经过前面的配置,如果master主服务器的keepalived停止服务,slave从服务器会自动接管VIP对外服务;
一旦主服务器的keepalived恢复,会重新接管VIP。 但这并不是我们需要的,我们需要的是当NginX停止服务的时候能够自动切换。
2)keepalived支持配置监控脚本,我们可以通过脚本监控NginX的状态,如果状态不正常则进行一系列的操作,最终仍不能恢复NginX则杀掉keepalived,使得从服务器能够接管服务。
4.2、如何监控NginX的状态
最简单的做法是监控NginX进程,更靠谱的做法是检查NginX端口,最靠谱的做法是检查多个url能否获取到页面。
注意:这里要提示一下keepalived.conf中vrrp_script配置区的script一般有2种写法:
1)通过脚本执行的返回结果,改变优先级,keepalived继续发送通告消息,backup比较优先级再决定。这是直接监控Nginx进程的方式。
2)脚本里面检测到异常,直接关闭keepalived进程,backup机器接收不到advertisement会抢占IP。这是检查NginX端口的方式。
上文script配置部分,"killall -0 nginx"属于第1种情况,"/opt/chk_nginx.sh" 属于第2种情况。个人更倾向于通过shell脚本判断,但有异常时exit 1,正常退出exit 0,然后keepalived根据动态调整的 vrrp_instance 优先级选举决定是否抢占VIP:
● 如果脚本执行结果为0,并且weight配置的值大于0,则优先级相应的增加● 如果脚本执行结果非0,并且weight配置的值小于0,则优先级相应的减少
● 其他情况,原本配置的优先级不变,即配置文件中priority对应的值。
提示:
优先级不会不断的提高或者降低
可以编写多个检测脚本并为每个检测脚本设置不同的weight(在配置中列出就行)
不管提高优先级还是降低优先级,最终优先级的范围是在[1,254],不会出现优先级小于等于0或者优先级大于等于255的情况
在MASTER节点的 vrrp_instance 中 配置 nopreempt ,当它异常恢复后,即使它 prio 更高也不会抢占,这样可以避免正常情况下做无谓的切换,以上可以做到利用脚本检测业务进程的状态,并动态调整优先级从而实现主备切换。
另外:在默认的keepalive.conf里面还有 virtual_server,real_server 这样的配置,我们这用不到,它是为lvs准备的。
4.3、如何尝试恢复服务
由于keepalived只检测本机和他机keepalived是否正常并实现VIP的漂移,而如果本机nginx出现故障不会则不会漂移VIP。
所以编写脚本来判断本机nginx是否正常,如果发现NginX不正常,重启之。等待3秒再次校验,仍然失败则不再尝试,关闭keepalived,其他主机此时会接管VIP;
根据上述策略很容易写出监控脚本。此脚本必须在keepalived服务运行的前提下才有效!如果在keepalived服务先关闭的情况下,那么nginx服务关闭后就不能实现自启动了。
该脚本检测ngnix的运行状态,并在nginx进程不存在时尝试重新启动ngnix,如果启动失败则停止keepalived,准备让其它机器接管。
监控脚本如下(master和slave都要有这个监控脚本):
[root@Nginx-Master ~]# vim /opt/chk_nginx.sh
[root@Nginx-Master ~]# chmod +x /opt/chk_nginx.sh
#!/bin/bash
counter=$(ps -C nginx --no-heading|wc -l)
if [ "${counter}" = "0" ]; then
    /usr/local/nginx/sbin/nginx
    sleep 2
    counter=$(ps -C nginx --no-heading|wc -l)
    if [ "${counter}" = "0" ]; then
        /etc/init.d/keepalived stop
    fi
fi
测试一:
关闭主服务器上的keepalived或nginx,vip是否会自动飘到从服务器上
1)先后在master、slave服务器上启动nginx和keepalived,保证这两个服务都正常开启:
[root@Nginx-Master ~]# /usr/local/nginx/sbin/nginx
[root@Nginx-Master ~]# /etc/init.d/keepalived start
[root@Nginx-Master ~]# /usr/local/nginx/sbin/nginx
[root@Nginx-Master ~]# /etc/init.d/keepalived start
如果在启动keepalived报如下的错:
5月 28 21:22:39 Nginx-Master systemd[1]: PID file /usr/local/keepalived/var/run/keepalived.pid  not readable (yet?) after start.
5月 28 21:24:09 Nginx-Master systemd[1]: keepalived.service start operation timed out. Terminating.
5月 28 21:24:09 Nginx-Master systemd[1]: Failed to start LVS and VRRP High Availability Monitor.
5月 28 21:24:09 Nginx-Master systemd[1]: Unit keepalived.service entered failed state.
5月 28 21:24:09 Nginx-Master systemd[1]: keepalived.service failed.
查看keepalived的进程
[root@Nginx-Master ~]# ps aux | grep keepalived
root      30898  0.0  0.0  48064  1040 ?        Ss   5月28   0:02 /usr/local/sbin/keepalived -D
root      30899  0.0  0.1  48064  1928 ?        S    5月28   0:02 /usr/local/sbin/keepalived -D
root      30900  0.0  0.0  48064  1544 ?        S    5月28   0:23 /usr/local/sbin/keepalived -D
root      76617  0.0  0.0 112720   988 pts/0    S+   09:49   0:00 grep --color=auto keepalived
然后将该进程写入到文件中
[root@Nginx-Master ~]# echo 30898 >> /usr/local/keepalived/var/run/keepalived.pid
2)查看keepalived日志
[root@Nginx-Master ~]# tail -f /var/log/messages
3)在主服务器上查看是否已经绑定了虚拟IP
[root@Nginx-Master ~]# ip addr
ens33: <BROADCAST,MULTICAST,UP,LOWER_UP> mtu 1500 qdisc pfifo_fast state UP group default qlen 1000
link/ether 00:0c:29:e0:69:a0 brd ff:ff:ff:ff:ff:ff
inet 192.168.182.110/24 brd 192.168.182.255 scope global noprefixroute ens33
   valid_lft forever preferred_lft forever
inet 192.168.182.156/32 scope global ens33
   valid_lft forever preferred_lft forever
inet6 fe80::3064:9b6a:9819:180a/64 scope link noprefixroute
   valid_lft forever preferred_lft forever
会发现在ens33网卡上多出了一个ip地址192.168.182.156,分别访问三个地址:
192.168.182.110
192.168.182.111
会发现vip的地址上成功的绑定到了master上去了。
4)关闭主服务器上的keepalived,vip会自动飘到从服务器上
先查看keepalived的状态是在运行中:
[root@Nginx-Master ~]# /etc/init.d/keepalived status
● keepalived.service - LVS and VRRP High Availability Monitor
   Loaded: loaded (/usr/lib/systemd/system/keepalived.service; disabled; vendor preset: disabled)
   Active: active (running) since 二 2018-05-29 10:02:23 CST; 6min ago
  Process: 84372 ExecStart=/usr/local/keepalived/sbin/keepalived $KEEPALIVED_OPTIONS (code=exited, status=0/SUCCESS)
 Main PID: 42685 (keepalived)
    Tasks: 3
   Memory: 968.0K
   CGroup: /system.slice/keepalived.service
           ├─42685 /usr/local/keepalived/sbin/keepalived -D
           ├─42686 /usr/local/keepalived/sbin/keepalived -D
           └─42687 /usr/local/keepalived/sbin/keepalived -D

5月 29 10:02:23 Nginx-Master systemd[1]: Starting LVS and VRRP High Availability Monitor...
5月 29 10:02:23 Nginx-Master Keepalived[84372]: Starting Keepalived v1.3.5 (03/19,2017), git commit v1.3.5-6-g6fa32f2
5月 29 10:02:23 Nginx-Master systemd[1]: Started LVS and VRRP High Availability Monitor.
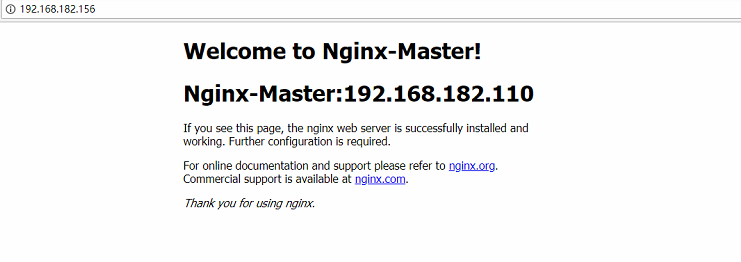
然后访问VIP: http://192.168.182.156显示的是Nginx-Master:192.168.182.110 这个nginx
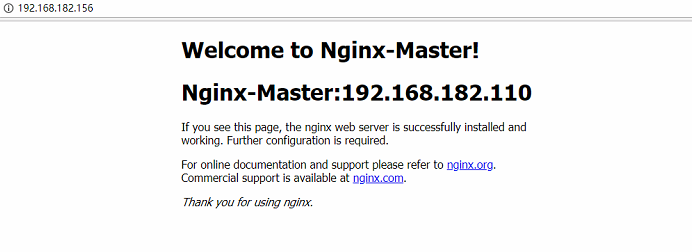
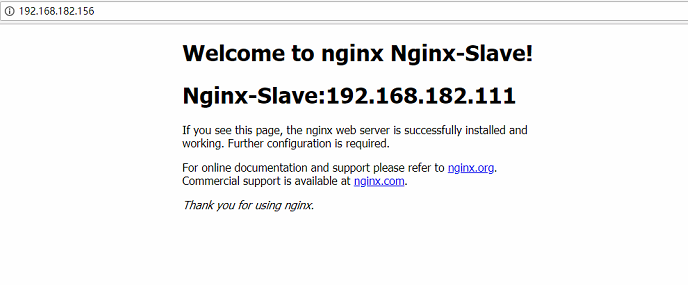
接下来停止主服务器上的keepalived,看从服务器的keepalived是否已经已经接管了VIP,访问: http://192.168.182.156/ 显示的是Nginx-Slave:192.168.182.111
测试二:
接着验证下nginx服务故障,看看keepalived监控nginx状态的脚本是否正常?
手动关闭master机器上的nginx服务,最多2秒钟后就会自动起来(因为keepalive监控nginx状态的脚本执行间隔时间为2秒)
[root@Nginx-Master ~]# /usr/local/nginx/sbin/nginx -s stop
[root@Nginx-Master ~]# ps -ef|grep nginx
root 28401 24826 0 19:43 pts/1 00:00:00 grep --color=auto nginx
[root@Nginx-Master ~]# ps -ef|grep nginx
root 28871 28870 0 19:47 ? 00:00:00 /bin/sh /opt/chk_nginx.sh
root 28875 24826 0 19:47 pts/1 00:00:00 grep --color=auto nginx
[root@Nginx-Master ~]# ps -ef|grep nginx
root      99994  99993  0 11:17 ?        00:00:00 /bin/bash /opt/chk_nginx.sh
root      99999      1  0 11:17 ?        00:00:00 nginx: master process /usr/local/nginx/sbin/nginx
nobody   100001  99999  0 11:17 ?        00:00:00 nginx: worker process
nobody   100002  99999  0 11:17 ?        00:00:00 nginx: worker process
root     100005  93395  0 11:17 pts/0    00:00:00 grep --color=auto nginx
这种情况下是nginx挂掉了,会自动起来,keepalived挂掉了,会由Slave来接管。哪如果想要实现如下的效果:
1、当 keepalived 挂掉,那么理论上说 keepalived 服务会重新启动起来
2、当 nginx 挂掉后,那么理论上说 keepalived 服务也会关闭
3、当 keepalived 状态变为 Master 之后,发送邮件
4、当 nginx-1 配置改动之后,nginx-2 的配置也会相应的更改,并且 reload
可参看这篇文章:https://blog.csdn.net/wanglei_storage/article/details/51175418
五、搭建Tomcat集群
Tomcat集群只要去掉nginx.conf配置文件的以下注释就可以了:
		#location ~ .*\.(jsp|do|action)$
		#location / {
		#		proxy_next_upstream http_502 http_504 error timeout invalid_header;
		#		proxy_pass http://mycluster;
		#		# 真实的clientIP
		#		proxy_set_header   X-Real-IP        $remote_addr;
		#		# 请求头中Host信息
		#		proxy_set_header   Host             $host;
		#		# 代理路由信息,此处取IP有安全隐患
		#		proxy_set_header   X-Forwarded-For  $proxy_add_x_forwarded_for;
		#		# 真实的用户訪问协议
		#		proxy_set_header   X-Forwarded-Proto $scheme;
		#}
		#静态文件交给nginx处理
		#location ~ .*\.(htm|html|gif|jpg|jpeg|png|bmp|swf|ioc|rar|zip|txt|flv|mid|doc|ppt|pdf|xls|mp3|wma)$
		#{
		#		root /usr/local/webapps;
		#		expires 30d;
		#}
		#静态文件交给nginx处理
		#location ~ .*\.(js|css)$
		#{
		#		root /usr/local/webapps;
		#		expires 1h;
		#}
参考:
https://www.cnblogs.com/kevingrace/p/6138185.html
https://www.cnblogs.com/chimeiwangliang/p/7768438.html
https://www.cnblogs.com/jhcelue/p/7387665.html