组件之间的通信
自定义组件需要有一个root element
父子组件的data是无法共享
组件可以有data,methods,computed…,但是data 必须是一个函数
props传递数据
组件实例的作用域是孤立的,父组件不能直接使用子组件的数据,子组件也不能直接使用父组件的数据
父组件在模板中使用子组件的时候可以给子组件传递数据
<bbb money="2"></bbb>
子组件需要通过props属性来接收后才能使用
'bbb':{
    props:['money']
}
如果父组件传递属性给子组件的时候键名有’-’,子组件接收的时候写成小驼峰的模式
  <bbb clothes-logo='amani' clothes-price="16.58"></bbb>
  props:['clothesLogo','clothesPrice']   子组件模板中:{{clothesLogo}}
我们可以用 v-bind 来动态地将 prop 绑定到父组件的数据。每当父组件的数据变化时,该变化也会传导给子组件
示例1:
<body>
    <div id="app">
        <father></father>
    </div>

    <template id="father">
        <div>
            <p>这是father组件!---> {{pMsg}}</p>
            <son :p-msg="pMsg"></son>
        </div>
    </template>
</body>


<script src="./base/vue.js"></script>
<script>
    // 父组件给子组件传递数据的时候,
    //子组件需要利用props的属性来确定自己的预期数据
    //中间有-   需要写出驼峰的形式来接收
    //如果儿子没有通过props属性接受传递过来的数据,则数据会以自定义属性的方式,放在儿子最外层的根元素上面


    //为什么组件中的data必须是一个函数返回对象的形式?
    //目的是让每一个实例可以维护一份被返回对象的独立的拷贝 (每个组件使用到的数据地址不一样)
    //内部必须要返回一个对象的写法,这样就可以保证每个组件里面用到的数据对象都是唯一的。

    //组件之间的作用域是相互独立的,组件的数据默认只能组件的模板里面使用。

    // var json = {pMsg:"hello father"}
    Vue.component("father",{
        template:"#father",
        data:function(){
            return {
                pMsg:"hello father"
            }
        },
        components:{
            son:{
                template:"<div>这是son子组件... {{pMsg}}</div>",
                props:["pMsg"] //接受父组件传递来的属性
            }
        }
    })

    let vm = new Vue({
        el: '#app',
        data:{
            msg:"hello app!"
        }
    })


</script>
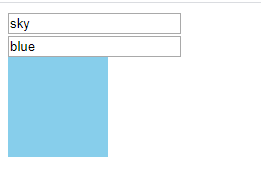
示例2:
例子:
<body>
    <div id="app">
        <father></father>
    </div>

    <template id="father">
        <div>
            <input type="text" v-model="sky">
            <son :sky="sky"></son>
        </div>
    </template>
    <template id="son">
        <div>
            <input type="text" v-model="color">
            <div class="box" :style="{background:ownColor}"></div>
        </div>
    </template>

</body>
<script src="./base/vue.js"></script>

<script>
    //父组件可以通过v-bind来为子组件传递数据,当父组件的数据改变的时候,
    //子组件接收到的数据也会改变
    new Vue({
        el:"#app",
        components:{
            father:{
                template:"#father",
                data(){
                    return {
                        sky:"sky"
                    }
                },
                components:{ //声明父组件的子组件
                    son:{
                        template:"#son",
                        props:["sky"], //接收父组件传递来的数据  <son :sky="sky"></son>
                        data(){ //让每个组件拥有一份被返回对象的独立的拷贝
                            return {
                               color:"blue"
                            }
                        },
                        computed:{
                            ownColor(){ //props和data里面的数据,必须要通过this才可以访问到
                                return this.sky + this.color
                            }
                        }
                    }
                }
            }
        }
    })


</script>
单向数据流
Prop 是单向绑定的:当父组件的属性变化时,将传递给子组件,但是反过来不会。这是为了防止子组件无意间修改了父组件的状态,来避免应用的数据流变得难以理解。
另外,每次父组件更新时,子组件的所有 prop 都会更新为最新值。这意味着你不应该在子组件内部改变 prop。如果你这么做了,Vue 会在控制台给出警告。
示例:
<body>
    <div id="app">
        <father></father>
    </div>
    <template id="father">
        <div>
            <input type="text" v-model="message">
            <son :message="message"></son>
        </div>
    </template>
    <template id="son">
        <div>
            <p>这是子组件</p>
            <input type="text" v-model="message">
        </div>
    </template>

</body>
<script src="./base/vue.js"></script>

<script>

    Vue.component("father",{
        template:"#father",
        data(){
            return {
                message:"hello world"
            }
        }
    })

    Vue.component("son",{
        template:"#son",
        props:["message"]
    })


    new Vue({
        el:"#app"
    })

</script>
效果:
正确的方法应该是依靠的就是应用类型的地址传递:
<body>
    <div id="app">
        <father></father>
    </div>
    <template id="father">
        <div>
            <input type="text" v-model="message.value">
            <son :message="message"></son>
        </div>
    </template>
    <template id="son">
        <div>
            <p>这是子组件</p>
            <input type="text" v-model="message.value">
        </div>
    </template>

</body>
<script src="./base/vue.js"></script>

<script>

    //Vue/React单向数据流的体现:数据只能从父级组件流向子级组件
    //实现父子间的数据共享,依靠的就是应用类型的地址传递
    Vue.component("father",{
        template:"#father",
        data(){
            return {
                // message:"hello world"
                message:{  //子组件这边的话改的是里面的内容,没有对引用类型的地址进行更改。
                    value:"hello world"
                }
            }
        }
    })

    Vue.component("son",{
        template:"#son",
        props:["message"]
    })


    new Vue({
        el:"#app"
    })

</script>
效果:
注意在 JavaScript 中对象和数组是引用类型,指向同一个内存空间,如果 prop 是一个对象或数组,在子组件内部改变它会影响父组件的状态。 message:{val:""}
prop验证
我们可以为组件的 prop 指定验证规则。如果传入的数据不符合要求,Vue 会发出警告。这对于开发给他人使用的组件非常有用
验证主要分为:类型验证、必传验证、默认值设置、自定义验证
props:{
    //类型验证:
    str:String,
    strs:[String,Number],
    //必传验证
    num:{
        type:Number,
        required:true
    },
    //默认数据
    bool:{
        type:Boolean,
        // default:true,
        default:function(){
            return true
        }
    },
    //自定义验证函数
    //props:["nums"]
    props:{
        nums:{
            type:Number, //[Number,String,Boolean,Array]
            validator: function (value) {
                return value %2 == 0
            }
        }
    }
}
当父组件传递数据给子组件的时候,子组件不接收,这个数据就会挂载在子组件的模板的根节点上
slot插槽
vue里提供了一种将父组件的内容和子组件的模板整合的方法:内容分发,通过slot插槽来实现
匿名插槽
在父组件中使用子组件的时候,在子组件标签内部写入内容。在子组件的模板中可以通过来使用
<div id="app">
    <hello>
        <div>联通卡</div>
        <div>移动卡</div>
    </hello>
</div>

<template id="hello">
    <div>
    	<slot></slot>
    </div>
</template>
具名插槽
父组件在子组件标签内写的多个内容我们可以给其设置slot属性来命名,在子组件的模板通过通过使用带有name属性的slot标签来放置对应的slot。
<div id="app">
    <hello>
        <div slot="a">联通卡</div>
        <div slot="b">移动卡</div>
    </hello>
</div>

<template id="hello">
    <div>
        <slot name="a"></slot>
        <slot name="b"></slot>
    </div>
</template>
新版本2.6+支持v-slot方式
v-slot在使用时,需要在template标签内,这点大家要注意
<hello>
    <template v-slot:a>
        <div>联通卡</div>
    </template>
    <template v-slot:b>
        <div>移动卡</div>
    </template>
</hello>


<template id="hello">
    <div>
        <slot name="a" ></slot>
        <slot name="b" ></slot>
    </div>
</template>
接受props的具名槽口
<div id="app">
    <hello>
        <template v-slot:a>
        	<div>联通卡</div>
        </template>
        <template v-slot:b="info">
        	<div>移动卡 {{info.msgb}}</div>
        </template>
    </hello>
</div>

<template id="hello">
    <div>
        <slot name="a" ></slot>
        <slot name="b" :msgb="msg"></slot>
    </div>
</template>


 Vue.component("hello",{
     template:"#hello",
     data(){
         return {
         	msg:"你好"
         }
     }
 })
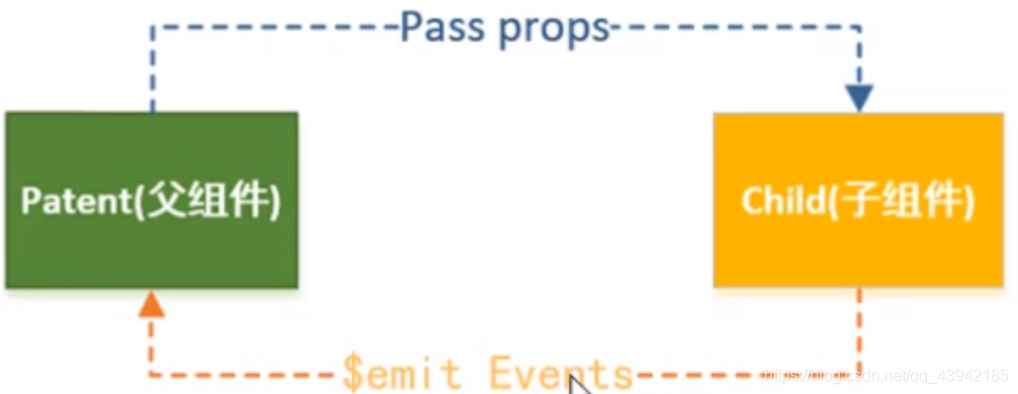
组件之间通信方式
i. 父子组件传值 (props down, events up)
ii. 属性验证 props:{name:Number} Number,String,Boolean,Array,Object,Function,null(不限制类型)
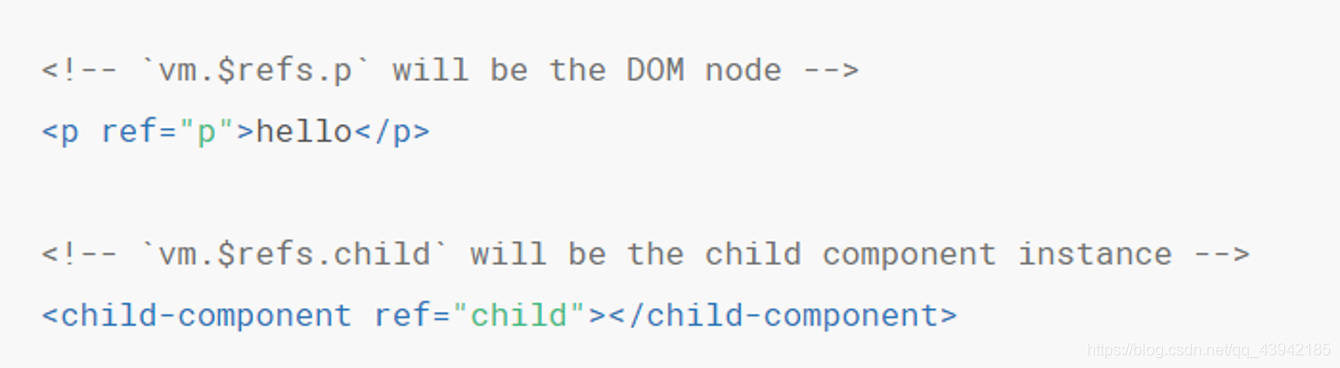
iii. Ref
this.$refs.child
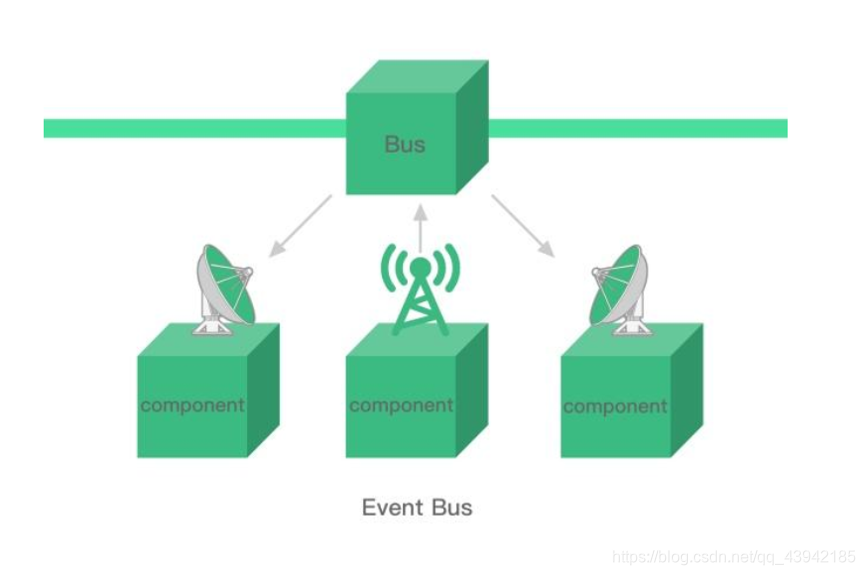
iv. 事件总线
var bus = new Vue()
*mounted生命周期中进行监听
扩展
v-once 用在组件上有什么用?
只渲染元素和组件一次。随后的重新渲染,元素/组件及其所有的子节点将被视为静态内容并跳过。这可以用于优化更新性能。
<!-- 单个元素 -->
<span v-once>This will never change: {{msg}}</span>

<!-- 有子元素 -->
<div v-once>
  <h1>comment</h1>
  <p>{{msg}}</p>
</div>

<!-- 组件 -->
<my-component v-once :comment="msg"></my-component>

<!-- `v-for` 指令-->
<ul>
  <li v-for="i in list" v-once>{{i}}</li>
</ul>
v-model 可以用在组件通信?
可以的。在组件上面使用v-model指令,相当于绑定了value属性与监听input事件。
transition过渡
Vue 在插入、更新或者移除 DOM 时,提供多种不同方式的应用过渡效果。
Vue提供了transition组件来帮助我们实现过渡效果,依据就是在控制元素显示隐藏的时候为dom在指定的时刻添加上对应的类名
而我们只要在这些类名里写上对应的css样式
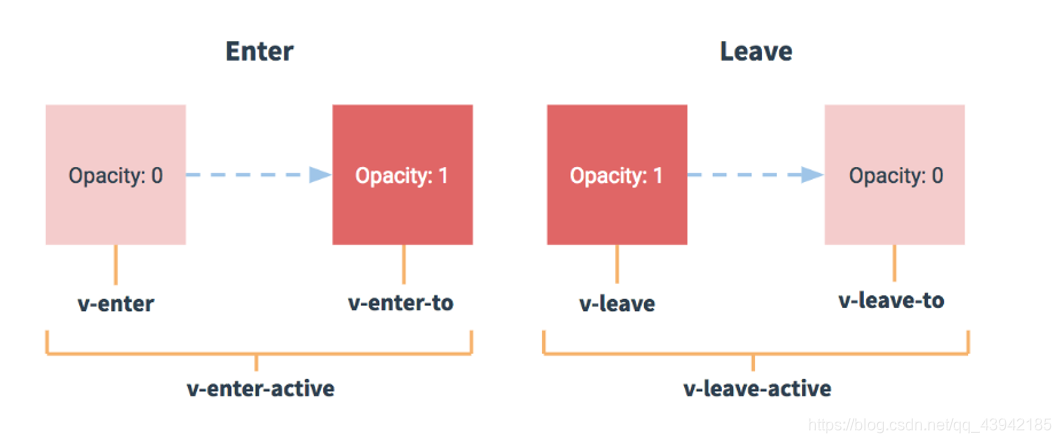
在进入/离开的过渡中,会有 6 个 class 切换(v代表的是transition的name属性的值)。
v-enter:定义进入过渡的开始状态。在元素被插入时生效,在下一个帧移除。
v-enter-active:定义过渡的状态。在元素整个过渡过程中作用,在元素被插入时生效,在 transition/animation 完成之后移除。这个类可以被用来定义过渡的过程时间,延迟和曲线函数。
v-enter-to: 2.1.8版及以上 定义进入过渡的结束状态。在元素被插入一帧后生效 (于此同时 v-enter 被删除),在 transition/animation 完成之后移除。
v-leave: 定义离开过渡的开始状态。在离开过渡被触发时生效,在下一个帧移除。
v-leave-active:定义过渡的状态。在元素整个过渡过程中作用,在离开过渡被触发后立即生效,在 transition/animation 完成之后移除。这个类可以被用来定义过渡的过程时间,延迟和曲线函数。
v-leave-to: 2.1.8版及以上 定义离开过渡的结束状态。在离开过渡被触发一帧后生效 (于此同时 v-leave 被删除),在 transition/animation 完成之后移除。
(1)单元素/组件过渡
- css过渡
- css动画
- 结合animate.css动画库
<transition
    leave-active-class="animated fadeOut"
    enter-active-class="animated slideInLeft">
    <p v-if="isShow" class="box"></p>
</transition>
示例:
    <!-- <link rel="stylesheet" href="./base/animate.css"> -->
<style>
    .box{
        width: 200px;
        height: 200px;
        background: red;
    }

    /*abc-enter abc-enter-to*/
    .abc-enter{ /*进入开始的时候*/
        opacity: 0;
    }
    .abc-enter-to{ /*进入过程结束的时候*/
        opacity: 1;
    }
    .abc-leave{ /*离开开始的时候*/
        opacity: 1;
    }
    .abc-leave-to{ /*离开过程结束的时候*/
        opacity: 0;
    }
    .abc-enter-active,.abc-leave-active{
        transition:all 3s;
    }

</style>
<body>
    <div id="app">
        <aaa></aaa>
    </div>


    <template id="aaa">
        <div>
            <button @click="isShow=!isShow">toggle</button>
            <transition name="abc">
                <div v-if="isShow" class="box"></div>
            </transition>
        </div>
    </template>
</body>
<script src="./base/vue.js"></script>

<script>

    //transition组件主要的作用就是可以给元素在某些特定的时刻添加上特定的类名
    //transition  template 不会被渲染出来
    Vue.component("aaa",{
        template:"#aaa",
        data(){
            return {
                isShow:false
            }
        }
    })

    new Vue({
        el:"#app"
    })

</script>
(2)多个元素的过渡
当有相同标签名的元素切换时,需要通过 key 特性设置唯一的值来标记以让 Vue 区分它们,否则 Vue 为了效率只会替换相同标签内部的内容。
(3)列表过渡(设置key)
不同于 transition, 它会以一个真实元素呈现:默认为一个 span元素。你也可以 通过 tag 特性更换为其他元素。
提供唯一的 key 属性值
(4)过渡模式
in-out: 新元素先进行过渡,完成之后当前元素过渡离开

out-in: 当前元素先进行过渡,完成之后新元素过渡进入
<body style="overflow: hidden;">
    <div id="app">
        <button @click="type='aaa'">A</button>
        <button @click="type='bbb'">B</button>
        <transition
            enter-active-class="animated slideInLeft"
            leave-active-class="animated slideOutRight"
            mode="out-in"
        >
            <component :is="type"></component>
        </transition>
    </div>
</body>
<script src="./base/vue.js"></script>

<script>
    // 利用component标签来代替某一个组件,设置is属性为真正组件的名字
    //transition组件默认是进入和离开同时发生。
     //vue中对于transition提供了过渡模式
    //in-out:新元素先进行过渡,完成之后当前元素过渡离开
    //out-in:当前元素先进行过渡,完成之后新元素过渡进入。
    new Vue({
        el:"#app",
        data(){
            return {
                type:"aaa"
            }
        },
        components:{
            "aaa":{
                template:"<h1>AAAAAAAAAAAAAAA</h1>"
            },
            "bbb":{
                template: "<h1>BBBBBBBBBBBBBBB</h1>"
            }
        }
    })

</script>
效果: