流量如水,文章就是一个瓶子,标题是瓶口,内容是瓶身。 瓶子装水有多快依赖瓶口大小,瓶子装水有多少依赖瓶身大小。
Spring Security 浅析
Spring Security 是什么?
Spring Security 是 Spring 家族中一个安全管理框架,实际上,在 Spring Boot 出现之前,Spring Security 就已经发展了好多年了,但是使用的并不多,安全管理这块,一直主打的是 Shiro 。
Spring Security 与 Shiro 的区别?
相对于 Shiro 来说,在经典的 SSM/SSH 框架中整合 Spring Security 都是比较繁琐,虽然 Spring Security 功能比 Shiro 强大,但是因为配置比较繁琐,使用的反而没有 Shiro 多。
两者不同之处:
1. Spring Security 功能比 Shiro 更加丰富一些;
2. Spring Security 上手复杂;Shiro 上手简单;
3. Spring Security 依赖 Spring 容器;Shiro 依赖性低,不需要任何框架和容器;
自从有了 Spring Boot 之后,Spring Boot 对于 Spring Security 提供了自动化配置方案,可以零配置使用 Spring Security ,下面看一下具体使用吧!
Spring Security 初体验?
1. 准备环境以及工具
- JDK 8
- IDEA
2. 创建项目
在 Spring Boot 中使用 Spring Security 非常容易,只需要引入对应依赖即可:
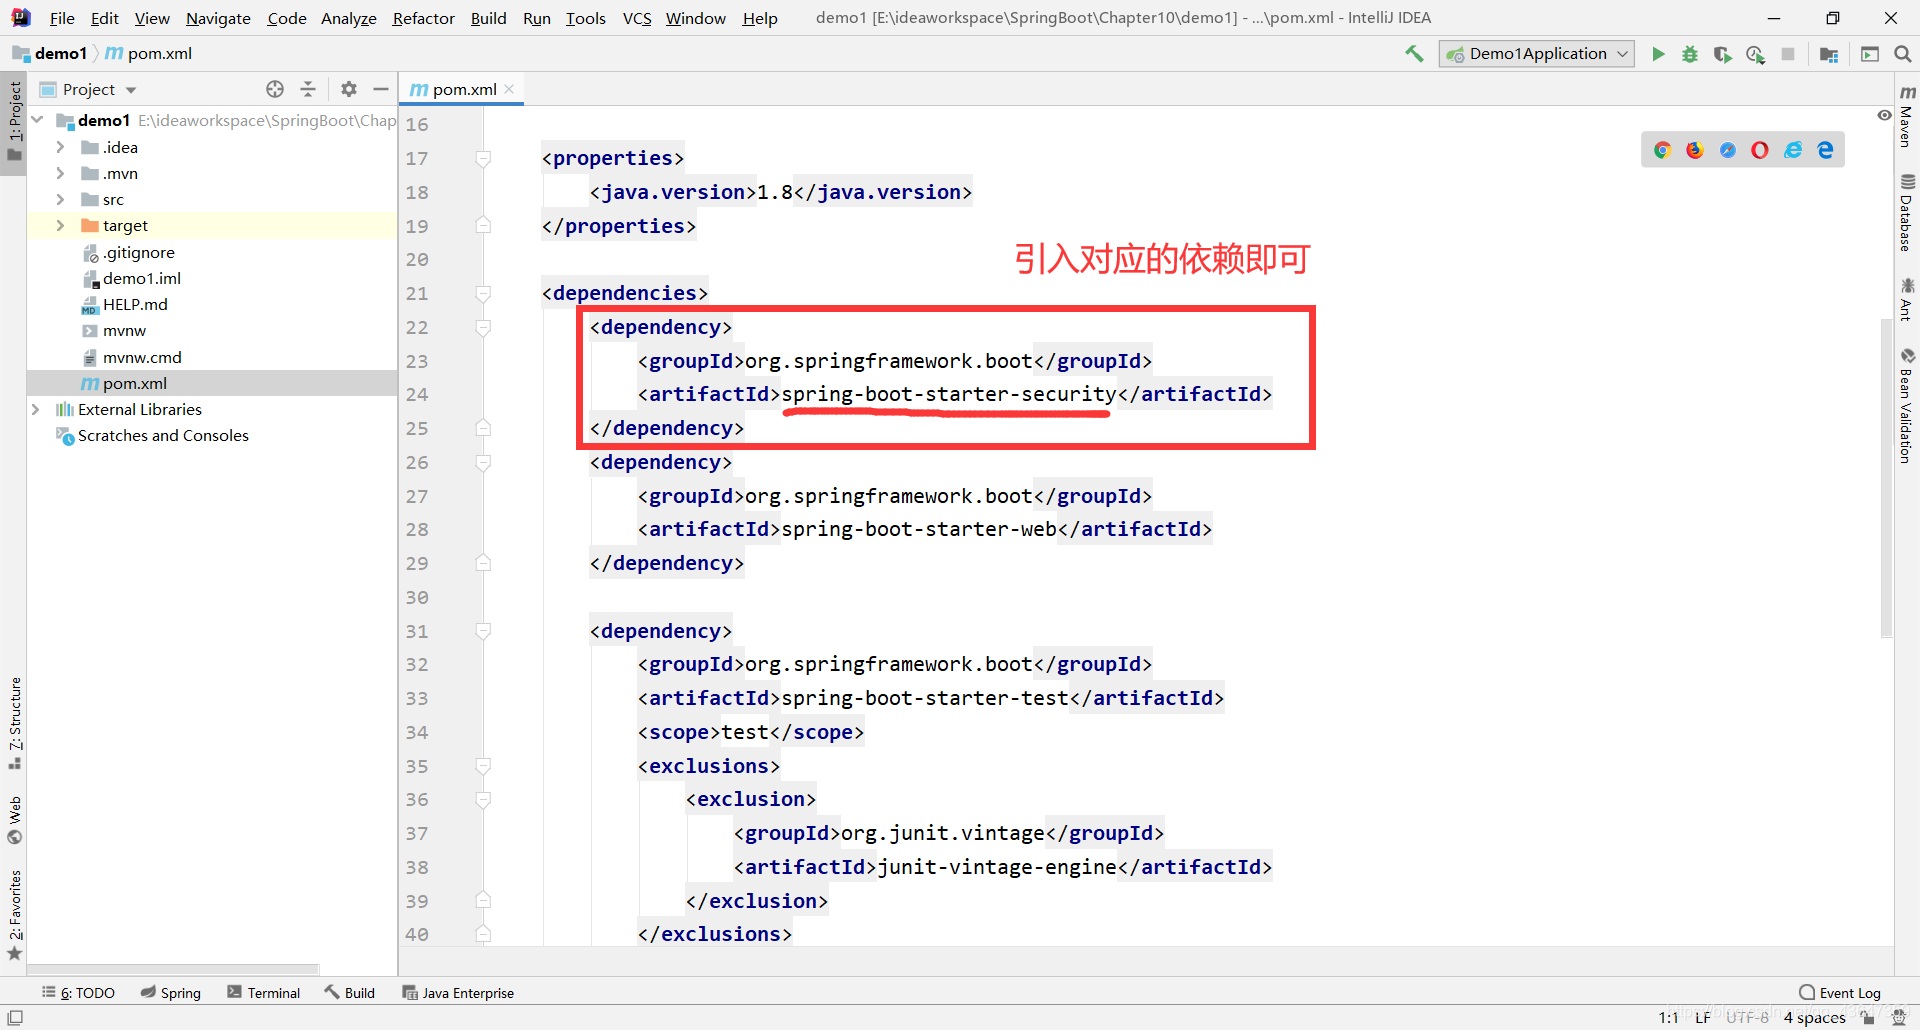
pom.xml 中的 Spring Security 依赖:
<dependency>
	<groupId>org.springframework.boot</groupId>
	<artifactId>spring-boot-starter-security</artifactId>
</dependency>
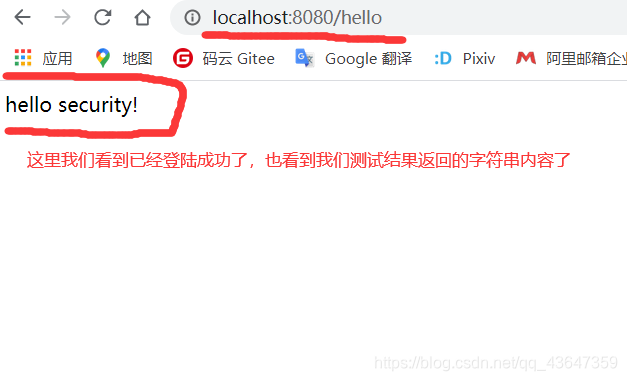
我们创建一个测试接口:
@RestController
public class HelloController {
	@GetMapping("/hello")
    public String hello() {
        return "hello security!";
    }
}
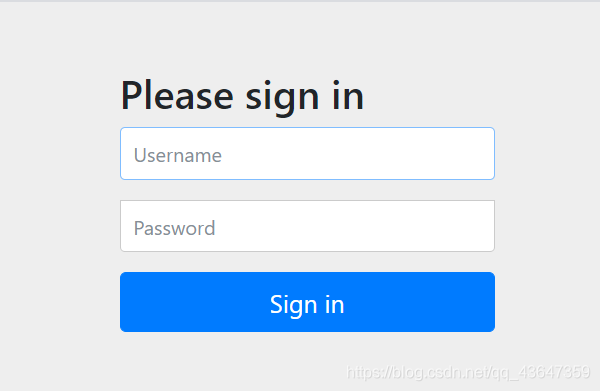
启动项目,通过 URL 访问 /hello 接口,需要登陆之后才能访问。
默认的账户是:user
默认的密码是随机生成的,这里我们看一下控制台随机生成的密码是多少。
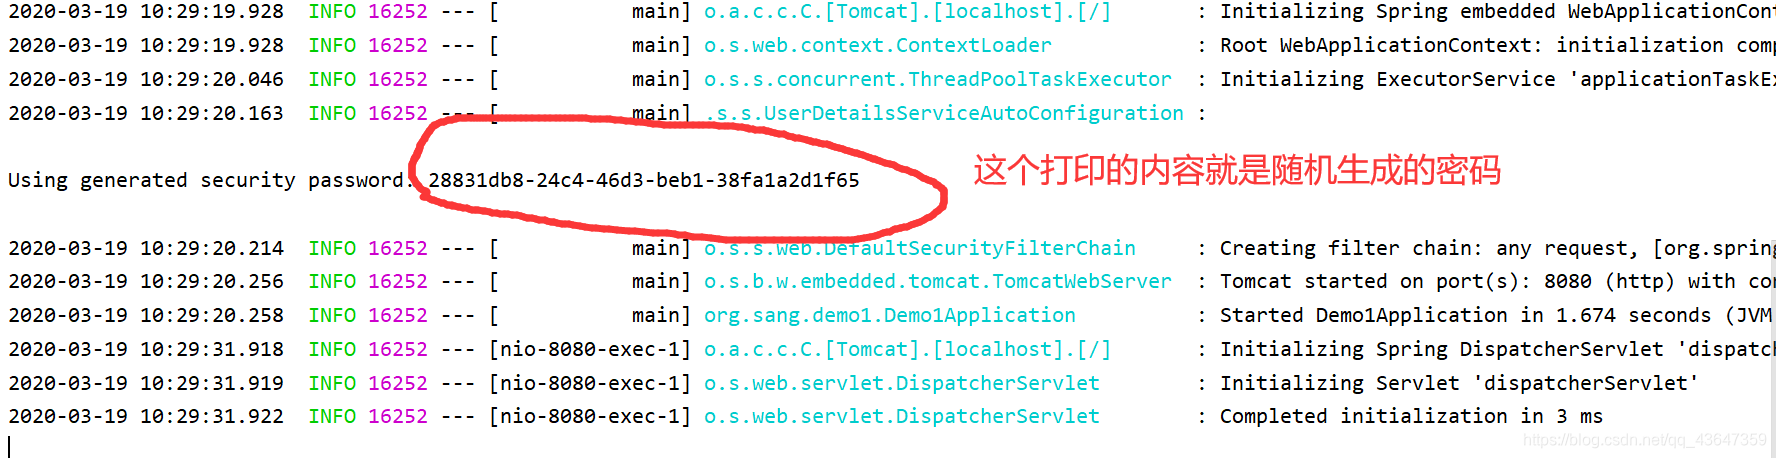
- 好现在我们账号密码都知道是多少了,这里我们去测试登陆。
自定义用户名或密码
默认情况下,登陆的用户名是 user,密码则是项目启动时随机生成的字符串,可以从启动的控制台日志中看到默认密码,这个随机生成的密码,每次启动都会变,对登陆的用户名/密码进行配置,有三种不同的方式:
- 在 application.properties 中进行配置
- 通过 Java 代码配置到内存中
- 通过 Java 从数据库中加载
1. 在配置文件中配置用户名/密码
可以直接在 application.properties 中进行配置用户的基本信息:
这里配置完成后,重启项目,控制台就不会随机生成密码了,你就可以使用这里配置的用户名和密码登陆了。因为这里测试同上,我们就简略了!
spring.security.user.name=javaboy
spring.security.user.password=123
spring.security.user.roles=admin
2. 通过 Java 配置用户名/密码
第二种情况:首先我们需要创建一个 Spring Security 的配置类,继承 WebSecurityConfigurerAdapter 类,代码如下:
@Configuration
public class SecurityConfig extends WebSecurityConfigurerAdapter {
	@Bean
    PasswordEncoder passwordEncoder() {
    	// 表示对密码进行加密加盐
        return new BCryptPasswordEncoder();
    }

	@Override
    protected void configure(AuthenticationManagerBuilder auth) throws Exception {
        auth.inMemoryAuthentication()
                // 这行表示配置了用户 javaboy 密码为 123 角色为 admin
                .withUser("javaboy").password("$2a$10$3pOk/IanPEdCev05Wmew/uTOj96b3KtDc11nCTOHQdjITV0WA4rQW").roles("admin")
                .and()
                // 这行表示配置了用户 红颜祸水 密码为 123 角色为 user
                .withUser("红颜祸水").password("$2a$10$uNB.x3J3ebn8nirQkRdljO5ZtNQMODKghfNA7J/W07XbrmlBdIzr.").roles("user");
    }
}
这里我们在 configure 方法中配置了两个用户,用户的密码都是加密之后的字符串(明文是 123),从 Spring 5 开始,强制要求密码要加密,如果非不想加密,可以使用一个早已过期的 PasswordEncoder de 实例 NoOpPasswordEcoder ,但是不建议这么做,因为不安全。
NoOpPasswordEcoder 如何使用代码如下:
	@Bean
    PasswordEncoder passwordEncoder() {
    	// 表示不对密码进行加密操作
        return NoOpPasswordEncoder.getInstance();
    }
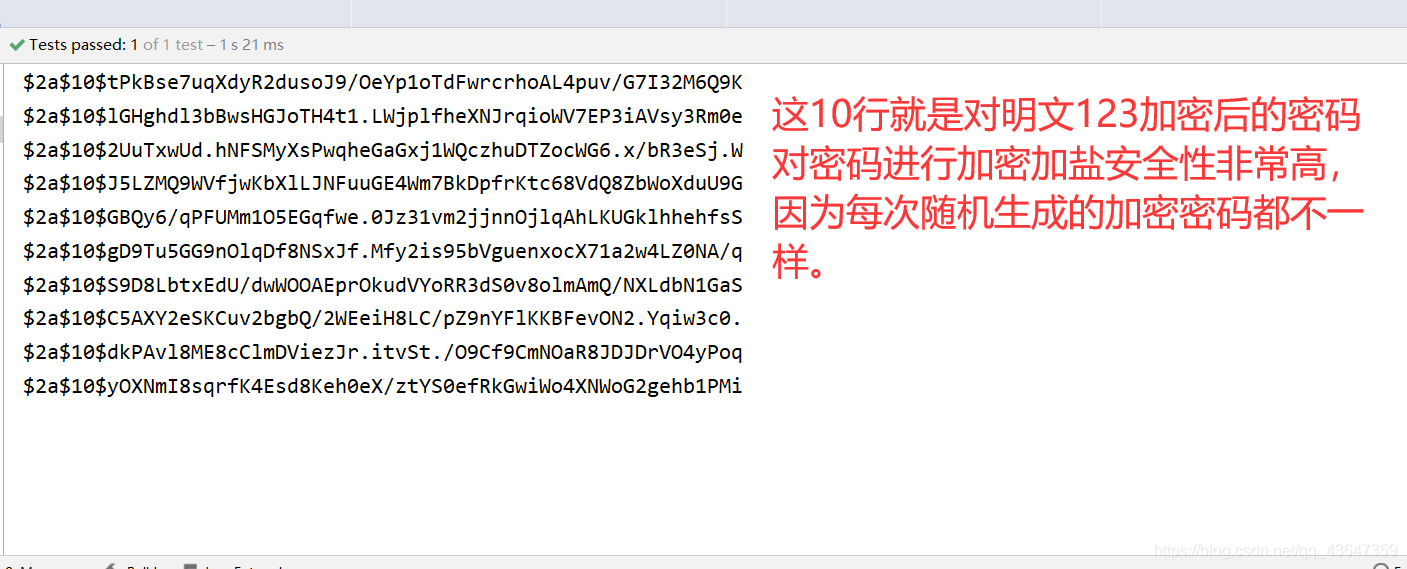
如何实现BCryptPasswordEncoder 对密码进行加密加盐
首先在项目测试类中添加如下代码,并输入到控制台:
@Test
    void contextLoads() {
        for (int i = 0; i < 10; i++) {
        	// 这里创建 BCryptPasswordEncoder 的实例
            BCryptPasswordEncoder encoder = new BCryptPasswordEncoder();
            // 对明文密码加密加盐并输入
            System.out.println(encoder.encode("123"));
        }
    }
控制台结果如下图所示:
登陆表单配置
对于登陆接口,登陆成功后的响应,登陆失败后的响应,我们都可以在 WebSecurityConfigurerAdapter 的实现类中进行配置,例如下面这样:
@Configuration
public class SecurityConfig extends WebSecurityConfigurerAdapter {
	@Bean
    PasswordEncoder passwordEncoder() {
    	// 表示对密码进行加密加盐
        return new BCryptPasswordEncoder();
    }

	@Override
    protected void configure(AuthenticationManagerBuilder auth) throws Exception {
        auth.inMemoryAuthentication()
                // 这行表示配置了用户 javaboy 密码为 123 角色为 admin
                .withUser("javaboy").password("$2a$10$3pOk/IanPEdCev05Wmew/uTOj96b3KtDc11nCTOHQdjITV0WA4rQW").roles("admin")
                .and()
                // 这行表示配置了用户 红颜祸水 密码为 123 角色为 user
                .withUser("红颜祸水").password("$2a$10$uNB.x3J3ebn8nirQkRdljO5ZtNQMODKghfNA7J/W07XbrmlBdIzr.").roles("user");
    }

	@Override
    protected void configure(HttpSecurity http) throws Exception {
        http.authorizeRequests()
        		// 这行表示访问 /admin/** 需要具备 admin 角色权限
                .antMatchers("/admin/**").hasRole("admin")
                // 这行表示访问 /user/** 需要具备 admin 或者 user 角色权限
                .antMatchers("/user/**").hasAnyRole("admin","user")
                // 这行表示剩下的其他请求只要登陆成功就能访问
                .anyRequest().authenticated()
                .and()
                // 这行表示配置表单登陆
                .formLogin()
                // 这行表示处理表单登陆的 URL 为 doLogin
                .loginProcessingUrl("/doLogin")
                // 这行表示配置 Security 默认的登陆页面
                .loginPage("/login")
                // 自定义登陆名参数为 uname
                .usernameParameter("uname")
                // 自定义登陆密码参数为 passwd
                .passwordParameter("passwd")
                // 登陆成功后的处理
                .successHandler(new AuthenticationSuccessHandler() {
                    @Override
                    public void onAuthenticationSuccess(HttpServletRequest req,
                                                        HttpServletResponse resp,
                                                        Authentication authentication) throws IOException, ServletException {
                        resp.setContentType("application/json;charset=utf-8");  // 设置响应头为 json 格式
                        PrintWriter out = resp.getWriter();
                        Map<String,Object> map = new HashMap<>();
                        map.put("status",200);  // 登陆成功响应码 200
                        map.put("msg",authentication.getPrincipal());   // 将登陆成功后的用户信息返回
                        out.write(new ObjectMapper().writeValueAsString(map) );
                        out.flush();
                        out.close();
                    }
                })
                // 登陆失败后的处理
                .failureHandler(new AuthenticationFailureHandler() {
                    @Override
                    public void onAuthenticationFailure(HttpServletRequest req,
                                                        HttpServletResponse resp,
                                                        AuthenticationException e) throws IOException, ServletException {
                        resp.setContentType("application/json;charset=utf-8");  // 设置响应头为 json 格式
                        PrintWriter out = resp.getWriter();
                        Map<String,Object> map = new HashMap<>();
                        map.put("status",401);  // 登陆失败响应码 401
                        if (e instanceof LockedException) {
                            map.put("msg","账户被锁定,登陆失败!");
                        } else if (e instanceof BadCredentialsException) {
                            map.put("msg","用户名或密码输入错误,登陆失败!");
                        } else if (e instanceof DisabledException) {
                            map.put("msg","账户被禁用,登陆失败!");
                        } else if (e instanceof AccountExpiredException) {
                            map.put("msg","账户过期,登陆失败!");
                        } else if (e instanceof CredentialsExpiredException) {
                            map.put("msg","密码过期,登陆失败!");
                        } else {
                            map.put("msg","登陆失败!");
                        }
                        out.write(new ObjectMapper().writeValueAsString(map) );
                        out.flush();
                        out.close();
                    }
                })
                // 这行表示只要跟登陆相关的接口直接通过
                .permitAll()
                .and()
                // 注销
                .logout()
                // 处理注销的请求地址
                .logoutUrl("/logout")
                // 注销后的处理
                .logoutSuccessHandler(new LogoutSuccessHandler() {
                    @Override
                    public void onLogoutSuccess(HttpServletRequest req,
                                                HttpServletResponse resp,
                                                Authentication authentication) throws IOException, ServletException {
                        resp.setContentType("application/json;charset=utf-8");  // 设置响应头为 json 格式
                        PrintWriter out = resp.getWriter();
                        Map<String,Object> map = new HashMap<>();
                        map.put("status",200);  // 登陆成功响应码 200
                        map.put("msg","注销成功!");   // 将登陆成功后的用户信息返回
                        out.write(new ObjectMapper().writeValueAsString(map) );
                        out.flush();
                        out.close();
                    }
                })
                .and()
                // 这行表示关闭 csrf 攻击,因为使用 Postman 工具测试,Security 框架会默认以为 Postman 的请求带有 csrf 攻击
                .csrf().disable();
    }
}
我们可以在 successHandler 方法中,配置登陆成功的回调,如果是前后端分离的开发的话,登陆成功后直接返回 JSON 即可,同理,failureHandler 方法中配置登陆失败的回调, logoutSuccessHandler 中配置注销成功的回调。
