这一阵子没有更新文章,虽说也没啥人看吧,但是还是给有可能看的读者说声抱歉,最近心情不太好,
力扣刷题虽然也在持续的刷着,但是没啥感觉了,所以也就没有将他们转换成博客的想法,有可能是一个刚开始的瓶颈期吧,等回头突破了这段瓶颈期,
我再写一些力扣的文章。
一切都是为了live||life whatever
so,我这一阵子还在学习了MyBatis的相关知识,在这里跟大家分享下,也算是做个总结吧。
所用到的源代码和建库脚本都在评论下方,以及本人资源当中,欢迎下载!!!
顺带说一句,想体验的话,代码最好自己手敲,看源代码跑一遍,没啥用,我们要动手,从实践中获得真知,但是数据库就没必要自己建立了。那数据好几千条我们手动造数据吗?
对吧。
=分隔符=
关于MyBatis是一个Java里面的框架
至于什么是框架,咋用的?到底是个什么东西,这玩意困惑了我好久。
何为框架Framework
????
框架是可被应用开发中定制的应用骨架
框架是一种规则,保证开发者遵循相同的方式开发程序
框架提倡“不要重复造轮子”,对基础功能进行封装
(扯犊子的理论)
框架的优点:
极大提高了开发效率
统一的编码规则,利于团队管理
灵活配置的应用,拥有更好的维护性
(最坑爹的东西,因为要背)
SSM开发框架:
Spring 框架的框架,职责是对系统中各个对象进行有效的管理
Spring MVC 替代servlet更有效的web开发,职责是替代Servlet,进行web层面的开发。
MyBatist 简化数据库的交互ORM框架
(好牛掰啊)
什么是MyBatis?
MyBatis是优秀的持久层框架,持久就是将内存的数据保存到数据库中防止丢失
MyBatis通过xml将SQL与程序解耦,便于维护
MyBatis学习简单,执行高效,是JDBC的延伸,在JDBC的基础上进行扩展和封装
(说那么多就是个可以使连接数据库,对数据库在程序中进行操作的一个库而已。)
MyBatis开发流程
引入MyBatis依赖(利用Maven自动下载MyBatis核心jai包)
创建核心配置文件(基于XML进行配置管理的)
创建实体(Entity)类/域对象/pojo(将数据表和类进行一一对应,表字段和类属性一一对应)
创建Mapper映射文件(通过此文件设置哪个表和哪个类对应,哪个字段和哪个属性对应)
初始化SessionFactory(读取配置文件,做好Mapper映射,做前期准备)
利用SqlSession对象操作数据
OK,开始第一步实操的准备工作,我们需要完成创建Maven工程

下一步
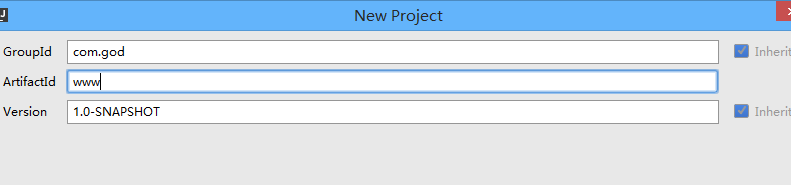
下一步

完成
结果如下:

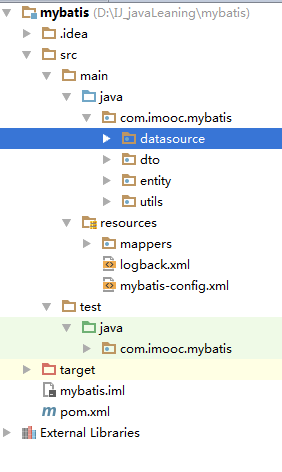
然后我们在将文件夹结构创建下。
具体如图:
接下来需要建库数据库:
具体的数据库脚本和数据都在文章开头说的地方,在这里列出来数据库的大致效果
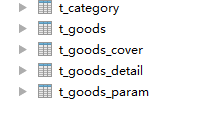
一共四张表
每张表的内容是


接下来我们做真正的第一步
引入MyBatis依赖以及其他我们需要用到的包
我们在pom.xml文件中输入如下内容,pom文件刚开始开头的内容和我的不同的话,不要修改,那是自动生成和你的项目对应的,不能乱改,不然会报错。
<?xml version="1.0" encoding="UTF-8"?>
<project xmlns="http://maven.apache.org/POM/4.0.0"
         xmlns:xsi="http://www.w3.org/2001/XMLSchema-instance"
         xsi:schemaLocation="http://maven.apache.org/POM/4.0.0 http://maven.apache.org/xsd/maven-4.0.0.xsd">
    <modelVersion>4.0.0</modelVersion>
    <groupId>com.imooc</groupId>
    <artifactId>mybatis</artifactId>
    <version>1.0-SNAPSHOT</version>
    <dependencies>
        <dependency>
            <groupId>org.mybatis</groupId>
            <artifactId>mybatis</artifactId>
            <version> 3.5.1</version>
        </dependency>
        <dependency>
            <groupId>junit</groupId>
            <artifactId>junit</artifactId>
            <version>4.12</version>
            <scope>test</scope>
        </dependency>
        <dependency>
            <groupId>mysql</groupId>
            <artifactId>mysql-connector-java</artifactId>
            <version>5.1.47</version>
        </dependency>
        <dependency>
            <groupId>ch.qos.logback</groupId>
            <artifactId>logback-classic</artifactId>
            <version>1.2.3</version>
        </dependency>
        <dependency>
            <groupId>com.github.pagehelper</groupId>
            <artifactId>pagehelper</artifactId>
            <version>5.1.10</version>
        </dependency>
        <dependency>
            <groupId>com.github.jsqlparser</groupId>
            <artifactId>jsqlparser</artifactId>
            <version>2.0</version>
        </dependency>
        <dependency>
            <groupId>com.mchange</groupId>
            <artifactId>c3p0</artifactId>
            <version>0.9.5.4</version>
        </dependency>
    </dependencies>
</project>
2、接下来我们在
创建myba-config.xml即MyBatis的核心配置文件
具体内容如下:按照你自己的实际情况输入配置文件的密码哈,别照抄,所用的的数据库文件,我会放在文章尾部评论的位置。
<?xml version="1.0" encoding="UTF-8" ?>
<!DOCTYPE configuration
PUBLIC "-//mybatis.org//DTD Config 3.0//EN"
"http://mybatis.org/dtd/mybatis-3-config.dtd">
<configuration>
<settings>
<!--goods_id===>goodsId驼峰命名转换-->
<setting name="mapUnderscoreToCamelCase" value="true"/>
</settings>
<!--启用PageHelper分页插件-->
<plugins>
<plugin interceptor="com.github.pagehelper.PageInterceptor">
<!--设置数据库类型-->
<property name="helperDialect" value="mysql"/>
<!---分页合理化-->
<property name="reasonable" value="true"/>
</plugin>
</plugins>
<!--设置默认指向的数据库-->
<environments default="dev">
<!--配置环境,不同的环境用不同的id名字-->
<environment id="dev">
<!--采用jdbc的方式对数据库事物进行commit、rollback-->
<transactionManager type="JDBC"/>
<!--采用连接池的方式管理数据库-->
<!--<dataSource type="POOLED">-->
<dataSource type="com.imooc.mybatis.datasource.C3P0DataSourceFactory">
<property name="driverClass" value="com.mysql.jdbc.Driver"/>
<property name="jdbcUrl" value="jdbc:mysql://localhost:3306/babytun?useUnicode=true&characterEncoding=UTF-8"/>
<property name="user" value="root"/>
<property name="password" value="root"/>
<property name="initialPoolSize" value="5"/>
<property name="maxPoolSize" value="20"/>
<property name="minPoolSize" value="5"/>
</dataSource>
</environment>
<environment id="prd">
<!--采用jdbc的方式对数据库事物进行commit、rollback-->
<transactionManager type="JDBC"/>
<!--采用连接池的方式管理数据库,&在xml中有意义,若要使用加上amp;-->
<dataSource type="POOLED">
<property name="driver" value="com.mysql.jdbc.Driver"/>
<property name="url" value="jdbc:mysql://localhost:3306/babytun?useUnicode=true&characterEncoding=UTF_8"/>
<property name="username" value="root"/>
<property name="password" value="root"/>
</dataSource>
</environment>
</environments>
<mappers>
<mapper resource="mappers/goods.xml"></mapper>
<mapper resource="mappers/goods_detail.xml"></mapper>
</mappers>
</configuration>
3、创建实体(Entity)类/域对象/pojo(将数据表和类进行一一对应,表字段和类属性一一对应)
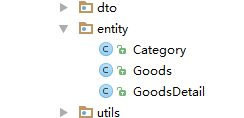
这三个都是我们以后会用得到的实体,先一次性创建完吧。
代码如下:
public class Category {
    private Integer categoryId;
    private String categoryName;
    private Integer parentId;
    private Integer categoryLevel;
    private Integer categoryOrder;

    @Override
    public String toString() {
        return "Category{" +
                "categoryId=" + categoryId +
                ", categoryName='" + categoryName + '\'' +
                ", parentId=" + parentId +
                ", categoryLevel=" + categoryLevel +
                ", categoryOrder=" + categoryOrder +
                '}';
    }

    public Integer getCategoryId() {
        return categoryId;
    }

    public void setCategoryId(Integer categoryId) {
        this.categoryId = categoryId;
    }

    public String getCategoryName() {
        return categoryName;
    }

    public void setCategoryName(String categoryName) {
        this.categoryName = categoryName;
    }

    public Integer getParentId() {
        return parentId;
    }

    public void setParentId(Integer parentId) {
        this.parentId = parentId;
    }

    public Integer getCategoryLevel() {
        return categoryLevel;
    }

    public void setCategoryLevel(Integer categoryLevel) {
        this.categoryLevel = categoryLevel;
    }

    public Integer getCategoryOrder() {
        return categoryOrder;
    }

    public void setCategoryOrder(Integer categoryOrder) {
        this.categoryOrder = categoryOrder;
    }

}

public class Goods {
    private Integer goodsId;//商品编号
    private String title;//标题
    private String subTitle;//子标题
    private Float originalCost;//原始价格
    private Float currentPrice;//当前价格
    private Float discount;//折扣率
    private Integer isFreeDelivery;//是否包邮1包邮0不包邮
    private Integer categoryId;//分类编号
    private List<GoodsDetail> goodsDetails;

    public List<GoodsDetail> getGoodsDetails() {
        return goodsDetails;
    }

    public void setGoodsDetails(List<GoodsDetail> goodsDetails) {
        this.goodsDetails = goodsDetails;
    }

    public Integer getGoodsId() {
        return goodsId;
    }

    @Override
    public String toString() {
        return "Goods{" +
                "goodsId=" + goodsId +
                ", title='" + title + '\'' +
                ", subTitle='" + subTitle + '\'' +
                ", originalCost=" + originalCost +
                ", currentPrice=" + currentPrice +
                ", discount=" + discount +
                ", isFreeDelivery=" + isFreeDelivery +
                ", categoryId=" + categoryId +
                '}';
    }

    public void setGoodsId(Integer goodsId) {
        this.goodsId = goodsId;
    }

    public String getTitle() {
        return title;
    }

    public void setTitle(String title) {
        this.title = title;
    }

    public String getSubTitle() {
        return subTitle;
    }

    public void setSubTitle(String subTitle) {
        this.subTitle = subTitle;
    }

    public Float getOriginalCost() {
        return originalCost;
    }

    public void setOriginalCost(Float originalCost) {
        this.originalCost = originalCost;
    }

    public Float getCurrentPrice() {
        return currentPrice;
    }

    public void setCurrentPrice(Float currentPrice) {
        this.currentPrice = currentPrice;
    }

    public Float getDiscount() {
        return discount;
    }

    public void setDiscount(Float discount) {
        this.discount = discount;
    }

    public Integer getIsFreeDelivery() {
        return isFreeDelivery;
    }

    public void setIsFreeDelivery(Integer isFreeDelivery) {
        this.isFreeDelivery = isFreeDelivery;
    }

    public Integer getCategoryId() {
        return categoryId;
    }

    public void setCategoryId(Integer categoryId) {
        this.categoryId = categoryId;
    }
}


public class GoodsDetail {
    private Integer gdId;
    private Integer goodsId;
    private String gdPicUrl;
    private Integer gdOrder;
    private  Goods goods;

    public Goods getGoods() {
        return goods;
    }

    public void setGoods(Goods goods) {
        this.goods = goods;
    }

    public Integer getGdId() {
        return gdId;
    }

    public void setGdId(Integer gdId) {
        this.gdId = gdId;
    }

    public Integer getGoodsId() {
        return goodsId;
    }

    public void setGoodsId(Integer goodsId) {
        this.goodsId = goodsId;
    }

    public String getGdPicUrl() {
        return gdPicUrl;
    }

    public void setGdPicUrl(String gdPicUrl) {
        this.gdPicUrl = gdPicUrl;
    }

    public Integer getGdOrder() {
        return gdOrder;
    }

    public void setGdOrder(Integer gdOrder) {
        this.gdOrder = gdOrder;
    }

}
4、创建Mapper映射文件(通过此文件设置哪个表和哪个类对应,哪个字段和哪个属性对应)

我们会创建这两个mapper,代码不慌给大家,我们接着来。
5、初始化SessionFactory(读取配置文件,做好Mapper映射,做前期准备)
这一步我们在测试类中完成,顺便也就检验了我们的项目到底成没成功的搭建呢???
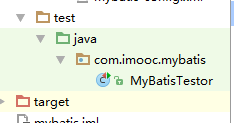
我们创建此类,并在该类中添加测试代码。以后叫其为测试类,我们所有的测试都放在这里,
接下来不会一次性把测试类的代码都给大家,而是需要一个(我们尝试在Mapper中添加一个数据库操作的时候),我们向测试类添加一个测试方法,来检测我们的数据库操作有没有成功!!
此处谨记
public class MyBatisTestor {
    @Test
    public void testSqlSessionFactory() throws IOException{
      //利用Reader加载classpath下的MyBatis-config。XML核心配置文件
       Reader reader= Resources.getResourceAsReader("mybatis-config.xml");
      //初始化SQLSessionFactory对象,同时解析MyBatis-config。xml文件
        SqlSessionFactory sqlSessionFactory=new SqlSessionFactoryBuilder().build(reader);
        System.out.println("加载成功");
        SqlSession sqlSession=null;
        //创建SQLSession对象,SQLSession是JDBC的扩展类,用于与数据库交互
        try {
            sqlSession = sqlSessionFactory.openSession();
            Connection connection = sqlSession.getConnection();
            System.out.println(connection);
            System.out.println("asdadadasdadas");
        }catch (Exception e){
            e.printStackTrace();
        }finally {
            if(sqlSession!=null){
                sqlSession.close();
            }

        }
    }
}
点击测试:
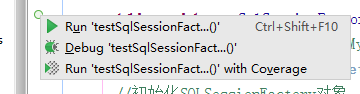
运行后结果如图:


OK我们现在看起来配置完成了,但是这样就OK了吗??
我们目前只能说我们的框架的结构搭起来了
但是我们难道每次运行MyBatis框架进行数据库连接的时候都需要那么长的代码吗?
我们可以借助JDBC开发的经验,开发一个工具类
于是我们在:
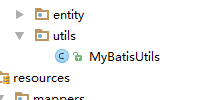
新建该工具类
然后具体代码:
以及测试该工具类的方法,记得放在上一步创建的测试类中哈
public class MyBatisUtils {
   //利用static(静态)属于类不属于对象,且全局唯一
    //static保证此属性属于类,而非对象
    private static SqlSessionFactory sqlSessionFactory=null;
//利用静态块在初始化类时实例化SQLSessionFactory
    static {
       Reader reader=null;
        try {
           reader= Resources.getResourceAsReader("mybatis-config.xml");
            sqlSessionFactory = new SqlSessionFactoryBuilder().build(reader);
        }catch (IOException e){
            e.printStackTrace();
            //初始化错误时,通过抛出异常ExceptionInInitializerError通知调用者
            throw new ExceptionInInitializerError(e);
        }
    }
    /**
     * 创建一个新的SQLSession对象
     * @return SQLSession对象
     */
    public static SqlSession openSession(){
        //默认SQLSession是自动提交事务数据(commit)
        //设置false代表关闭自动提交,改为手动提交事务数据
        return sqlSessionFactory.openSession(false);
    }
    /**
     * 释放一个有效的SQLSession对象
     * @param session 准备释放SQLSession对象
     */
    public static  void closeSession(SqlSession session){
        if(session!=null){
            session.close();
        }
    }
}


    @Test
    public  void testMyBatisUtils(){
        SqlSession sqlSession=null;
      try {
           sqlSession = MyBatisUtils.openSession();
          Connection connection = sqlSession.getConnection();
          System.out.println("工具类成功");
          System.out.println(connection);
          MyBatisUtils.closeSession(sqlSession);
      } catch (Exception e){
          e.printStackTrace();
      }finally {
          MyBatisUtils.closeSession(sqlSession);
      }
    }
这样看来是不是简洁多了?
嗯,效果如图所示:

接下来就是
6、利用SqlSession对象操作数据
首先对于数据的操作是查询哦
查询步骤
1、 创建实体类Entity
2、 创建Mapper XML说明当前sql语句
3、 在MapperXML< select >SQL标签
4、 开启驼峰命名映射
5、 在MyBatis-config增加Mapper文件的声明
6、 SQLSession执行select语句
驼峰式命名我们在上面就开启啦,所以不用担心
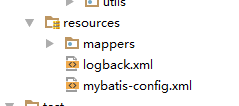
我们打开Mapper包下面的goods.xml
然后在里面输入如下内容

<?xml version="1.0" encoding="UTF-8" ?>
<!DOCTYPE mapper
        PUBLIC "-//mybatis.org//DTD Mapper 3.0//EN"
        "http://mybatis.org/dtd/mybatis-3-mapper.dtd">
<mapper namespace="goods">
<select id="selectAll" resultType="com.imooc.mybatis.entity.Goods" useCache="false">
    select *
    from t_goods
    order BY  goods_id DESC limit 10
  <!--单参数传递,使用parameterType指定参数的数据类型即可,SQL中#{VALUE }提取参数-->
    <select id="selectById" parameterType="Integer" resultType="com.imooc.mybatis.entity.Goods">
        SELECT *
        from t_goods
        where goods_id=#{VALUE }
    </select>
    <!--多参数传递时,使用parameterType 指定Map接口,SQL中#{key}提取参数-->
    <select id="selectByPriceRange" parameterType="java.util.Map" resultType="com.imooc.mybatis.entity.Goods">
        SELECT * FROM t_goods
        where current_price BETWEEN #{min} and #{max}
        order by current_price
        limit 0,#{limit}
    </select>
    <!--利用linkedHashMap保存多表关联结果
    MyBatis会将每一条记录包装为LinkedHashMap对象
    key是字段名,value是字段对应的值,字段类型根据表结构进行自动判断
    优点:易于扩展,易于使用
    缺点:太过灵活,无法进行编译时检查
    -->
    <select id="selectGoodsMap" resultType="java.util.LinkedHashMap" flushCache="true">
        select g.*,c.category_name,'1'as test
        from t_goods g,t_category c
        where g.category_id=c.category_id
    </select>

    <!-- 结果映射-->
    <resultMap id="rmGoods" type="com.imooc.mybatis.dto.GoodsDTO">
      <!-- 设置主键字段和属性的映射-->
       <id property="goods.goodsId" column="goods_id" ></id>
        <!-- 设置非主键字段和属性的映射-->
        <result property="goods.title" column="title"></result>
        <result property="goods.originalCost" column="original_cost"></result>
        <result property="goods.currentPrice" column="current_price"></result>
        <result property="goods.discount" column="discount"></result>
        <result property="goods.isFreeDelivery" column="is_free_delivery"></result>
        <result property="goods.categoryId" column="category_id"></result>
        <result property="category.categoryId" column="category_id"></result>
        <result property="category.categoryName" column="category_name"></result>
        <result property="category.categoryLevel" column="category_level"></result>
        <result property="category.categoryOrder" column="category_order"></result>
        <result property="test" column="test"></result>
    </resultMap>
    <select id="selectGoodsDTO" resultMap="rmGoods">
            select g.*,c.*,'1'as test
    from t_goods g,t_category c
    where g.category_id=c.category_id
</select>
    </mapper>
好的,这一共是五个查询有关的方法
为了测试第五个方法呢,我们需要在dto包内建立一个新的类
利用ResultMap结果映射到GoodsDto对象当中
ResultMap可以将查询结果映射为复杂类型的Java对象
ResultMap适用于Java对象保存多表关联结果
ResultMap支持对象关联查询等高级特性

内中代码:
public class GoodsDTO {
    private Goods goods=new Goods();
    private Category category=new Category();
    private String test;


    public Goods getGoods() {
        return goods;
    }

    public void setGoods(Goods goods) {
        this.goods = goods;
    }

    public Category getCategory() {
        return category;
    }

    @Override
    public String toString() {
        return "GoodsDTO{" +
                "goods=" + goods +
                ", category=" + category +
                ", test='" + test + '\'' +
                '}';
    }

    public void setCategory(Category category) {
        this.category = category;
    }

    public String getTest() {
        return test;
    }

    public void setTest(String test) {
        this.test = test;
    }
}
好的接下来是五个搜索方法的测试方法啦
:
  @Test
    public void TestSelectAll(){
       SqlSession sqlSession=null;
      try{
          sqlSession=MyBatisUtils.openSession();
        List<Goods> l= sqlSession.selectList("goods.selectAll");
          for(Goods g:l){
              System.out.println(g.toString());
          }

      }catch (Exception e){
          e.printStackTrace();
      }finally {
          MyBatisUtils.closeSession(sqlSession);
      }
    }

    @Test
    public void testSelectById() throws Exception{
        SqlSession sqlSession=null;
        try{
            sqlSession=MyBatisUtils.openSession();
          Goods g= sqlSession.selectOne("goods.selectById",888);

                System.out.println(g.toString());


        }catch (Exception e){
            e.printStackTrace();
        }finally {
            MyBatisUtils.closeSession(sqlSession);
        }
    }

    @Test
    public void testSelectByPriceRange()  throws Exception{
        SqlSession sqlSession=null;
        try{
            sqlSession=MyBatisUtils.openSession();
            Map param=new HashMap();
            param.put("min",100);
            param.put("max",500);
            param.put("limit",10);
         List<Goods> l=  sqlSession.selectList("selectByPriceRange",param);

            for(Goods g:l) {
                System.out.println(g.toString());
            }
        }catch (Exception e){
            e.printStackTrace();
        }finally {
            MyBatisUtils.closeSession(sqlSession);
        }
    }
    @Test
    public void testSelectGoodsMap()  throws Exception{
        SqlSession sqlSession=null;
        try{
            sqlSession=MyBatisUtils.openSession();
       List<Map> list=  sqlSession.selectList("goods.selectGoodsMap");
      for(Map map:list){
          System.out.println(map);
      }

        }catch (Exception e){
            e.printStackTrace();
        }finally {
            MyBatisUtils.closeSession(sqlSession);
        }
    }

    @Test
    public void testSelectGoodsDTO()  throws Exception{
        SqlSession sqlSession=null;
        try{
            sqlSession=MyBatisUtils.openSession();
        List<GoodsDTO> o=  sqlSession.selectList("goods.selectGoodsDTO");
       for(GoodsDTO g:o){
           System.out.println(g.toString());
       }
        }catch (Exception e){
            e.printStackTrace();
        }finally {
            MyBatisUtils.closeSession(sqlSession);
        }
    }
这里效果如下:只展示最后一个操作啦,后面的就不一一展示结果啦,

接下来我们就要进行数据库内的增删改操作啦
在相同的Mapper下面加入如下的操作语句:
    <!-- flushCache="true"在sql后强制清空缓存-->
    <insert id="insert" parameterType="com.imooc.mybatis.entity.Goods" flushCache="true">
        Insert into t_goods(title,sub_title,original_cost,current_price,discount,is_free_delivery,category_id)
        VALUES (#{title},#{subTitle},#{originalCost},#{currentPrice},#{discount},#{isFreeDelivery},#{categoryId})
<selectKey resultType="Integer" keyProperty="goodsId" order="AFTER">
    SELECT  Last_insert_id()
</selectKey>
    </insert>
    <update id="update" parameterType="com.imooc.mybatis.entity.Goods">
        update t_goods
        SET
        title=#{title},
        sub_title=#{subTitle},
        original_cost=#{originalCost},
        current_price=#{currentPrice},
        discount=#{discount},
        is_free_delivery=#{isFreeDelivery},
        category_id=#{categoryId}
        where goods_id=#{goodsId}
    </update>
    <!--delete t_goods where goods_id in(1312,1313)-->
    <delete id="delete" parameterType="Integer">
        DELETE from t_goods where goods_id=#{value}
    </delete>
相对应的测试代码:
  @Test
    public void testInsert()  throws Exception{
        SqlSession sqlSession=null;
        try{
            sqlSession=MyBatisUtils.openSession();
            Goods goods=new Goods();
            goods.setTitle("TestProduct");
            goods.setSubTitle("subTest");
            goods.setOriginalCost(123f);
            goods.setCurrentPrice(120f);
            goods.setDiscount(0.3f);
            goods.setIsFreeDelivery(0);
            goods.setCategoryId(43);
//insert()方法代表本次成功插入的记录总数
          int num= sqlSession.insert("goods.insert",goods);
            sqlSession.commit();//提交事务数据
            System.out.println(num);
            System.out.println(goods.getGoodsId());
        }catch (Exception e){
            if(sqlSession!=null)
                sqlSession.rollback();
            e.printStackTrace();
        }finally {
            MyBatisUtils.closeSession(sqlSession);
        }
    }

    @Test
    public void testUpdate()  throws Exception{
        SqlSession sqlSession=null;
        try{
            sqlSession=MyBatisUtils.openSession();
            Goods goods=sqlSession.selectOne("goods.selectById",739);
            goods.setTitle("更新测试商品");
            int num=sqlSession.update("goods.update",goods);
            sqlSession.commit();
        }catch (Exception e){
            if(sqlSession!=null)
                sqlSession.rollback();
            e.printStackTrace();
        }finally {
            MyBatisUtils.closeSession(sqlSession);
        }
    }


    @Test
    public void testDelete()  throws Exception{
        SqlSession sqlSession=null;
        try{
            sqlSession=MyBatisUtils.openSession();
            int num=sqlSession.delete("goods.delete",739);
            sqlSession.commit();
        }catch (Exception e){
            if(sqlSession!=null)
                sqlSession.rollback();
            e.printStackTrace();
        }finally {
            MyBatisUtils.closeSession(sqlSession);
        }
    }
接下来学习sql注入的防止
在Mapper中加入如下语句:
<select id="selectByTitle" parameterType="java.util.Map" resultType="com.imooc.mybatis.entity.Goods">
SELECT * from t_goods where title=#{title}
#{order}
</select>
<select id="dynamicSQL" parameterType="java.util.Map" resultType="com.imooc.mybatis.entity.Goods">
SELECT * from t_goods
<!-- where 1=1-->
<where>
<if test="categoryId!=null">
and category_id=#{categoryId}
</if>
<if test="currentPrice!=null">
and current_price < ${currentPrice}
</if>
</where>
</select>
对应的测试方法:
 @Test
    public void testSelectByTitle()  throws Exception{
        SqlSession sqlSession=null;
        try{
            sqlSession=MyBatisUtils.openSession();
            Map param=new HashMap();
            /**
             * ${ }原文传值,用来进行sql拼接,但是有sql注入的风险
             * select * from t_goods
             * where title='' or 1=1 or title='爱恩幼 孕妇护肤品润养颜睡眠面膜 100g'
             #{ }预编译,将前端输入的值变成一个字符串
             select * from t_goods
             where title="'' or 1=1 or title='爱恩幼 孕妇护肤品润养颜睡眠面膜 100g'"
             */
            param.put("title","'' or 1=1 or title='爱恩幼 孕妇护肤品润养颜睡眠面膜 100g'");
          param.put("order","order by title");
            List<Goods> list=sqlSession.selectList("goods.selectByTitle",param);
            for(Goods g:list){
                System.out.println(g.toString());
            }
        }catch (Exception e){
            if(sqlSession!=null)
                sqlSession.rollback();
            e.printStackTrace();
        }finally {
            MyBatisUtils.closeSession(sqlSession);
        }
    }
@Test
    public void testDynamicSQL() throws Exception{
    SqlSession sqlSession=null;
    try{
        sqlSession=MyBatisUtils.openSession();
        Map param=new HashMap();

        param.put("categoryId",44);
        param.put("currentPrice",50);
        List<Goods> list=sqlSession.selectList("goods.dynamicSQL",param);
        for(Goods g:list){
            System.out.println(g.toString());
        }
    }catch (Exception e){
        if(sqlSession!=null)
            sqlSession.rollback();
        e.printStackTrace();
    }finally {
        MyBatisUtils.closeSession(sqlSession);
    }
}
首先在Mapper中加入图中的话

然后我们来看看MyBatis中的一级二级缓存的测试方法
MyBatis二级缓存
一级缓存默认开启,缓存范围SQLSession会话
二级缓存手动开启,属于Mapper Namespace
二级缓存运行规则
二级开启后默认所有查询操作均使用缓存
写操作commit提交时对该namespace缓存强制清空
配置userCache=false可以不用缓存
配置flushCache=true 代表强制清空缓存
  @Test
    public void testLv1Cache(){
        SqlSession sqlSession=null;
        try{
            sqlSession=MyBatisUtils.openSession();
            Goods g= sqlSession.selectOne("goods.selectById",1666);
            Goods g2= sqlSession.selectOne("goods.selectById",1666);
            System.out.println(g.hashCode()+"  "+g2.hashCode());
            System.out.println(g.toString());
        }catch (Exception e){
            e.printStackTrace();
        }finally {
            MyBatisUtils.closeSession(sqlSession);
        }
        try{
            sqlSession=MyBatisUtils.openSession();
            Goods g= sqlSession.selectOne("goods.selectById",1666);
            sqlSession.commit();
            Goods g2= sqlSession.selectOne("goods.selectById",1666);
            System.out.println(g.hashCode()+"  "+g2.hashCode());
            System.out.println(g.toString());
        }catch (Exception e){
            e.printStackTrace();
        }finally {
            MyBatisUtils.closeSession(sqlSession);
        }
    }
    @Test
    public void testLv2Cache(){
        SqlSession sqlSession=null;
        try{
            sqlSession=MyBatisUtils.openSession();
            Goods g= sqlSession.selectOne("goods.selectById",1666);

            System.out.println(g.hashCode()+"  ");

            System.out.println(g.toString());


        }catch (Exception e){
            e.printStackTrace();
        }finally {
            MyBatisUtils.closeSession(sqlSession);
        }
        try{
            sqlSession=MyBatisUtils.openSession();
            Goods g= sqlSession.selectOne("goods.selectById",1666);


            System.out.println(g.hashCode());

            System.out.println(g.toString());


        }catch (Exception e){
            e.printStackTrace();
        }finally {
            MyBatisUtils.closeSession(sqlSession);
        }
//        try{
//            sqlSession=MyBatisUtils.openSession();
//            Goods g= sqlSession.selectOne("goods.selectById",1666);
//
//
//            System.out.println(g.hashCode());
//
//            System.out.println(g.toString());
//
//
//        }catch (Exception e){
//            e.printStackTrace();
//        }finally {
//            MyBatisUtils.closeSession(sqlSession);
//        }
    }
接下来进行一对多关系的查询
在goods的Mapper中添加
    <!--
        resultMap可用于说明一对多或者多对一的映射逻辑
        id 是resultMap属性引用的标志
        type 指向One的实体(Goods)
    -->
    <resultMap id="rmGoods1" type="com.imooc.mybatis.entity.Goods">
        <!-- 映射goods对象的主键到goods_id字段 -->
        <id column="goods_id" property="goodsId"></id>
        <!--
            collection的含义是,在
            select * from t_goods limit 0,1 得到结果后,对所有Goods对象遍历得到goods_id字段值,
            并代入到goodsDetail命名空间的findByGoodsId的SQL中执行查询,
            将得到的"商品详情"集合赋值给goodsDetails List对象.
        -->
        <collection property="goodsDetails" select="goodsDetail.selectByGoodsId"
                    column="goods_id"/>
    </resultMap>
    <select id="selectOneToMany" resultMap="rmGoods1">
        select * from t_goods limit 0,10
    </select>
在goods_detail.xml中添加
<?xml version="1.0" encoding="UTF-8"?>
<!DOCTYPE mapper
        PUBLIC "-//mybatis.org//DTD Mapper 3.0//EN"
        "http://mybatis.org/dtd/mybatis-3-mapper.dtd">
<mapper namespace="goodsDetail">
    <select id="selectByGoodsId" parameterType="Integer"
            resultType="com.imooc.mybatis.entity.GoodsDetail">
        select * from t_goods_detail where goods_id = #{value}
    </select>

    <resultMap id="rmGoodsDetail" type="com.imooc.mybatis.entity.GoodsDetail">
        <id column="gd_id" property="gdId"/>
        <result column="goods_id" property="goodsId"/>
        <association property="goods" select="goods.selectById" column="goods_id"></association>
    </resultMap>
    <select id="selectManyToOne" resultMap="rmGoodsDetail">
        select * from t_goods_detail limit 0,20
    </select>
</mapper>
具体的测试代码:
@Test
    public void testoneToMany()  throws Exception{
        SqlSession sqlSession=null;
        try{
            sqlSession=MyBatisUtils.openSession();
            List<Goods> list=sqlSession.selectList("goods.selectOneToMany");
            for(Goods g:list){
                System.out.println(g.getTitle()+":"+g.getGoodsDetails().size());
            }
        }catch (Exception e){
            if(sqlSession!=null)
                sqlSession.rollback();
            e.printStackTrace();
        }finally {
            MyBatisUtils.closeSession(sqlSession);
        }
    }
    @Test
    public void testManyToOne()  throws Exception{
        SqlSession sqlSession=null;
        try{
            sqlSession=MyBatisUtils.openSession();
            List<GoodsDetail> list=sqlSession.selectList("goodsDetail.selectManyToOne");
            for(GoodsDetail g:list){
                System.out.println(g.getGdPicUrl()+":"+g.getGoods().getTitle());
            }
        }catch (Exception e){
            if(sqlSession!=null)
                sqlSession.rollback();
            e.printStackTrace();
        }finally {
            MyBatisUtils.closeSession(sqlSession);
        }
    }
然后是分页利用PageHelper进行分页管理
PageHelper的使用流程
Maven引入pagehelper和jsqlparser
MyBatis-config.xml增加plugin配置
代码中使用PageHelper.startPage()自动分页
ps我们在刚开始就配置好了,大家可以都相应的配置文件下找一找。会找到的哈
goods的Mapper中加入
<select id="selectPage" resultType="com.imooc.mybatis.entity.Goods">
select * from t_goods where current_price<1000
</select>
测试方法
 @Test
    public void testSelectpage()  throws Exception{
        SqlSession sqlSession=null;
        try{
            sqlSession=MyBatisUtils.openSession();
            /*startPage方法会自动将下一次查询进行分页*/
            PageHelper.startPage(2,10);
             Page<Goods> page=(Page)sqlSession.selectList("goods.selectPage");
            System.out.println("总页数:"+page.getPages());
            System.out.println("总记录数:"+page.getTotal());
            System.out.println("开始行号:"+page.getStartRow());
            System.out.println("结束行号:"+page.getEndRow());
            System.out.println("当前页码:"+page.getPageNum());
            List<Goods> data=page.getResult();
            for(Goods g:data){
                System.out.println(g.toString());
            }
            System.out.println("");
        }catch (Exception e){
            if(sqlSession!=null)
                sqlSession.rollback();
            e.printStackTrace();
        }finally {
            MyBatisUtils.closeSession(sqlSession);
        }
    }
效果

我们在配置下C3P0连接池作为数据源
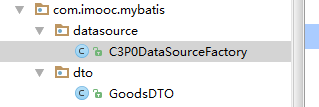
代码:
public class C3P0DataSourceFactory extends UnpooledDataSourceFactory{
    public C3P0DataSourceFactory(){
        this.dataSource=new ComboPooledDataSource();
    }
}
然后我们来进行批处理的测试了
先准备Mapper
也是goods的
  <!--Insert into Table-->
    <!--Values("a"..),("b"..)...-->
    <insert id="batchInsert" parameterType="java.util.List">
        Insert into t_goods(title,sub_title,original_cost,current_price,discount,is_free_delivery,category_id)
        VALUES
        <foreach collection="list" item="item" index="index" separator=",">
            (#{item.title},#{item.subTitle},#{item.originalCost},#{item.currentPrice},#{item.discount},#{item.isFreeDelivery},#{item.categoryId})
        </foreach>
    </insert>
<!--in(1001,1002)-->
    <delete id="batchDelete" parameterType="java.util.List">
      DELETE FROM t_goods WHERE  goods_id IN
      <foreach collection="list" item="item" index="index" open="(" close=")" separator=",">
          #{item}
      </foreach>
    </delete>
对应的测试类
    @Test
    public void testBatchInsert()  throws Exception{
        SqlSession sqlSession=null;
        try{
            long st=new Date().getTime();
            sqlSession=MyBatisUtils.openSession();
            List<Goods> list=new ArrayList<Goods>();
            for(int i=0;i<1000;i++) {
                Goods goods = new Goods();
                goods.setTitle("TestProduct");
                goods.setSubTitle("subTest");
                goods.setOriginalCost(123f);
                goods.setCurrentPrice(120f);
                goods.setDiscount(0.5f);
                goods.setIsFreeDelivery(0);
                goods.setCategoryId(43);
                list.add(goods);
            }
           sqlSession.insert("goods.batchInsert",list);
            sqlSession.commit();//提交事务数据
            long et=new Date().getTime();
            System.out.println("执行时间"+(et-st)+"毫秒");
        }catch (Exception e){
            if(sqlSession!=null)
                sqlSession.rollback();
            e.printStackTrace();
        }finally {
            MyBatisUtils.closeSession(sqlSession);
        }
    }
    @Test
    public void testInsert1()  throws Exception{
        SqlSession sqlSession=null;
        try{
            long st=new Date().getTime();
            sqlSession=MyBatisUtils.openSession();

            for(int i=0;i<1000;i++) {
                Goods goods = new Goods();
                goods.setTitle("TestProduct");
                goods.setSubTitle("subTest");
                goods.setOriginalCost(123f);
                goods.setCurrentPrice(120f);
                goods.setDiscount(0.5f);
                goods.setIsFreeDelivery(0);
                goods.setCategoryId(43);
                sqlSession.insert("goods.insert",goods);
            }

            sqlSession.commit();//提交事务数据
            long et=new Date().getTime();
            System.out.println("执行时间"+(et-st)+"毫秒");
        }catch (Exception e){
            if(sqlSession!=null)
                sqlSession.rollback();
            e.printStackTrace();
        }finally {
            MyBatisUtils.closeSession(sqlSession);
        }
    }

    @Test
    public void testBatchDelete()  throws Exception{
        SqlSession sqlSession=null;
        try{
            long st=new Date().getTime();
            sqlSession=MyBatisUtils.openSession();
            List<Integer> list=new ArrayList<Integer>();
            for(int i=0;i<1000;i++) {
                list.add(i+3000);
            }
            sqlSession.insert("goods.batchDelete",list);
            sqlSession.commit();//提交事务数据
            long et=new Date().getTime();
            System.out.println("执行时间"+(et-st)+"毫秒");
        }catch (Exception e){
            if(sqlSession!=null)
                sqlSession.rollback();
            e.printStackTrace();
        }finally {
            MyBatisUtils.closeSession(sqlSession);
        }
    }
以及插入的效果

最后的最后是MyBatis的注解开发方式。。。
我们需要配置新的maven工程来试验,具体配置和之前类似,源代码也在我开头说的位置,我们可以把配置拿过来。
包结构

Goods实体类和GoodsDTO没有变化,数据库还用的是原来的数据库
我们主要来看下注解开发方式,我们找到接口类
代码如下
public interface GoodsDAO {
    @Select("select * from t_goods where current_price between #{min} and #{max} order by current_price limit 0,#{limit}")
    public List<Goods> selectByPriceRange(@Param("min")Float min, @Param("max") Float max,@Param("limit") Integer limit);

    @Insert("INSERT INTO t_goods(title, sub_title, original_cost, current_price, discount, is_free_delivery, category_id) VALUES (#{title} , #{subTitle} , #{originalCost}, #{currentPrice}, #{discount}, #{isFreeDelivery}, #{categoryId})")
    @SelectKey(statement = "select last_insert_id()",before = false,keyProperty = "goodsId", resultType = Integer.class)
    public int insert(Goods goods);

    @Select("select * from t_goods")
    //<resultMap>
    @Results({
            //id
            @Result(column = "goods_id",property = "goodsId",id = true),
          //result
            @Result(column = "title",property = "title"),
            @Result(column = "current_price",property = "currentPrice")
    })
    public List<GoodsDTO> selectAll();
}
就是把我们在xml文件中的拿到了接口的注解中
我们在运行测试类时MyBatis会自动解析注解,和解析Mapper文件一样的,紧接着MyBatis就会进行相应的操作并返回给我们对应的反馈。
测试类代码以及部分效果
public class MyBatisTestor {
    @Test
    public void testSelectByPriceRange(){
        SqlSession sqlSession=null;
        try{
            sqlSession=MyBatisUtils.openSession();
          GoodsDAO goodsDAO=  sqlSession.getMapper(GoodsDAO.class);
          List<Goods> list= goodsDAO.selectByPriceRange(100f,200f,10);
            for (Goods g:list){
                System.out.println(g);
            }

        }catch (Exception e){
            e.printStackTrace();
        }finally {
            MyBatisUtils.closeSession(sqlSession);
        }
    }
    /**
     * 新增数据
     * @throws Exception
     */
    @Test
    public void testInsert() throws Exception {
        SqlSession session = null;
        try{
            session = MyBatisUtils.openSession();
            Goods goods = new Goods();
            goods.setTitle("测试商品");
            goods.setSubTitle("测试子标题");
            goods.setOriginalCost(200f);
            goods.setCurrentPrice(100f);
            goods.setDiscount(0.5f);
            goods.setIsFreeDelivery(1);
            goods.setCategoryId(43);
           GoodsDAO goodsDAO=session.getMapper(GoodsDAO.class);
            //insert()方法返回值代表本次成功插入的记录总数
            int num = goodsDAO.insert(goods);
            session.commit();//提交事务数据
            System.out.println(goods.getGoodsId());
        }catch (Exception e){
            if(session != null){
                session.rollback();//回滚事务
            }
            throw e;
        }finally {
            MyBatisUtils.closeSession(session);
        }
    }
    @Test
    public void testSelectAll() throws Exception {
        SqlSession session = null;
        try{
            session = MyBatisUtils.openSession();
       GoodsDAO goodsDAO=session.getMapper(GoodsDAO.class);
            List<GoodsDTO> list=goodsDAO.selectAll();
            System.out.println(list.size());
        }catch (Exception e){
            if(session != null){
                session.rollback();//回滚事务
            }
            throw e;
        }finally {
            MyBatisUtils.closeSession(session);
        }
    }
}
效果:


OK,也算是从头到尾整理了下思路。
大家看到这里的麻烦点下关注点下赞。如果你有什么疑问欢迎在下方留言,我会即时恢复哒。
看这篇文章的老铁们,点下赞,点下关注。
感恩点赞,感恩关注
最后宣传下我个人的微信公众号,微信搜索:可及的小屋,有志向整副业,娱乐的程序员们,欢迎您的到来。谢谢。
100G程序员资料,自取哦!!