系统前提
系统:Ubuntu 16.04
安装环境:安装JDK 1.8,安装编译打包工具ant
安装Floodlight
1.下载Floodlight
方法一:
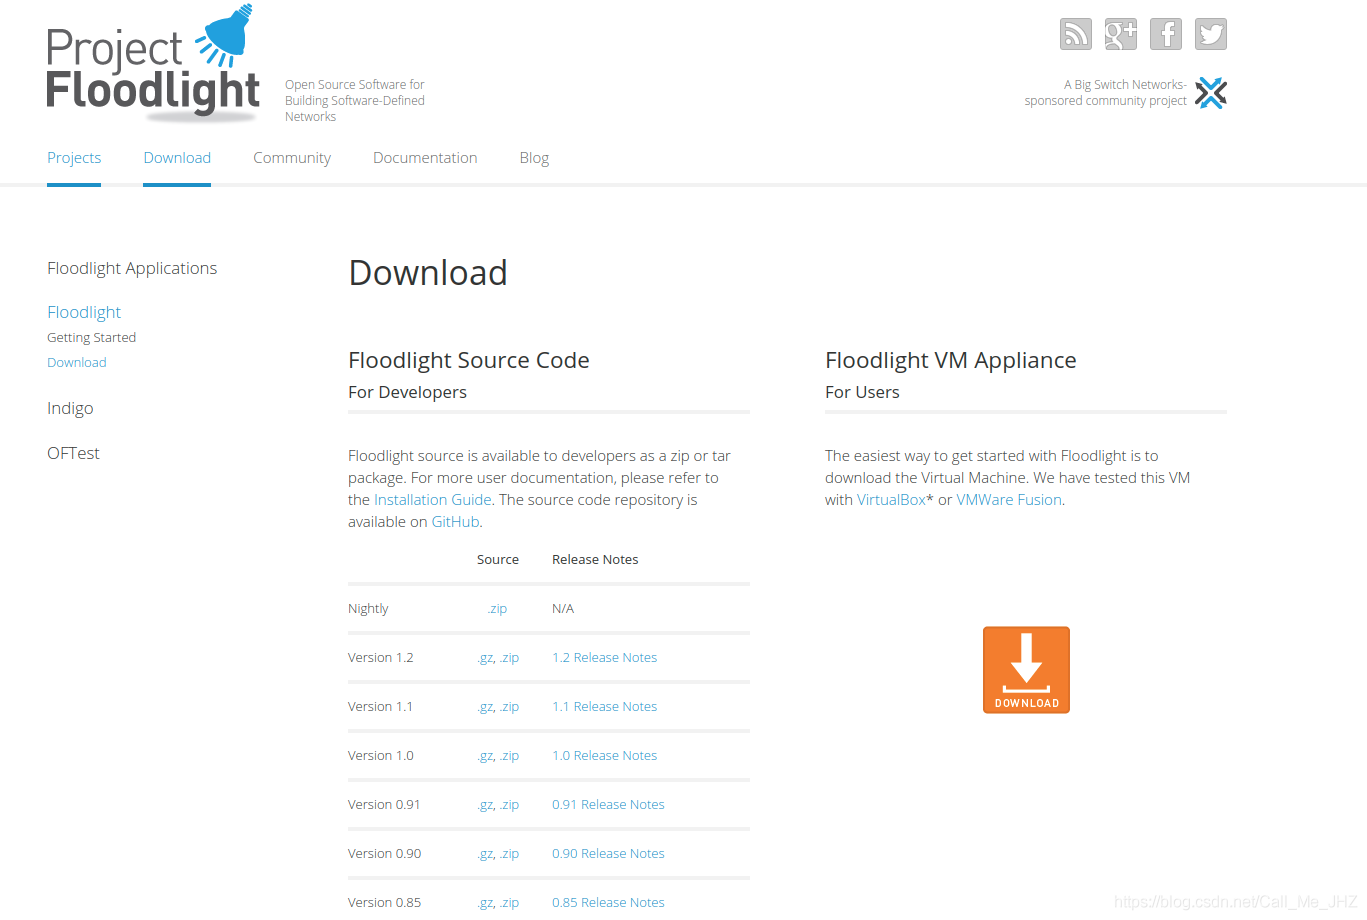
到http://www.projectfloodlight.org/download/下载floodlight的压缩安装包,解压到自定义目录,解压文件夹命名为floodlight。
方法二:
git clone git://github.com/floodlight/floodlight.git2.编译安装
cd floodlight
sudo ant
3.启动floodlight
java -jar target/floodlight.jar
启动后,通过浏览器访问floodlight的管理界面,http://localhost:8080/ui/index.html
扫描二维码关注公众号,回复:
10700008 查看本文章

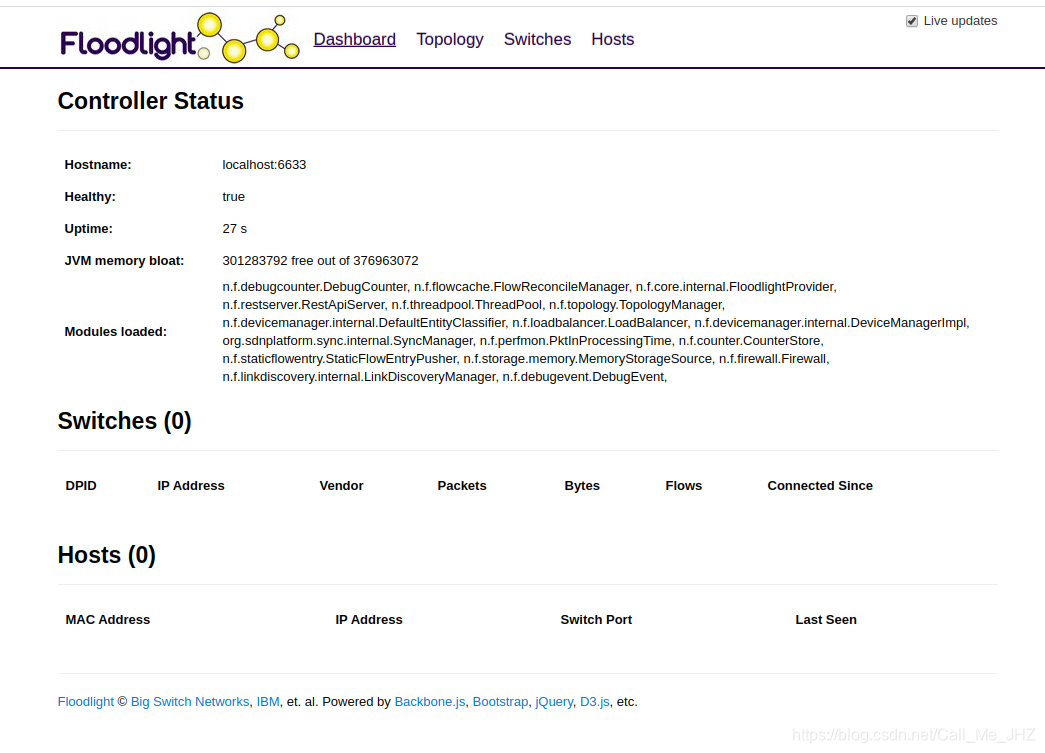
4.查看Floodlight的主进程是否正在运行
ps -ef |grep floodlight 通过Mininet和Floodlight实现多中心拓扑网络
1.编写拓扑网络的python脚本
进入mininet目录的custom子目录编写保存拓扑网络实现python代码实现以下结构的拓扑网络
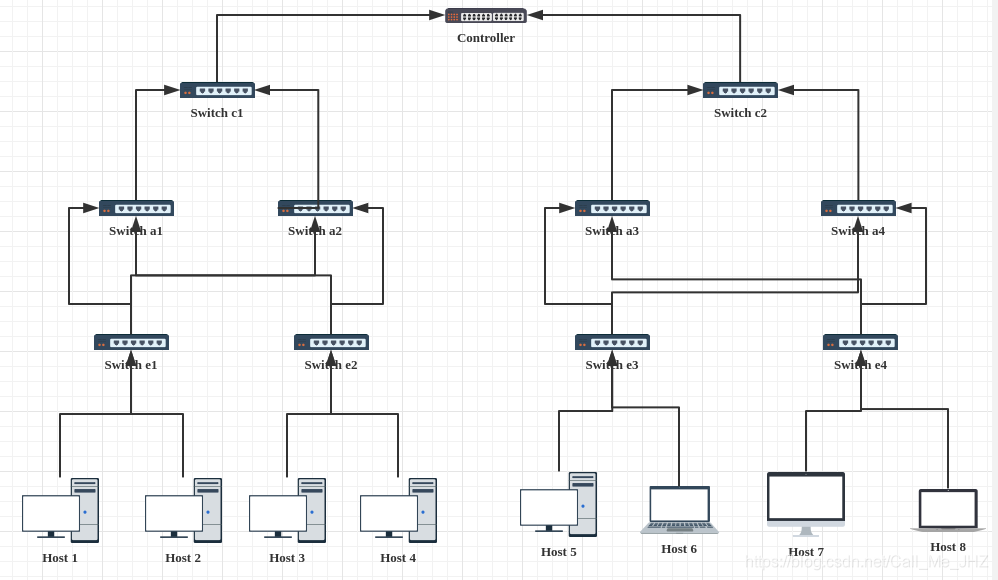
c1和c2为核心交换机,a1-a4为聚合交换机,e1-e4为边缘交换机,h1-h8为主机。
from mininet.topo import Topo
from mininet.net import Mininet
from mininet.node import RemoteController, CPULimitedHost
from mininet.link import TCLink
from mininet.util import dumpNodeConnections

class MyTopo(Topo):
    "Simple topology example."
    def __init__(self):
        "Create custom topo."

        # Initialize topology
        Topo.__init__(self)
        L1 = 2
        L2 = L1 * 2
        L3 = L2
        c = []
        a = []
        e = []

        # add core ovs
        for i in range(L1):
            sw = self.addSwitch('c{}'.format(i + 1))
            c.append(sw)

        # add aggregation ovs
        for i in range(L2):
            sw = self.addSwitch('a{}'.format(L1 + i + 1))
            a.append(sw)

        # add edge ovs
        for i in range(L3):
            sw = self.addSwitch('e{}'.format(L1 + L2 + i + 1))
            e.append(sw)

        # add links between core and aggregation ovs
        for i in range(L1):
            sw1 = c[i]
            for sw2 in a[i // 2::L1 // 2]:
                self.addLink(sw2, sw1)

        # add links between aggregation and edge ovs
        for i in range(0, L2, 2):
            for sw1 in a[i:i + 2]:
                for sw2 in e[i:i + 2]:
                    self.addLink(sw2, sw1)

        # add hosts and its links with edge ovs
        count = 1
        for sw1 in e:
            for i in range(2):
                host = self.addHost('h{}'.format(count))
                self.addLink(sw1, host)
                count += 1

topos = {'mytopo': (lambda: MyTopo())}
2.执行脚本
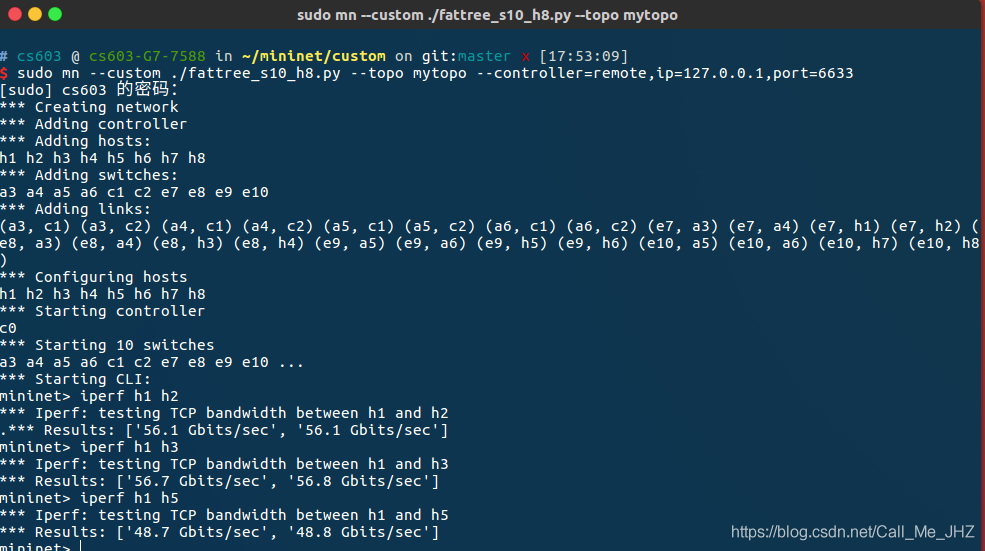
sudo mn --custom ./fattree_s10_h8.py --topo mytopo --controller=remote,ip=127.0.0.1,port=66333.连通性以及通信带宽测试
分别测试同一交换机内部主机间宽带,相同汇聚交换机下不同边缘交换机的主机间宽带以及相同核心交换机下不同汇聚交换机下的主机间宽带。
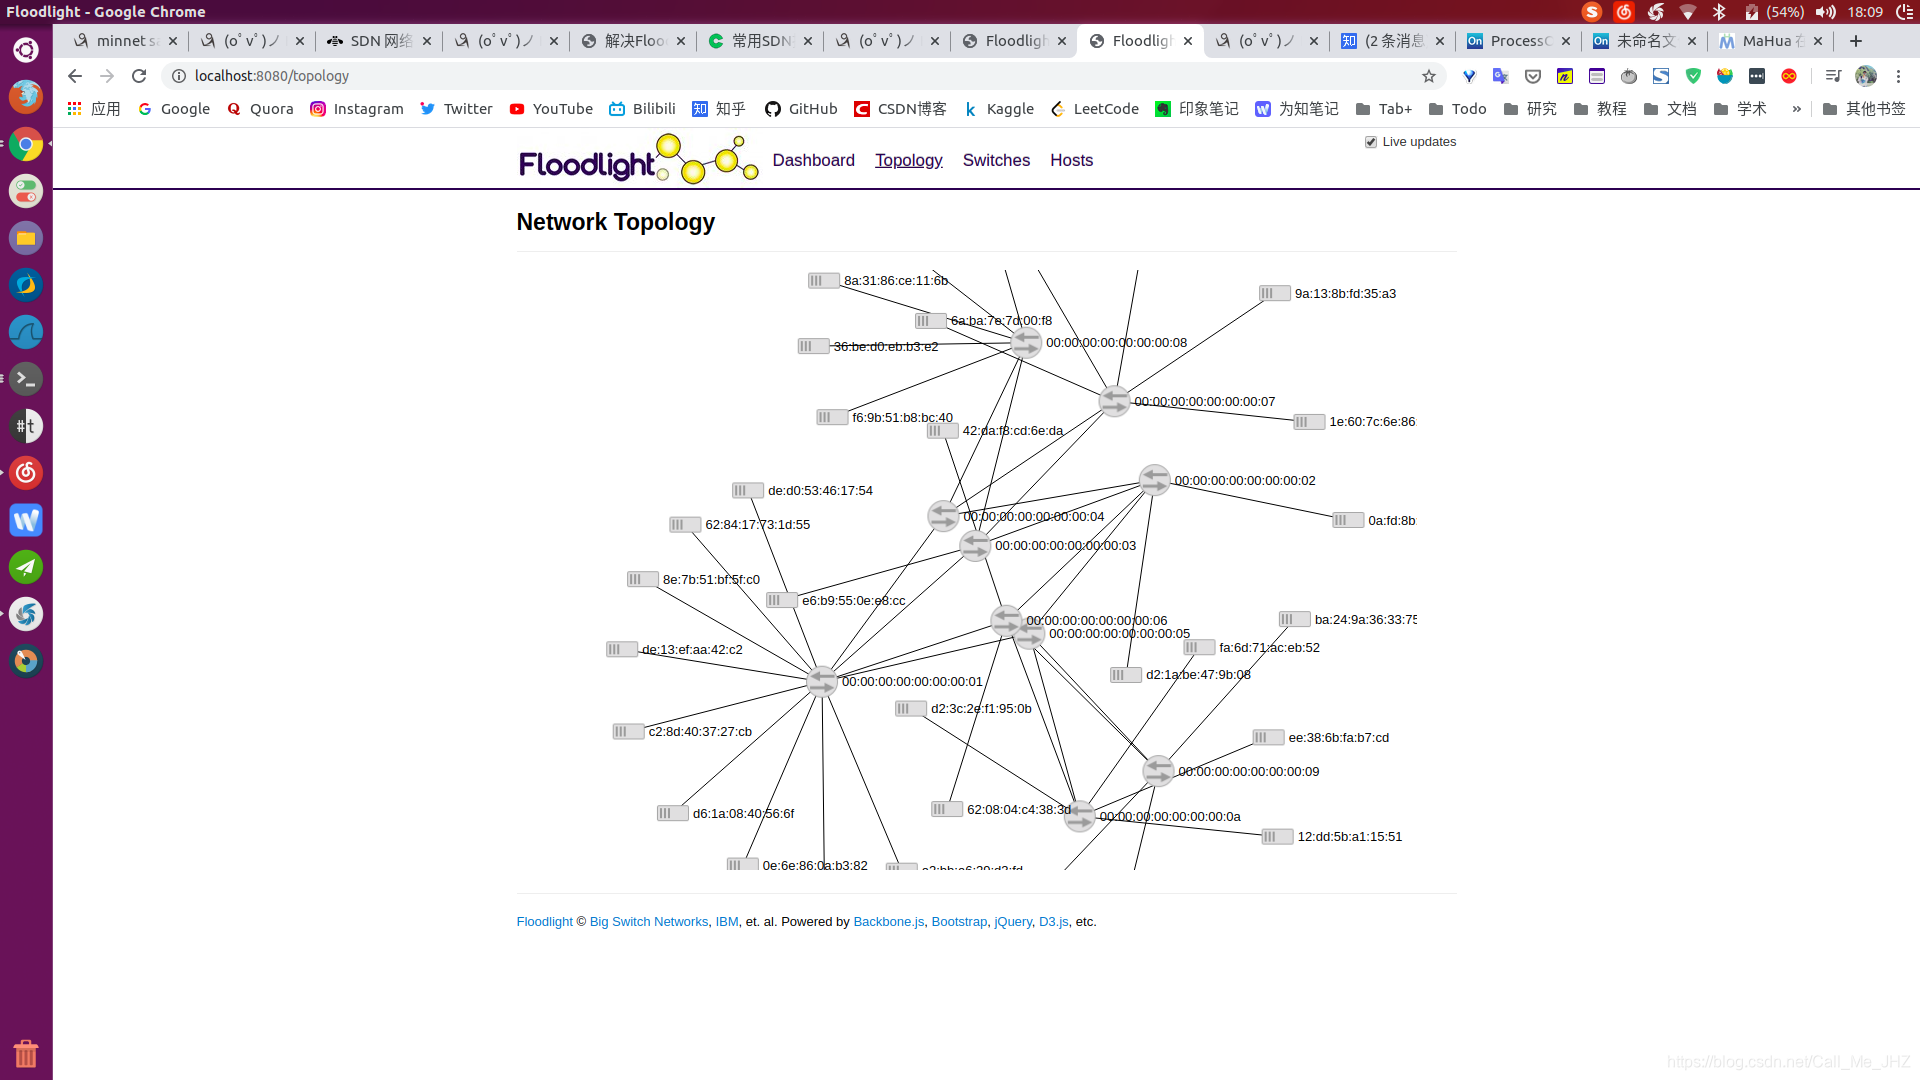
4.在floodlight web页面中查看网络拓扑信息