scrapy重爬世界大学排名
写在前面
scrapy中文文档
https://scrapy-chs.readthedocs.io/zh_CN/1.0/intro/overview.html
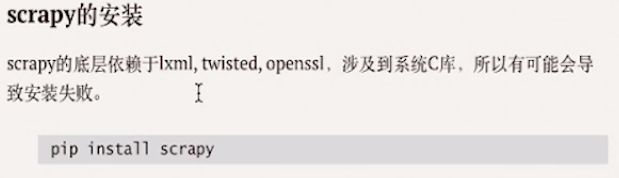
安装scrapy
pip install scrapy
用于测试 scrapy的网址
http://quotes.toscrape.com/
Scrapy是Python开发的一个快速、高层次的屏幕抓取和web抓取框架,用于抓取web站点并从页面中提取结构化的数据。Scrapy用途广泛,可以用于数据挖掘、监测和自动化测试。
1、scrapy入门小demo
打开http://quotes.toscrape.com/

import scrapy


class QuoteSpider(scrapy.Spider):
    # 爬虫的名字,没有什么实际的作用
    name = "aaa"
    url = ['http://quotes.toscrape.com/']

    # parse函数固定的写法
    def parse(self, response):
        quotes = response.xpath('//div[@class="quote"]')
        for quote in quotes:
            # yield {}会自动返回{}里的数据,不做存储就会自动打印到控制台上
            yield {
                # scrapy里面自动封装了css、xpath,两种语法都可以写
                # css、xpath返回的数据都是列表,包含了一些选择器对象
                # extract_first()返回选择器里面的第一个内容
                'text': quote.css('span.text::text').extract_first(),
                'author': quote.xpath('./span/small/text()').extract_first()
            }
运行
scrapy runspider scrapyDEMO.py
把结果保存成json文件

保存成csv

2、安装scrapy所需依赖库

3、scrapy重爬世界大学排名
创建步骤

3.1、创建项目
打开新的cmd窗口(这里我是在windows下操作)
创建一个scrapy项目qianmu
scrapy startproject qianmo
进入项目目录
cd qianmu

指定我们要爬的网址入口
scrapy genspider usnews qianmu.org

给项目创建一个虚拟环境:在项目根目录下创建
没有安装库的先安装库:pip install virtualenv

进入虚拟环境安装scrapy(windows下)
cd env/Scripts/
activate.bat
pip install scrapy


*进入虚拟环境安装scrapy(linux下)

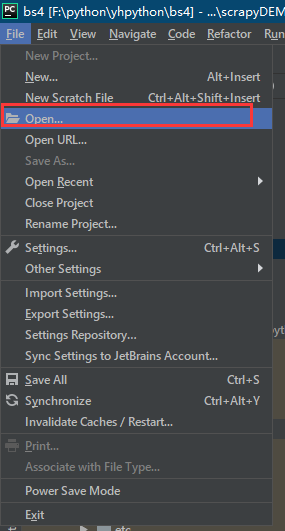
用pycharm打开这个项目

3.2、开始写代码
# -*- coding: utf-8 -*-
import scrapy


class UsnewsSpider(scrapy.Spider):
    name = 'usnews'
    allowed_domains = ['qianmu.org']
    start_urls = ['http://www.qianmu.org/ranking/1528.htm']

    def parse(self, response):
        urls = response.xpath("//div[@class='rankItem']//tr/td[2]//a/@href").extract()
        for url in urls:
            if not url.startswith("http://www.qianmu.org"):
                url = "http://www.qianmu.org/%s" % url
            yield response.follow(url, self.parse_university)

    def parse_university(self, response):
        """处理大学详情页面"""
        data = {}
        data['name'] = response.xpath("//div[@class='wikiContent']/h1/text()")
        table = response.xpath("//div[@class='wikiContent']//table")[0]
        k = table.xpath(".//td[1]/p/text()")
        cols = table.xpath(".//td[2]")
        v = [" ".join(col.xpath('.//text()').extract_first()) for col in cols]
        data.update(zip(k, v))
        yield data
开始运行
scrapy crawl usnews

去除我们获取到的数据里的\t\r\n

启用http请求缓存,下次再遇到该url时不再需要请求远程网站

4、配置pycharm,一键启动scrapy

先找到虚拟环境里面的scrapy安装地址
这里的找文件指令:windows是where scrapy,linux是which scrapy

将地址复制过去


成功运行

5、scrapy shell


查看有哪些指令:shelp()

对某个网站发起请求:fetch(url)
这里也可以在进入shell之前直接加url,效果一样:
scrapy shell http://www.qianmu.org/ranking/1528.htm

发起请求过后,我们可以查看现在可以执行的参数指令:shelp()

我们获取一下response的类型:type(response)

查看response下有什么属性

5、关于虚拟环境的配置
p616,10:30
6、本章完整代码
# -*- coding: utf-8 -*-
import scrapy


# scrapy异步请求数据
class UsnewsSpider(scrapy.Spider):
    name = 'usnews'
    # allowed_domains允许爬的url必须要在此字段内
    allowed_domains = ['qianmu.org']
    # start_urls可以设置多个
    start_urls = ['http://www.qianmu.org/ranking/1528.htm']

    # start_urls请求成功后就会调用parse方法
    def parse(self, response):
        # extract()返回的是一个列表类型的数据
        urls = response.xpath("//div[@class='rankItem']//tr/td[2]//a/@href").extract()
        for url in urls:
            if not url.startswith("http://www.qianmu.org"):
                url = "http://www.qianmu.org/%s" % url
            yield response.follow(url, self.parse_university)

    def parse_university(self, response):
        """处理大学详情页面"""
        response = response.replace(
            body=response.text.replace('\t', '').replace('\r\n', '')
        )
        data = {}
        data['name'] = response.xpath("//div[@class='wikiContent']/h1/text()")
        table = response.xpath("//div[@class='wikiContent']//table")[0]
        k = table.xpath(".//td[1]/p/text()")
        cols = table.xpath(".//td[2]")
        v = [" ".join(col.xpath('.//text()').extract_first()) for col in cols]
        data.update(zip(k, v))
        yield data
