Centos7通过Python3安装Jupyter NoteBook
其他
2020-04-08 10:45:43
阅读次数: 0
- jupyter notebook官方文档
- https://jupyter-notebook.readthedocs.io/en/stable/index.html
- 安装jupyter
- pip3 install jupyter -i https://pypi.douban.com/simple/ --trusted-host pypi.douban.com

-
- 创建jupyter软连接直接执行
- ln -s /usr/local/python/bin/jupyter /usr/bin/jupyter

-
- 执行命令进行测试
- jupyter notebook

-
- 由于我是用root执行的所以要加参数"""--allow-root"""
- jupyter notebook --allow-root

-
- 以上表示jupyter notebook执行成功,不过只能本机访问
- 配置外部访问
- 可以通过jupyter notebook --help查看配置命令
- jupyter notebook --help
- # 允许用root来运行此程序
--allow-root
# 设置log级别
--log-level=<Enum> (Application.log_level)
Default: 30
Choices: (0, 10, 20, 30, 40, 50, 'DEBUG', 'INFO', 'WARN', 'ERROR', 'CRITICAL')
Set the log level by value or name.
# 指定配置文件
--config=<Unicode> (JupyterApp.config_file)
Default: ''
Full path of a config file.
# 指定ip和端口(默认端口为8888)
--ip=<Unicode> (NotebookApp.ip)
Default: 'localhost'
The IP address the notebook server will listen on.
--port=<Int> (NotebookApp.port)
Default: 8888
The port the notebook server will listen on.
- jupyter notebook --ip=192.168.35.131 --prot=9999 --allow-root

-
- 通过浏览器访问jupyter notebook
- http://192.168.35.131:8888

-
- token在运行下的终端中展示的复制进去

-

-
- 以上表示启动成功,所在的目录为你启动jupyter notebook的目录
- 以上为手动启动jupyter notebook
- 生成jupyter notebook配置文件
- 默认目录在$HOME下的.jupyter/jupyternotebookconfig.py
- jupyter notebook --generate-config

-
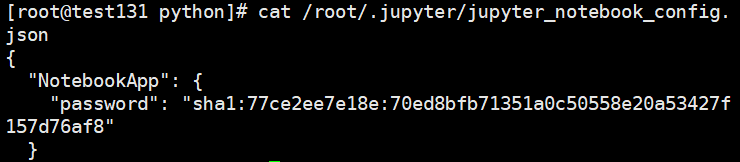
- 生成jupyter notebook 密码
- 存放于$HOME下的.jupyter/jupyternotebookconfig.json中
- jupyter notebook password

-
-
- 配置jupyter notebook的配置文件的默认项
- vim /root/.jupyter/jupyter_notebook_config.py
mkdir
- # jupyter notebook的密码配置
c.NotebookApp.password = u'sha1:77ce2ee7e18e:70ed8bfb71351a0c50558e20a53427f157d76af8'
# jupyter notebook的IP配置
c.NotebookApp.ip = '192.168.35.131'
# jupyter notebook的端口配置
c.NotebookApp.port = 9999
# jupyter notebook的工作路径(必须提前建好目录)
c.NotebookApp.notebook_dir = '/root/JupyterNotebook'
# jupyter notebook打开浏览器配置
c.NotebookApp.open_browser = False
# jupyter notebook的https配置(我这里不配置)
c.NotebookApp.certfile = '/xxx/fullchain.pem'
c.NotebookApp.keyfile = '/xxxxx/privkey.key'
- 将$HOME/.jupyter/jupyternotebookconfig.json中的密码拷贝过来
- 官网给出的说法(json密码优先于配置密码)
-

-

-

-

-

-
- 使用https配置(官网)

-
- 启动jupyter notebook
- jupyter notebook --allow-root

-
- 访问网页http://192.168.35.131:9999

-
- 输入设置的密码(******)

-
- 后台启动jupyter notebook
- mkdir /var/log/jupyternotebook
nohup jupyter notebook --allow-root >> /var/log/jupyternotebook/jupyternohup.out 2>&1 &

-
-
- 登录并新建一个文件进行操作测试

-
- 进行测试操作

-
- 日志变更前与日志变更后

-
- 此时结束,后续使用文档后续写作
发布了45 篇原创文章 ·
获赞 9 ·
访问量 2260
转载自blog.csdn.net/adsszl_no_one/article/details/103749676
