pytest
pytest的官方文档地址: https://docs.pytest.org/en/latest/
pytest通过 pypi分发托管:https://pypi.org/project/pytest/
安装
pip3 install pytest
Pytest命令在安装pytest测试框架时默认生成于python安装目录Python37/Scripts/目录下。
Pytest单元测试框架并没有提供专门的断言方法,而是直接使用Python的assert进行断言。
测试文件命名规则
测试文件应当命名为:test_<something>.py或者<something>_test.py
测试函数、测试类方法应当命名为:test_<something>
测试类应当命名为:Test<Something>
测试文件和测试函数最好以test_开头,但如果先前编写的测试用例遵循的是其它命名规则,也可以修改默认的测试搜索规则。
脚本执行方式
终端客户端工具下执行脚本
在windows操作系统里,我们使用自带的命令提示符里来执行pytest命令及相关参数来运行脚本的操作。我们也可以自行安装cmder或者Git Bash工具,然后在其里面执行pytest命令及相关参数来运行脚本的操作。
对于linux和macos系统来说,直接使用其自带终端来执行pytest命令及相关参数来运行脚本的操作。
我们这里以windows操作系统里的Git Bash工具里作为例子讲解:
假设我们在D盘符根目录下创建一个test_one.py文件,其文件内容是:
def test_passing():
assert (1, 2, 3) == (1, 2, 3)
注:其测试用例执行结果是通过的。
首先我们用cd命令将当前目录变到D盘根目录下,然后通过“pytest test_one.py”命令执行test_one.py脚本文件:
yuandaping@yuandaping-PC MINGW64 /d
$ pytest test_one.py
============================= test session starts =============================
platform win32 -- Python 3.7.4, pytest-5.3.5, py-1.8.1, pluggy-0.13.1
rootdir: D:\
collected 1 item
test_one.py . [100%]
============================== 1 passed in 0.10s ==============================
注:test_one.py .这里有一个点号(.)表示:运行了一个测试用例,且测试通过。如果想查看详情,可以在pytest后面加上参数:-v或者—verbose选项。
yuandaping@yuandaping-PC MINGW64 /d
$ pytest -v test_one.py
============================= test session starts =============================
platform win32 -- Python 3.7.4, pytest-5.3.5, py-1.8.1, pluggy-0.13.1 -- d:\python37\python.exe
cachedir: .pytest_cache
rootdir: D:\
collecting ... collected 1 item
test_one.py::test_passing PASSED [100%]
============================== 1 passed in 0.01s ==============================
同理,我们再举例执行测试用例失败的情况:
假设我们在D盘符根目录下创建一个test_two.py文件,其文件内容是:
def test_passing():
assert (1, 2, 3) == (3, 2, 1)
首先我们用cd命令将当前目录变到D盘根目录下,然后通过“pytest test_two.py”命令执行test_two.py脚本文件:
yuandaping@yuandaping-PC MINGW64 /d
$ pytest test_two.py
============================= test session starts =============================
platform win32 -- Python 3.7.4, pytest-5.3.5, py-1.8.1, pluggy-0.13.1
rootdir: D:\
collected 1 item
test_two.py F [100%]
注:test_one.py F这里有一个字母(F)表示:运行了一个测试用例,但是测试失败。
如果这里是小写字母s表示一个测试被跳过不运行;
如果是小写字母x表示xfail,意味着预期失败,实际上也失败了;如果是大写字母X表示XPASS,意味着预期失败,但实际运行并没有失败。
================================== FAILURES ===================================
________________________________ test_passing _________________________________
def test_passing():
> assert (1, 2, 3) == (3, 2, 1) //每个失败的测试用例在行首都用一个>号来标识。
E assert (1, 2, 3) == (3, 2, 1) //以E开头的行是pytest提供的额外判定信息,用于帮助我们了解
E At index 0 diff: 1 != 3 异常的具体情况。
E Use -v to get the full diff
test_two.py:2: AssertionError
============================== 1 failed in 0.11s ==============================
yuandaping@yuandaping-PC MINGW64 /d
$ pytest -v test_two.py
============================= test session starts =============================
platform win32 -- Python 3.7.4, pytest-5.3.5, py-1.8.1, pluggy-0.13.1 -- d:\python37\python.exe
cachedir: .pytest_cache
rootdir: D:\
collecting ... collected 1 item
test_two.py::test_passing FAILED [100%]
================================== FAILURES ===================================
________________________________ test_passing _________________________________
def test_passing():
> assert (1, 2, 3) == (3, 2, 1)
E assert (1, 2, 3) == (3, 2, 1)
E At index 0 diff: 1 != 3
E Full diff:
E - (1, 2, 3)
E ? ^ ^
E + (3, 2, 1)
E ? ^ ^
注:脱字符(^)准确地指出了前后的区别。
test_two.py:2: AssertionError
============================== 1 failed in 0.02s ==============================
注:
1)pytest有一块专门的区域展示test_passing的失败信息,它能准确地指出失败的原因:index 0 is mismatch。重要的提示信息用红色字体显示(在彩色显示器上),以方便用户阅读。其中有一条提示指出,使用-v可以得到更完整的前后对比信息。
2)执行脚本的时候,也可以直接通过pytest命令里带上脚本文件所在的目录。
比如:$ pytest -v D:\\test_one.py
(windows操作系统的路径的反斜杠必须再使用转义字符\来原样输出)
如果不指定,pytest会搜索当前目录及其子目录中以test_开头或者以_test结尾的所有测试函数。如果指定某一个目录,则它会搜索此目录及其子目录中以以test_开头或者以_test结尾的所有测试函数。
3)如果明确一同执行多个测试函数,比如:$ pytest -v D:\\test_one.py D:\\test_two.py
多个脚本之间用空格分隔开来。
下面我们来逐句讲解pytest运行单个测试文件时的控制台输出信息:
1)platform win32 -- Python 3.7.4, pytest-5.3.5, py-1.8.1, pluggy-0.13.1 --
如果使用的windows操作系统,所显示的是platform win32,如果是Mac显示的是platform Darwin。接着显示的是python、pytest以及pytest包的版本。py和pluggy都是pytest包,用于pytest的实现。
2) rootdir: D:\ 表示当前起始目录是pytest搜索测试代码时最常使用的目录;
3)collected 1 item表示搜索范围内找到了一个测试条目。
4)test_one.py .表示测试文件,每个测试文件的测试情况只占据一行,一个点号表示一个测试用例已通过,如果有多个测试文件,多个点号表示多个测试用例均已通过。而failure(失败)、error(异常)、skip(跳过)、xfail(预期失败)、xpass(预期失败但通过)会被分别标记为:F、E、s、x、X。
5)============================== 1 passed in 0.01s ==============================
表示测试通过的数量是1,以及这段会话耗费的时间,如果存在未通过的测试用例,则会根据未通过的类型列举数量。
测试结果是测试人员了解测试始末的主要途径。在pytest中,测试函数可能返回多种结果,不只是通过或失败。
以下是可能出现的类型:
PASSED(.):测试通过
FAILED(F):测试失败(也有可能是XPASS状态与strict选项冲突造成的失败)
SKIPPED(s):测试未被执行。指定测试跳过执行,可以将测试标记为@pytest.mark.skip(),或者使用@pytest.mark.skipif()指定跳过测试的条件;
xfail(x):预期测试失败,并且确实失败。使用@pytest.mark.xfail()指定你认为会失败的测试用例;
XPASS(X):预期测试失败,但实际上运行通过,不符合预期;
ERROR(E):测试用例之外的代码触发了异常,可能由fixture引起,也可能由hook函数引起。
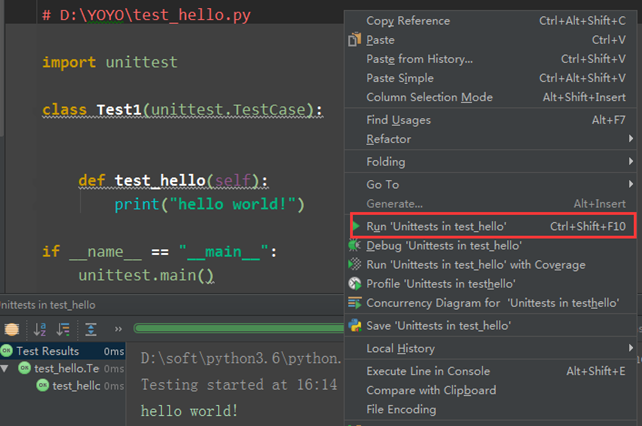
pycharm工具下执行脚本
pycharm设置pytest
Pycharm里面默认使用的test runner是Unittests,把它换为pytest。通过点击:file->Setting->Tools->Python Integrated Tools->Default test runner->选择pytest

改完之后,再重新建个脚本(注意是先改项目运行方式,再写代码才能出来),接下来右键运行就能出来pytest运行了
注:pytest是可以兼容unittest框架代码的,之前写的unittest用例也能用pytest框架去运行。
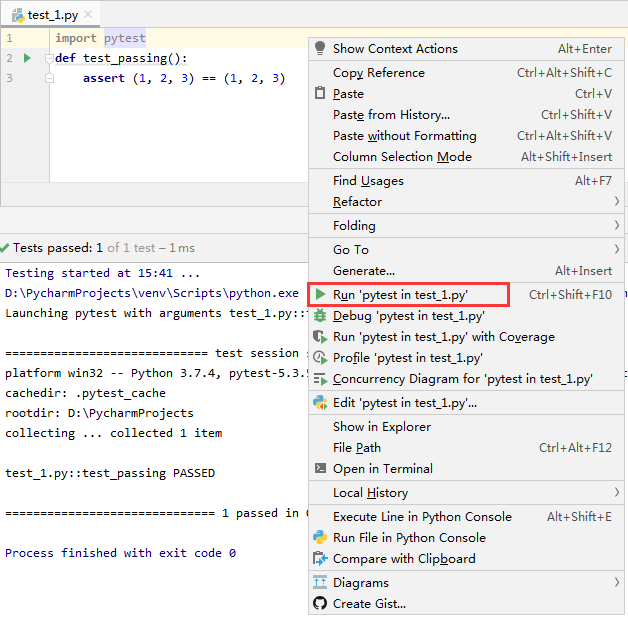
当pycharm工具设置好之后,再创建一个test_1.py的脚本,内容如下:
import pytest
def test_passing():
assert (1, 2, 3) == (1, 2, 3)
右键选择“ ”运行后的结果:
Testing started at 19:54 ...
D:\PycharmProjects\venv\Scripts\python.exe "D:\PyCharm 2019.3\plugins\python\helpers\pycharm\_jb_pytest_runner.py" --target test_1.py::test_passing
Launching pytest with arguments test_1.py::test_passing in D:\PycharmProjects
============================= test session starts =============================
platform win32 -- Python 3.7.4, pytest-5.3.5, py-1.8.1, pluggy-0.13.1 -- D:\PycharmProjects\venv\Scripts\python.exe
cachedir: .pytest_cache
rootdir: D:\PycharmProjects
collecting ... collected 1 item
test_1.py::test_passing PASSED [100%]
============================== 1 passed in 0.01s ==============================
Process finished with exit code 0
注:其测试用例执行结果是通过的。
同理,我们再举例执行测试用例失败的情况:
import pytest
def test_passing():
assert (1, 2, 3) == (3, 2, 1)
右键选择“ ”运行后的结果:
Testing started at 19:58 ...
D:\PycharmProjects\venv\Scripts\python.exe "D:\PyCharm 2019.3\plugins\python\helpers\pycharm\_jb_pytest_runner.py" --target test_1.py::test_passing
Launching pytest with arguments test_1.py::test_passing in D:\PycharmProjects
============================= test session starts =============================
platform win32 -- Python 3.7.4, pytest-5.3.5, py-1.8.1, pluggy-0.13.1 -- D:\PycharmProjects\venv\Scripts\python.exe
cachedir: .pytest_cache
rootdir: D:\PycharmProjects
collecting ... collected 1 item
test_1.py::test_passing FAILED [100%]
test_1.py:1 (test_passing)
(1, 2, 3) != (3, 2, 1)
Expected :(3, 2, 1)
Actual :(1, 2, 3)
<Click to see difference>
def test_passing():
> assert (1, 2, 3) == (3, 2, 1)
E assert (1, 2, 3) == (3, 2, 1)
test_1.py:3: AssertionError
================================== FAILURES ===================================
________________________________ test_passing _________________________________
def test_passing():
> assert (1, 2, 3) == (3, 2, 1)
E assert (1, 2, 3) == (3, 2, 1)
test_1.py:3: AssertionError
============================== 1 failed in 0.03s ==============================
Process finished with exit code 0
Assertion failed
Assertion failed
pycharm运行三种方式
1)以xx.py脚本方式直接执行,当写的代码里面没用到unittest和pytest框架时,并且脚本名称不是以test_开头命名的,此时pycharm会以xx.py脚本方式运行。

2)当脚本命名为test_xx.py时,用到unittest框架,此时运行代码,pycharm会自动识别到以unittest方式运行
3)第三种方式就是“pycharm设置pytest”章节所讲的,关于当脚本命名为test_xx.py时,用到pytest框架,此时运行代码,pycharm会自动识别到以pytest方式运行。
使用命令行选项
我们可以使用pytest –help查看全部选项。下面我们讲解常用的pytest命令选项。
--collect-only筛选选项
使用此选项可以展示在给定的配置下哪些测试用例会被运行。意思是在测试运行之前,检查选中的测试用例是否符合预期。
yuandaping@yuandaping-PC MINGW64 /d
$ pytest --collect-only test_one.py test_two.py //这里明确了两个测试用例文件名
============================= test session starts =============================
platform win32 -- Python 3.7.4, pytest-5.3.5, py-1.8.1, pluggy-0.13.1
rootdir: D:\
collected 2 items
<Module test_one.py>
<Function test_passing>
<Module test_two.py>
<Function test_passing>
============================ no tests ran in 0.08s ============================
yuandaping@yuandaping-PC MINGW64 /d
$ pytest --collect-only test_* //这里使用了通配符星号*来模糊匹配测试用例文件名
============================= test session starts =============================
platform win32 -- Python 3.7.4, pytest-5.3.5, py-1.8.1, pluggy-0.13.1
rootdir: D:\
collected 2 items
<Module test_one.py>
<Function test_passing>
<Module test_two.py>
<Function test_passing>
============================ no tests ran in 0.01s ============================
-v(--verbose)选项
使用此选项,输出的信息会更详细。最明显的区别就是每个文件中的每个测试用例都占一行(先前是每个文件占一行),测试的名字和结果都会显示出来,而不仅仅是一个点或字符。
yuandaping@yuandaping-PC MINGW64 /d
$ pytest -v test_* //-v可以显示执行的文件里的每个函数的运行结果信息
============================= test session starts =============================
platform win32 -- Python 3.7.4, pytest-5.3.5, py-1.8.1, pluggy-0.13.1 -- d:\python37\python.exe
cachedir: .pytest_cache
rootdir: D:\
collecting ... collected 3 items
test_one.py::test_passing PASSED [ 33%]
test_three.py::test_passing FAILED [ 66%]
test_two.py::test_passing FAILED [100%]
================================== FAILURES ===================================
________________________________ test_passing _________________________________
def test_passing():
> assert (1, 2, 3) == (1, 1, 1)
E assert (1, 2, 3) == (1, 1, 1)
E At index 1 diff: 2 != 1
E Full diff:
E - (1, 2, 3)
E ? ^ ^
E + (1, 1, 1)
E ? ^ ^
test_three.py:3: AssertionError
________________________________ test_passing _________________________________
def test_passing():
> assert (1, 2, 3) == (3, 2, 1)
E assert (1, 2, 3) == (3, 2, 1)
E At index 0 diff: 1 != 3
E Full diff:
E - (1, 2, 3)
E ? ^ ^
E + (3, 2, 1)
E ? ^ ^
test_two.py:3: AssertionError
========================= 2 failed, 1 passed in 0.03s =========================
-k表达式快速定位选项
此选项允许你使用表达式指定希望运行的测试用例。如果某测试名是唯一的,或者多个测试名的前缀或后缀相同,那么可以使用表达式来快速定位。表达式中可以包含and、or、not。
假设希望选中测试用例里含有test_passing()和test_defaults()函数的文件,那么可以使用—collect-only验证筛选情况:
$ pytest -k "passing or defaults" --collect-only
简单的说就是一种关键字模糊匹配查询检索符合预期要求的测试用例文件名
$ pytest –v -k "passing or defaults"
上面的命令是通过-k参数模糊匹配出来的测试用例正常运行及结果的详细情况。
--tb=style捕捉到失败时输出信息的显示方式选项
我推荐的style类型有short、line、no。
short模式仅输出assert断言的一行以及系统判定内容(不显示上下文);
line模式只使用一行输出显示所有的错误信息;
no模式则直接屏蔽全部回溯信息。
--tb=no模式直接屏蔽全部错误回溯信息
如果不想看到执行所有测试用例有断言失败的测试用例的错误信息,则使用此选项。
yuandaping@yuandaping-PC MINGW64 /d
$ pytest --tb=no test_*
============================= test session starts =============================
platform win32 -- Python 3.7.4, pytest-5.3.5, py-1.8.1, pluggy-0.13.1
rootdir: D:\
collected 2 items
test_one.py . [ 50%]
test_two.py F [100%]
-- Docs: https://docs.pytest.org/en/latest/warnings.html
=================== 1 failed, 1 passed, 1 warning in 0.02s ====================
--tb=line模式只使用一行输出所有的错误信息
使用此选项可以告诉我们错误的位置,有时候这已经足够了(特别是在运行大量测试用例的情况下,可以用它发现失败的共性)。
yuandaping@yuandaping-PC MINGW64 /d
$ pytest --tb=line test_*
============================= test session starts =============================
platform win32 -- Python 3.7.4, pytest-5.3.5, py-1.8.1, pluggy-0.13.1
rootdir: D:\
collected 3 items
test_one.py . [ 33%]
test_three.py F [ 66%]
test_two.py F [100%]
================================== FAILURES ===================================
D:\test_three.py:3: assert (1, 2, 3) == (1, 1, 1)
D:\test_two.py:3: assert (1, 2, 3) == (3, 2, 1)
========================= 2 failed, 1 passed in 0.03s =========================
--tb=short或者—tb=long模式输出错误的回溯信息与不带任何选项默认的差不多
这两个选项输出错误信息内容和命令不带任何选项时基本一致。
yuandaping@yuandaping-PC MINGW64 /d
$ pytest --tb=short test_*
============================= test session starts =============================
platform win32 -- Python 3.7.4, pytest-5.3.5, py-1.8.1, pluggy-0.13.1
rootdir: D:\
collected 3 items
test_one.py . [ 33%]
test_three.py F [ 66%]
test_two.py F [100%]
================================== FAILURES ===================================
________________________________ test_passing _________________________________
test_three.py:3: in test_passing
assert (1, 2, 3) == (1, 1, 1)
E assert (1, 2, 3) == (1, 1, 1)
E At index 1 diff: 2 != 1
E Use -v to get the full diff
________________________________ test_passing _________________________________
test_two.py:3: in test_passing
assert (1, 2, 3) == (3, 2, 1)
E assert (1, 2, 3) == (3, 2, 1)
E At index 0 diff: 1 != 3
E Use -v to get the full diff
========================= 2 failed, 1 passed in 0.03s =========================
yuandaping@yuandaping-PC MINGW64 /d
$ pytest --tb=long test_*
============================= test session starts =============================
platform win32 -- Python 3.7.4, pytest-5.3.5, py-1.8.1, pluggy-0.13.1
rootdir: D:\
collected 3 items
test_one.py . [ 33%]
test_three.py F [ 66%]
test_two.py F [100%]
================================== FAILURES ===================================
________________________________ test_passing _________________________________
def test_passing():
> assert (1, 2, 3) == (1, 1, 1)
E assert (1, 2, 3) == (1, 1, 1)
E At index 1 diff: 2 != 1
E Use -v to get the full diff
test_three.py:3: AssertionError
________________________________ test_passing _________________________________
def test_passing():
> assert (1, 2, 3) == (3, 2, 1)
E assert (1, 2, 3) == (3, 2, 1)
E At index 0 diff: 1 != 3
E Use -v to get the full diff
test_two.py:3: AssertionError
========================= 2 failed, 1 passed in 0.03s =========================
-m标记选项
标记用于标记测试并分组,以便快速选中并运行。假设希望选中测试用例里含有test_passing()和test_defaults()函数的文件,它们甚至都不在同一个文件里,如果你希望同时选中它们,那么可以预先做好标记。
使用什么标记名由你自己决定,假设希望使用run_these_please,则可以使用@pytest.mark.run_these_please这样的装饰器来做标记。此时就需要对待选中的文件中的这两个函数都做上同样的标记。即有相同标记的测试集合,可以一起运行。
测试用例文件里代码增加此装饰器代码:
import pytest
@pytest.mark.run_these_please
def test_passing():
assert (1, 2, 3) == (1, 2, 2)
此时我们就可以使用$ pytest -v -m run_these_please命令就可以同时运行含有test_passing()和test_defaults()函数的文件。
注:使用-m选项可以用表达式指定多个标记名。
使用-m "mark1 and mark2"可以同时选中带有这两个标记的所有测试用例。
使用-m "mark1 and not mark2"则会选择mark1的测试用例,而过滤掉带有mark2的测试用例。
使用-m "mark1 or mark2"则会选择带有mark1或者mark2的所有测试用例。
-x遇到失败时立即停止整个会话选项
正常情况下,pytest会运行每一个搜索到的测试用例。如果某个测试函数被断言失败,或者触发了外部异常,则该测试用例的运行就会到此为止,pytest将其标记为失败后会继续运行下一个测试用例。通常,这就是我们期望的运行模式。但是在debug时,我们会希望遇到失败时立即停止整个会话,这时-x选项就派上用场了。
yuandaping@yuandaping-PC MINGW64 /d
$ pytest -x test_*
============================= test session starts =============================
platform win32 -- Python 3.7.4, pytest-5.3.5, py-1.8.1, pluggy-0.13.1
rootdir: D:\
collected 2 items
test_one.py . [ 50%]
test_two.py F [100%]
================================== FAILURES ===================================
________________________________ test_passing _________________________________
@pytest.mark.run_these_please
def test_passing():
> assert (1, 2, 3) == (3, 2, 1)
E assert (1, 2, 3) == (3, 2, 1)
E At index 0 diff: 1 != 3
E Use -v to get the full diff
test_two.py:4: AssertionError
!!!!!!!!!!!!!!!!!!!!!!!!!! stopping after 1 failures !!!!!!!!!!!!!!!!!!!!!!!!!!
=================== 1 failed, 1 passed, 1 warning in 0.02s ====================
stopping after 1 failures提示我们测试中断了。如果后续还有待执行的测试用例将不会继续执行下去了。
如果没有-x选项,那么所有的测试用例都会被执行,即使遇到断言失败的测试用例,如果还有后续的测试用例,它仍然会继续往下执行。
-maxfail=num遇到失败几次后再停止整个会话选项
-x选项的特点是一旦遇到测试失败,则会全局停止执行后续的测试用例。假设你允许pytest遇到失败几次后再停止执行后续的测试用例,则可以使用此选项来明确指定可以失败几次。
yuandaping@yuandaping-PC MINGW64 /d
$ pytest --maxfail=1 test_*
============================= test session starts =============================
platform win32 -- Python 3.7.4, pytest-5.3.5, py-1.8.1, pluggy-0.13.1
rootdir: D:\
collected 2 items
test_one.py . [ 50%]
test_two.py F [100%]
================================== FAILURES ===================================
________________________________ test_passing _________________________________
def test_passing():
> assert (1, 2, 3) == (3, 2, 1)
E assert (1, 2, 3) == (3, 2, 1)
E At index 0 diff: 1 != 3
E Use -v to get the full diff
test_two.py:3: AssertionError
!!!!!!!!!!!!!!!!!!!!!!!!!! stopping after 1 failures !!!!!!!!!!!!!!!!!!!!!!!!!!
========================= 1 failed, 1 passed in 0.19s =========================
-s测试运行时输出某些结果选项
-s选项允许终端在测试运行时输出某些结果,包括任何符合标准的输出流信息。-s等价于—capture=no选项。正常情况下,所有的测试输出都会被捕获。
--capture=('fd', 'sys', 'no')只有这三种参数值,fd表示若文件描述符为1或者2,则会被输出至临时文件中;sys表示将sys.stdout/stderr将被输出至内存。
-lf(--last-failed)定位到最后一个失败的测试用例选项
当一个或多个测试失败时,我们常常希望能够定位到最后一个失败的测试用例重新运行。
我们这里有三个测试用例一起执行:
yuandaping@yuandaping-PC MINGW64 /d
$ pytest test_*
============================= test session starts =============================
platform win32 -- Python 3.7.4, pytest-5.3.5, py-1.8.1, pluggy-0.13.1
rootdir: D:\
collected 3 items
test_one.py . [ 33%]
test_three.py F [ 66%]
test_two.py F [100%]
================================== FAILURES ===================================
________________________________ test_passing _________________________________
def test_passing():
> assert (1, 2, 3) == (1, 1, 1)
E assert (1, 2, 3) == (1, 1, 1)
E At index 1 diff: 2 != 1
E Use -v to get the full diff
test_three.py:3: AssertionError
________________________________ test_passing _________________________________
def test_passing():
> assert (1, 2, 3) == (3, 2, 1)
E assert (1, 2, 3) == (3, 2, 1)
E At index 0 diff: 1 != 3
E Use -v to get the full diff
test_two.py:3: AssertionError
========================= 2 failed, 1 passed in 0.03s =========================
而加上—lf参数选项后,则就会显示最后一个失败的测试用例及其错误信息。
yuandaping@yuandaping-PC MINGW64 /d
$ pytest --lf test_*
============================= test session starts =============================
platform win32 -- Python 3.7.4, pytest-5.3.5, py-1.8.1, pluggy-0.13.1
rootdir: D:\
collected 3 items / 2 deselected / 1 selected
run-last-failure: rerun previous 1 failure
test_two.py F [100%]
================================== FAILURES ===================================
________________________________ test_passing _________________________________
def test_passing():
> assert (1, 2, 3) == (3, 2, 1)
E assert (1, 2, 3) == (3, 2, 1)
E At index 0 diff: 1 != 3
E Use -v to get the full diff
test_two.py:3: AssertionError
======================= 1 failed, 2 deselected in 0.17s =======================
-ff(--failed-first)先执行所有的失败的测试用例选项
yuandaping@yuandaping-PC MINGW64 /d
$ pytest --ff test_*
============================= test session starts =============================
platform win32 -- Python 3.7.4, pytest-5.3.5, py-1.8.1, pluggy-0.13.1
rootdir: D:\
collected 3 items
run-last-failure: rerun previous 2 failures first
test_three.py F [ 33%]
test_two.py F [ 66%]
test_one.py . [100%]
================================== FAILURES ===================================
________________________________ test_passing _________________________________
def test_passing():
> assert (1, 2, 3) == (1, 1, 1)
E assert (1, 2, 3) == (1, 1, 1)
E At index 1 diff: 2 != 1
E Use -v to get the full diff
test_three.py:3: AssertionError
________________________________ test_passing _________________________________
def test_passing():
> assert (1, 2, 3) == (3, 2, 1)
E assert (1, 2, 3) == (3, 2, 1)
E At index 0 diff: 1 != 3
E Use -v to get the full diff
test_two.py:3: AssertionError
========================= 2 failed, 1 passed in 0.03s =========================
-q(--quiet)简化运行测试用例输出信息选项
该选项与-v选项的作用相反,简化输出信息。我喜欢将-q和—tb=line(仅打印异常的代码位置)搭配使用。
yuandaping@yuandaping-PC MINGW64 /d
$ pytest -q test_*
.FF [100%]
================================== FAILURES ===================================
________________________________ test_passing _________________________________
def test_passing():
> assert (1, 2, 3) == (1, 1, 1)
E assert (1, 2, 3) == (1, 1, 1)
E At index 1 diff: 2 != 1
E Full diff:
E - (1, 2, 3)
E ? ^ ^
E + (1, 1, 1)
E ? ^ ^
test_three.py:3: AssertionError
________________________________ test_passing _________________________________
def test_passing():
> assert (1, 2, 3) == (3, 2, 1)
E assert (1, 2, 3) == (3, 2, 1)
E At index 0 diff: 1 != 3
E Full diff:
E - (1, 2, 3)
E ? ^ ^
E + (3, 2, 1)
E ? ^ ^
test_two.py:3: AssertionError
2 failed, 1 passed in 0.03s
yuandaping@yuandaping-PC MINGW64 /d
$ pytest -q --tb=line test_*
.FF [100%]
================================== FAILURES ===================================
D:\test_three.py:3: assert (1, 2, 3) == (1, 1, 1)
D:\test_two.py:3: assert (1, 2, 3) == (3, 2, 1)
2 failed, 1 passed in 0.03s
-l(--showlocals)局部变量及其值显示出来选项
使用此选项,失败测试用例由于被堆栈追踪,所以局部变量及其值都会显示出来。
到目前为止,我们还没有包含局部变量的失败测试。
--duration=N可以加快测试节奏的选项
其不关心测试是如何进行的,只统计测试过程中哪几个阶段是最慢的(包括每个测试用例的call、setup、teardown过程)。它会显示最慢的N个阶段,耗时越长越靠前。如果使用—duration=0,则会将所有阶段按耗时从长到短排序后显示。
--version显示当前pytest版本及安装目录选项
yuandaping@yuandaping-PC MINGW64 /d
$ pytest --version
This is pytest version 5.3.5, imported from d:\python37\lib\site-packages\pytest\__init__.py
-h(--help)帮助信息选项
其不断能展示原生pytest的用法,还能展示新添加的插件的选项和用法。
yuandaping@yuandaping-PC MINGW64 /d
$ pytest -h
usage: pytest [options] [file_or_dir] [file_or_dir] [...] //基本用法
positional arguments:
file_or_dir
general:
-k EXPRESSION only run tests which match the given substring
expression. An expression is a python evaluatable
expression where all names are substring-matched against
test names and their parent classes. Example: -k
'test_method or test_other' matches all test functions
and classes whose name contains 'test_method' or
'test_other', while -k 'not test_method' matches those
that don't contain 'test_method' in their names. -k 'not
test_method and not test_other' will eliminate the
matches. Additionally keywords are matched to classes
and functions containing extra names in their
'extra_keyword_matches' set, as well as functions which
have names assigned directly to them.
-m MARKEXPR only run tests matching given mark expression. example:
-m 'mark1 and not mark2'.
--markers show markers (builtin, plugin and per-project ones).
-x, --exitfirst exit instantly on first error or failed test.
--maxfail=num exit after first num failures or errors.
--strict-markers, --strict
markers not registered in the `markers` section of the
configuration file raise errors.
-c file load configuration from `file` instead of trying to
locate one of the implicit configuration files.
--continue-on-collection-errors
Force test execution even if collection errors occur.
--rootdir=ROOTDIR Define root directory for tests. Can be relative path:
'root_dir', './root_dir', 'root_dir/another_dir/';
absolute path: '/home/user/root_dir'; path with
variables: '$HOME/root_dir'.
--fixtures, --funcargs
show available fixtures, sorted by plugin appearance
(fixtures with leading '_' are only shown with '-v')
--fixtures-per-test show fixtures per test
--import-mode={prepend,append}
prepend/append to sys.path when importing test modules,
default is to prepend.
--pdb start the interactive Python debugger on errors or
KeyboardInterrupt.
--pdbcls=modulename:classname
start a custom interactive Python debugger on errors.
For example:
--pdbcls=IPython.terminal.debugger:TerminalPdb
--trace Immediately break when running each test.
--capture=method per-test capturing method: one of fd|sys|no.
-s shortcut for --capture=no.
--runxfail report the results of xfail tests as if they were not
marked
--lf, --last-failed rerun only the tests that failed at the last run (or all
if none failed)
--ff, --failed-first run all tests but run the last failures first. This may
re-order tests and thus lead to repeated fixture
setup/teardown
--nf, --new-first run tests from new files first, then the rest of the
tests sorted by file mtime
--cache-show=[CACHESHOW]
show cache contents, don't perform collection or tests.
Optional argument: glob (default: '*').
--cache-clear remove all cache contents at start of test run.
--lfnf={all,none}, --last-failed-no-failures={all,none}
which tests to run with no previously (known) failures.
--sw, --stepwise exit on test failure and continue from last failing test
next time
--stepwise-skip ignore the first failing test but stop on the next
failing test
reporting:
--durations=N show N slowest setup/test durations (N=0 for all).
-v, --verbose increase verbosity.
-q, --quiet decrease verbosity.
--verbosity=VERBOSE set verbosity. Default is 0.
-r chars show extra test summary info as specified by chars:
(f)ailed, (E)rror, (s)kipped, (x)failed, (X)passed,
(p)assed, (P)assed with output, (a)ll except passed
(p/P), or (A)ll. (w)arnings are enabled by default (see
--disable-warnings).
--disable-warnings, --disable-pytest-warnings
disable warnings summary
-l, --showlocals show locals in tracebacks (disabled by default).
--tb=style traceback print mode (auto/long/short/line/native/no).
--show-capture={no,stdout,stderr,log,all}
Controls how captured stdout/stderr/log is shown on
failed tests. Default is 'all'.
--full-trace don't cut any tracebacks (default is to cut).
--color=color color terminal output (yes/no/auto).
--pastebin=mode send failed|all info to bpaste.net pastebin service.
--junit-xml=path create junit-xml style report file at given path.
--junit-prefix=str prepend prefix to classnames in junit-xml output
--result-log=path DEPRECATED path for machine-readable result log.
collection:
--collect-only, --co only collect tests, don't execute them.
--pyargs try to interpret all arguments as python packages.
--ignore=path ignore path during collection (multi-allowed).
--ignore-glob=path ignore path pattern during collection (multi-allowed).
--deselect=nodeid_prefix
deselect item during collection (multi-allowed).
--confcutdir=dir only load conftest.py's relative to specified dir.
--noconftest Don't load any conftest.py files.
--keep-duplicates Keep duplicate tests.
--collect-in-virtualenv
Don't ignore tests in a local virtualenv directory
--doctest-modules run doctests in all .py modules
--doctest-report={none,cdiff,ndiff,udiff,only_first_failure}
choose another output format for diffs on doctest
failure
--doctest-glob=pat doctests file matching pattern, default: test*.txt
--doctest-ignore-import-errors
ignore doctest ImportErrors
--doctest-continue-on-failure
for a given doctest, continue to run after the first
failure
test session debugging and configuration:
--basetemp=dir base temporary directory for this test run.(warning:
this directory is removed if it exists)
--version display pytest lib version and import information.
-h, --help show help message and configuration info
-p name early-load given plugin module name or entry point
(multi-allowed). To avoid loading of plugins, use the
`no:` prefix, e.g. `no:doctest`.
--trace-config trace considerations of conftest.py files.
--debug store internal tracing debug information in
'pytestdebug.log'.
-o OVERRIDE_INI, --override-ini=OVERRIDE_INI
override ini option with "option=value" style, e.g. `-o
xfail_strict=True -o cache_dir=cache`.
--assert=MODE Control assertion debugging tools. 'plain' performs no
assertion debugging. 'rewrite' (the default) rewrites
assert statements in test modules on import to provide
assert expression information.
--setup-only only setup fixtures, do not execute tests.
--setup-show show setup of fixtures while executing tests.
--setup-plan show what fixtures and tests would be executed but don't
execute anything.
pytest-warnings:
-W PYTHONWARNINGS, --pythonwarnings=PYTHONWARNINGS
set which warnings to report, see -W option of python
itself.
logging:
--no-print-logs disable printing caught logs on failed tests.
--log-level=LOG_LEVEL
logging level used by the logging module
--log-format=LOG_FORMAT
log format as used by the logging module.
--log-date-format=LOG_DATE_FORMAT
log date format as used by the logging module.
--log-cli-level=LOG_CLI_LEVEL
cli logging level.
--log-cli-format=LOG_CLI_FORMAT
log format as used by the logging module.
--log-cli-date-format=LOG_CLI_DATE_FORMAT
log date format as used by the logging module.
--log-file=LOG_FILE path to a file when logging will be written to.
--log-file-level=LOG_FILE_LEVEL
log file logging level.
--log-file-format=LOG_FILE_FORMAT
log format as used by the logging module.
--log-file-date-format=LOG_FILE_DATE_FORMAT
log date format as used by the logging module.
--log-auto-indent=LOG_AUTO_INDENT
Auto-indent multiline messages passed to the logging
module. Accepts true|on, false|off or an integer.
[pytest] ini-options in the first pytest.ini|tox.ini|setup.cfg file found:
markers (linelist): markers for test functions
empty_parameter_set_mark (string):
default marker for empty parametersets
norecursedirs (args): directory patterns to avoid for recursion
testpaths (args): directories to search for tests when no files or
directories are given in the command line.
usefixtures (args): list of default fixtures to be used with this project
python_files (args): glob-style file patterns for Python test module
discovery
python_classes (args):
prefixes or glob names for Python test class discovery
python_functions (args):
prefixes or glob names for Python test function and
method discovery
disable_test_id_escaping_and_forfeit_all_rights_to_community_support (bool):
disable string escape non-ascii characters, might cause
unwanted side effects(use at your own risk)
console_output_style (string):
console output: "classic", or with additional progress
information ("progress" (percentage) | "count").
xfail_strict (bool): default for the strict parameter of xfail markers when
not given explicitly (default: False)
enable_assertion_pass_hook (bool):
Enables the pytest_assertion_pass hook.Make sure to
delete any previously generated pyc cache files.
junit_suite_name (string):
Test suite name for JUnit report
junit_logging (string):
Write captured log messages to JUnit report: one of
no|system-out|system-err
junit_log_passing_tests (bool):
Capture log information for passing tests to JUnit
report:
junit_duration_report (string):
Duration time to report: one of total|call
junit_family (string):
Emit XML for schema: one of legacy|xunit1|xunit2
doctest_optionflags (args):
option flags for doctests
doctest_encoding (string):
encoding used for doctest files
cache_dir (string): cache directory path.
filterwarnings (linelist):
Each line specifies a pattern for
warnings.filterwarnings. Processed after
-W/--pythonwarnings.
log_print (bool): default value for --no-print-logs
log_level (string): default value for --log-level
log_format (string): default value for --log-format
log_date_format (string):
default value for --log-date-format
log_cli (bool): enable log display during test run (also known as "live
logging").
log_cli_level (string):
default value for --log-cli-level
log_cli_format (string):
default value for --log-cli-format
log_cli_date_format (string):
default value for --log-cli-date-format
log_file (string): default value for --log-file
log_file_level (string):
default value for --log-file-level
log_file_format (string):
default value for --log-file-format
log_file_date_format (string):
default value for --log-file-date-format
log_auto_indent (string):
default value for --log-auto-indent
faulthandler_timeout (string):
Dump the traceback of all threads if a test takes more
than TIMEOUT seconds to finish. Not available on
Windows.
addopts (args): extra command line options
minversion (string): minimally required pytest version
environment variables:
PYTEST_ADDOPTS extra command line options
PYTEST_PLUGINS comma-separated plugins to load during startup
PYTEST_DISABLE_PLUGIN_AUTOLOAD set to disable plugin auto-loading
PYTEST_DEBUG set to enable debug tracing of pytest's internals
to see available markers type: pytest --markers
to see available fixtures type: pytest --fixtures
(shown according to specified file_or_dir or current dir if not specified; fixtures with leading '_' are only shown with the '-v' option
帮助信息最后一句话的意思是:显示结果取决于指定的文件或目录,未指定的则默认使用当前目录和文件。这句话非常重要,选项、marker、fixture都会因为目录的变化而发生变化。这是因为pytest有可能在某个叫conftest.py的文件中搜索到hook函数(新增命令行选项)、新的fixture定义及新的marker的定义。
Pytest允许你在conftest.py和测试文件中自定义测试行为,其作用域仅仅是某个项目,甚至只是某个项目的测试子集。
编写测试函数
测试示例程序
如果你的测试目录没有按照规范来建立,可以下载该项目的源代码包:https://pragprog.com/titles/bopytest/source_code,在后续工作中,可以按照类似结构存放测试文件。
下面将以Tasks项目来演示如何为python程序包编写测试。Tasks是一个包含同名命令行工具的python程序包。
首先我们来讲解一下Tasks项目的文件结构,有助于我们理解每个文件的用处及项目结构规范的标准。
项目tasks_proj根目录结构展示了测试文件与整个项目的关系,其中有几个关键的文件值得我们注意:conftest.py、pytest.ini、__init__.py、setup.py,它们在测试中发挥重要作用。
所有的测试都放在tests文件夹里,与包含程序源码的src文件夹分开。这并非是pytest的硬性要求,而是一个很好的习惯。
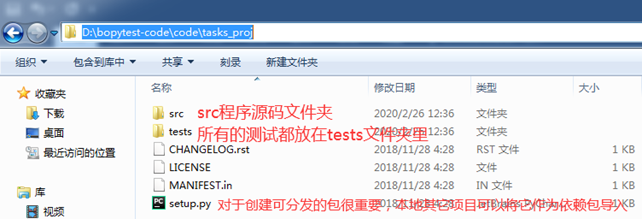
功能测试和单元测试放在不同的目录下,这也不是硬性规定,但这样做可以让你更方便地分别运行两类测试。我习惯将这两类测试分开放,因为功能测试只会在改变系统功能时才有可能发生中断异常,而单元测试的中断在代码重构、业务逻辑实现期间都有可能发生。

pytest.ini和conftest.py文件是可选的。pytest.py保存了pytest在该项目下的特定配置。项目中顶多包含一个配置文件,其中的指令可以调节pytest的工作行为,例如配置常用的命令行选项列表。conftest.py是pytest的“本地插件库”,其中可以包含hook函数和fixture。同一个项目内可以包含多个conftest.py文件。例如在tests目录下有一个,在tests的每个子目录下也可以各有一个conftest.py文件。
hook函数可以将自定义逻辑引入pytest,用于改善pytest的执行流程;fixture则是一些用于测试前后执行配置及销毁逻辑的外壳函数,可以传递测试中用到的资源。
项目目录中包含两类__init__.py文件,一类出现在src目录下,一类出现在tests目录下。

tests/func和tests/unit两个测试文件夹都分别有一个__init__.py都是空文件,它们的作用是给pytest提供搜索路径,找到测试根目录以及pytest.ini文件。
本地安装Tasks项目程序包
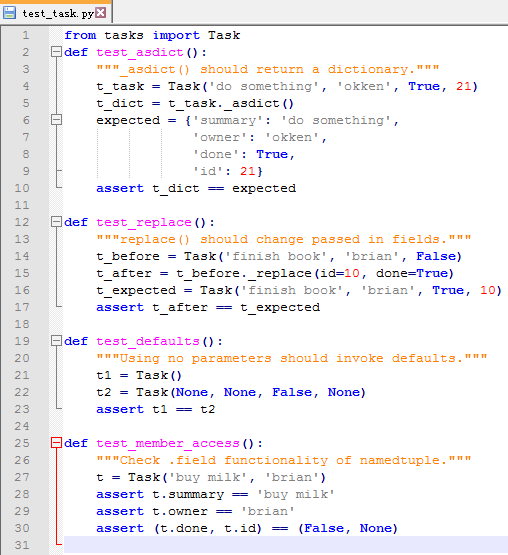
下图为\tasks_proj\tests\unit\test_tasks.py文件源码:
测试中如果希望使用import tasks或者from tasks import something,最好的方式是在本地使用pip安装tasks包。包的根目录包含一个setup.py文件,pip可以直接使用。
可以切换到tasks_proj根目录,运行pip3 install .或pip3 install –e .来安装tasks包,也可以在上层目录使用:pip3 install –e tasks_proj来安装tasks包。
如果仅仅是测试tasks包,就不需要带-e选项,但是,如果安装后希望修改源码重新安装,就需要使用-e选项。
yuandaping@yuandaping-PC MINGW64 /d/bopytest-code/code
$ pip3 install -e tasks_proj/
Obtaining file:///D:/bopytest-code/code/tasks_proj
Collecting click
Downloading Click-7.0-py2.py3-none-any.whl (81 kB)
Collecting tinydb
Downloading tinydb-3.15.2-py2.py3-none-any.whl (17 kB)
Requirement already satisfied: six in d:\python37\lib\site-packages (from tasks==0.1.0) (1.12.0)
Installing collected packages: click, tinydb, tasks
Running setup.py develop for tasks
Successfully installed click-7.0 tasks tinydb-3.15.2
现在来运行测试一下效果:
yuandaping@yuandaping-PC MINGW64 /d/bopytest-code/code/tasks_proj/tests/unit
$ pytest -v test_task.py
============================= test session starts =============================
platform win32 -- Python 3.7.4, pytest-5.3.5, py-1.8.1, pluggy-0.13.1 -- d:\python37\python.exe
cachedir: .pytest_cache
rootdir: D:\bopytest-code\code\tasks_proj\tests, inifile: pytest.ini
collecting ... collected 4 items
test_task.py::test_asdict PASSED [ 25%]
test_task.py::test_replace PASSED [ 50%]
test_task.py::test_defaults PASSED [ 75%]
test_task.py::test_member_access PASSED [100%]
============================== 4 passed in 0.02s ==============================
import语句执行成功,说明tasks包已正常安装。接下来的测试就可以使用import tasks了,下面来编写一些测试用例。
使用assert声明
用pytest编写测试时,若需要传递测试失败信息,则可以直接使用python自带的assert关键字,这样做很方便,也是许多开发者选择pytest的原因。
如果使用其他测试框架,则可能会看到许多以assert开头的函数。比如说unittest单元测试框架就是以assert开头的函数。
pytest允许在assert关键字后面添加任何表达式。如果表达式的值,通过布尔类型转换后等于False,则意味着测试失败。
pytest有一个重要功能时可以重写assert关键字。Pytest会截断对原生assert的调用,替换为pytest定义的assert,从而提供更多的失败信息和细节。
使用marker标记测试函数
pytest提供了标记机制,允许你使用marker对测试函数做标记。一个测试函数可以有多个marker,一个marker也可以用来标记多个测试函数。
讲解marker的作用需要看实际的例子。比如我们选一部分测试作为冒烟测试,以了解当前系统中是否存在大的缺陷。通常冒烟测试不会包含全套测试,只选择可以快速出结果的测试子集,让开发者对系统健康状况有一个大致的了解。
为了把选定的测试加入冒烟测试,可以对它们添加@pytest.mark.smoke装饰器。
具体命令的使用见:-m标记选项章节。
使用skip或skipif跳过测试
pytest自身内置了一些标记:skip、skipif、xfail。
skip和skipif允许你跳过不希望运行的测试。要跳过某个测试,只需要简单地在测试函数上方添加装饰器:@pytest.mark.skip()或者@pytest.mark.skipif()接口。它们两者的区别是skipif标记可以给要跳过的测试添加理由和条件。skipif()的判定条件可以是任何python表达式。
无论是skip还是skipif。我都写上了跳过的理由(尽管skip并不要求这样做)。我习惯在使用他们时都写清楚理由。就是在括号里写理由,比如:@pytest.mark.skip(reason=’理由’)或者@pytest.mark.skipif(表达式)
使用xfail标记预期会失败的测试
使用xfail标记则告诉pytest运行此测试,但我们预期它会失败。
运行测试子集
运行测试子集有很多种方式,不但可以选择运行某个目录、文件、类中的测试,还可以选择运行某一个测试用例(可能在文件中,也可能在类中)。
单个目录:运行func目录下的所有测试,以目录作为pytest的参数即可。
yuandaping@yuandaping-PC MINGW64 /d/bopytest-code/code/tasks_proj/tests
$ pytest -v ./func
============================= test session starts =============================
platform win32 -- Python 3.7.4, pytest-5.3.5, py-1.8.1, pluggy-0.13.1 -- d:\python37\python.exe
cachedir: .pytest_cache
rootdir: D:\bopytest-code\code\tasks_proj\tests, inifile: pytest.ini
collecting ... collected 1 item
func/test_add.py::test_add PASSED [100%]
============================== 1 passed in 0.01s ==============================
单个测试文件/模块:运行单个文件里的全部测试,以路径名加文件名作为pytest参数即可。
yuandaping@yuandaping-PC MINGW64 /d/bopytest-code/code/tasks_proj/tests/func
$ pytest -v test_add.py
============================= test session starts =============================
platform win32 -- Python 3.7.4, pytest-5.3.5, py-1.8.1, pluggy-0.13.1 -- d:\python37\python.exe
cachedir: .pytest_cache
rootdir: D:\bopytest-code\code\tasks_proj\tests, inifile: pytest.ini
collecting ... collected 1 item
test_add.py::test_add PASSED [100%]
============================== 1 passed in 0.01s ==============================
单个测试函数:运行单个测试函数,只需要在文件名后面添加::符号和函数名。
yuandaping@yuandaping-PC MINGW64 /d/bopytest-code/code/tasks_proj/tests/func
$ pytest -v test_add.py::test_add
============================= test session starts =============================
platform win32 -- Python 3.7.4, pytest-5.3.5, py-1.8.1, pluggy-0.13.1 -- d:\python37\python.exe
cachedir: .pytest_cache
rootdir: D:\bopytest-code\code\tasks_proj\tests, inifile: pytest.ini
collecting ... collected 1 item
test_add.py::test_add PASSED [100%]
============================== 1 passed in 0.01s ==============================
单个测试类:测试类用于将某些相似的测试函数组合在一起。一个类里含有一个或者多个函数。只需要在文件名后面添加::符号和类名。
yuandaping@yuandaping-PC MINGW64 /d/bopytest-code/code/tasks_proj/tests/func
$ pytest -v test_add.py::TestUpdate
单个测试类中的测试方法:如果不希望运行测试类中的所有测试,只想指定运行其中一个,一样可以在文件名后面添加::符号和方法名。
yuandaping@yuandaping-PC MINGW64 /d/bopytest-code/code/tasks_proj/tests/func
$ pytest -v test_add.py::TestUpdate::test_bad_id
参数化测试
向函数传值并检验输出结果是软件测试的常用手段,但是对大部分功能测试而言,仅仅使用一组数据是无法充分测试函数功能的。参数化测试允许传递多组测试,一旦发现测试失败,pytest会及时报告。
为了介绍参数化测试需要解决的问题,举一个关于add()的例子,源码如下:
"""Test the tasks.add() API function."""
import pytest
import tasks
from tasks import Task
"""新创建的Task对象,其id会被至为None,只有在发生数据库交互之后其id才会被填入相应的值,因此,要比较两个Task对象的值是否相等,不能使用==,而应该使用equivalent()方法。equivalent()方法检查除id之外的所有属性是否相等。Autouse的fixture能确保数据库可访问。"""
//测试test_add_1函数的结果是只测试了一个task。
def test_add_1():
"""tasks.get() using id returned from add() works."""
task = Task('breathe', 'BRIAN', True)
task_id = tasks.add(task)
t_from_db = tasks.get(task_id)
# everything but the id should be the same
assert equivalent(t_from_db, task)
def equivalent(t1, t2):
"""Check two tasks for equivalence."""
# Compare everything but the id field
return ((t1.summary == t2.summary) and
(t1.owner == t2.owner) and
(t1.done == t2.done))
@pytest.fixture(autouse=True)
def initialized_tasks_db(tmpdir):
"""Connect to db before testing, disconnect after."""
tasks.start_tasks_db(str(tmpdir), 'tiny')
yield
tasks.stop_tasks_db()
"""通过使用@pytest.mark.parametrize(参数名,参数值)装饰器到达批量传送参数的目的,来进行批量测试。parametrize的第一参数是用逗号分隔的字符串列表,本例中只有一个task;第二个参数是一个值列表,本例中是一个Task对象列表。pytest会轮流对每个task做测试,并分别报告每一个测试用例的结果。"""
@pytest.mark.parametrize('task',
[Task('sleep', done=True),
Task('wake', 'brian'),
Task('breathe', 'BRIAN', True),
Task('exercise', 'BrIaN', False)])
def test_add_2(task):
"""Demonstrate parametrize with one parameter."""
task_id = tasks.add(task)
t_from_db = tasks.get(task_id)
assert equivalent(t_from_db, task)
"""把第一个参数task对象列表替换为几组键值对。"""
@pytest.mark.parametrize('summary, owner, done',
[('sleep', None, False),
('wake', 'brian', False),
('breathe', 'BRIAN', True),
('eat eggs', 'BrIaN', False),
])
"""
如果测试某一组键值对的值,写法如下:
$ pytest -v test_add_variety.pyy::test_add_3[sleep-None-False]
注:如果标识中包含空格,别忘了添加引号。写法如下:
$ pytest -v "test_add_variety.pyy::test_add_3[eat eggs-BrIaN-False]"
综上所述,建议为这些标识加上引号,否则空格、方括号和圆括号等在命令行中会显得难以理解。
"""
def test_add_3(summary, owner, done):
"""Demonstrate parametrize with multiple parameters."""
task = Task(summary, owner, done)
task_id = tasks.add(task)
t_from_db = tasks.get(task_id)
assert equivalent(t_from_db, task)
tasks_to_try = (Task('sleep', done=True),
Task('wake', 'brian'),
Task('wake', 'brian'),
Task('breathe', 'BRIAN', True),
Task('exercise', 'BrIaN', False))
"""将装饰器中的第二个参数值列表移出装饰器,这样造成装饰器代码看起来比较美观,但测试输出信息的可读性就较差。"""
@pytest.mark.parametrize('task', tasks_to_try)
def test_add_4(task):
"""Slightly different take."""
task_id = tasks.add(task)
t_from_db = tasks.get(task_id)
assert equivalent(t_from_db, task)
"""在多参数情况下,测试输出的可读性非常好,但这里只显示Task对象列表。为了改善可读性,我们为参数化装饰器引入一个额外参数ids,使列表中的每一个元素都被标识。ids是一个字符串列表,它和数据对象列表的长度保持一致。由于给数据集分配了一个变量task_to_try,所以可以通过它生成ids"""
task_ids = ['Task({},{},{})'.format(t.summary, t.owner, t.done)
for t in tasks_to_try]
@pytest.mark.parametrize('task', tasks_to_try, ids=task_ids)
def test_add_5(task):
"""Demonstrate ids."""
task_id = tasks.add(task)
t_from_db = tasks.get(task_id)
assert equivalent(t_from_db, task)
"""在给参数化装饰器传入列表参数时,还可以在参数值旁边定义一个id来做标识,语法是pytest.param(<value>,id="something"),其作用是在id不能被参数化批量生成,需要自定义的时候,这个方法很管用"""
@pytest.mark.parametrize('task', [
pytest.param(Task('create'), id='just summary'),
pytest.param(Task('inspire', 'Michelle'), id='summary/owner'),
pytest.param(Task('encourage', 'Michelle', True), id='summary/owner/done')])
def test_add_6(task):
"""Demonstrate pytest.param and id."""
task_id = tasks.add(task)
t_from_db = tasks.get(task_id)
assert equivalent(t_from_db, task)
"""也可以为测试类加上参数化装饰器,这种情况下,该数据集会被传递给该类的所有类方法"""
@pytest.mark.parametrize('task', tasks_to_try, ids=task_ids)
class TestAdd():
"""Demonstrate parametrize and test classes."""
def test_equivalent(self, task):
"""Similar test, just within a class."""
task_id = tasks.add(task)
t_from_db = tasks.get(task_id)
assert equivalent(t_from_db, task)
def test_valid_id(self, task):
"""We can use the same data for multiple tests."""
task_id = tasks.add(task)
t_from_db = tasks.get(task_id)
assert t_from_db.id == task_id
pytest Fixture组件
测试任何规模稍大的软件系统,fixture都可以派上用场。fixture是在测试函数运行前后,由pytest执行的外壳函数。fixture中的代码可以定制,满足多变的测试需求,包括定义传入测试中的测试集、配置测试前系统的初始状态、为批量测试提供数据源等等。
以下是一个返回数值的简单fixture:
"""Demonstrate simple fixtures."""
import pytest
@pytest.fixture() //装饰器用于声明函数是一个fixture
def some_data():
"""Return answer to ultimate question."""
return 42
"""如果测试函数的参数列表中含有fixture名,那么pytest会检测到,并在测试函数运行之前执行该fixture。Fixture可以完成任务,也可以返回数据给测试函数。测试用例test_some_data()的参数列表中包含一个fixture名some_data,pytest会以该名称搜索fixture。Pytest会优先搜索该测试所在的模块,然后搜索conftest.py文件"""
def test_some_data(some_data):
"""Use fixture return value in a test."""
assert some_data == 42
在开始介绍fixture和conftest.py之前,必须指出:fixture作为编程领域、测试领域,甚至是python语言层面的专业术语,是存在多种含义的。本章中使用的fixture、fixture函数、fixture方法都是指由@pytest.fixture()装饰器定义的函数。有时fixture也可以指出fixture函数配置的程序资源。Fixture函数常用于配置、检索测试数据,因此,这些数据有时也称fixture。
Pytest中使用的fixture用于将测试前后进行预备、清理工作的代码分离出核心测试逻辑的一种机制。
通过conftest.py共享fixture
fixture可以放在单独的测试文件里。如果你希望多个测试文件共享fixture,可以在某个公共目录下新建一个conftest.py文件,将fixture放在其中。
如果你希望fixture的作用域仅限于某个测试文件,那么将它写在该测试文件里。你也可以在tests目录的子目录下创建新的conftest.py文件,低一级的conftest.py中的fixture可以供所在目录及其子目录下的测试使用。
尽管conftest.py是python模块,但它不能被测试文件导入。import conftest的用法是不允许出现的。conftest.py被pytest视作一个本地插件库。
使用fixture执行配置及销毁逻辑
pytest中正好包含一个名为tmpdir的fixture供测试使用,无需担心清理的问题。tmpdir的值并非是一个字符串,而是一个目录对象,但由于指定了__str__方法,所以它可以转换为字符串,并传递给start_tasks_db()。我们仍然用tiny表示TinyDB。
fixture函数会在测试函数之前运行,但如果fixture函数包含yield,那么系统会在yield处停止,转而运行测试函数,等测试函数执行完毕后再回到fixture,继续执行yield后面的代码。因此,可以将yield之前的代码视为配置(setup)过程,将yield之后的代码视为清理(teardown)过程。无论测试过程中发生了什么,yield之后的代码都会被执行。本例中没有让yield返回任何数据,大家可以自行尝试。
"""Define some fixtures to use in the project."""
import pytest
import tasks
from tasks import Task
@pytest.fixture()
def tasks_db(tmpdir):
"""Connect to db before tests, disconnect after."""
# Setup : start db
tasks.start_tasks_db(str(tmpdir), 'tiny')
yield # this is where the testing happens
# Teardown : stop db
tasks.stop_tasks_db()
使用—setup-show回溯fixture的执行过程
我编写fixture时希望看到测试过程中执行的是什么,以及执行的先后顺序,pytest提供的—setup-show选项可以实现这个功能。
yuandaping@yuandaping-PC MINGW64 /d/bopytest-code/code/ch3/a/tasks_proj/tests/func
$ pytest --setup-show test_add.py -k valid_id
============================= test session starts =============================
platform win32 -- Python 3.7.4, pytest-5.3.5, py-1.8.1, pluggy-0.13.1
rootdir: D:\bopytest-code\code\ch3\a\tasks_proj\tests, inifile: pytest.ini
collected 3 items / 2 deselected / 1 selected
test_add.py
SETUP S tmp_path_factory
SETUP F tmp_path (fixtures used: tmp_path_factory)
SETUP F tmpdir (fixtures used: tmp_path)
SETUP F tasks_db (fixtures used: tmpdir)
func/test_add.py::test_add_returns_valid_id (fixtures used: request, tasks_db, tmp_path, tmp_path_factory, tmpdir).
TEARDOWN F tasks_db
TEARDOWN F tmpdir
TEARDOWN F tmp_path
TEARDOWN S tmp_path_factory
================= 1 passed, 2 deselected, 1 warning in 0.34s ==================
注:fixture名称前面的F和S代表的是fixture的作用范围,F代表函数级别的作用范围,S代表会话级别的作用范围。
生成测试报告
pytest-html可以生成HTML格式的测试报告。首先通过pip3命令安装:
pip3 install pytest-html
执行pytest命令后带的参数有:
-s:表示参数用于关闭捕捉,从而输出打印信息;
-v:表示参数用于增加测试用例冗长
可以通过pytest –help查看帮助信息


pytest-rerunfailures可以在测试用例失败时进行重试。
通过pip3 install pytest-rerunfailures进行安装
执行命令:pytest -v test_rerunfailures.py –-reruns 3
通过—reruns参数设置测试用例运行失败后的重试次数。