Unity 3-3 背包系统(基于UGUI)
任务1&2&3:演示、介绍、类图分析
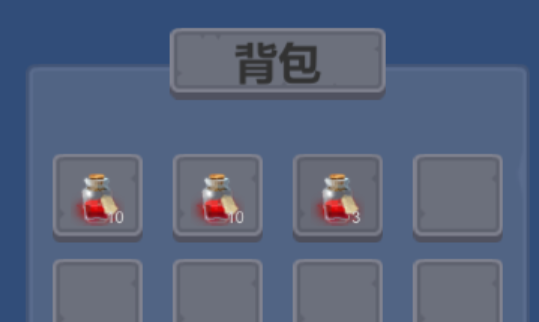
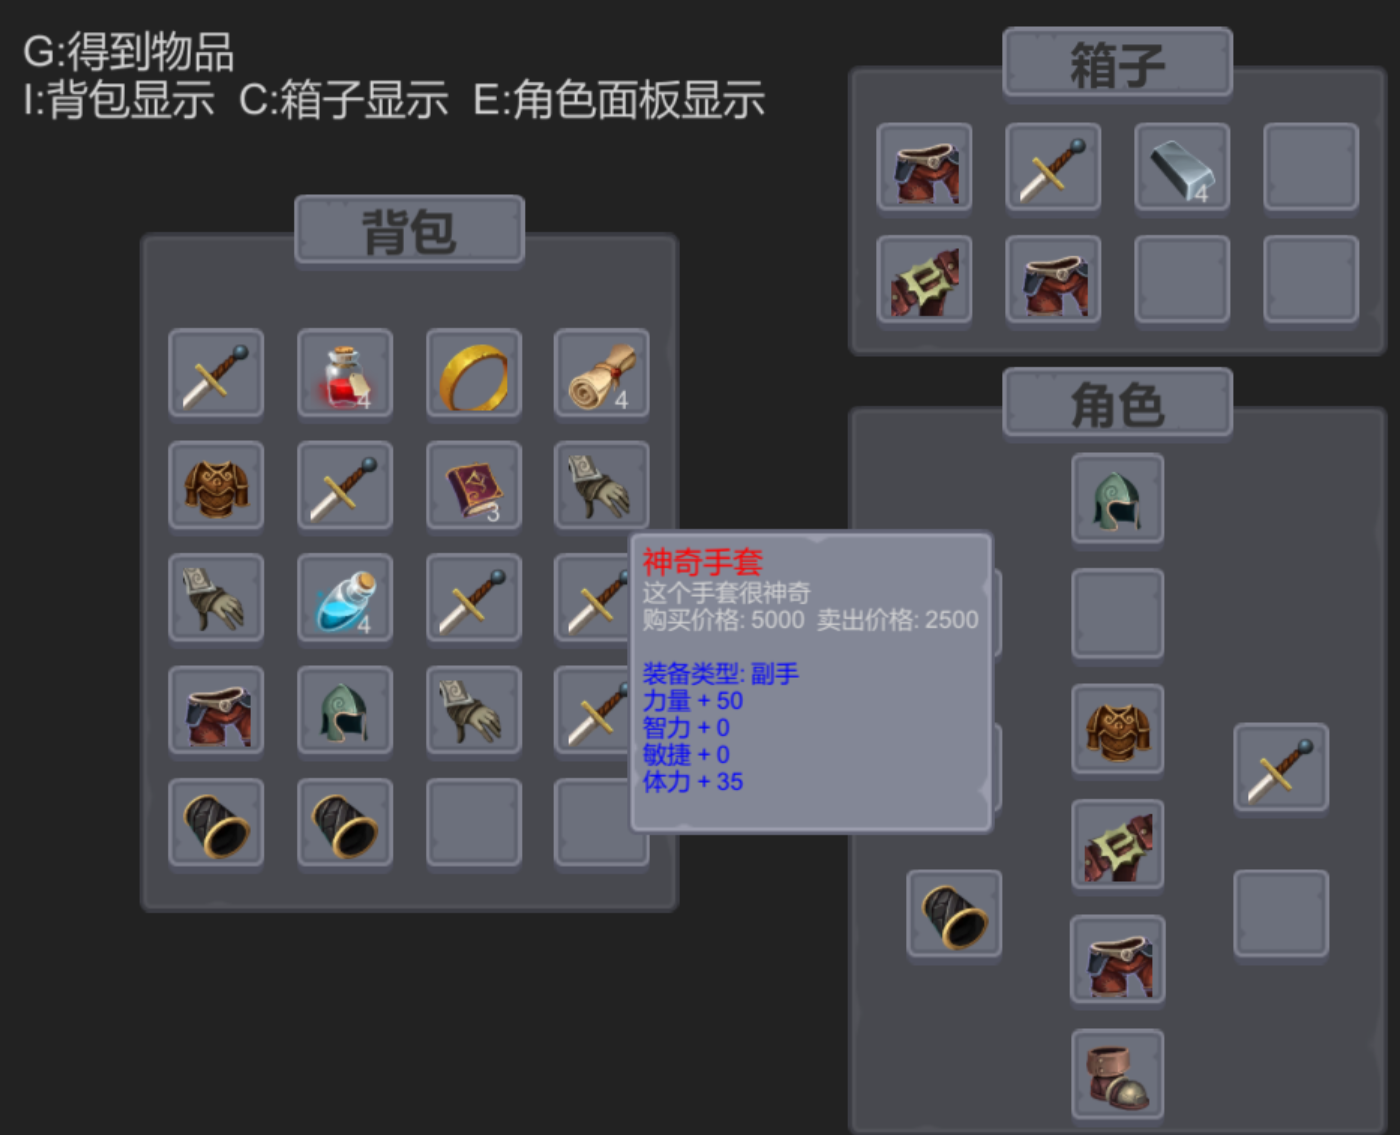
背包面板、箱子面板、锻造合成面板、装备佩戴面板、商店面板等
面板的显示和隐藏、保存和加载、拾起物品、物品移动、物品出售和购买等
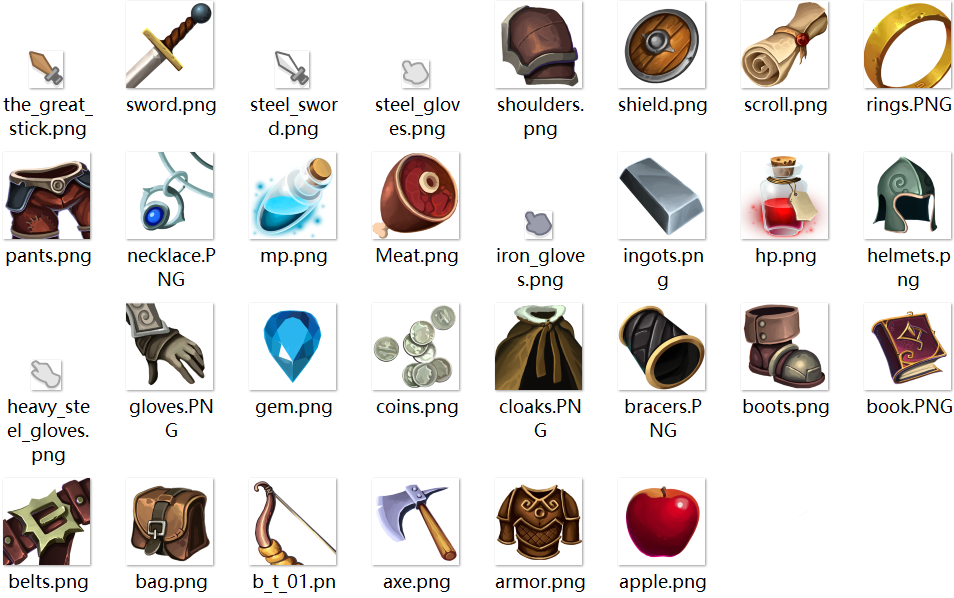
导入素材UI.unitypackage
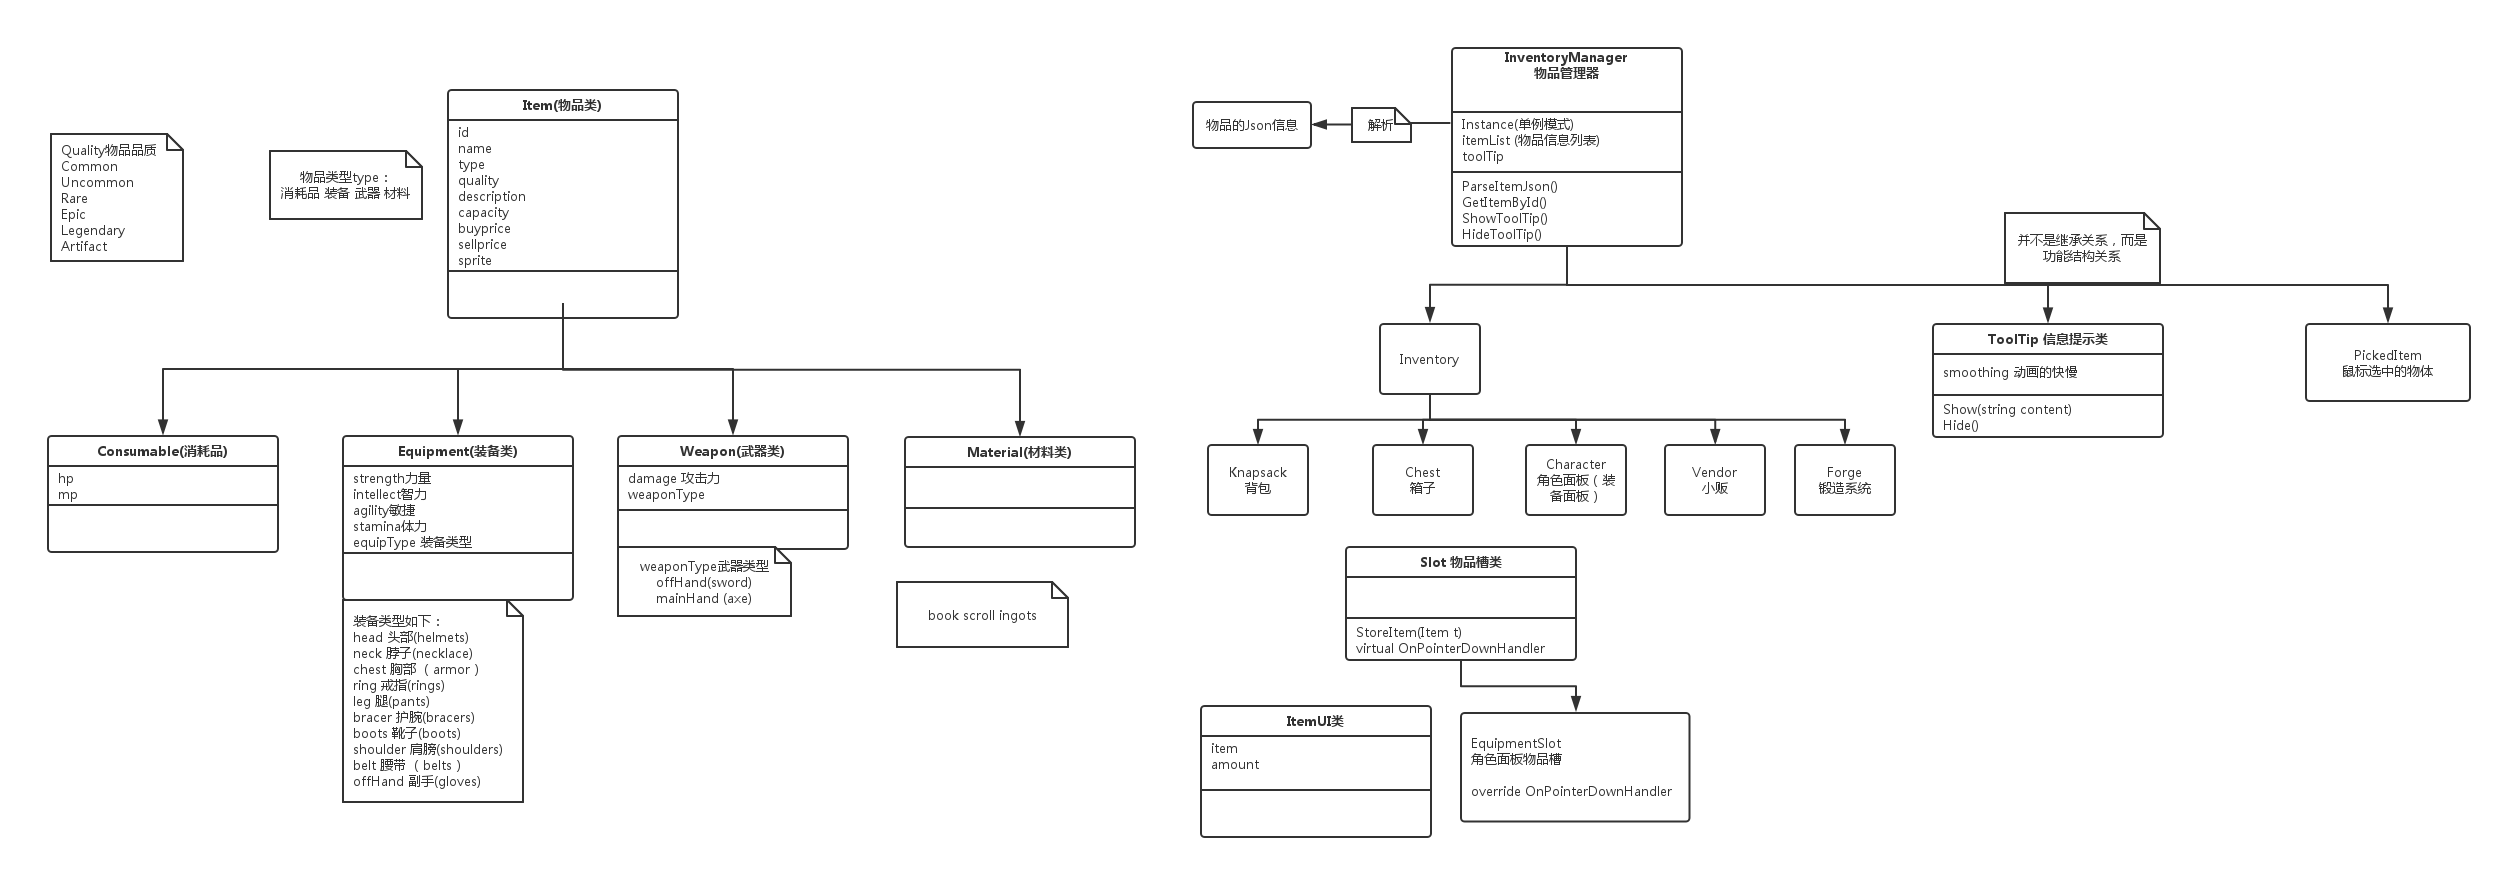
UML图设计:
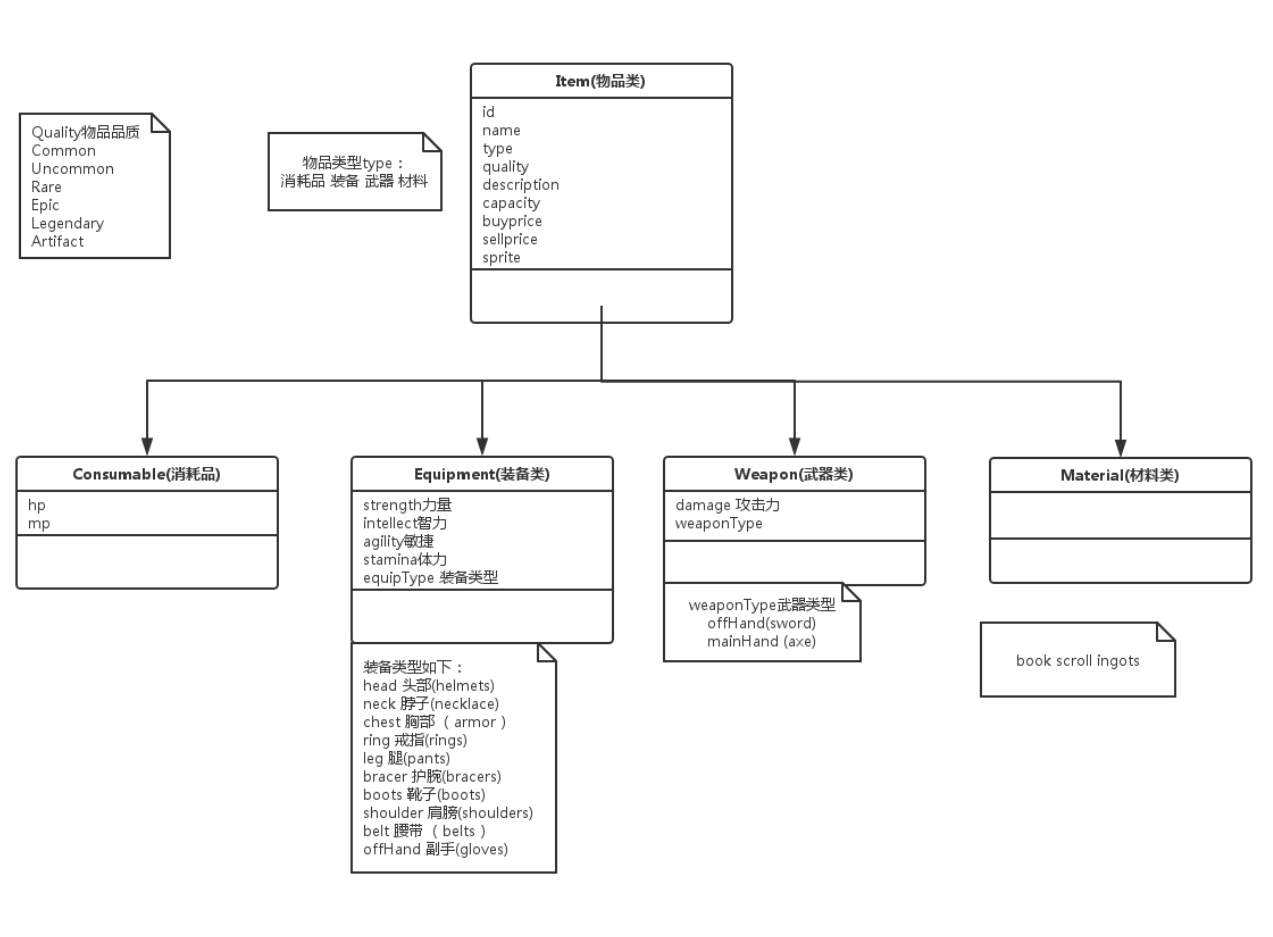
物品Item分为几类:消耗品Consumable、装备Equipment、武器Weapon、材料Material
消耗品影响HP/MP
装备影响strength/ intelligence/ agility/ stamina等
装备类型有:head/ neck/ chest/ ring/ leg/ bracer/ boots/ shoulder/ belt/ offHand
武器影响damage
武器类型有:offHand/ mainHand
材料用于合成装备和武器
物品共有变量:
id/ name/ type/ quality/ description/ capacity/ buyprice/ sellprice
消耗品变量:
hp/ mp
装备变量:
strength/ intelligence/ agility/ stamina等/ 还有equipmentType
武器变量:
damage/ 还有weaponType
材料变量:无
任务5&6:开发Item类(根据类图创建类)
使用get;set;的方式,可以很灵活地控制变量的访问权限
public class Item {
    public int ID { get; set; }
    public string Name { get; set; }
    public ItemType Type { get; set; }
    public ItemQuality Quality { get; set; }
    public string Description { get; set; }
    public int Capacity { get; set; }
    public int buyprice { get; set; }
    public int sellprice { get; set; }

    public Item(int id, string name, ItemType type, ItemQuality quality, string desc, int capacity, int buyprice, int sellprice){
        this.ID = id;
        this.Name = name;
        ...
        this.buyprice = buyprice;
        this.sellprice = sellprice;
    }
    public enum ItemType {
        Consumable, Equipment, Weapon, Material
    }
    public enum ItemQuality {
        Common, Uncommon, Rare, Epic, Legendary, Artifact
}}
-- 注意:两个枚举类型ItemType和ItemQuality是在类内部声明的,在外部使用时需要通过类名,比如Item.ItemType来使用
而且声明的时候需要为public的
-- 改进:每个Item都有自己的UI图标
public string SpritePath { get; set; }
并在Project中创建Resources文件夹,将所有Item图标的Sprite移入该文件夹
其他类的构造函数里也得加上spritePath
public class Consumable : Item {
    public int HP { get; set; }
    public int MP { get; set; }

    public Consumable(int id, string name, ItemType type, ItemQuality quality,
        string desc, int capacity, int buyprice, int sellprice, int hp, int mp)
        : base(id, name, type, quality, desc, capacity, buyprice, sellprice) {
        this.HP = hp;
        this.MP = mp;
}}
public class Equipment : Item {
    public int Strength { get; set; }
    public int Intelligence { get; set; }
    public int Agility { get; set; }
    public int Stamina { get; set; }
    public EquipmentType EquipType { get; set; }

    public Equipment(int id, string name, ItemType type, ItemQuality quality,
        string desc, int capacity, int buyprice, int sellprice, int strength,
        int intelligence, int agility, int stamina, EquipmentType equipType) :
        base(id, name, type, quality, desc, capacity, buyprice, sellprice) {
        this.Strength = strength;
        this.Intelligence = intelligence;
        this.Agility = agility;
        this.Stamina = stamina;
        this.EquipType = equipType;
    }
    public enum EquipmentType {
        Head, Neck, Chest, Ring, Leg, Bracer, Boots, Shoulder, Belt, OffHand
}}
public class Weapon : Item {
    public int Damage { get; set; }
    public WeaponType WeapType { get; set; }

    public Weapon(int id, string name, ItemType type, ItemQuality quality,
        string desc, int capacity, int buyprice, int sellprice, int damage, WeaponType weapType)
        : base(id, name, type, quality, desc, capacity, buyprice, sellprice) {
        this.Damage = damage;
        this.WeapType = weapType;
    }
    public enum WeaponType {
        OffHand, MainHand
}}
-- 注意,这里因为Weapon不是继承与Equipment,因此这里使用的EquipmentType需要写成Equipment.EquipmentType
public class Material : Item {
    public Material(int id, string name, ItemType type, ItemQuality quality,
        string desc, int capacity, int buyprice, int sellprice)
        : base(id, name, type, quality, desc, capacity, buyprice, sellprice) {
}}
-- 因为子类必须提供一个构造方法去构造父类,而父类没有空的构造方法,所以Material必须写对应的构造方法去构造父类
否则需要在Item中写一个空的构造方法
任务7:Item类的Json文件 -- 策划
https://www.bejson.com/jsoneditoronline -- 在线Json编辑器
有很多种物品,在Json文件中保存成一个数组
属性根据类中成员变量来确定
[
    {
        "id": 1,
        "name": "血瓶",
        "type": "Consumable",
        "quality": "Common",
        "description": "这个是用来加血的",
        "capacity": 10,
        "buyprice": 10,
        "sellprice": 5,
        "hp": 10,
        "mp": 0,
        "spritePath": "Sprites/Items/hp"
    }
]
暂时先写一个物品,用于测试
在Project->Items下保存一个记事本Items.Json文件,编码格式改为UTF-8
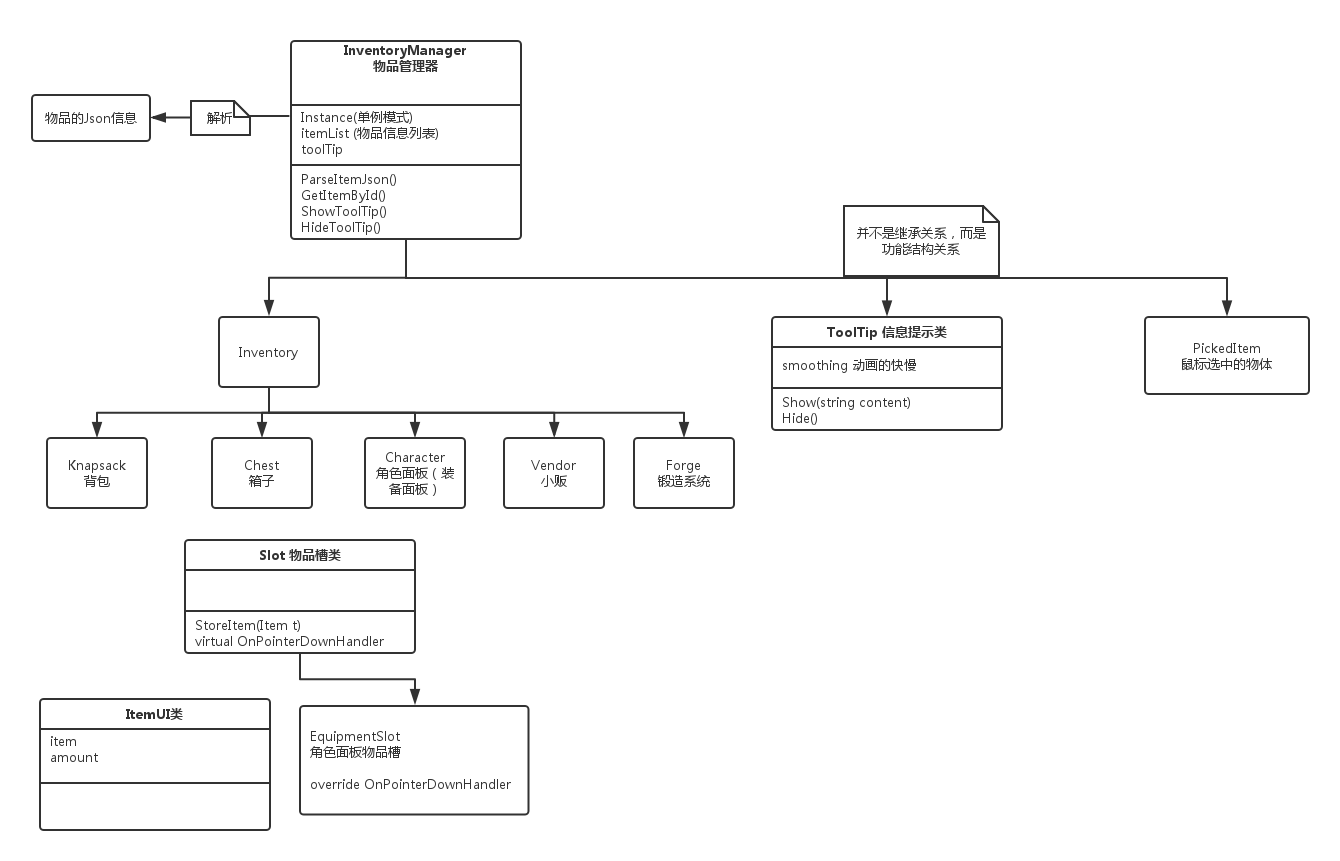
任务8:InventoryManager物品管理器
&& 任务14:改进Knapsack和Chest的设计
创建空物体InventoryManager,添加脚本InventoryManager.cs -- 用于管理所有物品
之后还有两个分管理器:背包Knapsack,箱子Chest
Knapsack和Chest不是继承于InventoryManager的,只是功能结构关系而已
背包和箱子之间有一些交互,比如移动物品等,这些交互方法就在InventoryManager中实现
注意:InventoryManager和这些一般都为单例模式

InventoryManager.cs中
单例模式的实现
1. _instance为private,因为不能在外界访问
2. Instance为public,作为在外界访问的接口
3. 构造函数为private,不能在外界直接调用,而必须通过Instance进行调用
private static InventoryManager _instance;
public static InventoryManager Instance {
get {
if(_instance == null) {
// 第一次想要得到的时候,未赋值,给它赋值
_instance = GameObject.Find("InventoryManager").GetComponent<InventoryManager>();
}
return _instance;
}}
任务14:改进Knapsack和Chest的设计
因为Knapsack和Chest是有共有功能的,因此可以创建一个类Inventory作为他俩的父类
任务9&10&11:Json解析 -- LitJSON 和 JsonObject
InventoryManager需要进行Items.Json数据的解析
在Json官网 www.json.org中找到c#的 LitJSON
或前往 https://litjson.net/
额。。。下载失败,我直接在csdn下载了
https://download.csdn.net/download/blackbord/10016032
下载dll文件,导入unity中就可以使用dll中的相关类了
在Project文件夹下创建Plugins文件夹,这个文件夹下的文件会被预编译,一般用于放置插件
在InventoryManager中创建解析Json文件的方法:
ParseItemJson()
解析出来的结果为很多Item,新建一个List列表来存储
private List<Item> itemList;
itemList = new List<Item>();
取得Json文件的内容
TextAsset jsonTextAsset = Resources.Load<TextAsset>("Items");
string jsonString = jsonTextAsset.text; // 得到了文本文件中的字符串
解析
using LitJson;
LitJson的教程 -- https://www.cnblogs.com/Firepad-magic/p/5532650.html
// Siki老师下载失败后,从AssetStore上import了JsonObject
-- 会和LitJson有所区别
思路:
1. 通过API得到存储数据的对象(该对象为一个集合)
2. 通过遍历该对象,得到每一个数据对象
3. 通过"type"字段的值,判断Item的类型
4. 声明对应类型的对象,并通过构造函数新建对象
5. 将新建的对象添加到list中
LitJson版本:
// 得到的jsonData为一个集合,每一个元素也是JsonData类型
JsonData jsonData = JsonMapper.ToObject(jsonString);
foreach (JsonData data in jsonData) {
    // 将JsonData对象中存储的值,通过Item或子类的构造函数,新建一个对应的Item对象
    // 先得到共有的属性
    int id = int.Parse(data["id"].ToString());
    string name = data["name"].ToString();
    string type = data["type"].ToString();
    Item.ItemType itemType = (Item.ItemType)System.Enum.Parse(typeof(Item.ItemType), type);
    Item.ItemQuality itemQuality = (Item.ItemQuality)System.Enum.Parse(typeof(Item.ItemQuality), data["quality"].ToString());
    string description = data["description"].ToString();
    int capacity = int.Parse(data["capacity"].ToString());
    int buyprice = int.Parse(data["buyprice"].ToString());
    int sellprice = int.Parse(data["sellprice"].ToString());
    string spritePath = data["spritePath"].ToString();
    Item item = null;

    // 首先需要通过"type"的值,确认该Item是什么类型的
    switch (itemType) {
        case Item.ItemType.Consumable:
            int hp = int.Parse(data["hp"].ToString());
            int mp = int.Parse(data["mp"].ToString());
            // 通过JsonData的数据,新建一个Consumable对象
            item = new Consumable(id, name, itemType, itemQuality, description,
                capacity, buyprice, sellprice, spritePath, hp, mp);
            break;
        case Item.ItemType.Equipment:
            break;
        case Item.ItemType.Weapon:
            break;
        case Item.ItemType.Material:
            break;
        default:
            break;
    }
    // 将新建的Item对象添加到list中
    itemList.Add(item);
}
JsonObject版本:
JsonObject讲解:readme.txt
直接通过JSONObject的构造函数进行Json数据的解析
得到的多个JsonObject对象会存储在list中
事实上Json数据中的任何一个整体都是一个JsonObject类的对象
比如一个键值对,或一个对象,或一个数组
对于每个对象,通过jsonObject["key"]访问对应的value,根据value类型
通过.n表示float,.b表示bool,.str表示string等等,还有Object、数组等类型
// 得到的jsonObject为一个list集合,每一个元素也是JsonObject类型
JSONObject jsonObject = new JSONObject(jsonString);
// 遍历JSONObject.list,得到每一个对象
foreach(JSONObject elem in jsonObject.list) {
    // 将对象转换为Item类
    // 通过索引器得到的为JsonObject类型
    // ToString()后发现,数据带有引号""
    // 不能使用 elementObject["name"].ToString());
    int id = (int)elem["id"].n;
    string name = elem["name"].str;
    Item.ItemType type=(Item.ItemType)System.Enum.Parse(typeof(Item.ItemType),elem["type"].str);
    ...
    Item item = null;

    switch (type) {
        case Item.ItemType.Consumable:
            int hp = (int)elem["hp"].n;
            int mp = (int)elem["mp"].n;
            item = new Consumable(id, name, type, quality, description, capacity,
                buyprice, sellprice, spritePath, hp, mp);
            break;
        ...
        default:
            break;
    }
    itemList.Add(item);
}
任务12&13:背包的UI
所有物品的信息都保存在了InventoryManager.itemList中,
现在开发数据和UI之间的连通,将item显示在UI上
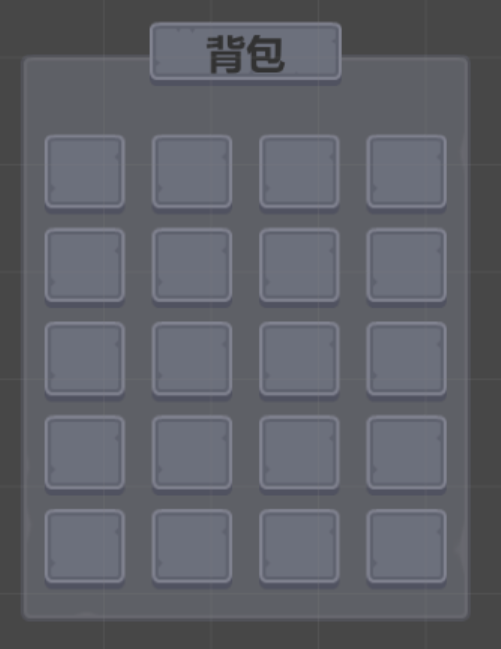
开发背包的UI
新建UI->Panel,命名KnapsackPanel,SourceImage: panel,调节颜色
屏幕自适应
Canvas--CanvasScaler--UI Scale Mode = Scale With Screen Size
表示按控件占屏幕的比例来显示,而不是按像素来显示
Match = Width,表示按宽度的比例来,而高度的确定按照控件的宽高比而定
显示效果不好 -- 去掉天空盒子,Window->Lighting->Skybox选择None
新建子物体UI->Panel,命名ItemsContainer,作为所有物品的容器
调整大小
因为不需要显示,所以alpha=0;
新建子物体UI->Image,命名Slot,作为一个物品的容器
SourceImage: button_square
因为需要很多个Slot,因此在ItemsContainer中添加组件Grid Layout Group,用于排序
调整Cell大小,调整Spacing
新建Knapsack的子物体,UI->Image,命名TitleBg,SourceImage: button_long
新建子物体, UI->Text,背包,字体等微调
因为不需要交互,取消勾选Knapsack、TitleBg、Text、ItemsContainer的Raycast Target
只有Slot需要交互
Slot的完善:
实现鼠标移入的颜色变化效果
在Slot上添加组件Button
制作成prefab
在Slot下创建子物体UI->Image,命名Item,作为Slot中存储的物品
调整大小,SourceImage: 先随便选一个,因为最后是动态赋值的
在Item下创建子物体UI->Text,命名Amount,用于显示物品数量,微调颜色等
因为在Slot中做了交互,所以Item和Amount中的Raycast Target取消勾选
将Item制作成prefab
给Slot添加脚本Slot.cs,用于管理自身
给Item添加脚本ItemUI.cs,用于管理Item自身的显示等功能
因为ItemUI表示的为存在该Slot中的物体,因此需要保存该Item和数量
public Item Item {get; set; }
public int Amount {get; set; }
任务14~18:Inventory的实现 -- 物品存储功能
&任务19:物品存储后的UI更新显示
&任务25:Bugfixing
&任务39:添加物品时的动画显示
Inventory.cs脚本 -- 管理自身中所有的Slot
在Knapsack中添加脚本Knapsack 继承自 Inventory
// 存储所有的Slot
private Slot[] slotList;
// 在Start()中获取所有的Slot
public virtual void Start() {
slotList = GetComponentsInChildren<Slot>();
}
-- 因为在Knapsack等子类中也需要用到这个Start(),因此设置为virtural,方便子类访问
拾起物品并存储进背包的功能:
public bool StoreItem(int id)
public bool StoreItem(Item itemToStore)
// 返回bool表示是否存储成功,因为一些原因比如背包满了
-- InventoryManager 中根据item id返回Item对象的方法
public Item GetItemById(int id) {
foreach(Item item in itemList) {
if(item.ID == id) {
return item;
}}
return null;
}
public bool StoreItem(int id) {
// 先进行转换
Item item = InventoryManager.Instance.GetItemById(id);
return StoreItem(item);
}
public bool StoreItem(Item item) {
// 安全判断
if(item == null) { Debug.LogWarning("要存储的物品id不存在"); }
// 存储
// 两种情况
// 1. 之前背包没有该类物品
实例化一个该类物体,将其放入一个Slot
2. 背包已有该类物品
找到该Slot
若物品个数小于Capacity,Amount+1 (装备等capacity为1)
若放满了,则实例化另一个Item,并放入另一个Slot
if(item.capacity == 1) {
Slot slotToStore = FindEmptySlot();
if(slotToStore == null) { Debug.LogWarning("没有空位"); return false; }
else { // 将物品放入该slot
slotToStore.StoreItem(item);
}} else {
// 判断当前是否已经存在该类物体
Slot slotToStore = FindSlotWithSameItemType(item);
if(slotToStore != null) { // 找到已存在同类未满Slot
slotToStore.StoreItem(item);
} else { // 未找到
// 新建一个slot存储
slotToStore = FindEmptySlot();
if(slotToStore == null) { ... 警告已满; return false; }
else {
slotToStore.StoreItem(item);
}}}
如何找到空格子呢?
private Slot FindEmptySlot()
foreach(Slot slot in slotList) {
if slot.transform.childCount == 0) {
return Slot;
}}
return null;
}
如何找到类型相同的物品槽呢?
private Slot FindSlotWithSameItemType(Item item) {
foreach(Slot slot in slotList) {
if(slot.transform.childCount == 1) { // 有一个子物体
if(slot.GetItemId() == item.ID && !slot.IsSlotFilled()) { // 符合类型且数量未满
// ------- 在Slot中实现GetItemType()方法
// public Item.ItemType GetItemType() {
// return transfrom.GetChild(0).GetComponent<ItemUI>().Item.Type;
// }
// ------- 任务25中发现:不应该判断GetItemType()
// 这样如果血瓶和蓝瓶都是Consumable的Type,就会互相叠加了
// public int GetItemId() {
// return transfrom.GetChild(0).GetComponent<ItemUI>().Item.ID;
// }
// ------- 在Slot中实现IsSlotFilled()方法
// public bool IsSlotFilled() {
// ItemUI itemUI = transform.GetChild(0).GetComponent<ItemUI>();
// return itemUI.Amount >= itemUI.Item.Capacity;
// }
return slot;
}}}
return null;
}
如何将物品存入Slot呢?
在Slot.cs中
public void StoreItem(Item item) {
if(transform.ChildCount == 0) { // 空slot
// 实例化Item,并存入Slot
-- public GameObject itemPrefab;
GameObject itemObject = Instantiate(itemPrefab);
itemObject.transform.SetParent(transform);
itemObject.transform.localPosition = Vector3.zero;
// 这里的Scale显示会出现Bug,在任务39中(即本节最后)会详细说明
// 给实例化出来的空Item进行赋值
// ---------在ItemUI中实现Item的赋值 public void SetItem(Item item, int amount = 1) {
// this.Item = item;
// this.Amout = amount;
// // 更新UI
// }
itemObject.GetComponent<ItemUI>().SetItem(item);
} else { // 本身已经存储了物体
Item itemInSlot = transform.GetChild(0);
ItemUI itemUI = itemInSlot.GetComponent<ItemUI>();
// 这里不必判断Slot满的情况,因为在外界判断完了
// -------- 在ItemUI中实现数量+1的方法 public void AddAmount(int num = 1) {
// this.Amount += num;
// // 更新UI
// }
itemUI.AddAmount();
}
如何更新UI呢?
// 显示有两个部分,一个部分是Sprite,一个部分是Amount.text
private Image itemImage;
private Text amountText;
// 如果将初始化写在Start中,会报空指针,因为在一开始的时候就执行了赋值初始化
// 所以写成get的形式
public Image ItemImage {
get{
if(itemImage == null) {
itemImage = GetComponent<Image>();
}
return itemImage;
}
public Text AmountText {
// 相似
amountText = GetComponentInChildren<Text>();
}
public void UpdateUISprite() {
ItemImage.sprite = Resources.Load<Sprite>(Item.SpritePath);
public void UpdateUIText() {
AmountText.text = Amount.ToString();
测试:
新建脚本Player.cs
-- 因为操作物品的来源一般为Player(随意啦,一个解释而已)
-- 通过键盘按键G,随机得到一个物品放到背包中
在 Update()中
if(Input.GetKeyDown(KeyCode.G) {
// 随机生成一个id
int id = Random.Range(1, 2);
// 调用Knapsack (即Inventory中)的StoreItem(id)进行存储
// ---------- 将Inventory做成单例模式
// 但是不能在Inventory中实现,应该在Knapsack和Chest中实现
// 因为如果在Inventory中实现,那么Knapsack和Chest就会共用了
// 将Knapsack做成单例模式
// private static Knapsack _instance;
// public static Knapsack Instance {
// get{
// if(_instance == null) {
// _instance = GameObject.Find("KnapsackPanel").GetComponent<Knapsack>();
// }
// return _instance;
// }}
Knapsack.Instance.StoreItem(id);
代码:
Player.cs
public class Player : MonoBehaviour {
    void Update () {
        if(Input.GetKeyDown(KeyCode.G)) {
            // 随机生成一个id
            int id = Random.Range(1, 2);
            Knapsack.Instance.StoreItem(id);
}}}
Knapsack.cs中只有单例模式的实现代码
Inventory.cs
public class Inventory : MonoBehaviour {
    private Slot[] slotList;

    public virtual void Start () {
        slotList = GetComponentsInChildren<Slot>();
    }

    public bool StoreItem(Item itemToStore) {
        // 存储一个Item,有两种情况
        // 1. 在Inventory中没有此类Item,则寻找空Slot存储
        // 2. 在Inventory中已有此类Item
        //      若数量已满,则寻找空Slot存储;若数量未满,则增加数量即可
        // 另一种判断:
        // 1. 若Item.Capacity为1,则需要寻找空Slot存储
        // 2. 若不为1,寻找是否已经存在该类物品
        //      已存在,则数量增加;没有存在,寻找空Slot
        Slot slotToStore = FindSlotWithSameItemType(itemToStore);
        if(slotToStore == null) {
            // 没有找到相同类型且未满的Slot -- 故寻找空slot存储
            slotToStore = FindEmptySlot();
            if(slotToStore == null) {
                Debug.LogWarning("空间已满,不可进行存储");
                return false;
            } else {
                //找到空slot,进行存储
                slotToStore.StoreItem(itemToStore);
            }
        } else {
            // 找到相同类型且未满的Slot,存储
            slotToStore.StoreItem(itemToStore);
        }
        return true;
    }
    public bool StoreItem(int itemId) {
        Item itemToStore = InventoryManager.Instance.GetItemById(itemId);
        if(itemToStore == null) { // 未找到该Item
            return false;
        }
        return StoreItem(itemToStore);
    }

    private Slot FindSlotWithSameItemType(Item item) {
        foreach(Slot slot in slotList) {
            if(slot.transform.childCount == 1) {
                // 不是空slot
                if(slot.GetItemType() == item.Type && !slot.IsSlotFilled()) {
                    // 相同类型的slot,且未满
                    return slot;
        }}}
        return null;
    }
    private Slot FindEmptySlot() {
        foreach(Slot slot in slotList) {
            if(slot.transform.childCount == 0) {
                // 找到空slot
                return slot;
        }}
        return null;
}}
Slot.cs
public class Slot : MonoBehaviour {
    public GameObject itemPrefab;

    public Item.ItemType GetItemType() {
        return transform.GetChild(0).GetComponent<ItemUI>().Item.Type;
    }
    public bool IsSlotFilled() {
        ItemUI itemUI = transform.GetChild(0).GetComponent<ItemUI>();
        return itemUI.Amount >= itemUI.Item.Capacity;
    }

    public void StoreItem(Item itemToStore) {
        // 两种情况下调用该方法:
        // 1. 本Slot为空,需要实例化Item进行存储
        // 2. 本Slot不为空,只需要增加数量即可
        if(transform.childCount == 0) {
            // 实例化Item
            GameObject itemObject = GameObject.Instantiate(itemPrefab) as GameObject;
            itemObject.transform.SetParent(transform);
            itemObject.transform.localPosition = Vector3.zero;
            // 给该Item赋值
            itemObject.GetComponent<ItemUI>().SetItem(itemToStore);
        } else {
            // 数量增加
            transform.GetChild(0).GetComponent<ItemUI>().AddAmount();
}}}
ItemUI.cs
public class ItemUI : MonoBehaviour {
    public Item Item { get; set; }
    public int Amount { get; set; }
    private Text amountText;
    public Text AmountText {
        get { ... }
    }
    private Image itemImage;
    public Image ItemImage {
        get { ...  }
    }

    public void SetItem(Item item, int amount  = 1) {
        // amount默认为1,因为该方法意为被空Slot存储item时调用
        this.Item = item;
        this.Amount = amount;
        // UI更新
        UpdateUISprite();
        UpdateUIText();
    }
    public void AddAmount(int num = 1) {
        // 默认+1,因为该方法意为存储item时调用,通常存储为1个
        this.Amount += num;
        // UI更新
        UpdateUIText();
    }
    private void UpdateUIText() {
        AmountText.text = Amount.ToString();
    }
    private void UpdateUISprite() {
        ItemImage.sprite = Resources.Load<Sprite>(Item.SpritePath);
}}
任务39:添加物品时的动画显示
-- 物品添加到Slot中时,会先放大一下物品表示强调,再缩小到应有大小
在ItemUI中控制动画的播放
流程解释:Player.Update() -> Knapsack.StoreItem(id/item) -> Slot.StoreItem(Item) -> ItemUI.SetItem(item)
ItemUI.SetItem(item)中,传递设置了item和amount,并更新了sprite和text的UI显示
因此在ItemUI.UpdateUISprite()中
添加
直接在UpdateUISprite()中完成动画效果吗?
不行,需要在Update()中不断调用Lerp来实现
定义属性
private float targetScale = 1;
Update() {
if(Mathf.Abs(transform.localScale.x - targetScale) > 0.05f) {
// 进行动画播放
transform.localScale = Vector3.one * Mathf.Lerp(transform.localScale.x, targetScale, Time.deltaTime*smooth);
} else {
transform.localScale = Vector3.one * targetScale; // 节约性能
if(targetScale != 1) {
// 每当添加物品时,会将targetScale设大,播放动画
// 结束动画后localScale=targetScale>1,此时自动将targetScale设为1,开始变小动画
targetScale = 1;
}}}
Bug修复:在Slot.cs的StoreItem()里有一个scale自动变化的问题
public void StoreItem(Item itemToStore) {
    if(transform.childCount == 0) {
        // 实例化Item
        GameObject itemObject = GameObject.Instantiate(itemPrefab) as GameObject;
        // 大小显示一直有问题,在这里手动设置
        // 为什么呢,因为实例化的时候是在slot里面实例化的
        // 实例化出来的时候,首先会放在场景的根目录下
        // 然后设置位置的时候,比如设置Parent的时候才会移动到Parent下面
        // 因为Canvas自身是有scale的大小设置的,因此会影响到实例化物体的scale变化
        itemObject.transform.SetParent(transform);
        itemObject.transform.localPosition = Vector3.zero;
        itemObject.transform.localScale = Vector3.one;
        // 给该Item赋值
        itemObject.GetComponent<ItemUI>().SetItem(itemToStore);
    } else {
        // 数量增加
        transform.GetChild(0).GetComponent<ItemUI>().AddAmount();
    }
}
任务20&21:实现ToolTip
什么是ToolTip?
当光标悬浮在某个控件上时,会有一个弹窗显示对控件的解释说明
实现物品Item的ToolTip,显示对应的description
新建UI->Image,命名ItemDescToolTipPanel,SourceImage: panel
新建子物体UI->Text,命名ItemDescText,微调颜色大小等
这个时候,ToolTip的大小是固定的,不会随着Text而改变
子类会随着父类的变化而变化,当父类的大小不会受子类的大小影响
但是因为每个Item的desc长度不同,需要的Panel长度也不同
解决方法:取巧
将Image设置为Text的子物体
现在只需要实现Text框大小随着文字数量而改变即可
在Text添加组件Content Size Fitter
Horizontal/ Vertical Fit:
Preferred Size -- 让组件随着内容的变化而变化
Min Size
Unconstrained
现在,实现了大小的自适应变化
但是,Text的内容因为Image的覆盖而看不见了
解决方法:取巧
复制一份Text,命名Content,作为Image子物体,实现显示的功能
注意,要将Image的pivot设置为四周拉伸,才会随着Text而改变大小
因为鼠标悬浮时,ToolTip需要显示在鼠标的右下方而不是以鼠标为中心
-- 设置ToolTip的中心点为左上角
但是缩放的时候会发现,会随着缩放而跑偏了
原因:pivot会根据缩放的比例而定
解决方法:pivot设置在Text的左上角,而不是背景框的左上角
ToolTip不需要进行交互,因此将所有的Raycast Target取消勾选
代码实现:
1. ToolTip框的显示与隐藏
2. Desc文字的变化
ToolTip.cs 信息提示类
在InventoryManager.cs中进行调用
给ToolTip物品添加ToolTip.cs脚本
// 因为需要实现Desc内容的显示和隐藏,因此需要得到
private Text descSizeController = GetComponent<Text>();
private Text contentText = transform.GetChild(0).Find("ContentText").GetComponent<Text>();
// contentText为ToolTip.transform的子物体的子物体,因此需要先得到子物体,在使用transform.Find()
// 通过Canvas Group.Alpha组件控制显示和隐藏
-- 给ToolTip物体添加CanvasGroup组件,并取消Interactable和Blocks Raycasts的勾选
private CanvasGroup canvasGroup = GetComponent<CanvasGroup>();
// 显示和隐藏功能
private float targetAlpha = 0; // 默认不显示
public void DisplayToolTip(String content) {
// 改变框大小和显示内容
descSizeController.text = content;
ContentText.text = content;
targetAlpha = 1; // 显示
}
public void HideToolTip() {
targetAlpha = 0; // 不显示
}
Update() {
// 控制将Alpha变化成targetAlpha值
if(canvasGroup.alpha != targetAlpha) {
canvasGroup.alpha = Mathf.Lerp(canvasGroup.alpha, targetAlpha, Time.deltaTime * smooth);
if(Mathf.Abs(canvasGroup.alpha - targetAlpha) > 0.05f) {
// 因为Lerp是逐渐趋近而不会到达
canvasGroup.alpha = targetAlpha;
}}
public class ToolTip : MonoBehaviour {
    private Text itemDescSizeController;
    private Text contentText;private CanvasGroup canvasGroup;
    private float targetAlpha = 1;
    private float smoothing = 4;

    void Start () {
        itemDescSizeController = GetComponent<Text>();
        contentText = transform.GetChild(0).Find("ContentText").GetComponent<Text>();
        canvasGroup = GetComponent<CanvasGroup>();
    }

    void Update () {
        if(canvasGroup.alpha != targetAlpha) {
            // 改变透明度
            canvasGroup.alpha = Mathf.Lerp(
                canvasGroup.alpha, targetAlpha, Time.deltaTime * smoothing);
            if(Mathf.Abs(targetAlpha - canvasGroup.alpha) < 0.05f) {
                canvasGroup.alpha = targetAlpha;
    }}}
    public void DisplayToolTip(string content) {
        itemDescSizeController.text = content;
        contentText.text = content;
        targetAlpha = 1;
    }
    public void HideToolTip() {
        targetAlpha = 0;
}}
任务22&23&24:使用InventoryManager管理ToolTip && 实现ToolTip的显示
为什么不将ToolTip写成单例模式呢?
private static ToolTip _instance;
public static ToolTip Instance {
get{
if(_instance == null) {
_instance = GameObject.Find("...").GetComponent<ToolTip>();
}
return _instance;
}}
Siki老师通过private ToolTip toolTip = GameObject.FindObjectOfType<ToolTip>(); 进行访问
创建两个方法进行Display和Hide
public void DisplayToolTip(string description) {
ToolTip(.Instance).DisplayToolTip();
}
public void HideToolTip() {
ToolTip(.Instance).HideToolTip();
}
检测鼠标的进入和移出:
UnityEngine.EventSystems -- Interfaces --
IPointerEnterHandler和IPointerExitHandler分别对应鼠标的进入和移出
在Slot.cs中监听这两个事件
因为Slot为button,且Item的Raycast Target取消勾选了
using UnityEngine.EventSystems;
public class Slot : MonoBehaviour, IPointerEnterHandler, IPointerExitHandler
实现这两个接口的OnPointerEnter() 和OnPointerExit()方法
public void OnPointerEnter(PointerEventData eventData) {
// 如果Slot为空,就不进行任何操作
if(transform.childCount != 0) {
InventoryManager.Instance.DisplayToolTip(GetComponentInChildren<ItemUI>().Item.Description);
// ---------- 传递的参数可以为Item中的用来得到Item需要被显示的Content的方法
// public virtual string GetToolTipContent() {
// return Name + ": " + Description;
// }
}}
public void OnPointerExit(PointerEventData eventData) {
// 相似,先判断是否为空slot,若不是,则执行InventoryManager中的HideToolTip()
// 如果不判断也是可以的,因为如果Slot为空
// 那么InventoryManager.HideToolTip() -> ToopTip.Instance.HideToolTip() -> targetAlpha=0;
// 没有什么实质影响
}
控制提示ToolTip面板的跟随:
修改ToolTip的位置
通过RectTransformUtility.ScreenPointToLocalPointInRectangle(RectTransform rect, Vector2 screenPoint, Camera cam, out Vector2 localPos)
在InventoryManager中实现ToolTip位置的控制
上述方法参数为:
1. rect: The RectTransform to find a point inside
2. For a RectTransform in a Canvas set to ScreenSpace-Overlay mode, it should be null.
3. localPos: Point in local space of the rect
在UpdateToolTipPosition()中控制ToolTip的位置
private void UpdateToolTipPosition() {
    Vector2 position;
    RectTransformUtility.ScreenPointToLocalPointInRectangle(
        canvas.transform as RectTransform, Input.mousePosition, null, out position);
    ToolTip.Instance.transform.localPosition = position;
}
在Update()中判断是否需要调用UpdateToolTipPosition()
// 当需要显示ToolTip时,调用
// ---- private bool isToolTipDisplayed = false;
// ---- 在DisplayToolTip()中改变值isToolTipDisplayed = true;
// ---- 在HideToolTip()中改变值isToolTipDisplayed = false;
if(isToolTipDisplayed) {
UpdateToolTipPosition();
}
运行,发现现在实现了ToolTip的跟随鼠标显示效果
但是,鼠标会在ToolTip的右上角 (Text的右上角)显示,而不是在边框外显示
-- 添加一个偏移 private Vector2 toolTipPosOffset = new Vector2(18, -28);
任务25&26&27:添加蓝瓶、胸甲的Json && 完善Equipment类型
任务28&29&30:完善所有Json数据
{
    "id": 2,
    "name": "蓝瓶",
    "type": "Consumable",
    "quality": "Common",
    "description": "这个是用来加蓝的",
    "capacity": 10,
    "buyprice": 10,
    "sellprice": 5,
    "hp": 0,
    "mp": 10,
    "spritePath": "Sprites/Items/mp"
}
{
    "id": 3,
    "name": "胸甲",
    "type": "Equipment",
    "quality": "Uncommon",
    "description": "这个胸甲很牛逼",
    "capacity": 1,
    "buyprice": 500,
    "sellprice": 250,
    "strength": 10,
    "intelligence": 2,
    "agility": 0,
    "stamina": 10,
    "equipType": "Chest",
    "spritePath": "Sprites/Items/armor"
}
case Item.ItemType.Equipment:
    int strength = int.Parse(data["strength"].ToString());
    int intelligence = int.Parse(data["intelligence"].ToString());
    int agility = int.Parse(data["agility"].ToString());
    int stamina = int.Parse(data["stamina"].ToString());
    Equipment.EquipmentType equipType = (Equipment.EquipmentType)
        System.Enum.Parse(typeof(Equipment.EquipmentType), data["equipType"].ToString());
    // 通过JsonData的数据,新建一个Consumable对象
    item = new Equipment(id, name, itemType, itemQuality, description, capacity,
        buyprice, sellprice, spritePath, strength, intelligence, agility, stamina, equipType);
    break;
改进 -- 这时可以显示胸甲和蓝瓶了
但是:胸甲的数量就不需要显示,因为恒为1
在ItemUI.UpdateUIText()中加入判断Item.Capacity的情况
private void UpdateUIText() {
    if (this.Item.Capacity == 1) {
        // 不需要显示Amount
        HideAmountText();
    } else {
        AmountText.text = Amount.ToString();
    }
}
无论是已存在物品的AddAmount()或是未存在物品的SetItem(),都适用了
通过Equipment.EquipType,一共12种,一种对应一个即可
完善Json数据
Equipment的Json信息完善:
{
    "id": 3, "name": "胸甲", "type": "Equipment", "quality": "Uncommon",
    "description": "这个胸甲很牛逼", "capacity": 1, "buyprice": 500, "sellprice": 250,
    "strength": 10, "intelligence": 2, "agility": 0, "stamina": 10,
    "equipType": "Chest", "spritePath": "Sprites/Items/armor"
},
{
    "id": 4, "name": "皮腰带", "type": "Equipment", "quality": "Epic",
    "description": "这个腰带很灵活哦", "capacity": 1, "buyprice": 200, "sellprice": 100,
    "strength": 0, "intelligence": 0, "agility": 10, "stamina": 5,
    "equipType": "Belt", "spritePath": "Sprites/Items/belts"
},
{
    "id": 5, "name": "靴子", "type": "Equipment", "quality": "Legendary",
    "description": "这个靴子很快很快", "capacity": 1, "buyprice": 300, "sellprice": 150,
    "strength": 0, "intelligence": 0, "agility": 30, "stamina": 5,
    "equipType": "Boots", "spritePath": "Sprites/Items/boots"
},
{
    "id": 6, "name": "护腕", "type": "Equipment", "quality": "Rare",
    "description": "这个护腕很聪明", "capacity": 1, "buyprice": 300, "sellprice": 150,
    "strength": 0, "intelligence": 20, "agility": 0, "stamina": 0,
    "equipType": "Bracer", "spritePath": "Sprites/Items/bracers"
},
{
    "id": 7, "name": "神奇手套", "type": "Equipment", "quality": "Artifact",
    "description": "这个手套很神奇", "capacity": 1, "buyprice": 5000, "sellprice": 2500,
    "strength": 50, "intelligence": 0, "agility": 0, "stamina": 35,
    "equipType": "OffHand", "spritePath": "Sprites/Items/gloves"
},
{
    "id": 8, "name": "头盔", "type": "Equipment", "quality": "Rare",
    "description": "这个头盔很重哦", "capacity": 1, "buyprice": 1000, "sellprice": 500,
    "strength": 10, "intelligence": 5, "agility": 0, "stamina": 25,
    "equipType": "Head", "spritePath": "Sprites/Items/helmets"
},
{
    "id": 9, "name": "白银项链", "type": "Equipment", "quality": "Common",
    "description": "这个项链只是镀了一层白银", "capacity": 1, "buyprice": 400, "sellprice": 200,
    "strength": 0, "intelligence": 15, "agility": 15, "stamina": 0,
    "equipType": "Neck", "spritePath": "Sprites/Items/necklace"
},
{
    "id": 10, "name": "戒指", "type": "Equipment", "quality": "Rare",
    "description": "这个戒指刮了一下,金色没了诶", "capacity": 1, "buyprice": 500,
   "sellprice": 250, "strength": 0, "intelligence": 30, "agility": 0, "stamina": 0,
    "equipType": "Ring", "spritePath": "Sprites/Items/rings"
},
{
    "id": 11, "name": "皮裤", "type": "Equipment", "quality": "Common",
    "description": "猪皮制成的裤子,汪峰最喜欢", "capacity": 1, "buyprice": 300,
    "sellprice": 150,"strength": 10, "intelligence": 0, "agility": 0, "stamina": 20,
    "equipType": "Leg", "spritePath": "Sprites/Items/pants"
},
{
    "id": 12, "name": "皮护肩", "type": "Equipment", "quality": "Common",
    "description": "猪皮制成的裤子,这次汪峰不喜欢了", "capacity": 1, "buyprice": 300,
    "sellprice": 150, "strength": 10, "intelligence": 0, "agility": 0, "stamina": 15,
    "equipType": "Shoulder", "spritePath": "Sprites/Items/shoulders"
}
武器的Json信息完善:
{
    "id": 13,
    "name": "木斧",
    "type": "Weapon",
    "quality": "Common",
    "description": "砍木头用的斧子",
    "capacity": 1,
    "buyprice": 500,
    "sellprice": 250,
    "damage": 50;
    "weapType": "MainHand",
    "spritePath": "Sprites/Items/axe"
},
{
    "id": 14,
    "name": "玄铁剑",
    "type": "Weapon",
    "quality": "Artifact",
    "description": "上古时期,蚩尤用玄铁锻造的剑",
    "capacity": 1,
    "buyprice": 15000,
    "sellprice": 7500,
    "damage": 450;
    "weapType": "OffHand",
    "spritePath": "Sprites/Items/sword"
}
武器的Json解析:
case Item.ItemType.Weapon:
    int damage = int.Parse(data["damage"].ToString());
    Weapon.WeaponType weaponType = (Weapon.WeaponType)System.Enum.Parse
        (typeof(Weapon.WeaponType), data["weaponType"].ToString());
    item = new Weapon(id, name, itemType, itemQuality, description, capacity,
        buyprice, sellprice, spritePath, damage, weaponType);
    break;
材料的Json信息完善:
{
    "id": 15, "name": "铁块", "type": "Material", "quality": "Common",
    "description": "用于合成装备和武器", "capacity": 20, "buyprice": 10,
    "sellprice": 5, "spritePath": "Sprites/Items/ingots"
},
{
    "id": 16, "name": "玄铁剑的锻造秘籍", "type": "Material", "quality": "Artifact",
    "description": "用来锻造玄铁剑的秘籍", "capacity": 5, "buyprice": 1000,
    "sellprice": 500, "spritePath": "Sprites/Items/book"
},
{
    "id": 17, "name": "头盔的锻造秘籍", "type": "Material", "quality": "Rare",
    "description": "用于合成装备和武器", "capacity": 5, "buyprice": 100,
    "sellprice": 50, "spritePath": "Sprites/Items/scroll"
}
材料的Json信息解析:
因为Material中只有基类Item的成员属性,因此不需要进行Json解析
item = new Material(id, name, itemType, itemQuality, description, capacity, buyprice, sellprice, spritePath);
任务31&32:完善物品的提示信息显示
之前在Item.GetToolTipContent()中简单显示了物品的信息,现在来完善这个功能
实现效果:Item.Name + Item.Quality + Item.Desc + Item.prices
public virtual string GetToolTipContent() {
    return Name + '\n' + Quality + '\n' + Description +
        "\n购买价格: " + Buyprice + "  卖出价格: " + Sellprice;
}
实现效果:对于不同品质的Item,显示的颜色、大小不同
对于部分文字的颜色修改:通过标记<color=...>...</color>
<color=red>text</color>
<size=16>text</size>
勾选Text中的Rich Text,表示需要解析标记
颜色列表
Quality 颜色
Common white
Uncommon lime
Rare navy
Epic megenta
Legendary orange
Artifact red
public virtual string GetToolTipContent() {
    string color;
    switch (Quality) {
        case ItemQuality.Common:
            color = "white";
            break;
        case ItemQuality.Uncommon:
            color = "lime";
            break;
        case ItemQuality.Rare:
            color = "navy";
            break;
        case ItemQuality.Epic:
            color = "megenta";
            break;
        case ItemQuality.Legendary:
            color = "orange";
            break;
        case ItemQuality.Artifact:
            color = "red";
            break;
        default:
            color = "white";
            break;
    }
    return string.Format("<color={0}><size=16>{1}</size></color>\n{2}\n
        购买价格: {3}  卖出价格: {4}", color, Name, Description, Buyprice, Sellprice);
}

消耗品的自有属性显示:
override Item中的GetToolTipContent()
public override string GetToolTipContent() {
    string text = base.GetToolTipContent();
    return string.Format("{0}\n\n<color=red>HP + {1}</color>\n
        <color=blue>MP + {2}</color>", text, HP, MP);
}
装备的自有属性显示:
public override string GetToolTipContent() {
    // Equipment.EquipmentType的中文
    string equipTypeText;
    switch (EquipType) {
        case EquipmentType.Head:
            equipTypeText = "头部";
            break;
        case EquipmentType.Neck:
            equipTypeText = "脖子";
            break;
        // ... "胸部" "戒指" "腿部" "护腕" "鞋子" "肩部" "腰带"
        case EquipmentType.OffHand:
            equipTypeText = "副手";
            break;
        default:
            equipTypeText = "";
            break;
    }
    string oldText = base.GetToolTipContent();
    return string.Format("{0}\n\n<color=blue>装备类型: {5}\n力量 + {1}\n
        智力 + {2}\n敏捷 + {3}\n体力 + {4}\n</color>", oldText, Strength,
        Intelligence, Agility, Stamina, equipTypeText);
}
武器的自有属性显示:
public override string GetToolTipContent() {
    string oldText = base.GetToolTipContent();
    string weaponTypeText;
    switch (WeapType) {
        case WeaponType.OffHand:
            weaponTypeText = "副手";
            break;
        case WeaponType.MainHand:
            weaponTypeText = "主武器";
            break;
        default:
            weaponTypeText = "";
            break;
    }
    return string.Format("{0}\n<color=blue>武器类型: {2}\n攻击 + {1}</color>",
        oldText, weaponTypeText, Damage);
}
任务33~38&40~43&48:PickedItem的移动功能实现
任务33:在InventoryManager中管理PickedItem
当物品被鼠标点击后,会被鼠标选中,随着鼠标位置的移动而移动
因为点击的是Slot,所以将Slot继承自IPointerDownHandler接口,并实现OnPointerDown()
在Canvas下创建一个Item物体PickedItem
在ItemUI中实现功能
在InventoryManager中控制该物体
在InventoryManager中:
private ItemUI pickedItem;
在Start中初始化
pickedItem = GameObject.Find("PickedItem").GetComponent<ItemUI>();
pickedItem.Hide();
// -------- ItemUI的一些基本功能,如显示自己、隐藏自己、控制自身位置等
// public void Hide/ Display() {
// gameObject.SetActive(false/ true);
// }
// -------- 设置自己的localPosition
// public void SetLocalPosition(Vector3 pos) {
// // 因为是设置在Canvas下的位置,因此为LocalPos
// transform.localPosition = pos;
// }
}
任务34:实现Slot中的OnPointerDown() -- 按下算选中一个Slot
分析物体移动的多种情况:
移动功能扩展:
当按住ctrl键,进行PickedItem选中时,会选择一半物品
当按住ctrl键,进行PickedItem放置时,会放置一个物品
1. 按下的Slot为空
1. 鼠标按下之前,已经选中了物品 -- 将PickedItem放入slot
按下Ctrl,会放置一个物品
没有按Ctrl,会放置鼠标上的所有物品
2. 鼠标按下之前,没有选中物品 -- 不做操作
2. 按下的Slot不为空
1. 鼠标按下之前,已经选中了物品
如果物品Id不同 -- 交换物品
如果物品Id相同
可叠加
可以完全叠加
按下Ctrl -- 叠加一个
没有按Ctrl -- 叠加所有
不可以完全叠加 -- 将当前物品数量设为capacity,原物品为剩下数量
不可叠加 -- 交换物品
2. 鼠标按下之前,没有选中物品
按下Ctrl,会选择一半物品
没有按Ctrl,会选择全部物品
代码实现:
任务35&36&37:物品的选中功能:
Slot不为空,且鼠标按下之前没有选中物品
if(transform.ChildCount != 0) { // 当前slot不为空
if(InventoryManager.Instance.IsPickedItemEmpty()) { // 还未选中物体
// -------- InventoryManager.IsPickedItemEmpty() {
// return pickedItem.Item == null;
// }
ItemUI currItemUI = transform.GetCompInChildren<ItemUI>()
if(Input.GetKey(KeyCode.LeftControl)) { // 注意是按住而不是按下
// 按下Ctrl,取走一半物品
// 捡起一半物品,放置在鼠标的PickedItem上
int amountPicked = (currItem.Amount+1) / 2; // 进一法,如果原个数为1,则取走1
int amountLeft = currItem.Amount - amountPicked;
InventoryManager.Instance.SetPickedItem(currItemUI.Item, amountPicked);
// ------- InventoryManager.SetPickedItem(Item item, int amount) {
// pickedItem.SetPickedItem(item, amount);
// }
// ------- ItemUI.SetPickedItem(Item item, int amount) {
// SetItem(item, amount);
// }
// 更新Slot中剩下的物品
if(amountLeft == 0) {
Destroy(currItemUI.gameObject);
} else {
currItem.SetAmount(amountLeft);
// ------- ItemUI.SetAmount(int amount) {
// Amount = amount;
// UpdateUIText();
// }
}
} else {
// 没有按Ctrl,取走所有物品
// 把当前Slot中的Item设置给PickedItem中的Item,还有Amount
InventoryManager.Instance.SetPickedItem(currItemUI.Item, currItemUI.Amount);
// 销毁原来空格中的物品显示
Destroy(transform.GetChild(0).gameObject);
}
}}
任务38:将选中的PickedItem显示出来,并更新位置
在InventoryManager.SetPickedItem(Item item, int amount) {
之前是做了pickedItem.SetPickedItem(item, amount);
设置了相关的Item给了PickedItem
那么现在,pickedItem中已经包含了当前选中的item,需要显示
pickedItem.Display();
}
在InventoryManager.Update()中控制pickedItem的位置跟随(和之前做的toolTip的跟随一样)
if(!IsPickedItemEmpty()) {
UpdatePickedItemPosition();
// ------- InventoryManager.UpdatePickedItemPosition() {
// Vector2 targetPos;
// RectTransformUtility.ScreenPointToLocalPointInRectangle(
// canvas.transform as RectTransform, Input.mousePosition, null, out targetPos);
// pickedItem.SetLocalPosition(targetPos);
// }
}
现在能够使pickedItem随鼠标移动了
但是,选中物品后,ToolTip仍然显示,需要将其自动隐藏
在InventoryManager.SetPickedItem(Item item, int amount) {
最后一句添加上
ToolTip.Instance.HideToolTip();
}
// Siki认为当pickedItem不为空时,即手上已经有选定物品时,移到其他物品时的ToolTip就不该显示
// 如果想实现的话,可以在InventoryManager.DisplayToolTip(string desc)中判断IsPickeItemEmpty()即可
// 但我认为还是需要显示的
任务40&41&42&43&48:放置物品
之前完成的是物品的选取
if(transform.childCount != 0) {
if(InventoryManager.IsPickedItemEmpty()) {
// 取走一定数量的物品
// ...上一节实现了
} else {
// 当前slot不为空,且手上已经有选中物品了
ItemUI pickedItemUI = InventoryManager.Instance.PickedItem;
if(currItemUI.Item.ID == pickedItemUI.Item.ID) {
// 当两个ID相同时
if(IsSlotFilled()) {
// 当前Slot满了,不可叠加,交换物品位置即可
// 任务48
ExchangeWithPickeItem();
// ------- Slot.ExchangeWithPickedItem() {
// ItemUI currItemUI = GetComponentInChildren<ItemUI>();
// Item tempItem = InventoryManager.Instance.PickedItem.Item;
// int tempAmount = InventoryManager.Instance.PickedItem.Amount;
// InventoryManger.Instance.SetPickedItem(currItemUI.Item, currItemUI.Amount);
// currItemUI.SetItem(tempItem, tempAmount);
// }
} else {
// 可进行叠加
int amount = currItem.Item.Amount; // 记录当前slot中item要变成的数量
int amountToAdd; // 需要添加到currItem中的数量
int leftAmount = pickedItemUI.Amount; // 记录pickedItem中item要变成的数量
if(Input.GetKey(KeyCode.LeftControl)) {
// 按下Ctrl,一次放一个
// if((1+currItemUI.Amount) > currItemUI.Item.Capacity) {
// 若放入,则超出数量 -- 无操作
// 这个无需判断,因为当slot未满,则必然slot数量+1不会超过capacity
amountToAdd = 1;
} else {
// 没有按Ctrl,全部放入
if((amount + leftamount) > currItemUI.Item.Capacity) {
// 需要放入的数量太多,不能完全叠加
amountToAdd = currItemUI.Item.Capacity - amount;
} else {
// 可以完全叠加
amountToAdd = leftAmount;
}
}
amount += amountToAdd;
leftAmount -= amountToAdd;
currItemUI.SetAmount(amount);
// 剩余个数判断
if(leftAmount == 0) {
// 销毁pickedItem
InventoryManager.Instance.ResetPickedItem();
// ------- InventoryManager.ResetPickedItem() {
// pickedItem.ResetItem();
// pickedItem.Hide();
// }
// ------- ItemUI.ResetItem() {
// this.Item = null;
// this.Amount = 0;
// }
} else {
InventoryManager.Instance.SetPickedItemAmount(leftAmount);
// 不知道为什么不直接通过pickedItem.SetAmount()解决
// 可能是因为pickedItem最好统一通过InventoryManager进行访问?
// ------- InventoryManager.SetPickedItemAmount(int amount) {
// pickedItem.SetAmount(amount);
// }
}
}
} else { // 当两个ID不同时 -- 交换物品
ExchangeWithPickedItem();
}
}
} else {
// 当前slot为空
if(!InventoryManager.Instance.IsPickedItemEmpty()) {
// pickedItem不为空,即已经选定了物品 -- 将物品放入该空slot
ItemUI pickedItemUI = InventoryManager.Instance.PickedItem;
if(Input.GetKey(KeyCode.LeftControl) {
// 按下Ctrl -- 一次放一个
// 通过StoreItem将pickedItem存入当前slot中
StoreItem(pickedItemUI.Item);
InventoryManager.Instance.SetPickedItemAmount(pickedItemUI.Amount - 1);
} else {
// 没有按Ctrl -- 一次性全放(因为不存在溢出的情况)
StoreItem(pickedItemUI.Item);
transform.GetComponentInChildren<ItemUI>().SetAmount(pickedItemUI.Amount);
InventoryManager.Instance.SetPickedItemAmount(0);
}}}
任务44:添加Chest箱子
复制Knapsack物体,改名Chest,设置位置大小
子物体TitleBg的Text修改为箱子
container中slot数量设置为8个
将附带的Knapsack.cs脚本替换为Chest.cs脚本
Chest.cs中实现单例模式
private static Chest _instance;
public static Chest Instance {
    get {
        if(_instance == null) {
            _instance = GetComponent<Chest>();
        }
        return _instance;
}}
任务45:物品的丢弃
思路:如果pickedItem不为空,且鼠标点击的位置没有UI,则进行丢弃操作
在哪里写代码呢?Slot
不,这个功能并不是跟Slot挂钩的,而是跟InventoryManager很相关
InventoryManager.Update()
// 物品丢弃操作
if (!IsPickedItemEmpty()) {
    if (Input.GetMouseButtonDown(0) &&
        !UnityEngine.EventSystems.EventSystem.current.IsPointerOverGameObject(-1)) {
        // 按下鼠标左键,且点击处没有任何物体
        int amount = pickedItem.Amount;
        if(Input.GetKey(KeyCode.LeftControl)) {
            // 如果按住ctrl,一个一个扔
            amount--;
        } else {
            // 没有按住ctrl,全部扔掉
            amount = 0;
        }
        SetPickedItemAmount(amount);
}}
BugFix --
运行,发现如果鼠标点击不精确,将pickedItem放置到slot之间的空位
会执行丢弃物品的操作
因为此时EventSystem没有得到点击的反馈
解决方法 -- 将Knapsack等Inventory的Image.RaycastTarget勾选上即可
任务46&47:控制背包、箱子的显示和隐藏
在父类Inventory中实现
在Knapsack和Chest物体上添加Canvas Group,通过alpla进行透明度控制
private float targetAlpha = 1;
private float smooth = 5;
在Inventory.Update中,实现显示和隐藏
if(Mathf.Abs(canvasGroup.alpha - targetAlpha) > 0.05f) {
    canvasGroup.alpha = Mathf.Lerp(canvasGroup.alpha, targetAlpha, Time.deltaTime * smooth);
} else {
    canvasGroup.alpha = targetAlpha;
}
两个方法实现显示和隐藏
public void Hide/ Display () {
targetAlpha = 0 / 1;
}
在Player中用I控制背包的显示和隐藏:
if(Input.GetKeyDown(KeyCode.I) {
// 这里要根据当前显示状态进行更换显示或隐藏状态
// 但是在这里实现不大好
// ------- Inventory.DisplaySwitch() {
// if(targetAlpha == 0) {
// Display();
// } else {
// Hide();
// }}
相同的,可以用C键控制Chest的显示和隐藏
发现bug -- 当箱子或背包隐藏以后,东西仍然可以移动给它
隐藏以后,将CanvasGroup.BlocksRaycasts = false;即可
在Hide和Display()的最后,添加一句
canvasGroup.blocksRaycasts = false/ true;
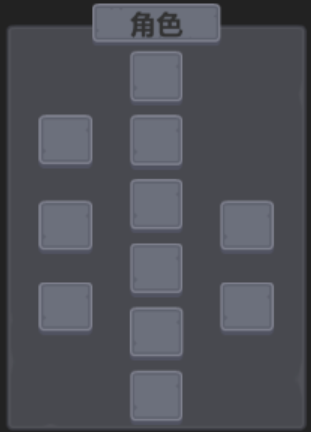
任务49&50&51:Character角色面板
角色面板会显示当前角色佩戴的装备和武器 -- 一共十一个部位
复制Chest
命名Character,修改Text
增加到11个slot
删除GridLayoutGroup,删除Container,因为slot不需要自动排列
删除脚本Chest,添加脚本Character.cs
运行,发现Slot里面没有存储限制,即其他物品也可以放入装备面板
解决方法 -- 创建Slot的子类EquipmentSlot
给每个装备添加对应的EquipmentType和WeaponType
public Equipment.EquipmentType equipmentType;
public Weapon.WeaponType weaponType;
修改EquipmentType和WeaponType,各添加一个None的选择,将不属于的slot赋值为None
注:OffHandSlot即可以放装备也可以放武器
角色面板的功能(策划)
1. 在其他地方直接右键,即可穿戴;在角色面板中直接右键,即可脱下
2. 拖拽方式
任务52&53&54:装备的穿戴与卸下 -- 拖拽方式
添加脚本Character.cs,继承自Inventory
需要使用Inventory中的slotList,就不能声明为private,改为protected
// 或者提供一个get方法
写成单例模式:
private static Character _instance;
public static Character Instance {
get {
if(_instance == null) {
_instance = GameObject.Find("Character").GetComponent<Character>();
}
return _instance;
}}
因为在装备槽中的判定方式不大一样
需要判定是否符合装备类型,而且不需要判断ctrl的情况
而且没有Amount的加减问题
override OnPointerDown()
分析:
1. pickedItem为空
当前slot为空 -- 无操作
当前slot不为空 -- 选取装备
2. pickedItem不为空
当前slot为空
判断是否符合类型,符合就放入,不符合则无操作
当前slot不为空
判断是否符合类型,符合就交换,不符合则无操作
using UnityEngine.EventSystems;
public class EquipmentSlot : Slot {
    public Equipment.EquipmentType equipmentType;
    public Weapon.WeaponType weaponType;

    // 传入item的类型是否与当前slot的类型匹配
    public bool IsItemMatchedSlotType(Item item) {
        return (item is Equipment && ((Equipment)item).EquipType == equipmentType ||
            item is Weapon && ((Weapon)item).WeapType == weaponType);
    }
    public override void OnPointerDown(PointerEventData eventData) {
        ItemUI pickedItemUI = InventoryManager.Instance.PickedItem;
        ItemUI currItemUI = GetComponentInChildren<ItemUI>();
        if (InventoryManager.Instance.IsPickedItemEmpty()    ) {
            if(transform.childCount == 1) {
                // pickedItem为空,且当前slot不为空
                // 选取装备
          InventoryManager.Instance.SetPickedItem(currItemUI.Item, currItemUI.Amount);
                Destroy(currItemUI.gameObject);
        }} else {
            // pickedItem不为空
            if(transform.childCount == 0) {
                // 当前slot为空
                if (IsItemMatchedSlotType(pickedItemUI.Item)) {
                    // pickedItem满足slot的类型
                    // 放入slot
                    StoreItem(pickedItemUI.Item);
            InventoryManager.Instance.SetPickedItemAmount(pickedItemUI.Amount - 1);
            }} else {
                // 当前slot不为空
                if (IsItemMatchedSlotType(pickedItemUI.Item)) {
                    // 交换物品
                    ExchangeWithPickedItem();
}}}}}
另一种override的思路(未验证可信性)
EquipmentSlot: Slot
将Slot.StoreItem()声明为virtual的
// 在StoreItem中判断是否符合slot的装备类型
public override bool StoreItem(Item itemToStore) {
    // 判断是否为Equipment,否则不能存入
    if(IsItemTypeEquipment()) {base.StoreItem(itemToStore);
        return true;
    } else {
        return false;
}}
因为之前StoreItem是肯定会将Item存入的,不存在不存入的情况
因此在Slot.OnPointerDown()中会报错。
解决方法:在Slot.StoreItem()最后返回return true;
任务55&56&57&58:装备的穿戴与卸下 -- 右键方式
之前对与鼠标按键的检测是通过IPointerDownHandler -- OnPointerDown()
该事件当鼠标的任意按键按下时触发
因此以上操作可以发生在鼠标左键/右键/滚轮按下时
要求:左键控制物品的移动,右键控制装备的穿戴
PointerEventData eventData.button表示当前按下的鼠标按键类型
if(eventData.button == PointerEventData.InputButton.Left) {
// 物品移动代码
} else if (eventData.button == PointerEventData.InputButton.Right) {
// 物品穿戴代码
}
在Slot中的物品穿戴代码 -- 因为物品的穿戴是在Slot上右键的而不是在Character中操作的
分析:
因为不需要判断pickedItem的状态,如果右键,就进行穿戴
-- 还是需要判断pickedItem的状态
当pickedItem不为空时,且当前slot不为空时,进行
当前slot不为空 -- 进行穿戴
} else if (eventData.button == PointerEventData.InputButton.Right) {
    // 右键按下,进行物品的穿戴
    if (transform.childCount == 1) {
        ItemUI currItemUI = transform.GetChild(0).GetComponent<ItemUI>();
        if (currItemUI.Item is Equipment || currItemUI.Item is Weapon) {
            // 当前slot不为空,且物品为可穿戴类型的 -- 进行穿戴
            Item currItem = currItemUI.Item;
            Debug.Log("currItem" + currItem.Name);
            // DestroyImmediate是立即销毁,立即释放资源,做这个操作的时候,会消耗很多时间的,影响主线程运行
            // Destroy是异步销毁,一般在下一帧就销毁了,不会影响主线程的运行。
            // 但是这里不能使用Destroy,否则在存回Knapsack时取得的EmptySlot就不准确了
            DestroyImmediate(currItemUI.gameObject);
            Character.Instance.PutOnEquipOrWeapon(currItem);
}}}
穿戴的方法Character.PutOnEquipOrWeapon(Item item):
public void PutOnEquipOrWeapon(Item item  ) {
    EquipmentSlot slot = FindSlotWithSameItemEquipOrWeaponType(item);
    if (slot != null) {
        // 如果找到匹配类型的slot
        if(slot.transform.childCount == 1) {
            // 如果slot不为空
            // 存入物品,再将将原来装备面板中的物品放回到背包中
            Item itemToPutBack = slot.GetComponentInChildren<ItemUI>().Item;
            slot.GetComponentInChildren<ItemUI>().SetItem(item);
            Knapsack.Instance.StoreItem(itemToPutBack);
        } else {
            // 如果slot为空 -- 直接将pickedItem放入
            slot.StoreItem(item);
}}}
public EquipmentSlot FindSlotWithSameItemEquipOrWeaponType(Item item) {
    foreach(EquipmentSlot slot in slotList) {
        if(slot.IsItemMatchedSlotType(item)) {
            Debug.Log(slot.name + " Matched!");
            return slot;
    }}
    return null;
}
注意点:
1. 原来打算通过PickedItem来进行物品穿戴或交换,后来改为直接执行
2. 注意knapsack中currItem的销毁和storeBack的执行顺序,会导致FindEmptySlot()的结果
3. Destroy() 和 DestroyImmediate()的区别
BugFixing --
1.
发现当手上有pickedItem时,对其他装备进行右键,仍然可以进行穿戴,而且pickedItem不变
因为右键的操作没有通过pickedItem来执行
解决方法:
在Slot.OnPointerDown()中穿戴装备处进行判断
if(!InventoryManager.Instance.IsPickedItemEmpty() && ...)
2.
在穿戴装备后,仍然显示该装备的TooTip
解决方法:
在成功穿戴装备后,隐藏ToolTip
ToolTip.Instance.HideToolTip();
装备栏中装备的右键卸下:
因为卸下的操作只在Character面板中,因此在EquipmentSlot.cs中
} else if (eventData.button == PointerEventData.InputButton.Right) {
    // 按下右键时,进行物品的卸下
    if(InventoryManager.Instance.IsPickedItemEmpty()    ) {
        // 当手上没有物品时,才能卸下装备
        if(transform.childCount == 1) {
            // 当当前slot不为空时
            if (Knapsack.Instance.FindEmptySlot()) {
                // 背包中有空位可以接收物品
                Destroy(currItemUI.gameObject);
                Character.Instance.TookOffEquipOrWeapon(currItemUI.Item);
                ToolTip.Instance.HideToolTip();
}}}}
对应的Character中的TookOffEquipOrWeapon() -- 很简单,只需要存入背包即可
public void TookOffEquipOrWeapon(Item item) {
Knapsack.Instance.StoreItem(item);
}
任务59:角色面板的显示和隐藏
在Player.cs中通过E键控制装备面板的显示和隐藏
if(Input.GetKeyDown(KeyCode.E)) {
Character.Instance.DisplaySwitch();
}
在Canvas中显示所有按键的提示信息
在Canvas中新建Text,命名KeyTip
内容:"G 得到物品(换行)I背包显示 C箱子显示 E装备面板显示"
任务60:控制角色面板的属性显示
武器和装备对角色的属性影响,需要在角色面板上显示出来
在CharacterPanel下新建子物体UI->Panel,命名PropertyPanel
新建子物体UI->Text
居中,留些边距,大小颜色微调
属性的显示在Character.cs中进行控制
所有属性汇总:
装备影响:
strength力量
intelligence智力
agility敏捷度
stamina体力
武器影响:
damage攻击力
在Player中存放基础属性:
private int basicStrength = 10;
public int BasicStrength {
get {
return basicStrength;
}}
在Character.cs中
private void UpdatePropertyTextUI() {
  int strength = 0, intelligence = 0, agility = 0, stamina = 0, damage = 0;
  // 取得每一个装备的属性,并加到总属性值中
  foreach (Slot slot in slotList) {
  if (slot.transform.childCount == 1) {
    // 如果该slot中有装备
    Item currItem = slot.GetComponentInChildren<ItemUI>().Item;
    if (currItem is Equipment) {
      strength += ((Equipment)currItem).Strength;
      ......
    } else if (currItem is Weapon) {
      damage += ((Weapon)currItem).Damage;
  }}}
  // 加上基础属性
  Player player = GameObject.FindWithTag("Player").GetComponent<Player>();
  strength += player.BasicStrength;
  ......
  // 更新UI
  propertyText.text = string.Format("攻击力:{0}\n力量:{1}\n智力:
    {2}\n敏捷:{3}\n体力:{4}\n", damage, strength, intelligence, agility, stamina);
}
什么时候需要调用UpdatePropertyTextUI呢?
1. Start中
2. PutOn()和TookOff()中 -- 右键穿戴和卸下
3. EquipmentSlot中的OnPointerDown()中 -- 拖拽穿戴和卸下
在Start和PutOn()和TookOff()中,直接调用UpdatePropertyTextUI();即可
在EquipmentSlot中,在三个左键穿戴脱下装备的地方
transform.parent.SentMessage("UpdatePropertyTextUI");
// EquipmentSlot的父类是Character,向其发送消息,调用UpdatePropertyTextUI()
任务61&62:商店面板
复制ChestPanel,命名VendorPanel
Title Text内容为小贩
Slot个数改为12格
删除Chest.cs替换为Vendor.cs
小贩面板的功能:
不需要和其他面板进行交换,只负责买卖
小贩的Slot中只需要做右击购买的功能
小贩面板的初始化 -- 开始时有自己售卖的物品
将12个格子改为VendorSlot,添加VendorSlot.cs,继承自Slot.cs
在Vendor.cs中声明数组,表示售卖的物品
public int[] itemIdArray; // 在Inspector面板中赋值
在Start()进行根据itemId进行实例化Item
base.Start();
InitVendor();
}
其中private void InitVendor() {
for(int i = 0; i < itemIdArray.Length; i++) {
StoreItem(itemIdArray[i]);
}}
运行,报错 --
NullReferenceException: Object reference not set to an instance of an object
InventoryManager.GetItemById (Int32 id)
原因:因为GetItemById()中的itemList是在ParseItemJson()中初始化的,
ParseItemJson()是在InventoryManager.Start()中被调用的
而InitVendor()中调用了GetItemById(),InitVendor()也是在Vendor.Start()中被调用的
-- 同时调用,因此会报空指针
解决方法:在InventoryManager中,将ParseItemJson()在Awake()中调用