前言
我们经常使用到提示框,最简单的提示框就是那种添加标题和内容,再加上取消和确定按钮。
而在这里就来实现丰富的自定义AlertDialog提示框。
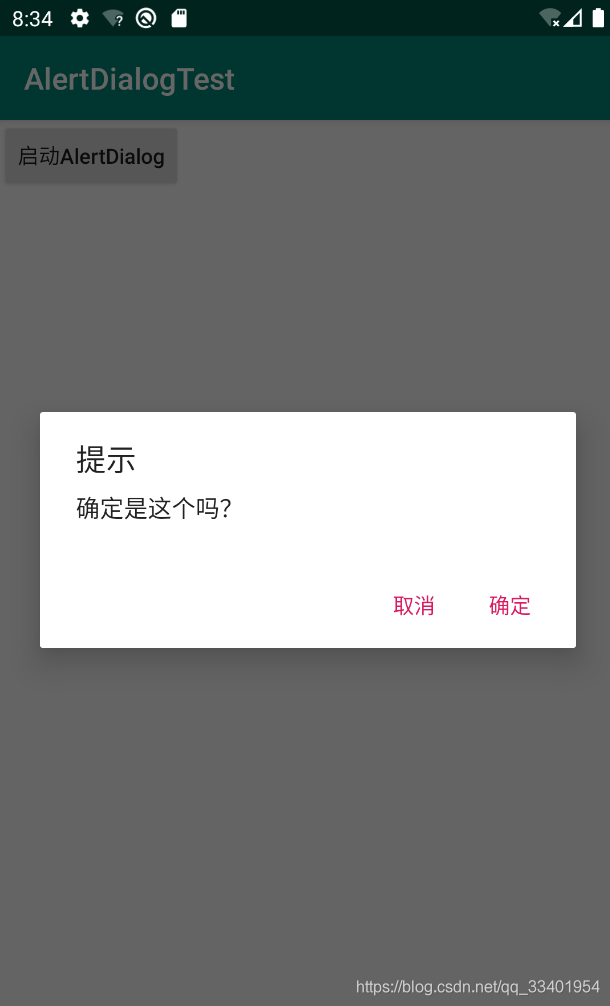
一、最基础的AlertDialog
直接代码布局文件activity_main.xml
<?xml version="1.0" encoding="utf-8"?>
<LinearLayout xmlns:android="http://schemas.android.com/apk/res/android"
    xmlns:app="http://schemas.android.com/apk/res-auto"
    xmlns:tools="http://schemas.android.com/tools"
    android:layout_width="match_parent"
    android:layout_height="match_parent"
    tools:context=".MainActivity"
    android:orientation="vertical">
   <Button
       android:text="启动AlertDialog"
       android:id="@+id/launchAlertDialog"
       android:layout_width="wrap_content"
       android:layout_height="wrap_content">
   </Button>
</LinearLayout>
然后就是Java代码
public class MainActivity extends AppCompatActivity {
    private Button mlaunchButon;

    @Override
    protected void onCreate(Bundle savedInstanceState) {
        super.onCreate(savedInstanceState);
        setContentView(R.layout.activity_main);
        initView();
        OnClick();
    }
    //加载布局
    public void initView(){
        mlaunchButon=findViewById(R.id.launchAlertDialog);
    }
    //点击事件管理
    public void OnClick(){
        mlaunchButon.setOnClickListener(new View.OnClickListener() {
            @Override
            public void onClick(View v) {
                showAlertDialog();
            }
        });
    }
    //创建并显示AlertDialog
    public void showAlertDialog(){
        AlertDialog.Builder builder =new AlertDialog.Builder(this);
        builder.setTitle("提示");
        builder.setMessage("确定是这个吗?");
        builder.setPositiveButton("确定", new DialogInterface.OnClickListener(){
            @Override
            public void onClick(DialogInterface dialog,int which){
			//点击确定执行的事件
            }
        });
        builder.setNegativeButton("取消", new DialogInterface.OnClickListener()
        {
            @Override
            public void onClick(DialogInterface dialog, int which) {
			//点击取消执行的事件
            }
        });
        builder.create().show();
    }

}
看截图
二、自定义布局的AlertDialog
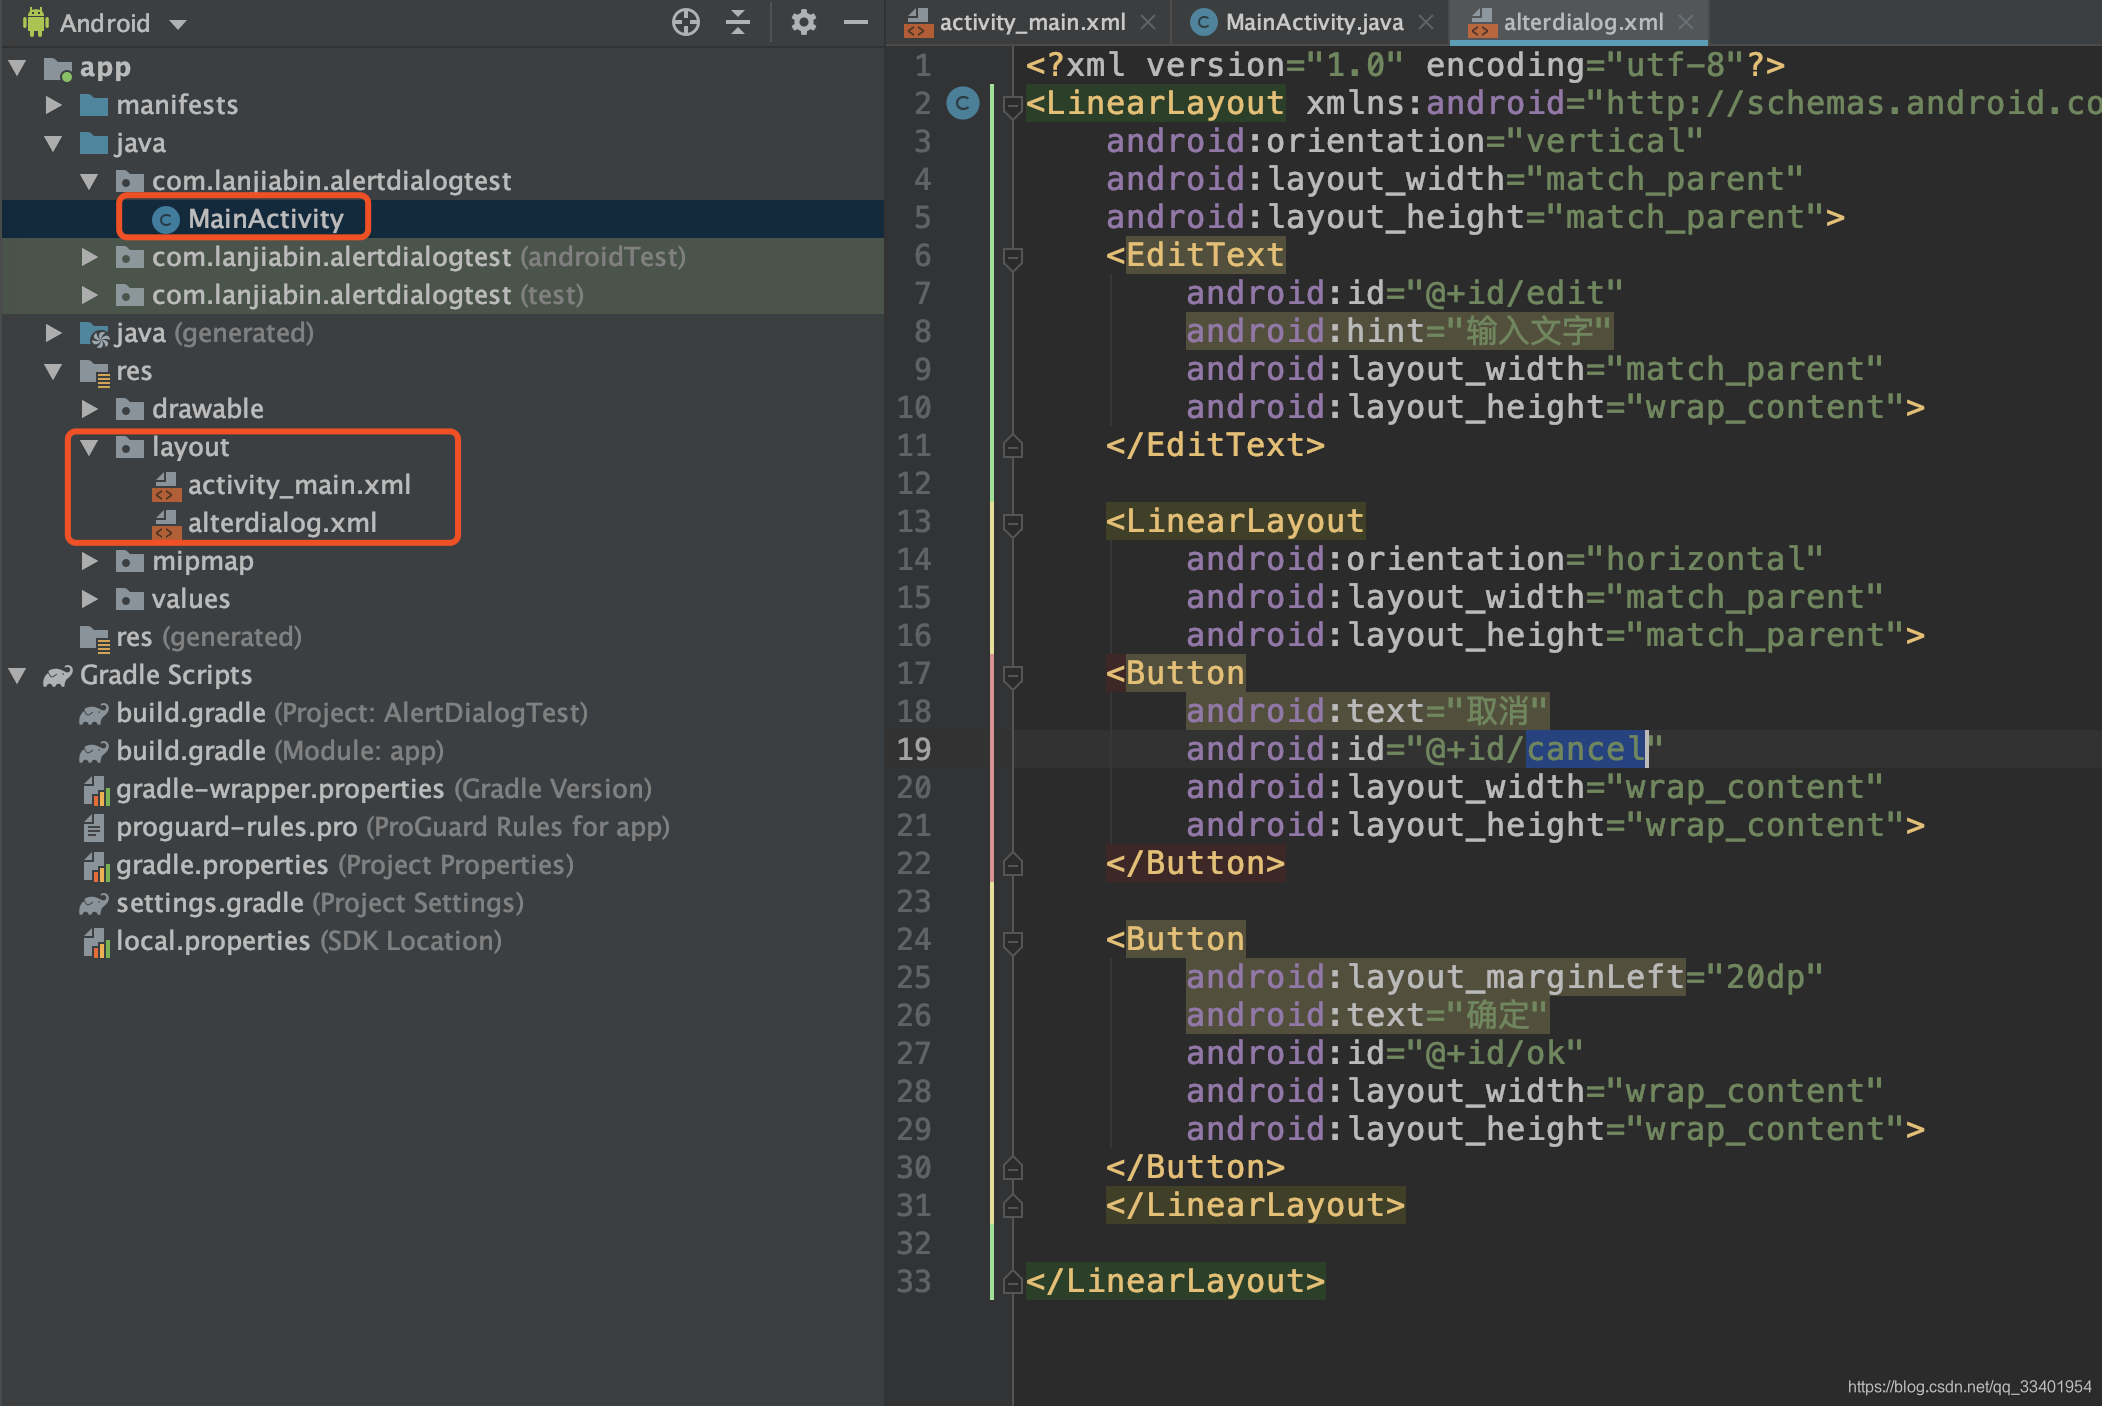
1.创建自定义布局文件
在layout下创建alterdialog.xml布局文件。
<?xml version="1.0" encoding="utf-8"?>
<LinearLayout xmlns:android="http://schemas.android.com/apk/res/android"
    android:orientation="vertical"
    android:layout_width="match_parent"
    android:layout_height="match_parent">
    <EditText
        android:id="@+id/edit"
        android:hint="输入文字"
        android:layout_width="match_parent"
        android:layout_height="wrap_content">
    </EditText>

    <LinearLayout
        android:orientation="horizontal"
        android:layout_width="match_parent"
        android:layout_height="match_parent">
    <Button
        android:text="取消"
        android:id="@+id/cancel"
        android:layout_width="wrap_content"
        android:layout_height="wrap_content">
    </Button>

    <Button
        android:layout_marginLeft="20dp"
        android:text="确定"
        android:id="@+id/ok"
        android:layout_width="wrap_content"
        android:layout_height="wrap_content">
    </Button>
    </LinearLayout>
</LinearLayout>
2.获得布局和控件实例
获得alterdialog.xml文件的实例,再从中得到控件的实例,这样就可以跟正常的控件一样,添加监听方法和其它操作。
 	private Button mlaunchButon,mCancel,mOK;
    private View mView;
    private EditText mEditText;

 		//获得布局文件实例
        mView=View.inflate(this,R.layout.alterdialog,null);
        //获得控件实例
        mEditText=mView.findViewById(R.id.edit);
        mCancel=mView.findViewById(R.id.cancel);
        mOK=mView.findViewById(R.id.ok);
3.关联布局文件
 	    //关联自定义布局文件
        builder.setView(mView);
4.完整代码
activity_main.xml
<?xml version="1.0" encoding="utf-8"?>
<LinearLayout xmlns:android="http://schemas.android.com/apk/res/android"
    xmlns:app="http://schemas.android.com/apk/res-auto"
    xmlns:tools="http://schemas.android.com/tools"
    android:layout_width="match_parent"
    android:layout_height="match_parent"
    tools:context=".MainActivity"
    android:orientation="vertical">
   <Button
       android:text="启动AlertDialog"
       android:id="@+id/launchAlertDialog"
       android:layout_width="wrap_content"
       android:layout_height="wrap_content"
       android:textAllCaps="false">
   </Button>
</LinearLayout>
MainActivity.java
public class MainActivity extends AppCompatActivity {
    private Button mlaunchButon,mCancel,mOK;
    private View mView;
    private EditText mEditText;

    @Override
    protected void onCreate(Bundle savedInstanceState) {
        super.onCreate(savedInstanceState);
        setContentView(R.layout.activity_main);
        initView();
        OnClick();
    }
    public void initView(){
        mlaunchButon=findViewById(R.id.launchAlertDialog);
        //获得布局文件实例
        mView=View.inflate(this,R.layout.alterdialog,null);
        //获得控件实例
        mEditText=mView.findViewById(R.id.edit);
        mCancel=mView.findViewById(R.id.cancel);
        mOK=mView.findViewById(R.id.ok);
    }
    public void OnClick(){
        mlaunchButon.setOnClickListener(new View.OnClickListener() {
            @Override
            public void onClick(View v) {
                setAlterdia();
            }
        });
    }

    public void setAlterdia(){

        AlertDialog.Builder builder =new AlertDialog.Builder(this);
        builder.setTitle("提示");
        builder.setMessage("确定是这个吗?");
        //关联自定义布局文件
        builder.setView(mView);
        builder.setPositiveButton("确定", new DialogInterface.OnClickListener()
        {
            @Override
            public void onClick(DialogInterface dialog,int which)
            {

            }
        });
        builder.setNegativeButton("取消", new DialogInterface.OnClickListener()
        {
            @Override
            public void onClick(DialogInterface dialog, int which) {

            }
        });
        //提示框消失时执行的方法
        builder.setOnDismissListener(new DialogInterface.OnDismissListener() {
            @Override
            public void onDismiss(DialogInterface dialog) {
                if (mView.getParent()!=null){
                    ((ViewGroup)mView.getParent()).removeView(mView);
                }
            }
        });
        builder.create().show();
    }

}
alterdialog.xml
<?xml version="1.0" encoding="utf-8"?>
<LinearLayout xmlns:android="http://schemas.android.com/apk/res/android"
    android:orientation="vertical"
    android:layout_width="match_parent"
    android:layout_height="match_parent">
    <EditText
        android:id="@+id/edit"
        android:hint="输入文字"
        android:layout_width="match_parent"
        android:layout_height="wrap_content">
    </EditText>

    <LinearLayout
        android:orientation="horizontal"
        android:layout_width="match_parent"
        android:layout_height="match_parent">
    <Button
        android:text="取消"
        android:id="@+id/cancel"
        android:layout_width="wrap_content"
        android:layout_height="wrap_content">
    </Button>

    <Button
        android:layout_marginLeft="20dp"
        android:text="确定"
        android:id="@+id/ok"
        android:layout_width="wrap_content"
        android:layout_height="wrap_content">
    </Button>
    </LinearLayout>

</LinearLayout>
三、效果图
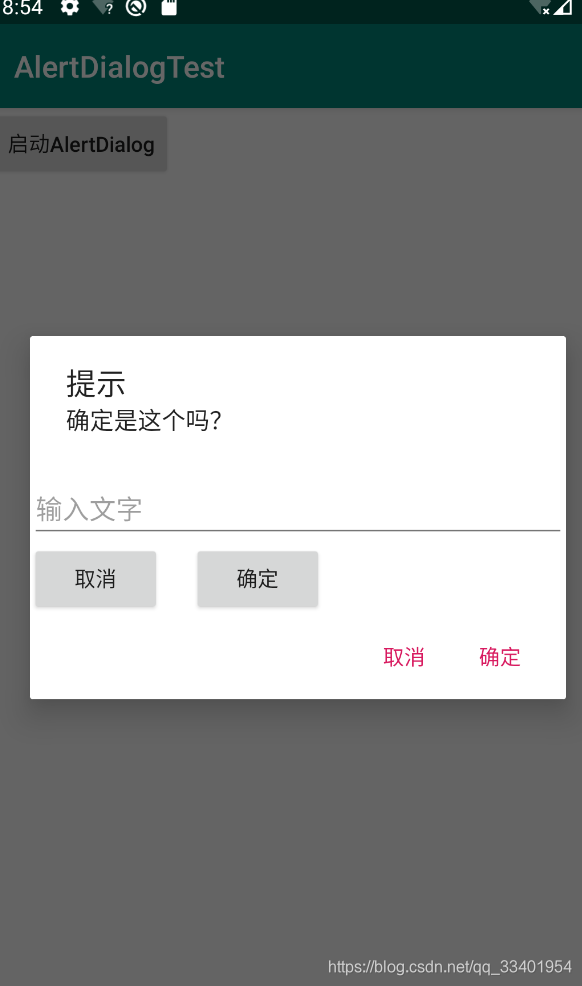
可以把原有的取消和确定按钮去掉,用自定义的布局构造,会更美观。
还有看到里面有这段代码
 			if (mView.getParent()!=null){
                    ((ViewGroup)mView.getParent()).removeView(mView);
                }
这是因为操作mView=View.inflate(this,R.layout.alterdialog,null);有父布局,也就是activity_main这个布局,我们要先移除掉activity_main下的子布局,才可以正常回到activity_main这个主布局,不然会报错。会报The specified child already has a parent. You must call removeView() on the child's parent first.这个错误。
