Flume的安装:
1.Flume的下载:
官网:
http://flume.apache.org/
下载地址:
http://archive.apache.org/dist/flume/
http://mirrors.hust.edu.cn/apache/
http://flume.apache.org/download.html
2.安装部署:
(1)将安装包上传到服务器并解压
[liu@master software]$ tar -zxf apache-flume-1.7.0-bin.tar.gz -C /hone/liu/module/
(2)将flume-1.7/conf 下的flume-env.sh.template文件修改为flume-env.sh,并配置flume-env.sh文件,将jdk的环境导入
[liu@master conf]$ mv flume-env.sh.template flume-env.sh
[liu@master conf]$ vi flume-env.sh
export JAVA_HOME=/home/liu/module/jdk1.8.0_144
(3)创建软连接
[liu@master ~]$ ln -s flume-1.7/ flume
(4)配置环境变量
[liu@master ~]$ sudo vi /ect/profile
export FLUME_HOME=/home/liu/module/flume-1.7
export PATH=$PATH:$FLUME_HOME/bin
使环境立即生效
[liu@master ~]$ source /etc/profile
(5)查看版本
[liu@master bin]$ flume-ng version

Flume的使用
案例实操:
Flume监控本机44444端口,然后通过telnet工具向本机44444端口发送消息,最后Flume将监听的数据实时显示在控制台。
(1)安装telnet工具(模拟ip:端口号的http请求)
sudo yum install telnet     安装telnet 工具
sudo yum install telnet-server   安装telnet 服务
sudo service xinetd restart  启动telnet 服务。
(2)创建配置文件(***.conf)
// 创建job文件夹,专门存储配置文件
[liu@master flume-1.7]$ mkdir job

// 进入job文件夹中
[liu@master flume-1.7]$ cd job/

// 在job文件夹下创建Flume Agent配置文件flume-telnet-logger.conf
[liu@master job]$ touch flume-telnet-logger.conf

// 在flume-telnet-logger.conf配置文件中添加如下内容
[liu@master job]$ vim flume-telnet-logger.conf
添加内容如下:
# example.conf: A single-node Flume configuration

# Name the components on this agent	// a1:表示agent的名称
a1.sources = r1				// r1:表示a1的输入源
a1.sinks = k1					// k1:表示a1的输出目的地
a1.channels = c1				//c1:表示a1的缓冲区

# Describe/configure the source
a1.sources.r1.type = netcat		// 表示a1的输入源类型为netcat端口
a1.sources.r1.bind = localhost		// 表示a1监听的主机
a1.sources.r1.port = 44444		// 表示a1监听的端口号

# Describe the sink
a1.sinks.k1.type = logger		// 表示a1的输出目的地是控制台logger类型

# Use a channel which buffers events in memory
a1.channels.c1.type = memory		// 表示a1的channel类型是memory类型
a1.channels.c1.capacity = 1000		// 表示a1的channel总容量1000个event
a1.channels.c1.transactionCapacity = 100		// 表示a1的channel传输时收集到了100条event以后再去提交事务

# Bind the source and sink to the channel
a1.sources.r1.channels = c1		// 表示将r1和c1连接起来
a1.sinks.k1.channel = c1		// 表示将k1和c1连接起来`在这里插入代码片`
(3)开启flume监听端口
[liu@master flume-1.7]$ bin/flume-ng agent --conf conf/ --name a1 --conf-file job/flume-telnet-logger.conf -Dflume.root.logger=INFO,console
参数说明:
	--conf conf/  :表示配置文件存储在conf/目录
	--name a1	:表示给agent起名为a1
	--conf-file job/flume-telnet.conf :flume本次启动读取的配置文件是在job文件夹下的flume-telnet.conf文件。
	-Dflume.root.logger==INFO,console :-D表示flume运行时动态修改flume.root.logger参数属性值,并将控制台日志打印级别设置为INFO级别。日志级别包括:log、info、warn、error。
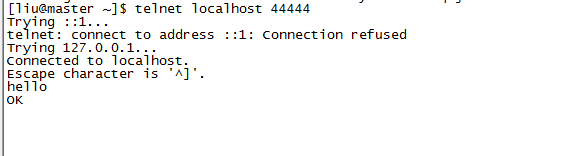
(4)使用telnet工具向本机的44444端口发送内容
[liu@master ~]$ telnet localhost 44444
结果:
向44444端口发送信息
接收44444端口发来的信息

