一、引入相关依赖
<parent>
	<groupId>org.springframework.boot</groupId>
	<artifactId>spring-boot-starter-parent</artifactId>
	<version>2.1.3.RELEASE</version>
</parent>

<properties>
	<project.build.sourceEncoding>UTF-8</project.build.sourceEncoding>
	<project.reporting.outputEncoding>UTF-8</project.reporting.outputEncoding>
	<java.version>1.8</java.version>
</properties>

<dependencies>
	<!-- Thymeleaf-Security -->
	<dependency>
		<groupId>org.thymeleaf.extras</groupId>
		<artifactId>thymeleaf-extras-springsecurity5</artifactId>
		<version>3.0.4.RELEASE</version>
	</dependency>
	<!-- Thymeleaf -->
	<dependency>
		<groupId>org.springframework.boot</groupId>
		<artifactId>spring-boot-starter-thymeleaf</artifactId>
	</dependency>
	<!-- SpringSecurity -->
	<dependency>
		<groupId>org.springframework.boot</groupId>
		<artifactId>spring-boot-starter-security</artifactId>
	</dependency>
	<dependency>
		<groupId>org.springframework.boot</groupId>
		<artifactId>spring-boot-starter-web</artifactId>
	</dependency>

	<dependency>
		<groupId>org.springframework.boot</groupId>
		<artifactId>spring-boot-starter-test</artifactId>
		<scope>test</scope>
	</dependency>
	<dependency>
		<groupId>org.projectlombok</groupId>
		<artifactId>lombok</artifactId>
		<version>1.18.6</version>
	</dependency>
</dependencies>
二、基础准备
1、准备Pojo类
@Data
public class LcyUser {
    private Long id;
    private String username;
    private String password;
}
2、Service层准备
@Service
public class UserServiceImpl implements UserService {
    @Override
    public LcyUser findUserByUsername(String username) {
        LcyUser user = new LcyUser();
        user.setUsername(username);
        // 对123加密后的密码
        user.setPassword("$2a$10$XcigeMfToGQ2bqRToFtUi.sG1V.HhrJV6RBjji1yncXReSNNIPl1K");
        return user;
    }
}
3、Controller层准备
@Controller
public class TestController {

    private final String PREFIX = "pages/";

    @RequestMapping("/")
    public String welcome(){
        return "welcome";
    }

    @GetMapping("/loginHtml")
    public String loginPage(){
        return PREFIX + "login";
    }

    @GetMapping("/403")
    public String fourZeroThree(){
        return PREFIX + "403";
    }

    /**
     * level1页面映射
     * @param path
     * @return
     */
    @GetMapping("/level1/{path}")
    public String level1(@PathVariable("path")String path) {
        return PREFIX+"level1/"+path;
    }

    /**
     * level2页面映射
     * @param path
     * @return
     */
    @GetMapping("/level2/{path}")
    public String level2(@PathVariable("path")String path) {
        return PREFIX+"level2/"+path;
    }

    /**
     * level3页面映射
     * @param path
     * @return
     */
    @GetMapping("/level3/{path}")
    public String level3(@PathVariable("path")String path) {
        return PREFIX+"level3/"+path;
    }

    /**
     * level3页面映射
     * @param path
     * @return
     */
    @GetMapping("/level4/{path}")
//    @Secured("ROLE_ADMIN")    // 拥有ADMIN角色可访问
//    @PreAuthorize("hasRole('ROLE_ADMIN') and hasRole('ROLE_VIP1')")   // 拥有ADMIN和VIP1可以访问
//    @PreAuthorize("hasAnyRole('ROLE_ADMIN','ROLE_VIP2')")   // 拥有其中一个就可以访问
//    @PostAuthorize("hasAnyRole('ROLE_VIP2','ROLE_VIP1')")   // 与@PreAuthorize用法差不多
    public String level4(@PathVariable("path")String path) {
        return PREFIX+"level3/"+path;
    }
}
4、前端页面准备
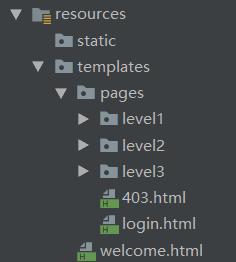
- 登录页面login.html
<body>
	<h1 align="center">欢迎登陆英雄联盟管理系统</h1>
	<hr>
	<div align="center">
		<form th:action="@{/userLogin}" method="post">
			用户名:<input name="username"/><br>
			密码:<input name="password"><br/>
			<input type="checkbox" name="remeber"> 记住我<br/>
			<input type="submit" value="登陆">
		</form>
	</div>
</body>
- 主页面welcome.html
<!DOCTYPE html>
<!-- 注意引入的是SpringSecurity5 -->
<html xmlns:th="http://www.thymeleaf.org"
	  xmlns:sec="http://www.thymeleaf.org/thymeleaf-extras-springsecurity5">
<head>
<meta http-equiv="Content-Type" content="text/html; charset=UTF-8">
<title>Insert title here</title>
</head>
<body>
<h1 align="center">欢迎光临英雄联盟管理系统</h1>
<!-- 没认证显示 -->
<div sec:authorize="!isAuthenticated()">
	<h2 align="center">游客您好,如果想查看联盟 <a th:href="@{/userLogin}">请登录</a></h2>
</div>
<!-- 认证显示 -->
<div sec:authorize="isAuthenticated()">
	<!-- 账号与角色 -->
	<h2><span sec:authentication="name"></span>,您好,您的角色有:
		<span sec:authentication="principal.authorities"></span></h2>
	<form th:action="@{/userLogout}" method="post">
		<input type="submit" value="注销"/>
	</form>
</div>
<hr>
<!-- 拥有VIP1角色可以访问 -->
<div sec:authorize="hasRole('VIP1')">
	<h3>诺克萨斯阵营</h3>
	<ul>
		<li><a th:href="@{/level1/1}">德莱厄斯</a></li>
		<li><a th:href="@{/level1/2}">卡特琳娜</a></li>
		<li><a th:href="@{/level1/3}">塞恩</a></li>
	</ul>

</div>
<!-- 拥有VIP2角色可以访问 -->
<div sec:authorize="hasRole('VIP2')">
	<h3>德玛西亚阵营</h3>
	<ul>
		<li><a th:href="@{/level2/1}">嘉文四世</a></li>
		<li><a th:href="@{/level2/2}">盖伦</a></li>
		<li><a th:href="@{/level2/3}">拉克丝</a></li>
	</ul>
</div>
<!-- 拥有VIP3角色可以访问 -->
<div sec:authorize="hasRole('VIP3')">
	<h3>艾欧尼亚阵营</h3>
	<ul>
		<li><a th:href="@{/level3/1}">亚索</a></li>
		<li><a th:href="@{/level3/2}">李青</a></li>
		<li><a th:href="@{/level3/3}">艾瑞莉娅</a></li>
	</ul>
</div>
</body>
</html>
三、自定义认证类
自定义认证类,用于登录认证使用,需要从数据库获取数据进行认证,并授权。需要实现UserDetailsService接口。
public class UserDetailServiceImpl implements UserDetailsService {
    @Autowired
    private UserService userService;

    @Override
    public UserDetails loadUserByUsername(String usernmae) throws UsernameNotFoundException {
        // 定义权限的集合 - 全部存储的是权限
        List<GrantedAuthority> authorities = new ArrayList<>();
        // 权限应该从数据库中获取,这里写死了,权限必须以ROLE_开头
        authorities.add(new SimpleGrantedAuthority("ROLE_VIP1"));
        // 判断用户名是否为空
        if (StringUtils.isEmpty(usernmae)) {
            return null;
        }
        // 去数据库中查找对象
        LcyUser lcyUser = userService.findUserByUsername(usernmae);
        // 封装到User对象中去
        User user = new User(usernmae,lcyUser.getPassword(),authorities);
        return user;
    }
}
四、核心配置类
核心配置类,主要对数据来源和加密、拦截、登录/注销、记住我进行了配置。
@EnableWebSecurity
@EnableGlobalMethodSecurity(prePostEnabled = true,securedEnabled = true)  // 开启注解配置方法安全
public class SecurityConfig extends WebSecurityConfigurerAdapter {
    /**
     * 定制请求的授权规则
     * @param http
     * @throws Exception
     */
    @Override
    protected void configure(HttpSecurity http) throws Exception {
        // 访问权限设置
        http.authorizeRequests().antMatchers("/").permitAll()    // 任何人都可以访问
                .antMatchers("/level1/**").hasRole("VIP1")       // VIP1角色可以访问
                .antMatchers("/level2/**").hasRole("VIP2")       // VIP2角色可以访问
                .antMatchers("/level3/**").hasRole("VIP3");      // VIP3角色可以访问
//                .antMatchers("/level4/**")
//                .access("hasRole('ADMIN') and hasRole('VIP3')") // 同时拥有ADMIN和VIP3可以访问
//                .antMatchers("/level5/**")
//                .access("hasAnyRole('VIP1','VIP3')")				// 拥有VIP1或VIP3可以访问
//                .anyRequest().authenticated(); // 表示除去上面的,其他URL必须通过认证才可以访问

        /**
         * 开启自动配置的登陆功能,如果没有登陆/没有权限就会来到登陆页面
         * usernameParameter:指定form表单中账号的name,默认为username
         * passwordParameter:指定form表单中密码的name,默认为password
         * loginPage:指定自定义登录页,如果不设置,默认为Security自带登录页
         * loginProcessingUrl:指定登录请求url,默认为/login
         * failureUrl:指定登录失败跳转url,默认为指定的loginPage?error,即loginHtml?error
         */
        http.formLogin().usernameParameter("username").passwordParameter("password")
                .loginPage("/loginHtml").loginProcessingUrl("/userLogin")
                .failureUrl("/loginHtml?error=true");
        /**
         * 开启自动配置的注销功能
         * logoutUrl:注销请求url,默认为/logout
         * logoutSuccessUrl:注销成功跳转rul,默认为/loginPage?logout,即这里的loginHtml?logout
         * clearAuthentication:是否清除身份认证信息,默认为true
         * invalidateHttpSession:是否使 Session 失效,默认为true
         */
        http.logout().logoutUrl("/userLogout").logoutSuccessUrl("/")
                     .clearAuthentication(true).invalidateHttpSession(true);

        /**
         * 开启记住我功能 - 参数为记住我复选框的name
         * 登陆成功以后,将cookie发给浏览器保存,以后访问页面带上这个cookie,只要通过检查就可以免登录
         * 点击注销会删除cookie
         */
        http.rememberMe().rememberMeParameter("remeber");
        // 访问无权限的请求,跳转的页面
        http.exceptionHandling().accessDeniedPage("/403");


        // 上面的登录成功/失败、注销、无权限都可以通过处理类来做
        // 成功处理类
//        http.formLogin().successHandler(new AuthenticationSuccessHandlerImpl());
        // 失败处理类 - 实现AuthenticationFailureHandler
//         http.formLogin().failureForwardUrl(new AuthenticationFailureHandlerImpl());
        // 注销处理类 - 实现LogoutSuccessHandler
//        http.logout().addLogoutHandler(new LogoutSuccessHandlerImpl());
        // 无权限处理类
//        http.exceptionHandling().accessDeniedHandler(new AccessDeniedHandler());
    }

    /**
     * 设置自定义数据源
     * @param builder
     * @throws Exception
     */
    @Override
    protected void configure(AuthenticationManagerBuilder builder) throws Exception{
        builder.userDetailsService(userDetailService())
                .passwordEncoder(passwordEncoder());
    }

    /**
     * 自定义数据源
     * @return
     */
    @Bean
    public UserDetailServiceImpl userDetailService(){
        return new UserDetailServiceImpl();
    }

    /**
     * 加密方法 - BCrypt
     * @return
     */
    @Bean
    public BCryptPasswordEncoder passwordEncoder(){
        /**
         * 可选参数:strength
         * strength 越大,密钥的迭代次数越多,密钥的迭代次数为2的strength次方
         * strength 取值在 4-31 之间,默认为10(不写参数的情况下)
         */
        return new BCryptPasswordEncoder();
    }
}
五、自定义登录成功/失败处理类
这里以成功示例:
public class AuthenticationSuccessHandlerImpl implements AuthenticationSuccessHandler {
    @Override
    public void onAuthenticationSuccess(HttpServletRequest httpServletRequest, HttpServletResponse httpServletResponse, Authentication authentication) throws IOException, ServletException {
        System.out.println("登录成功");
        // 手动跳转
        httpServletResponse.sendRedirect("/admin/index.html");    // 重定向
        /*
            httpServletRequest.getRequestDispatcher("/admin/index.html")
                    .forward(httpServletRequest,httpServletResponse);  // 请求转发
        */

    }
}
六、角色继承
前面所定义的VIP1、VIP2、VIP3,它们之间是没有任何关系的。但是,有时候我们需要这样一个需求。VIP1拥有VIP2的权限,VIP2拥有VIP3的权限,这时我们可以通过角色继承的方式来做。我们只需要在SpringSecurity的配置文件里添加一个RoleHierarchy的方法即可。
@Bean
public RoleHierarchy roleHierarchy(){
	RoleHierarchyImpl roleHierarchy = new RoleHierarchyImpl();
	// 角色继承 - VIP1拥有VIP2的角色,VIP2拥有VIP3的角色
	String hierarchy = "ROLE_VIP1 > ROLE_VIP2 ROLE_VIP2 > ROLE_VIP3";
	roleHierarchy.setHierarchy(hierarchy);
	return roleHierarchy;
}
但是,经过我测试,在Thymeleaf页面使用类似sec:authorize="hasRole('VIP3')"的标签,VIP1即使拥有VIP3的角色,它也是无法看到标签所标记的内容的,但是却是可以访问VIP3所能访问的URL。
动态配置权限
如果觉得基于HttpSecurity配置的认证授权规则不够灵活,无法实现资源与角色之间的动态调整。要实现动态配置URL权限,需要自己自定义权限配置。可以在数据配置,账户与角色之间的关系,角色与URL的关系来完成。
ROLE_VIP1    /level1/**
ROLE_VIP2    /level2/**
一、准备工作
1、准备POJO类
@Data
public class Role {
    private Integer id;
    /** 角色ROLE */
    private String name;
    /** 角色名,如经理、HR */
    private String rname;

    public Role(Integer id, String name, String rname) {
        this.id = id;
        this.name = name;
        this.rname = rname;
    }
}
@Data
public class Menu {
    private Integer id;
    /** 可访问url */
    private String pattern;
    /** 可以访问的角色有哪些 */
    private List<Role> roles;

    public Menu(Integer id, String pattern) {
        this.id = id;
        this.pattern = pattern;
    }
}
2、准备Service类
@Service
public class UserServiceImpl implements UserService {
    @Override
    public List<Menu> getAllMenus() {
        // URL和角色都应该从数据库获取,这里为了方便,写死了
        // URL
        Menu menu1 = new Menu(1,"/level1/**");
        Menu menu2 = new Menu(2,"/level2/**");
        List<Menu> list = new ArrayList<>();
        // 角色
        Role role1 = new Role(1,"ROLE_VIP1","VIP1玩家");
        Role role2 = new Role(1,"ROLE_VIP1","VIP1玩家");
        List<Role> roles = new ArrayList<>();
        roles.add(role1);
        roles.add(role2);
        // 角色与URL关系
        menu1.setRoles(roles);
        menu1.setRoles(roles);
        list.add(menu1);
        list.add(menu2);
        return list;
    }
二、自定义FilterInvocationSecurityMetadataSource
配置了动态权限,一个请求会先经过这个类的getAttributes方法进行判断返回角色。
// 一个请求先走FilterInvocationSecurityMetadataSource,然后再走AccessDecisionManager
public class MyFilterInvocationSecurityMetadataSource implements FilterInvocationSecurityMetadataSource {

    @Autowired
    private UserService userService;

    AntPathMatcher antPathMatcher = new AntPathMatcher();

    /**
     * 可以从FilterInvocation中获取当前请求的URL
     * @return URL所需角色
     * @throws IllegalArgumentException
     */
    @Override
    public Collection<ConfigAttribute> getAttributes(Object o) throws IllegalArgumentException {
        // 获取资源信息Menu,建议放在Redis等缓存数据库中
        List<Menu> allMenus = userService.getAllMenus();
        // 获取当前请求的URL
        String requestUrl = ((FilterInvocation) o).getRequestUrl();
        // 所有人都可以访问的URL,做特殊处理
        if("/".equals(requestUrl) || "/loginHtml".equals(requestUrl) || "/loginHtml?error=true".equals(requestUrl)){
            return SecurityConfig.createList("ROLE_ALL");
        }
        // 遍历资源信息
        for (Menu menu : allMenus) {
            if (antPathMatcher.match(menu.getPattern(),requestUrl)){
                List<Role> roles = menu.getRoles();
                // 获取所有角色名 类似于['VIP1','VIP2','VIP3']
                String[] roleArr = new String[roles.size()];
                for (int i = 0; i < roleArr.length; i++){
                    roleArr[i] = roles.get(i).getName();
                }
                return SecurityConfig.createList(roleArr);
            }
        }
        // 如果不存在相应的模式,直接返回ROLE_LOGIN,表示登录就可以访问
        return SecurityConfig.createList("ROLE_LOGIN");
    }

    /**
     * 返回定义好的权限资源
     * SpringSecurity启动时会校验相关配置是否正确
     * 如果不需要校验,直接返回null
     */
    @Override
    public Collection<ConfigAttribute> getAllConfigAttributes() {
        return null;
    }

    /**
     * 返回类对象是否支持校验
     */
    @Override
    public boolean supports(Class<?> aClass) {
        return FilterInvocation.class.isAssignableFrom(aClass);
    }
}
三、自定义AccessDecisionManager
当一个请求走完FilterInvocationSecurityMetadataSource之后就会来到这里,这里主要是判断是否有权限的,有权限才会正常走请求流程。
// 一个请求先走FilterInvocationSecurityMetadataSource,然后再走AccessDecisionManager
@Component
public class MyAccessDecisionManager implements AccessDecisionManager {
    /**
     * 判断当前登录的用户是否具备当前请求URL所需要的角色信息
     * 如不具备抛出AccessDeniedException异常
     * 否则不做任何事
     * @param authentication 当前登录用户信息
     * @param o FilterInvocation对象,可以获取当前请求对象
     * @param collection 请求当前URL所需要角色
     * @throws AccessDeniedException
     * @throws InsufficientAuthenticationException
     */
    @Override
    public void decide(Authentication authentication, Object o, Collection<ConfigAttribute> collection) throws AccessDeniedException, InsufficientAuthenticationException {
        Collection<? extends GrantedAuthority> authorities = authentication.getAuthorities();
        for (ConfigAttribute configAttribute : collection) {
            // 对所有人可访问做处理
        	if("ROLE_ALL".equals(configAttribute.getAttribute())){
                return;
            }
            // 登录即可访问
            if("ROLE_LOGIN".equals(configAttribute.getAttribute()) && authentication instanceof UsernamePasswordAuthenticationToken){
                return;
            }
            // 角色对比
            for (GrantedAuthority authority : authorities) {
                if(configAttribute.getAttribute().equals(authority.getAuthority())){
                    return;
                }
            }
        }
        // 可以通过处理该异常来进行跳转 - 配置http.exceptionHandling()
        throw new AccessDeniedException("权限不足");
    }

    @Override
    public boolean supports(ConfigAttribute configAttribute) {
        return true;
    }

    @Override
    public boolean supports(Class<?> aClass) {
        return true;
    }
}
四、配置文件
把上面配置文件静态的http.authorizeRequests().antMatches这些代码替换成动态的http.authorizeRequests().withObjectPostProcessor并且将两个类注入进来即可,其他不用变。
public class SecurityConfig extends WebSecurityConfigurerAdapter {
    /**
     * 定制请求的授权规则
     * @param http
     * @throws Exception
     */
    @Override
    protected void configure(HttpSecurity http) throws Exception {
        http.authorizeRequests()
                .withObjectPostProcessor(new ObjectPostProcessor<FilterSecurityInterceptor>() {
                    @Override
                    public <O extends FilterSecurityInterceptor> O postProcess(O o) {
                        o.setSecurityMetadataSource(mfisms());
                        o.setAccessDecisionManager(madm());
                        return o;
                    }
                });

    @Bean
    public MyFilterInvocationSecurityMetadataSource mfisms(){
        return new MyFilterInvocationSecurityMetadataSource();
    }

    @Bean
    public MyAccessDecisionManager madm(){
        return new MyAccessDecisionManager();
    }
注意事项:
动态权限,我目前还没使用过,经过测试。发现下面代码类似于antMatchers("/").permitAll()匹配的URL,实际是不生效的,还是要通过withObjectPostProcessor来处理,也就是说大家都可以访问的请求,需要在FilterInvocationSecurityMetadataSource的getAttributes方法中作处理。而且,我上面自定义的错误跳转URL,即http.formLogin().failureUrl("/loginHtml?error=true")也会进入withObjectPostProcessor,这就让我很郁闷了,百度了很久未解决。

http.authorizeRequests().antMatchers("/").permitAll()
		.withObjectPostProcessor(new ObjectPostProcessor<FilterSecurityInterceptor>() {
			@Override
			public <O extends FilterSecurityInterceptor> O postProcess(O o) {
				o.setSecurityMetadataSource(mfisms());
				o.setAccessDecisionManager(madm());
				return o;
			}
		});
也就是说静态资源同样也会经过这个withObjectPostProcessor,而且经过测试,发现角色继承同样失效。
我思考了一会儿,想来只能把静态资源和大家都能访问的URL赋给一个角色,每个用户都有这个共有的角色即可。如果用户在没有登录的情况下访问,即这时因为没有登录,也就没有角色,那就只能在FilterInvocationSecurityMetadataSource的getAttributes方法里想办法给它安排这个公共角色或者在AccessDecisionManager里处理也行。
当然这些都只是我个人的处理方法,因为技术水平未达到,也没有阅读过源码(水平不够),只能这样猜测+实验式处理了。
如果后面遇到需要处理这种问题且找到解决方案,会更新该博文。
